“Mom, can I have the pink one today?” My daughter asked this while peering into the fridge, her tiny hand already reaching for the row of little cups I’d prepped the night before. I wasn’t even fully awake yet, but she had already spotted them—those little rainbow layers of fruit and creamy yogurt dip, all packed into clear containers like edible stained glass. That was the moment I knew these Healthy Rainbow Fruit and Yogurt Dip Lunchbox Cups were more than just another snack idea. They were a small victory in the ongoing battle of getting something colorful and nutritious into her hands before she ran off to school.
Honestly, I didn’t set out to create a rainbow. I was just trying to use up the last of the strawberries, a half-eaten mango, and some blueberries that were starting to look a little sad. But when I lined them up on the counter, the colors practically glowed. And the dip? That came from a happy accident involving plain Greek yogurt, a drizzle of honey, and a pinch of vanilla that I’d been making for years. I just never thought to layer it all together in a cup. Now, these little cups have become a lunchbox staple, a after-school favorite, and honestly, a little piece of joy I feel good about packing. They’re not just pretty—they’re actually good for you.
Why You’ll Love This Recipe
These Healthy Rainbow Fruit and Yogurt Dip Lunchbox Cups are the kind of recipe that makes you feel like you’ve got your life together, even on a chaotic Tuesday morning. I’ve tested this with my own kids, my neighbor’s picky eater, and even a few adults who pretended they were just “taste-testing” for the kids. Spoiler alert: they all loved them.
- Quick & Easy: You can whip up a batch of these in under 15 minutes. Seriously, it’s faster than arguing about what to pack for lunch.
- Simple Ingredients: No fancy grocery trips needed. You probably have Greek yogurt, honey, and some fruit in your kitchen right now.
- Perfect for Lunchboxes: These cups are portable, mess-free, and won’t get soggy by lunchtime. They’re a total game-changer for school lunches.
- Crowd-Pleaser: Kids love the fun rainbow layers, and adults love that they’re actually eating something healthy. It’s a win-win.
- Unbelievably Delicious: The creamy, slightly tangy yogurt dip paired with sweet, juicy fruit is a combo that never gets old. It’s like a parfait, but better.
What makes this recipe different from the rest? It’s the layering technique. Instead of just tossing fruit and dip in a bowl, we’re building little edible art projects. The dip is thick enough to hold its shape, so the layers stay distinct and beautiful. Plus, the ratio of dip to fruit is perfectly balanced—not too much, not too little. This isn’t just another fruit salad. It’s a snack that feels special, looks amazing, and actually keeps you full until lunchtime.
What Ingredients You Will Need
This recipe uses simple, wholesome ingredients to create a snack that’s as nutritious as it is beautiful. Most of these are pantry staples, but I’ve included some tips for substitutions if you need them.
- Plain Greek Yogurt: This is the base of our dip. I prefer full-fat Greek yogurt for the creamiest texture, but 2% works great too. Avoid non-fat, as it can be a bit watery. (I personally love Fage or Chobani for their thickness.)
- Honey: A little bit of natural sweetness goes a long way. You can also use maple syrup or agave nectar if you prefer.
- Vanilla Extract: Pure vanilla extract adds a warm, aromatic flavor that makes the dip taste like dessert. Avoid imitation vanilla if you can.
- Fresh Strawberries: Look for bright red, fragrant berries. Hull and dice them into small, uniform pieces so they layer nicely.
- Fresh Mango: A ripe mango should give slightly when pressed. Peel and dice it into small cubes. If mango isn’t in season, you can use thawed frozen mango chunks.
- Fresh Blueberries: These little gems are perfect for layering because they hold their shape. Rinse and pat them dry before using.
- Fresh Kiwi: Peel and dice the kiwi into small pieces. The vibrant green color is stunning against the other fruits.
- Fresh Pineapple: Dice fresh pineapple into small chunks. Canned pineapple works in a pinch, but make sure to drain it well to avoid adding extra liquid.
- Optional Garnish: A sprinkle of shredded coconut, chia seeds, or a few mini chocolate chips can add a fun finishing touch.
Ingredient Selection Tips: For the best texture, make sure all your fruit is diced into similar-sized pieces—about 1/2-inch cubes. This ensures even layering and makes eating easier. If you’re using frozen fruit, thaw it completely and pat it dry with paper towels to prevent the yogurt dip from getting watery.
Substitution Guidance: Feel free to swap in any fruit you have on hand. Raspberries, blackberries, diced peaches, or even pomegranate arils would all be delicious. For a dairy-free version, use coconut yogurt or a thick plant-based yogurt. Just make sure it’s thick enough to hold its shape when layered.
Equipment Needed
You don’t need any fancy equipment for this recipe, which is part of its charm. Here’s what you’ll need:
- Small Cups or Jars: I use 4-ounce clear plastic cups with lids, but any small jar or container will work. Mason jars, Weck jars, or even small glass bowls are great options. Clear cups let the rainbow layers shine.
- Cutting Board and Sharp Knife: For dicing all that beautiful fruit. A sharp knife makes the job so much easier and safer.
- Mixing Bowl and Whisk: For making the yogurt dip. A small bowl and a fork work just fine if you don’t have a whisk.
- Measuring Spoons: For the honey and vanilla extract. Eyeballing it works too, but measuring ensures consistency.
- Spoon or Small Ladle: For layering the yogurt dip into the cups.
I’ve tried making these with a piping bag for the yogurt dip, but honestly, a spoon works just as well and saves you from washing extra dishes. If you’re making a big batch for a party or meal prep, a small cookie scoop is a game-changer for getting even layers of dip.
Preparation Method
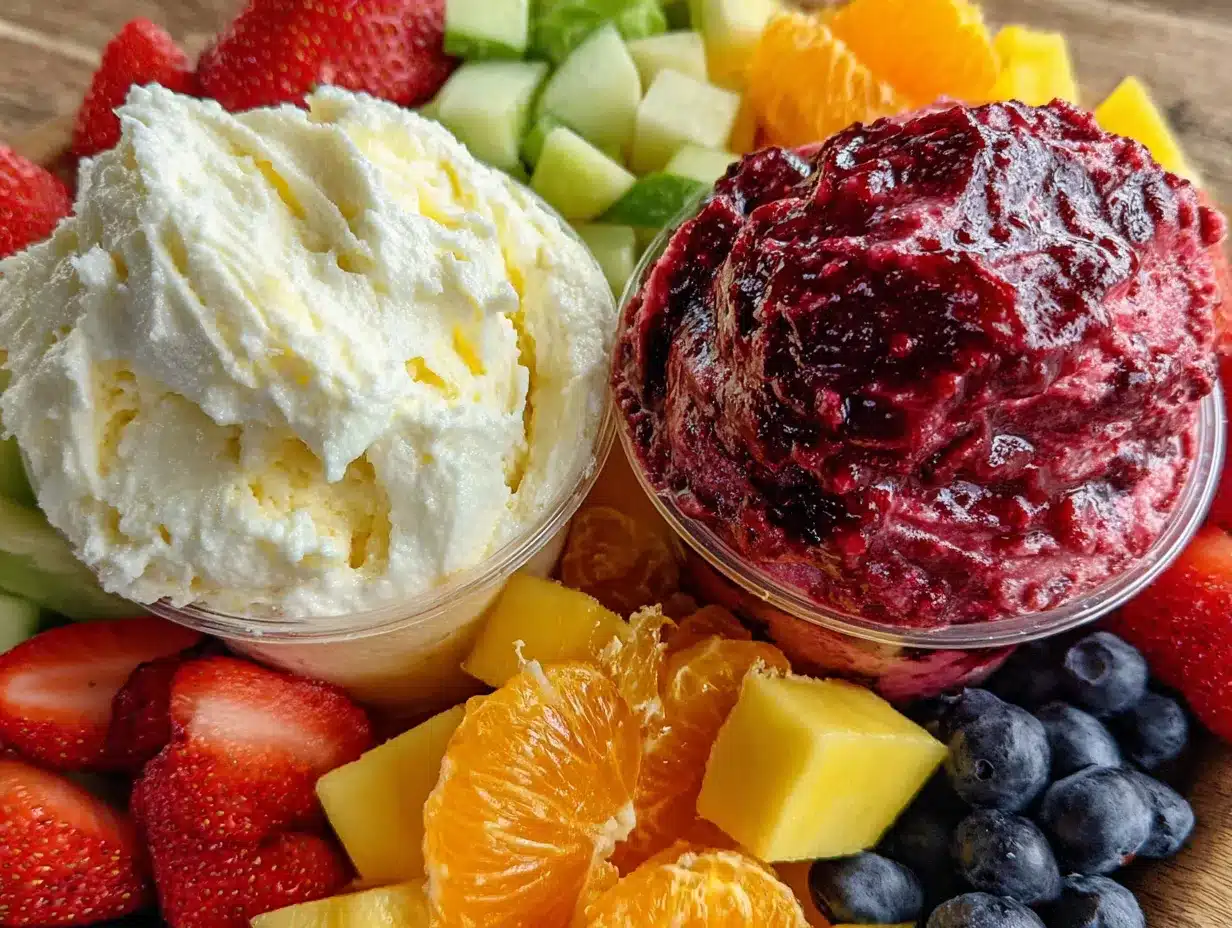
Making these Healthy Rainbow Fruit and Yogurt Dip Lunchbox Cups is almost as fun as eating them. The key is to work quickly and keep your layers neat. Here’s how to do it:
- Make the Yogurt Dip (5 minutes): In a small mixing bowl, combine 1 cup (240g) plain Greek yogurt, 2 tablespoons (30ml) honey, and 1/2 teaspoon (2.5ml) vanilla extract. Whisk until smooth and creamy. Taste and adjust sweetness if needed. Set aside.
- Prep the Fruit (10 minutes): Wash and dry all your fruit. Dice the strawberries, mango, kiwi, and pineapple into small, uniform pieces (about 1/2-inch cubes). Keep the blueberries whole. Place each fruit in separate small bowls for easy layering.
- Layer the First Fruit (2 minutes): Take your small cups or jars. Start with a layer of diced strawberries at the bottom of each cup. Use about 2 tablespoons of fruit per cup. Press it down gently with the back of a spoon to create an even layer.
- Add the Yogurt Dip (2 minutes): Spoon about 1 to 1.5 tablespoons of the yogurt dip over the strawberry layer. Use the back of the spoon to spread it evenly to the edges. This creates a barrier between the fruit layers.
- Layer the Next Fruit (2 minutes): Add a layer of diced mango over the yogurt dip. Again, use about 2 tablespoons per cup. Press down gently.
- Repeat with Yogurt and Fruit (5 minutes): Continue layering: yogurt dip, then blueberries; yogurt dip, then kiwi; yogurt dip, then pineapple. The order is up to you, but I like to alternate colors for the most visual impact. End with a final layer of yogurt dip on top.
- Garnish and Seal (2 minutes): If desired, sprinkle a little shredded coconut or chia seeds on top of the final yogurt layer. Seal the cups with their lids and refrigerate for at least 30 minutes before serving. This allows the layers to set and the flavors to meld.
Pro Tip: If you’re making these for a lunchbox, pack them the night before. The yogurt dip actually gets creamier and more flavorful overnight. Just make sure the fruit is patted dry to avoid any watery separation by morning.
Sensory Cue: When you’re layering, you should see distinct, vibrant bands of color. The yogurt dip should be thick enough that it doesn’t bleed into the fruit layers. If it seems too runny, add a tablespoon more yogurt to thicken it up.
Cooking Tips & Techniques
I’ve made these cups more times than I can count, and I’ve learned a few things the hard way. Here are my best tips for perfect rainbow cups every time:
- Pat Your Fruit Dry: This is the number one tip. Any excess moisture on the fruit will make the yogurt dip watery and ruin the layers. After washing, lay the fruit on a clean kitchen towel and pat it dry gently. For berries, let them air-dry for a few minutes on a paper towel.
- Use Thick Yogurt: The thickness of your yogurt is crucial. If your Greek yogurt is too thin, the layers will blend together. I always recommend full-fat Greek yogurt for the best consistency. If you only have thinner yogurt, you can strain it through a cheesecloth for 30 minutes to thicken it up.
- Don’t Overfill the Cups: Leave about 1/4 inch of space at the top of each cup. This gives the dip room to settle and prevents a mess when you put the lid on. Trust me, overfilled cups are a disaster waiting to happen in a lunchbox.
- Chill Before Serving: These cups need at least 30 minutes in the fridge to set. The cold temperature helps the yogurt firm up and makes the layers more distinct. If you’re in a rush, 15 minutes in the freezer works too, but don’t forget them!
- My Biggest Failure: The first time I made these, I used sliced strawberries instead of diced ones. The slices were too large and didn’t layer well. They also released a lot of juice, which made the yogurt dip runny. Now I always dice everything into small, uniform pieces. It makes all the difference.
Variations & Adaptations
One of the best things about this recipe is how easily it adapts to different tastes and dietary needs. Here are a few of my favorite variations:
- Dairy-Free Version: Swap the Greek yogurt for a thick coconut yogurt or a cashew-based yogurt. Just make sure it’s unsweetened and thick. You might need to adjust the honey to taste, as some plant-based yogurts are already sweetened.
- Seasonal Fruit Swap: In the summer, use fresh peaches, nectarines, and raspberries. In the fall, try diced apples, pears, and pomegranate arils. In the winter, use citrus segments like mandarin oranges and grapefruit. The possibilities are endless.
- Protein-Packed Version: Add a scoop of vanilla or unflavored protein powder to the yogurt dip. You may need to add a tablespoon or two of milk to thin it out. This turns these cups into a post-workout snack or a more filling lunchbox option.
- Kid-Friendly Fun: Let the kids help layer their own cups. They love choosing the order of the colors. You can also add a few mini chocolate chips or sprinkles on top as a special treat.
- Savory Twist: For a completely different take, skip the honey and vanilla, and season the yogurt with a pinch of salt, a squeeze of lime, and a little cumin. Layer with diced cucumber, bell peppers, and cherry tomatoes. It’s a fun, healthy snack for older kids and adults.
I once made a batch with diced dragon fruit and star fruit just because they looked so pretty at the store. The kids were intrigued, and honestly, it was the most beautiful snack I’ve ever made. Don’t be afraid to experiment with unusual fruits—you might discover a new favorite combination.
Serving & Storage Suggestions
These Healthy Rainbow Fruit and Yogurt Dip Lunchbox Cups are best served cold, straight from the fridge. The contrast between the cool, creamy yogurt and the sweet, juicy fruit is absolutely perfect. I like to serve them as a snack, a light breakfast, or even a fun dessert for parties.
Presentation Tips: For a party or brunch, arrange the cups on a platter with a few fresh mint leaves scattered around. You can also serve them in a larger glass dish, layered like a trifle, for a stunning centerpiece. If you’re packing them for lunch, just pop the lid on and throw them in the lunchbox. They’re completely mess-free.
Complementary Dishes: These cups pair beautifully with a wholesome high school lunch bowl with quinoa, avocado, and chickpeas for a balanced meal. They also go great with a turkey pinwheel bento box for a fun, kid-friendly lunch. For a quick afternoon snack, I love serving them alongside easy 3-ingredient peanut butter energy balls.
Storage Instructions: These cups will keep in the refrigerator for up to 3 days. The fruit may release a little juice over time, but the layers will still look beautiful. I do not recommend freezing them, as the texture of the fruit and yogurt will be compromised upon thawing.
Reheating Tips: You don’t need to reheat these—they’re meant to be eaten cold. If you’ve stored them in the fridge for a day or two, just give them a gentle stir before eating to redistribute any juices that may have settled.
Nutritional Information & Benefits
These Healthy Rainbow Fruit and Yogurt Dip Lunchbox Cups are not just pretty—they’re packed with nutrition. Here’s a rough estimate for one cup (made with full-fat Greek yogurt and a variety of fruits):
| Nutrient | Amount per Cup |
|---|---|
| Calories | 150-180 |
| Protein | 10-12g |
| Fat | 5-7g |
| Carbohydrates | 20-25g |
| Fiber | 3-4g |
| Sugar | 15-18g (mostly natural from fruit and honey) |
Health Benefits: Greek yogurt is an excellent source of protein and probiotics, which are great for gut health. The variety of fruits provides a wide range of vitamins, antioxidants, and fiber. Strawberries are packed with vitamin C, blueberries are loaded with antioxidants, and mangoes are rich in vitamin A. This snack is naturally gluten-free and can easily be made dairy-free or vegan.
Dietary Considerations: This recipe is naturally vegetarian and gluten-free. For a vegan version, use coconut yogurt and maple syrup instead of honey. For a low-sugar option, use unsweetened yogurt and skip the honey, relying on the natural sweetness of the fruit.
I love that I can feel good about giving these to my kids. They’re getting a dose of protein, healthy fats, and a rainbow of vitamins without any added junk. It’s a snack that supports their energy levels and keeps them full until their next meal.
Conclusion
These Healthy Rainbow Fruit and Yogurt Dip Lunchbox Cups have become a staple in our house for good reason. They’re quick to make, endlessly customizable, and somehow manage to be both healthy and fun. The first time I packed one in my daughter’s lunchbox, she came home and told me it was the “best lunch ever.” That’s the kind of feedback that keeps me coming back to this recipe again and again.
I encourage you to make these your own. Swap in your family’s favorite fruits, adjust the sweetness to your liking, or let the kids build their own rainbow layers. The beauty of this recipe is its flexibility. Whether you’re packing school lunches, prepping snacks for the week, or looking for a colorful addition to a brunch table, these cups deliver every time.
I’d love to hear how your rainbow cups turn out! What fruit combinations did you try? Did your kids help with the layering? Drop a comment below and share your creations. And if you loved this recipe, don’t forget to pin it for later or share it with a friend who needs a little more color in their lunchbox. Happy snacking!
Frequently Asked Questions
Can I use frozen fruit for these cups?
Yes, you can use frozen fruit, but it’s important to thaw it completely and pat it dry with paper towels before layering. Frozen fruit releases more moisture, which can make the yogurt dip watery and cause the layers to blend together. For the best results, stick with fresh fruit when it’s available.
How far in advance can I make these cups?
You can make these cups up to 3 days in advance. In fact, the flavors meld together beautifully overnight, and the yogurt dip gets even creamier. Just make sure to store them in an airtight container in the refrigerator. I wouldn’t recommend making them more than 3 days ahead, as the fruit may start to release too much juice.
Can I use a different type of yogurt?
Absolutely! While Greek yogurt is my go-to for its thickness and protein content, you can use any yogurt you like. Regular plain yogurt will work, but it’s thinner, so the layers may not be as distinct. For a dairy-free option, try coconut yogurt or a thick cashew-based yogurt. Just make sure it’s unsweetened so you can control the sweetness level.
How do I keep the layers from blending together?
The key to distinct layers is using thick yogurt and patting your fruit dry. Make sure your Greek yogurt is full-fat and thick. If it seems too thin, you can strain it through a cheesecloth for 30 minutes. Also, be gentle when adding each layer—press it down lightly with the back of a spoon to create a flat surface before adding the next layer.
Are these cups safe for school lunchboxes?
Yes, they are! As long as you have a way to keep them cold, they are perfect for lunchboxes. I recommend using an insulated lunch bag with an ice pack. If you’re packing them the night before, they’ll stay cold until lunchtime. The cups are also mess-free, which is a huge plus for school lunches.
Pin This Recipe!
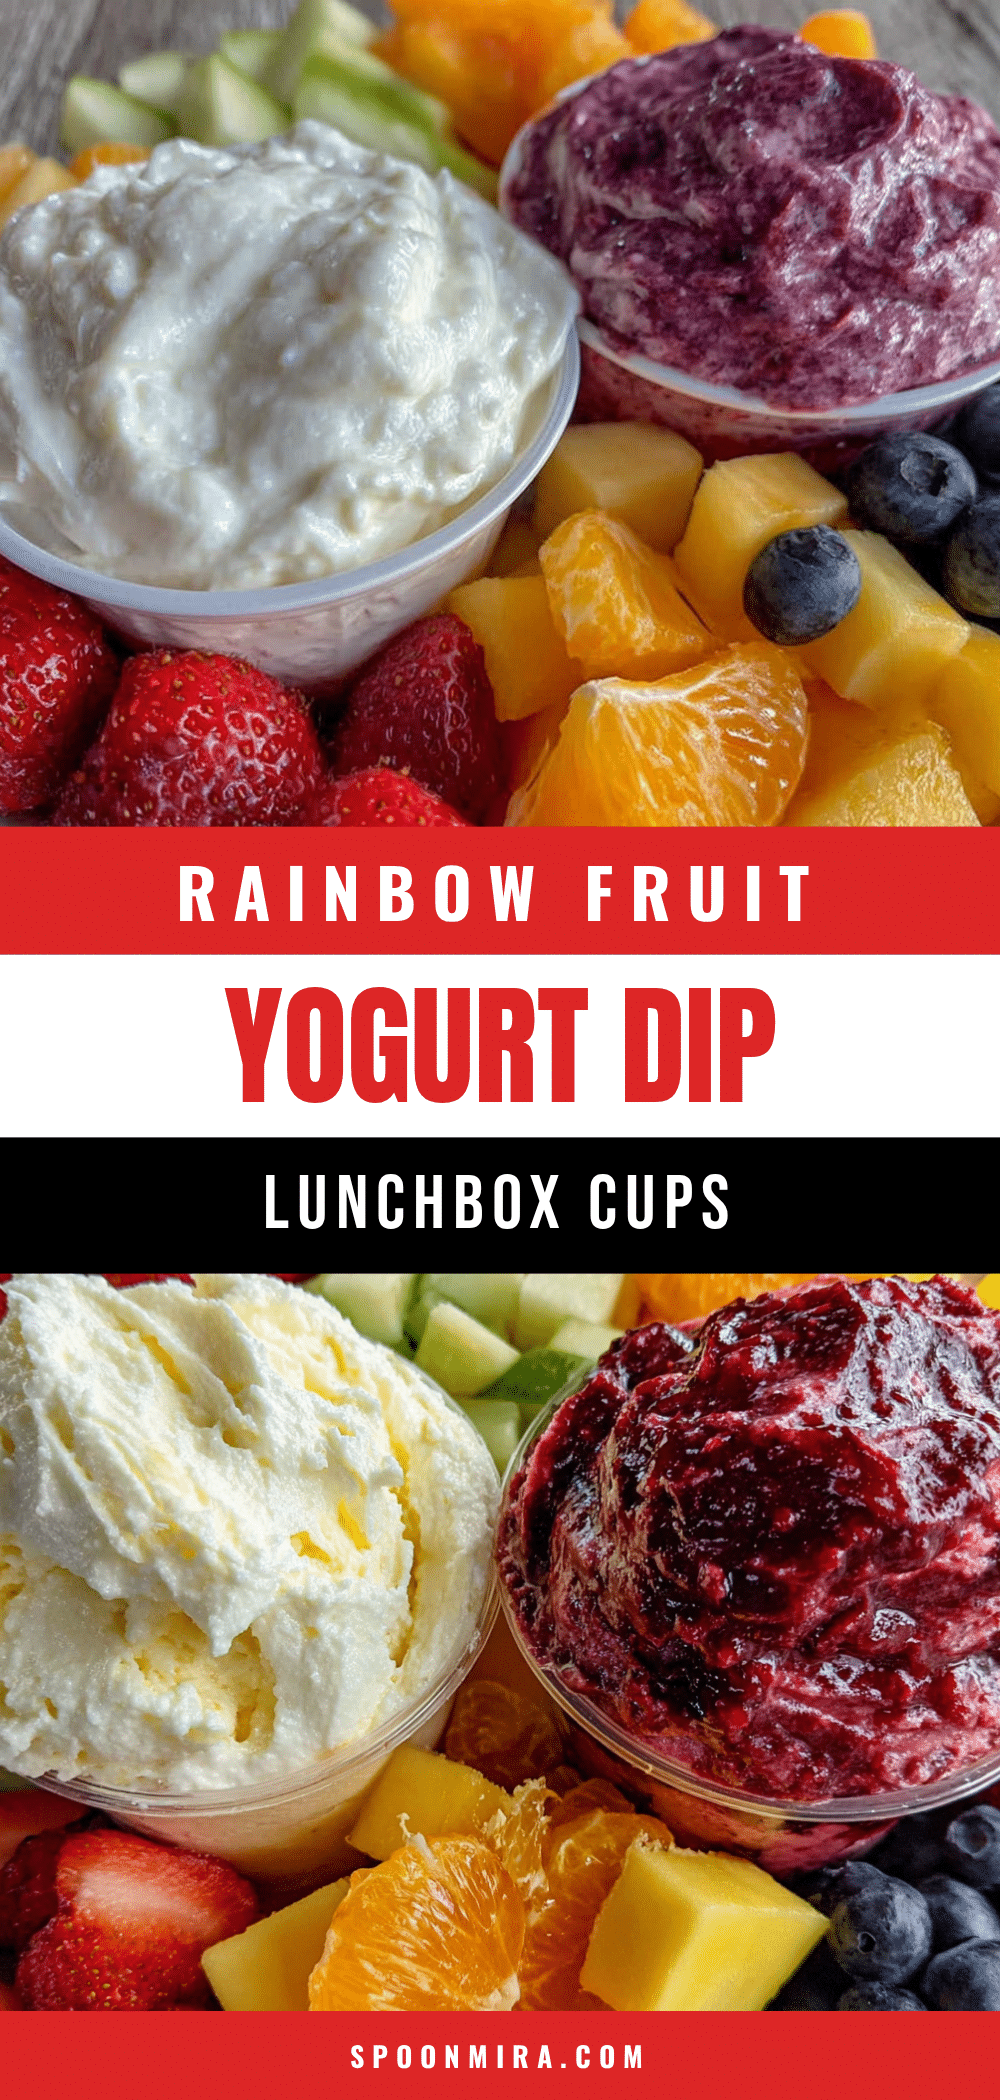
Healthy Rainbow Fruit & Yogurt Dip Lunchbox Cups
These Healthy Rainbow Fruit and Yogurt Dip Lunchbox Cups are a quick, easy, and nutritious snack featuring layers of creamy Greek yogurt dip and colorful fresh fruit. Perfect for lunchboxes, after-school snacks, or a fun, healthy treat that kids and adults love.
- Prep Time: 15 minutes
- Cook Time: 0 minutes
- Total Time: 45 minutes (includes 30 minutes chilling)
- Yield: 4 servings 1x
- Category: Snack
- Cuisine: American
Ingredients
- 1 cup (240g) plain Greek yogurt (full-fat or 2%)
- 2 tablespoons (30ml) honey
- 1/2 teaspoon (2.5ml) vanilla extract
- Fresh strawberries, hulled and diced
- Fresh mango, peeled and diced
- Fresh blueberries
- Fresh kiwi, peeled and diced
- Fresh pineapple, diced
- Optional garnish: shredded coconut, chia seeds, or mini chocolate chips
Instructions
- Make the Yogurt Dip: In a small mixing bowl, combine 1 cup (240g) plain Greek yogurt, 2 tablespoons (30ml) honey, and 1/2 teaspoon (2.5ml) vanilla extract. Whisk until smooth and creamy. Taste and adjust sweetness if needed. Set aside.
- Prep the Fruit: Wash and dry all fruit. Dice strawberries, mango, kiwi, and pineapple into small, uniform pieces (about 1/2-inch cubes). Keep blueberries whole. Place each fruit in separate small bowls.
- Layer the First Fruit: Take small cups or jars. Start with a layer of diced strawberries at the bottom of each cup (about 2 tablespoons per cup). Press down gently with the back of a spoon.
- Add the Yogurt Dip: Spoon about 1 to 1.5 tablespoons of yogurt dip over the strawberry layer. Spread evenly to the edges.
- Layer the Next Fruit: Add a layer of diced mango over the yogurt dip (about 2 tablespoons per cup). Press down gently.
- Repeat with Yogurt and Fruit: Continue layering: yogurt dip, then blueberries; yogurt dip, then kiwi; yogurt dip, then pineapple. End with a final layer of yogurt dip on top.
- Garnish and Seal: If desired, sprinkle shredded coconut or chia seeds on top. Seal cups with lids and refrigerate for at least 30 minutes before serving.
Notes
Pat fruit dry thoroughly to prevent watery layers. Use thick, full-fat Greek yogurt for best results. Chill at least 30 minutes before serving. Can be made up to 3 days in advance. For dairy-free, use thick coconut or cashew yogurt. For vegan, use maple syrup instead of honey.
Nutrition
- Serving Size: 1 cup
- Calories: 150180
- Sugar: 1518
- Sodium: 4060
- Fat: 57
- Saturated Fat: 34
- Carbohydrates: 2025
- Fiber: 34
- Protein: 1012
Keywords: rainbow fruit cups, yogurt dip, healthy snack, lunchbox ideas, kid-friendly snack, fruit and yogurt, easy snack, no-cook recipe


