Ground turkey sizzling in the pan while I fumbled through the fridge for the leftover black beans, thinking — for the millionth time — why do lunchboxes have to be so boring? It was a Sunday night, the kind where you’re already dreading the week ahead, and I had promised myself I’d actually pack lunches this time. No more sad sandwiches or overpriced cafeteria trays. But standing there, staring at a half-empty container of Greek yogurt and a lime that was definitely past its prime, I felt that familiar wave of meal prep dread.
Then it hit me. Taco Tuesday energy, but make it portable. I started throwing things together — the seasoned turkey, some corn I’d roasted earlier, a handful of cherry tomatoes that were about to turn. I whisked that sad lime juice into the yogurt with a pinch of salt, and honestly, I wasn’t expecting much. But when I took that first taste test spoonful? I actually stopped mid-cleanup. The tangy crema, the warm spice from the turkey, the little pop from the corn — it was like a fiesta in a bowl. And it took maybe twenty minutes total.
That’s how these Easy Turkey Taco Lunchbox Bowls with Lime Crema were born. Not from a fancy test kitchen or a Pinterest-perfect planning session, but from pure, desperate improvisation. And honestly? That’s usually where the best recipes come from. They’re the kind you actually want to eat for lunch, not just the kind you pack because you should. These bowls have become my secret weapon for busy weeks — they’re satisfying without being heavy, and that lime crema? It’s the kind of simple magic that makes you feel like you actually have your life together.
Why You’ll Love This Recipe
Let me tell you why these bowls have earned a permanent spot in my weekly rotation. I’ve tested this recipe about seven times (my coworkers have been very willing taste testers), and every version just worked. Here’s what makes them special:
- Quick & Easy : You can have these bowls prepped and ready in under 30 minutes. Seriously. The turkey cooks in about 10 minutes, and the rest is just assembly. Perfect for those Sunday meal prep sessions when you’re trying to get ahead of the week.
- Simple Ingredients : No fancy grocery store trips required. Ground turkey, pantry spices, canned beans, and a lime — that’s basically it. You probably have most of this stuff already.
- Perfect for Lunchboxes : These bowls travel beautifully. They’re sturdy enough to survive a commute, and they taste just as good cold as they do warm. My kids actually fight over who gets the last one.
- Crowd-Pleaser : I’ve packed these for school lunches, office potlucks, and even a picnic. Adults and kids alike gobble them up. The seasoning is flavorful but not too spicy, so even picky eaters are happy.
- Unbelievably Delicious : That lime crema is the real star here. It’s tangy, creamy, and cuts through the richness of the turkey perfectly. Every bite has that perfect balance of textures and flavors.
What makes this recipe different from the dozens of other taco bowl recipes out there? It’s the combination of speed and flavor. Most taco bowl recipes want you to roast vegetables or make complicated salsas. Not this one. We’re keeping it simple but not sacrificing taste. The lime crema is what really sets it apart — it’s not just sour cream with a squeeze of lime. I’ve perfected the ratio so it’s tangy enough to brighten the whole bowl but still creamy and indulgent.
This is the kind of lunch that makes you actually look forward to your lunch break. It’s comfort food that’s still good for you — protein-packed, veggie-loaded, and completely satisfying without that heavy, sluggish feeling afterward.
What Ingredients You Will Need
This recipe uses simple, wholesome ingredients that come together to create something genuinely delicious. Most of these are pantry staples or easy to find at any grocery store.
For the Turkey Taco Meat
- Ground turkey (1 lb / 450g): I prefer 93% lean — not too dry, not too greasy. Ground chicken works great too.
- Olive oil (1 tablespoon): For cooking the turkey. Avocado oil works too.
- Onion (1 medium, diced): Yellow or white onion adds sweetness and depth. You can use shallots if that’s what you have.
- Garlic (3 cloves, minced): Fresh is best here — it really makes a difference in the flavor.
- Chili powder (1 tablespoon): The backbone of your taco seasoning. I like using a good quality one like Spice Islands or Simply Organic.
- Cumin (1 teaspoon): Adds that warm, earthy flavor that screams “taco.”
- Smoked paprika (1 teaspoon): This is my secret ingredient — it adds a subtle smokiness that regular paprika just can’t match.
- Oregano (½ teaspoon, dried): Mexican oregano if you have it, but regular works fine.
- Salt and pepper (to taste): Don’t be shy with the salt — it makes everything pop.
- Tomato paste (2 tablespoons): Adds richness and depth. I use the tube kind so I don’t waste half a can.
- Chicken broth (¼ cup / 60ml): Helps create a nice saucy texture. Water works in a pinch.
For the Lime Crema
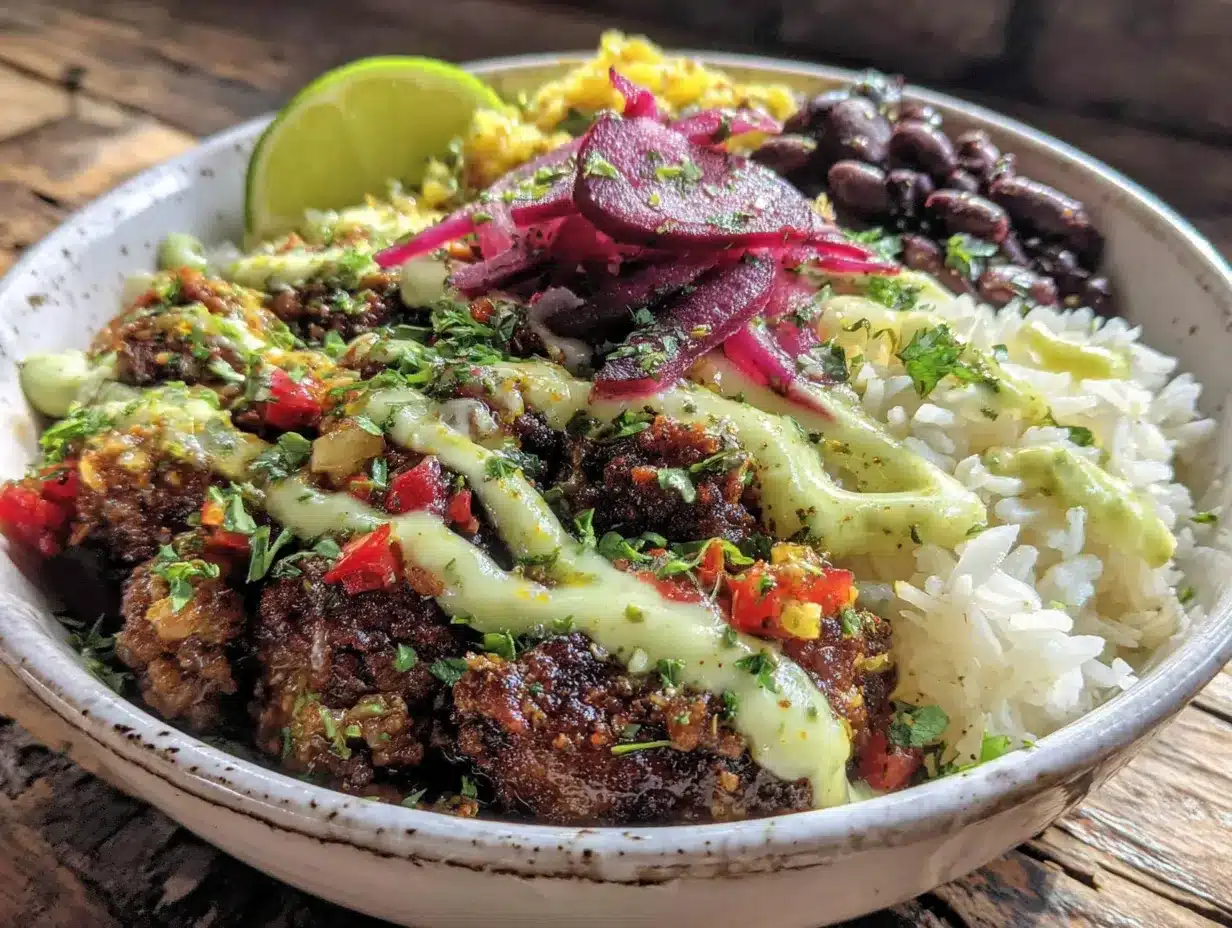
- Greek yogurt (½ cup / 120g): Full fat gives the creamiest result, but 2% works too. For dairy-free, use a thick coconut yogurt.
- Lime juice (2 tablespoons, fresh): Please don’t use bottled — fresh lime juice is non-negotiable here. It makes the crema bright and zingy.
- Lime zest (1 teaspoon): Adds that extra layer of citrus flavor. Don’t skip it!
- Salt (¼ teaspoon): Balances the tanginess.
- Garlic powder (¼ teaspoon): A subtle savory note.
For the Bowls
- Cooked rice (2 cups / 400g): White, brown, or cauliflower rice all work. I often use leftover rice from dinner.
- Black beans (1 can, drained and rinsed): Adds protein and fiber. Pinto beans are a great swap.
- Corn (1 cup / 150g): Frozen (thawed), canned (drained), or fresh — whatever you have. I love using fire-roasted corn for extra flavor.
- Cherry tomatoes (1 cup, halved): Adds freshness and color. Grape tomatoes work too.
- Avocado (1 large, sliced): For that creamy, healthy fat element. If prepping ahead, toss with lime juice to prevent browning.
- Fresh cilantro (¼ cup, chopped): For garnish. I know some people hate it — leave it out if that’s you.
- Lime wedges (for serving): Extra squeeze of lime never hurts.
Equipment Needed
You don’t need a fancy kitchen to make these bowls. Here’s what I use:
- Large skillet or frying pan (12-inch): For cooking the turkey. A non-stick pan makes cleanup easier, but stainless steel works great too. I’ve been using my trusty cast iron skillet for years — it gives the turkey a nice little sear.
- Cutting board and sharp knife: For dicing the onion and mincing the garlic. A dull knife is more dangerous than a sharp one, trust me.
- Small bowl: For whisking together the lime crema. Any bowl works.
- Measuring spoons and cups: For accuracy, especially with the spices. I’ve eyeballed it before and regretted it.
- Wooden spoon or spatula: For breaking up the turkey as it cooks.
- Meal prep containers (4-6): Glass containers with tight-fitting lids are my favorite. They don’t stain and they reheat beautifully. If you’re using plastic, make sure it’s BPA-free.
- Can opener: For the beans and corn if you’re using canned.
If you don’t have a large skillet, a Dutch oven or even a large saucepan will work. The key is having enough surface area so the turkey browns instead of steaming. And if you’re really in a pinch, you can even cook the turkey in a microwave-safe bowl — just crumble it well and cook in 2-minute intervals, stirring in between. I’ve done it when camping, and it’s not bad!
Preparation Method
Let me walk you through this step by step. I promise it’s easier than it looks.
- Make the lime crema first (5 minutes): In a small bowl, whisk together the Greek yogurt, fresh lime juice, lime zest, salt, and garlic powder. Taste it — it should be tangy and bright, with a hint of garlic. Cover and refrigerate while you prepare everything else. This gives the flavors time to meld together. Pro tip: if your yogurt is really thick, add a teaspoon of water to thin it out slightly.
- Cook the turkey (10-12 minutes): Heat the olive oil in your large skillet over medium-high heat. Add the diced onion and cook for about 3 minutes, until it’s soft and translucent. Add the minced garlic and cook for another 30 seconds — you should smell it immediately. Add the ground turkey, breaking it up with your wooden spoon. Cook for 5-7 minutes, stirring occasionally, until the turkey is browned and cooked through. Don’t rush this step — you want some golden brown bits on the bottom of the pan. That’s flavor.
- Season the meat (3 minutes): Reduce the heat to medium-low. Add the chili powder, cumin, smoked paprika, oregano, salt, and pepper. Stir everything together and let it cook for about a minute — this toasts the spices and makes them more aromatic. Add the tomato paste and stir until it’s evenly distributed. Pour in the chicken broth and scrape up any browned bits from the bottom of the pan. Let it simmer for 2-3 minutes until the sauce thickens slightly. Taste and adjust seasoning — I usually add a pinch more salt here.
- Prepare your bowl components (5 minutes): While the turkey is cooking, get your other ingredients ready. If you’re using frozen corn, thaw it by running it under warm water in a colander. Rinse and drain the black beans. Halve the cherry tomatoes. Slice the avocado. Chop the cilantro. Having everything ready makes assembly a breeze.
- Assemble the bowls (5 minutes): Divide the cooked rice evenly among your meal prep containers — about ½ cup per bowl. Top with the turkey taco meat, followed by the black beans, corn, and cherry tomatoes. Arrange the avocado slices on the side. Drizzle the lime crema over everything, or pack it separately if you’re prepping ahead (more on that in the storage section). Garnish with fresh cilantro and a lime wedge.
- Cool and store (10 minutes): Let the bowls cool completely before sealing the lids. This prevents condensation from making everything soggy. Once cooled, refrigerate for up to 4 days.
A few things to watch for: If your turkey seems dry, you might be overcooking it. Ground turkey is leaner than beef, so it can go from perfect to dry pretty quickly. Cook until it’s just done — no pink, but still juicy. Also, if the spice level seems off, start with less chili powder and add more to taste. You can always add heat, but you can’t take it away.
Cooking Tips & Techniques
I’ve made this recipe enough times to know where things can go wrong. Here’s what I’ve learned the hard way so you don’t have to.
Don’t skip browning the turkey. I know it’s tempting to just cook it until it’s done, but letting it get some color adds so much flavor. Let it sit in the pan for a minute or two before breaking it up. Those golden bits? That’s where the magic happens. If the pan seems too crowded, cook the turkey in batches. Crowding leads to steaming, and steaming leads to bland meat.
Toast your spices. This is a game-changer. When you add the spices to the hot pan and stir for a minute before adding the liquid, it releases their essential oils. The difference between untoasted and toasted cumin is night and day. I once skipped this step when I was rushing, and the whole bowl tasted flat. Never again.
Season in layers. Add salt at every stage — when you cook the onions, when you brown the turkey, and when you add the spices. It builds flavor from the ground up. I learned this from a chef friend, and it’s transformed my cooking. Just be careful not to overdo it — you can always add more at the end.
Let the crema sit. The lime crema gets better as it sits. If you can make it an hour ahead, do it. The flavors meld and mellow out. I’ve made it the night before and it was even better the next day. Just give it a good stir before using.
Multitask like a pro. While the turkey is cooking, prep your other ingredients. Rinse the beans, halve the tomatoes, chop the cilantro. This is where meal prep really shines — you’re using every minute efficiently. I usually set a timer for 10 minutes and see how much I can get done while the turkey cooks.
One mistake I made early on was not letting the bowls cool before refrigerating. I was in a hurry (when am I not?), and I sealed them up while they were still warm. The next day, the rice was mushy and the avocado had turned brown. Lesson learned: patience pays off. Give them a good 10-15 minutes on the counter before refrigerating.
Variations & Adaptations
This recipe is incredibly flexible. Here are some ways I’ve adapted it over the years:
Dietary Swaps: For a vegetarian version, swap the ground turkey for two cans of black beans or a package of crumbled tofu. Season them the same way, and you’ll barely miss the meat. For a low-carb version, use cauliflower rice instead of regular rice — it adds extra veggies and keeps things light. I’ve also made this with ground beef and ground chicken, and both work beautifully. If you’re dairy-free, use a thick coconut yogurt or cashew cream for the lime crema.
Seasonal Twists: In the summer, I add diced mango or peach for a sweet contrast to the spicy turkey. In the fall, roasted butternut squash cubes are amazing in place of the corn. In the winter, I sometimes add a spoonful of pickled jalapeños for extra warmth. The beauty of this recipe is that it works with whatever vegetables you have on hand — bell peppers, zucchini, even shredded cabbage would be great.
Different Cooking Methods: You can easily make this in a slow cooker. Just brown the turkey first (don’t skip this step!), then transfer everything except the crema and fresh toppings to the slow cooker. Cook on low for 4-6 hours. The flavors get even deeper. For an Instant Pot version, use the sauté function to brown the turkey, then pressure cook on high for 5 minutes with a quick release.
Spice It Up (or Down): For a milder version, reduce the chili powder to 1 teaspoon and skip the cayenne. For extra heat, add a diced jalapeño with the onions or a pinch of cayenne pepper with the other spices. My husband likes his with a drizzle of hot sauce on top — Cholula is his favorite.
One of my favorite variations is swapping the rice for quinoa. It adds extra protein and a nice nutty flavor. I also love adding roasted sweet potatoes when I have them — they add sweetness that balances the tangy lime crema perfectly. If you’re packing these for kids, try adding some shredded cheese on top. It makes everything more appealing to little ones.
Serving & Storage Suggestions
These bowls are designed to be eaten cold or at room temperature, which makes them perfect for lunchboxes. But here’s how to get the best experience:
Serving Temperature: You can eat these straight from the fridge — they’re delicious cold. But if you prefer them warm, microwave the bowl for 1-2 minutes, stirring halfway through. Just remove the avocado and lime wedge before reheating. Add them back after. The lime crema can go in the microwave too, but it’s better added cold right before eating.
Presentation Tips: When I’m packing these for a lunchbox, I like to arrange the components separately rather than mixing everything together. It looks prettier, and it keeps the textures distinct. The rice on one side, the turkey on the other, the beans and corn in between. The avocado goes on top with a sprinkle of cilantro. It’s like a little bento box of deliciousness.
Storage Instructions: These bowls will keep in the refrigerator for up to 4 days in airtight containers. I’ve pushed it to 5 days, and they were still good, but the avocado definitely suffered. For best results, store the lime crema separately and add it just before eating. This prevents the crema from making everything soggy. If you’ve already added it, it’s not the end of the world — just know the texture will be slightly different.
Freezer Instructions: You can freeze the turkey taco meat on its own for up to 3 months. Let it cool completely, then transfer to a freezer-safe bag or container. When you’re ready to use it, thaw overnight in the refrigerator and reheat in a skillet. The other components (rice, beans, vegetables) don’t freeze as well, so I recommend freezing just the meat and making fresh rice and toppings when you’re ready to assemble.
Flavor Development: Here’s a secret — these bowls actually taste better the next day. The flavors have time to meld and deepen. The spices settle into the turkey, the lime crema gets tangier, everything becomes more cohesive. I actually prefer day 2 bowls over day 1. By day 3, they’re still delicious, but the avocado might need replacing.
If you’re packing these for school lunches, I highly recommend checking out my turkey and cheese pinwheel roll-ups for another easy lunchbox option. And for a sweet treat to round out the lunchbox, these mini banana muffins are always a hit with kids.
Nutritional Information & Benefits
These bowls are packed with good-for-you ingredients that keep you full and energized. Here’s the breakdown per serving (based on 4 servings):
| Nutrient | Amount per Serving |
|---|---|
| Calories | 485 |
| Protein | 32g |
| Carbohydrates | 52g |
| Fiber | 10g |
| Fat | 16g |
| Saturated Fat | 3g |
| Sugar | 6g |
| Sodium | 680mg |
Health Highlights: Ground turkey is a lean protein source that’s lower in saturated fat than beef. Black beans are loaded with fiber and plant-based protein — they’re great for digestion and keeping you full. Avocado provides healthy monounsaturated fats that are good for your heart. The lime crema made with Greek yogurt adds probiotics for gut health and extra protein. This bowl is naturally gluten-free and can easily be made dairy-free with a simple swap.
Dietary Considerations: This recipe is gluten-free, nut-free, and egg-free. For a dairy-free version, use coconut yogurt in the crema. For a lower-carb option, swap the rice for cauliflower rice or extra vegetables. For a vegetarian version, double the beans or add tofu. The only potential allergen is dairy from the Greek yogurt, which is easily substituted.
I love that this recipe makes me feel good about what I’m eating without sacrificing flavor. It’s the kind of meal that supports my energy levels through the afternoon — no 3 PM slump here. Plus, with all that protein and fiber, I stay full until dinner without reaching for snacks.
Conclusion
These Easy Turkey Taco Lunchbox Bowls with Lime Crema have genuinely changed my lunch game. They’re quick enough for busy weeknights, healthy enough to feel good about, and delicious enough that I actually look forward to eating them. The lime crema is the kind of simple addition that makes everything feel special — it’s tangy, creamy, and absolutely perfect with the spiced turkey.
I encourage you to make this recipe your own. Swap in whatever vegetables you have on hand, adjust the spice level to your liking, or try different grains. The base recipe is forgiving and flexible, which is exactly what you want in a meal prep staple. And if you’re looking for more lunchbox inspiration, check out these no-bake peanut butter granola bars for a perfect snack companion.
I’d love to hear how these turn out for you! Drop a comment below and let me know what variations you tried. Did you add extra spice? Swap in a different protein? I’m always looking for new ideas. And if you loved these bowls, please share this recipe with a friend who could use a little lunchbox inspiration. Happy cooking, friends!
Frequently Asked Questions
Can I make these bowls ahead of time?
Absolutely! That’s the whole point of this recipe. You can prep them up to 4 days in advance. Just store the lime crema separately and add it right before eating for the best texture. The flavors actually get better as they sit.
Can I freeze the turkey taco meat?
Yes! The turkey meat freezes beautifully for up to 3 months. Let it cool completely, then transfer to a freezer-safe bag or container. Thaw overnight in the fridge and reheat in a skillet. Make fresh rice and toppings when you’re ready to assemble.
What can I use instead of Greek yogurt for the lime crema?
For a dairy-free option, use a thick coconut yogurt or cashew cream. Sour cream also works well — just use full fat for the creamiest result. If you’re avoiding dairy altogether, try blending soaked cashews with lime juice and water for a creamy, tangy alternative.
How do I keep the avocado from turning brown in the lunchbox?
Toss the avocado slices with a little extra lime juice before adding them to the bowl. The acidity helps prevent browning. You can also pack the avocado separately and add it just before eating. If you’re really worried about it, leave the avocado out and add it fresh each day.
Can I use ground beef instead of turkey?
Absolutely! Ground beef works great in this recipe. Just use lean ground beef (85/15 or 90/10) to keep it from being too greasy. The cooking time will be similar, but you might need to drain off some excess fat after browning. Ground chicken also works beautifully.
Pin This Recipe!
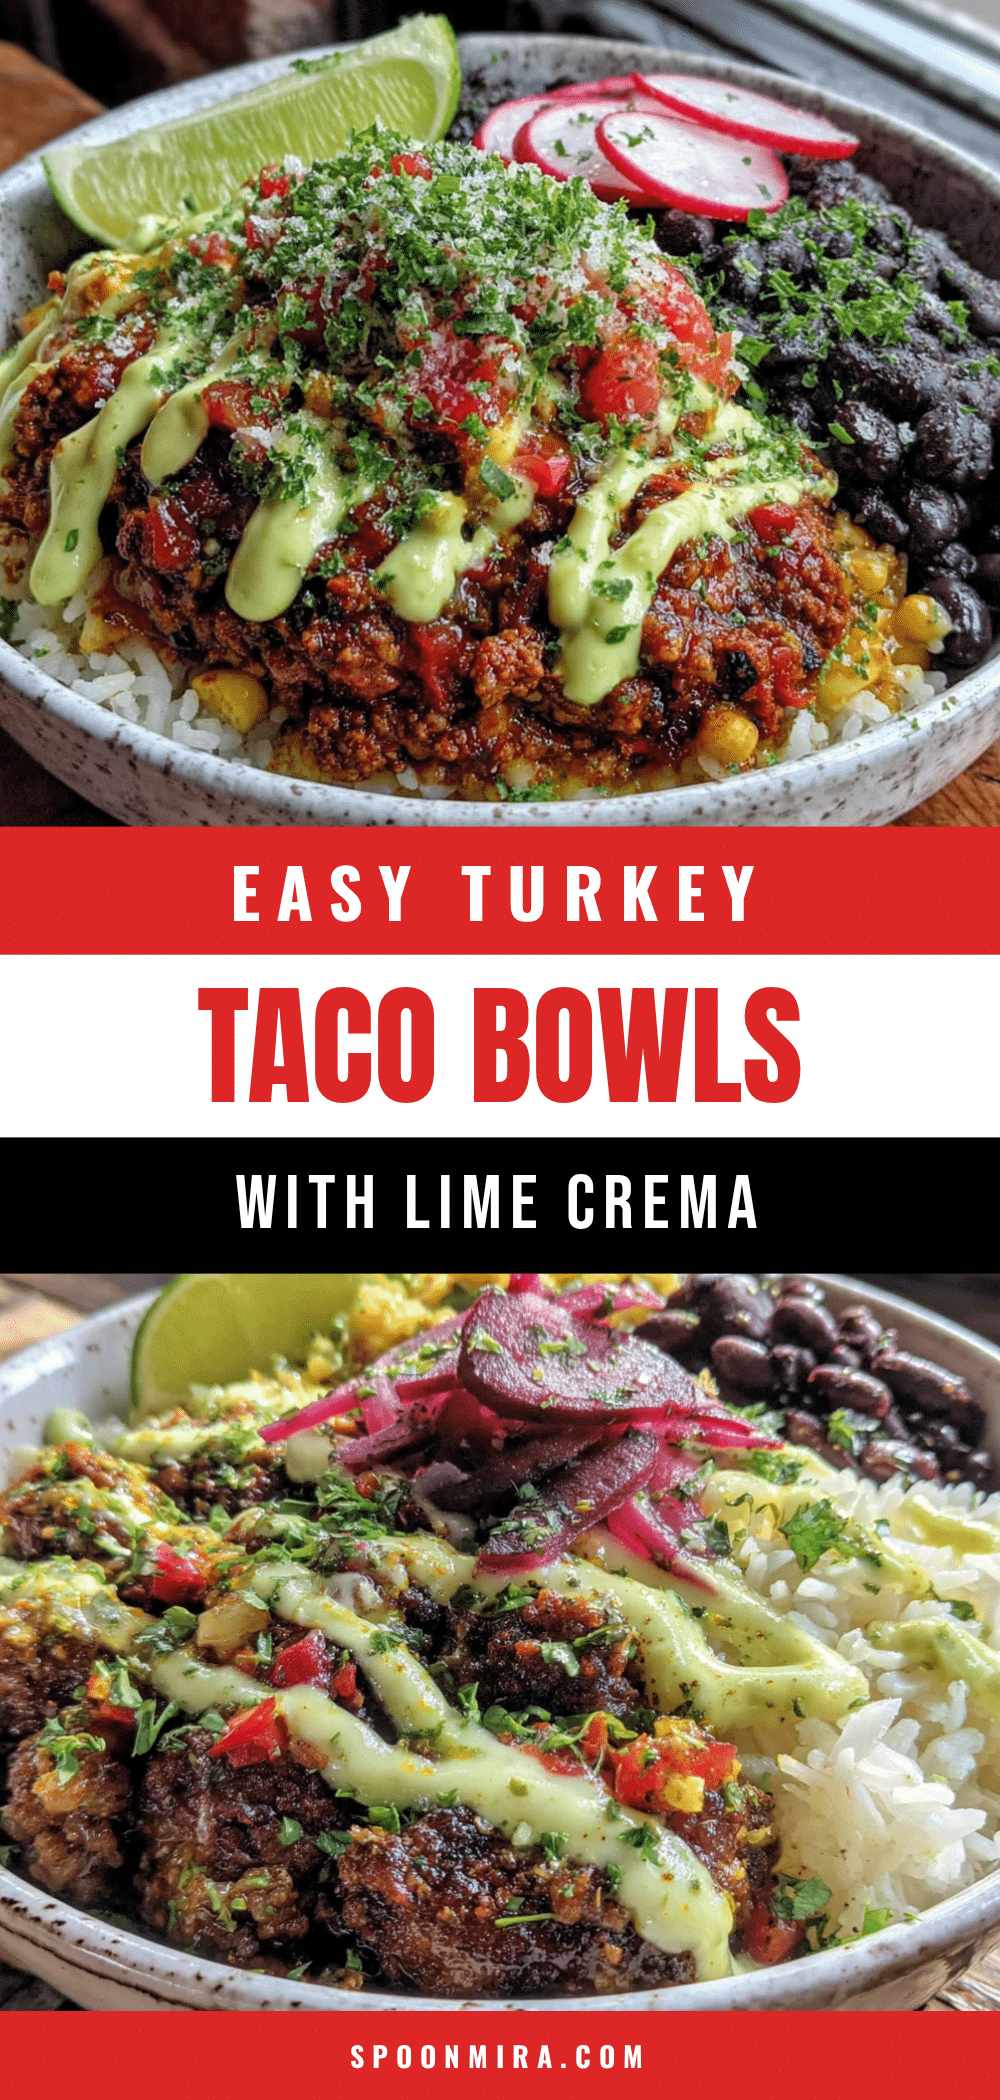
Easy Turkey Taco Lunchbox Bowls with Lime Crema
Quick and easy turkey taco bowls with a tangy lime crema, perfect for meal prep and lunchboxes. Ready in under 30 minutes with simple ingredients.
- Prep Time: 15 minutes
- Cook Time: 15 minutes
- Total Time: 30 minutes
- Yield: 4 servings 1x
- Category: Main Course
- Cuisine: Mexican
Ingredients
- 1 lb (450g) ground turkey (93% lean)
- 1 tablespoon olive oil
- 1 medium onion, diced
- 3 cloves garlic, minced
- 1 tablespoon chili powder
- 1 teaspoon cumin
- 1 teaspoon smoked paprika
- ½ teaspoon dried oregano
- Salt and pepper to taste
- 2 tablespoons tomato paste
- ¼ cup (60ml) chicken broth
- ½ cup (120g) Greek yogurt (full fat or 2%)
- 2 tablespoons fresh lime juice
- 1 teaspoon lime zest
- ¼ teaspoon salt
- ¼ teaspoon garlic powder
- 2 cups (400g) cooked rice (white, brown, or cauliflower)
- 1 can black beans, drained and rinsed
- 1 cup (150g) corn (frozen, canned, or fresh)
- 1 cup cherry tomatoes, halved
- 1 large avocado, sliced
- ¼ cup fresh cilantro, chopped
- Lime wedges for serving
Instructions
- Make the lime crema: In a small bowl, whisk together Greek yogurt, fresh lime juice, lime zest, salt, and garlic powder. Cover and refrigerate.
- Cook the turkey: Heat olive oil in a large skillet over medium-high heat. Add diced onion and cook for 3 minutes until soft. Add minced garlic and cook for 30 seconds. Add ground turkey, breaking it up, and cook for 5-7 minutes until browned and cooked through.
- Season the meat: Reduce heat to medium-low. Add chili powder, cumin, smoked paprika, oregano, salt, and pepper. Stir and cook for 1 minute. Add tomato paste and stir until evenly distributed. Pour in chicken broth, scrape up browned bits, and simmer for 2-3 minutes until sauce thickens.
- Prepare bowl components: While turkey cooks, thaw corn if frozen, rinse black beans, halve cherry tomatoes, slice avocado, and chop cilantro.
- Assemble the bowls: Divide cooked rice among meal prep containers (about ½ cup each). Top with turkey taco meat, black beans, corn, and cherry tomatoes. Arrange avocado slices on the side. Drizzle with lime crema or pack separately. Garnish with cilantro and a lime wedge.
- Cool and store: Let bowls cool completely before sealing lids. Refrigerate for up to 4 days.
Notes
For best results, store lime crema separately and add just before eating. Bowls taste even better the next day. To prevent avocado browning, toss with extra lime juice. For a vegetarian version, swap turkey for two cans of black beans or crumbled tofu.
Nutrition
- Serving Size: 1 bowl
- Calories: 485
- Sugar: 6
- Sodium: 680
- Fat: 16
- Saturated Fat: 3
- Carbohydrates: 52
- Fiber: 10
- Protein: 32
Keywords: turkey taco bowls, lunchbox meals, meal prep, healthy lunch, lime crema, ground turkey, easy dinner


