I was elbow-deep in pumpkin guts, and not in a cute, Instagram-worthy way. The kitchen counter was a battlefield of orange pulp and slippery seeds, and I’d just realized my carefully planned afternoon of baking had left me with a mountain of potential and zero actual snack food. My family was circling like sharks, asking what was for lunch, and all I had was a bowl of stringy, raw seeds and a vague memory of someone somewhere saying you could roast them. Honestly, I was this close to just tossing the whole mess in the compost. But then I spotted the limes in the fruit bowl and a forgotten jar of chili powder in the back of the spice cabinet. A little sprinkle of this, a squeeze of that, a quick toss in a hot pan—and suddenly, that pile of kitchen waste turned into the most addictive, crispy chili lime roasted pumpkin seeds I’d ever tasted. It was a total accident, born from a moment of pure laziness and a desperate need for crunch.
That first batch disappeared in about ten minutes flat, and I knew I’d stumbled onto something special. It wasn’t just a snack; it was a transformation. That salty, tangy, spicy, and deeply savory flavor combo is the kind of thing that makes you forget you were ever just “dealing with” a pumpkin. It’s the snack you didn’t know you needed, the one that turns a chore into a craving. And now, every time I see a pumpkin, I get a little thrill knowing what’s coming next. You’re going to want to save this one—it’s the kind of simple trick that makes you feel like a kitchen genius.
Why You’ll Love This Recipe
Let’s be real—most roasted pumpkin seeds are either burnt, chewy, or just plain bland. This recipe is different. It’s the result of a few happy accidents and a whole lot of taste-testing, and it’s built to deliver on every single level.
- Quick & Easy: From start to finish, we’re talking about 15 minutes. Seriously. No long, slow roasting. Just a hot pan and a few minutes of your time. It’s the perfect last-minute snack solution for when those cravings hit.
- Simple Ingredients: You probably already have everything you need. Pumpkin seeds (obviously), oil, chili powder, lime, and salt. No weird specialty items or trips to a fancy grocery store. It’s pantry-staple magic.
- Perfect for Pumpkin Carving: This is the ultimate reward for all that hard work. Instead of tossing the seeds, you turn them into the best part of the whole pumpkin-carving experience. It’s a tradition in the making.
- Crowd-Pleaser: I’ve served these at parties, movie nights, and even just as a weirdly satisfying afternoon snack. They vanish. Kids love them, adults hoard them, and everyone asks for the recipe. It’s a guaranteed hit.
- Unbelievably Crispy: The secret is in the technique. We’re not baking them low and slow; we’re using high heat and a watchful eye to get that perfect, shatteringly crisp texture that makes them so dangerously snackable. No sogginess allowed.
This isn’t just another roasted seed recipe. It’s the one that makes you close your eyes after the first bite and say, “Oh, that’s good.” It’s the snack you’ll start looking forward to every time a pumpkin enters your house. Trust me on this.
What Ingredients You Will Need
This recipe is beautifully simple, relying on a few key ingredients to create that incredible flavor punch. Each one plays a specific role, and together, they’re pure magic. Here’s what you’ll need to gather.
- Pumpkin Seeds (1 cup, fresh from a medium pumpkin): The star of the show. You can use seeds from any variety of pumpkin or winter squash. The key is to get them as clean and dry as possible before cooking. I usually rinse them in a colander and then pat them very dry with a clean kitchen towel. Any leftover moisture will steam them instead of crisping them.
- Avocado Oil (or other high-heat oil, 1 tablespoon): We need an oil with a high smoke point to get that perfect crisp without burning. Avocado oil is my go-to, but grapeseed or refined coconut oil work great too. Olive oil has too low a smoke point and can get bitter. This oil helps the spices stick and promotes even browning.
- Chili Powder (1 teaspoon): This is for warmth and depth, not just heat. I use a standard, mild chili powder blend. It adds a beautiful earthy, smoky flavor that pairs perfectly with the lime. Feel free to use a spicier blend if you like more kick, or even a chipotle powder for a smokier twist. I’ve found that a good quality chili powder makes a real difference here.
- Lime Zest (from 1 medium lime): This is the secret weapon. The zest contains all the fragrant, volatile oils that give you that bright, punchy lime flavor without the extra moisture of the juice. We’ll use the juice too, but the zest is what makes the flavor sing. Make sure to zest the lime before you juice it!
- Lime Juice (1 tablespoon, fresh squeezed): A little bit of acidity brightens everything up and cuts through the richness of the seeds. Fresh is always best. The bottled stuff just doesn’t have the same zing.
- Kosher Salt (½ teaspoon, plus more to taste): Salt is essential. It enhances all the other flavors and makes the seeds incredibly moreish. I prefer kosher salt for its clean taste and easy pinch-ability. You’ll want to season generously.
- Optional: Cayenne Pepper (¼ teaspoon): If you want a real kick, add a pinch of cayenne. I love the extra heat, but it’s totally optional. It adds a nice, lingering warmth that plays well with the chili and lime.
Equipment Needed
You don’t need any fancy gadgets for this recipe, which is part of its charm. A few basic kitchen tools are all it takes to get that perfect crunch.
- Large Non-Stick Skillet or Cast Iron Pan: This is your workhorse. A non-stick skillet makes clean-up a breeze, but a well-seasoned cast iron pan will give you even better heat distribution and a slightly deeper, toasty flavor. I use my cast iron for this and love the results.
- Sharp Knife and Cutting Board: For halving the pumpkin and scraping out the seeds. A sturdy cutting board is a must for stability.
- Colander: For rinsing the seeds and separating them from the pumpkin pulp. A large bowl of water also works if you prefer to swish the seeds clean by hand.
- Clean Kitchen Towel or Paper Towels: Essential for drying the seeds thoroughly. This step cannot be skipped. Wet seeds will steam, not crisp.
- Measuring Spoons: For accurate seasoning. Eyeballing it is fine once you’ve made it a few times, but for the first batch, measuring ensures you get that perfect balance.
- Spatula or Wooden Spoon: For stirring the seeds as they toast. A wooden spoon is gentle on your pan and gives you good control.
- Small Bowl: For mixing the chili powder, salt, and lime zest before adding them to the pan. This helps distribute the seasoning evenly.
If you don’t have a cast iron pan, don’t worry. A good non-stick skillet will work perfectly. The main thing is to use a pan that can handle high heat without the food sticking. A budget-friendly non-stick option is just fine for this job.
Preparation Method

Get ready for the easiest, most rewarding 15 minutes of your cooking life. Follow these steps, and you’ll be rewarded with a bowl of the most addictive snack you’ve ever made.
- Clean and Dry the Seeds (5 minutes): First things first, you need to separate the seeds from the pumpkin guts. Scoop them all into a colander and rinse them under cold water, using your fingers to gently rub off the largest bits of pulp. Don’t worry about getting every single string—a little bit of pulp adds flavor. The most important step is to dry them thoroughly. Spread them out on a clean kitchen towel and pat them completely dry. Any moisture left on the seeds will cause them to steam instead of crisp, so take your time here.
- Prep the Seasoning (2 minutes): In a small bowl, combine the chili powder, kosher salt, and lime zest (if using cayenne, add it here too). Use your fingers to rub the zest into the spices—this releases the oils and makes the flavor even more intense. Set this bowl aside. Squeeze the lime and measure out 1 tablespoon of juice. Have everything ready to go because the cooking part happens fast.
- Toast the Seeds (5-7 minutes): Place your large skillet over medium-high heat. Add the avocado oil and let it get hot—it should shimmer, not smoke. Carefully add the dried pumpkin seeds to the hot pan in a single layer. You should hear a satisfying sizzle right away. Let them cook undisturbed for about 2 minutes, then give them a good stir. Continue cooking, stirring every 30 seconds or so, until the seeds are golden brown and you can hear them start to pop. This usually takes about 5 to 7 minutes total. Watch them closely—they can go from perfectly toasted to burnt in seconds. They should be fragrant and sound hollow when you shake the pan.
- Season While Hot (30 seconds): This is the critical moment. As soon as the seeds are toasted to your liking, remove the pan from the heat. Immediately sprinkle the chili-lime seasoning mixture over the hot seeds and toss to coat evenly. The heat from the pan and the seeds will help the spices bloom and stick. Then, drizzle the fresh lime juice over the top and give everything one final toss. The sizzle you hear is pure flavor magic.
- Cool and Crisp (2 minutes): Spread the seasoned seeds out on a plate or a piece of parchment paper in a single layer. Let them cool completely. As they cool, they will get even crispier. Resist the urge to dig in immediately—they need this time to set! Once cool, transfer them to a bowl and get ready to snack.
Pro Tip: If you’re using seeds from a very large pumpkin, you might need to cook them in batches to avoid overcrowding the pan. Overcrowding lowers the pan temperature and steams the seeds instead of toasting them. It’s always better to do two small batches than one giant soggy one.
Cooking Tips & Techniques
I’ve made a lot of batches of pumpkin seeds over the years, and I’ve learned a few things the hard way. Here are my best tips to ensure you get perfect results every single time.
- Dryness is Key: I cannot stress this enough. Wet seeds are the enemy of crispiness. After rinsing, spread them on a towel and let them air dry for an hour if you have the time. If you’re in a hurry, pat them dry with a second towel. The drier they are going into the pan, the better the final texture will be.
- Don’t Walk Away: Toasting seeds over high heat is a fast process. You have to stay by the stove and watch them. They go from perfectly golden to burnt black in a matter of seconds. I like to use a wooden spoon and keep them moving. Listen for the popping sounds—that’s how you know they’re getting close.
- Season Immediately: The moment the seeds come off the heat, they are at their peak stickiness. This is when the seasoning will adhere best. If you wait even a minute, the seeds will start to cool, and the spices will just fall off. Be ready with your seasoning mix and lime juice.
- My Biggest Failure: The first time I made these, I tried to bake them at 300°F for 45 minutes like every other recipe said. They came out chewy and sad. That’s when I realized that high heat and a short cook time on the stovetop is the only way to get that shatteringly crisp texture. Don’t be like me—skip the oven.
- Multitasking is Easy: Since this whole process takes only 15 minutes, it’s the perfect thing to do while you’re waiting for something else. I often make a batch while my creamy swirled chocolate chip pumpkin bread is cooling or while a pot of coffee is brewing. It’s a great way to fill a small window of time with a big payoff.
Variations & Adaptations
This basic recipe is a fantastic starting point, but the possibilities are endless. Don’t be afraid to get creative and make it your own. Here are a few of my favorite twists.
- Spicy Honey-Lime: For a sweet and spicy version, add 1 teaspoon of honey to the pan along with the seeds in the last minute of cooking. The honey will caramelize slightly, creating a glossy, sweet coating. Then finish with the chili-lime seasoning as usual. It’s a game-changer.
- Smoky Chipotle: Swap the regular chili powder for ½ teaspoon of chipotle powder. This adds a deep, smoky heat that’s incredible. Pair it with the zest of a lime and a pinch of brown sugar for a complex, BBQ-style flavor. I made this for a party once, and people were literally asking for the recipe to take home.
- Everything Bagel Seed: Forget the chili and lime. After toasting the seeds, toss them with a mixture of sesame seeds, poppy seeds, dried garlic flakes, dried onion flakes, and salt. It’s the perfect savory, crunchy topping for salads, soups, or just eating by the handful. It’s a total crowd-pleaser.
- Garlic Parmesan: After toasting, toss the seeds with 1 tablespoon of grated Parmesan cheese, ½ teaspoon of garlic powder, and a pinch of black pepper. The cheese will melt slightly and stick to the seeds, creating a salty, umami bomb. This variation is dangerously addictive.
- Dietary Adaptation: This recipe is naturally gluten-free and can be made vegan by using a plant-based oil. For a lower-sodium version, simply reduce the salt and use a salt-free chili powder blend. The lime and chili provide plenty of flavor on their own.
Serving & Storage Suggestions
These seeds are incredibly versatile and can be enjoyed in so many ways. Here’s how to serve and store them to keep them at their peak crispiness.
- Serving Temperature: These are best enjoyed at room temperature. They are perfectly crispy right after cooling, and they stay that way for a while. I love serving them in a big wooden bowl for a party or just in a small bowl for a personal snack.
- Presentation Ideas: Sprinkle them over a bowl of soup for a crunchy topping, or use them to garnish a simple salad of greens, avocado, and a citrus vinaigrette. They’re also fantastic as a topping for a cozy copycat Starbucks pumpkin cold foam cold brew for a sweet and salty contrast. Honestly, I’ve even been known to just eat them straight from the plate.
- Storage Instructions: Store completely cooled seeds in an airtight container at room temperature. They will stay crispy for up to 2 weeks. Do not refrigerate them, as the moisture in the fridge will make them soft. If they do lose their crunch, you can pop them back into a dry skillet over medium heat for a minute or two to re-crisp them.
- Flavor Development: The flavors actually meld and deepen a bit after the first day. They’re still fantastic fresh, but I find they are even more flavorful on day two. The lime zest and chili powder have a chance to really settle into the seeds.
- Make-Ahead Tip: These are perfect for making ahead of time. I often make a double batch on Sunday to have for snacking all week long. They are a fantastic, healthy alternative to chips or pretzels. They also make a wonderful homemade gift when packed in a pretty jar.
Nutritional Information & Benefits
These little seeds are a nutritional powerhouse, which makes this delicious snack all the more guilt-free. Here’s a quick look at what you’re getting.
- Estimated Nutritional Values (per ¼ cup serving): Approximately 180 calories, 15g of healthy fats, 8g of protein, and 5g of fiber. They are also a good source of iron, magnesium, and zinc.
- Health Benefits: Pumpkin seeds are packed with antioxidants and healthy fats that are great for heart health. The magnesium is excellent for muscle function and sleep, while the zinc is a fantastic immune system booster. They are a truly nutrient-dense snack.
- Dietary Considerations: This recipe is naturally gluten-free, dairy-free, and can be made vegan. It is also low in sugar and high in protein and fiber, making it a satisfying snack that won’t spike your blood sugar.
- Potential Allergens: Seeds are a common allergen, though less common than nuts. Always check for individual sensitivities. The recipe itself is free from the top eight allergens if made with a compliant oil.
- Personal Wellness Perspective: I love that I can enjoy a handful of these as a snack and feel good about it. They satisfy that craving for something crunchy and savory without the processed ingredients of chips. It’s a snack that fuels my body while making my taste buds incredibly happy. For another healthy, snackable option, check out these easy no-bake peanut butter granola bars.
Conclusion
So there you have it—the easiest, most delicious way to turn a pumpkin carving byproduct into the star of the snack table. This crispy chili lime roasted pumpkin seeds recipe is quick, foolproof, and packed with flavor. It’s the kind of simple magic that makes you feel like a kitchen rockstar with almost no effort at all.
I really hope you give this a try the next time you’re faced with a pumpkin. Don’t be afraid to play with the spices and make it your own. Maybe add a little more lime zest, or a pinch of smoked paprika. The best recipes are the ones you make your own. I’d love to hear how it turns out for you! Drop a comment below and let me know what variations you tried, or share a photo of your creation. Happy snacking, and I’ll see you in the next recipe!
Frequently Asked Questions
Can I use store-bought pumpkin seeds instead of fresh ones?
Absolutely! You can use raw, hulled pumpkin seeds (pepitas) from the store. They are already clean and dry, so you can skip the cleaning step. Just follow the toasting and seasoning instructions as written. They might cook a minute or two faster since they are smaller.
My seeds came out chewy, not crispy. What went wrong?
The most common reason is that the seeds weren’t dry enough before going into the pan. Any moisture on the surface will steam them instead of toasting them. Make sure to pat them very dry with a towel. Another reason could be that the pan wasn’t hot enough, or the pan was overcrowded, which lowers the temperature.
Can I make this recipe in the oven?
You can, but the stovetop method is faster and yields a crispier result. If you must use the oven, toss the dry seeds with oil and seasoning, spread them on a baking sheet, and roast at 400°F for 8-12 minutes, stirring halfway through. Watch them closely so they don’t burn.
How long will these stay fresh and crispy?
Stored in an airtight container at room temperature, they will stay perfectly crispy for up to two weeks. If they start to soften, you can re-crisp them in a dry skillet over medium heat for a minute or two. Avoid storing them in the fridge, as the moisture will make them soft.
Can I use a different type of chili powder?
Yes! Feel free to experiment. Chipotle powder will give a smoky heat, ancho chili powder is mild and sweet, and cayenne is just pure fire. You can also use a store-bought chili-lime seasoning blend if you have one on hand. Just be mindful of the salt content in the blend and adjust accordingly.
Pin This Recipe!
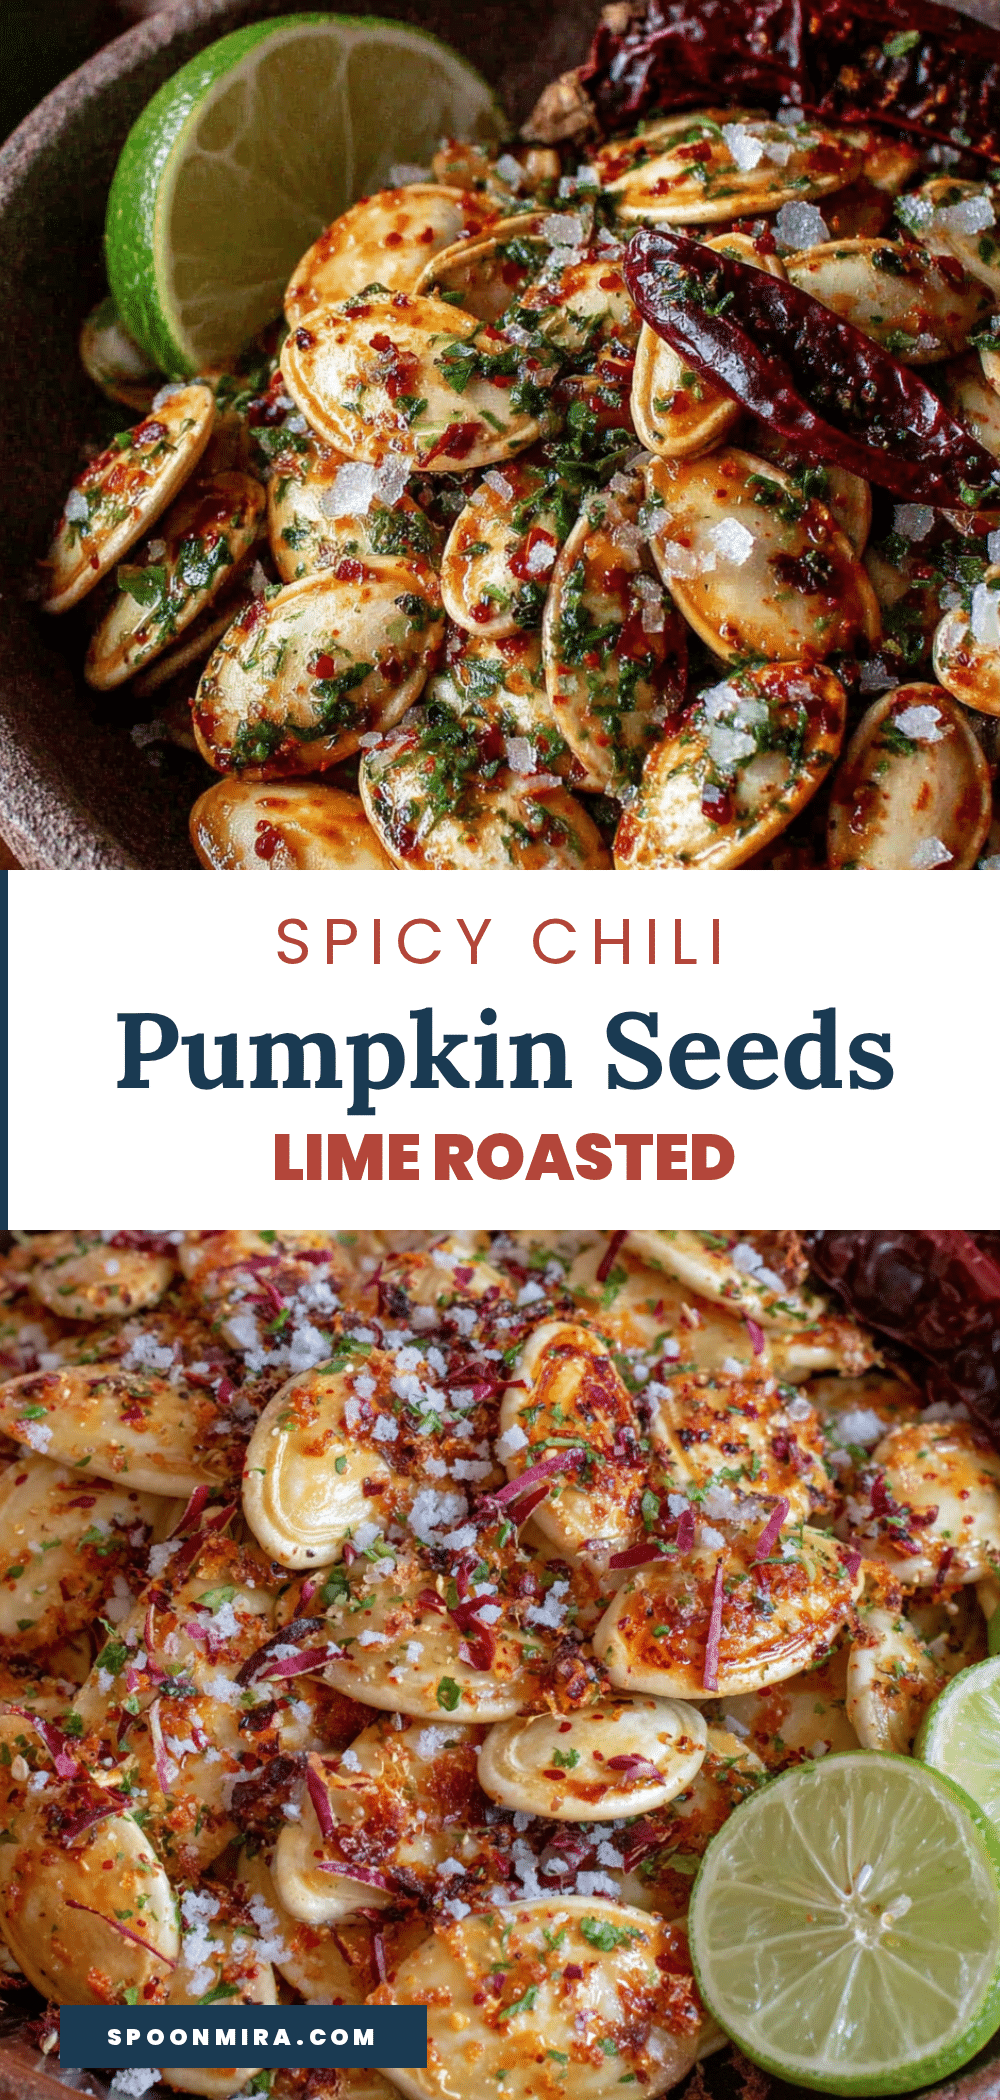
Crispy Chili Lime Roasted Pumpkin Seeds

Turn pumpkin carving leftovers into the most addictive, crispy chili lime roasted pumpkin seeds in just 15 minutes. This easy stovetop snack is salty, tangy, spicy, and deeply savory—perfect for a quick, healthy treat.
- Prep Time: 5 minutes
- Cook Time: 7 minutes
- Total Time: 15 minutes
- Yield: 4 servings 1x
- Category: Snack
- Cuisine: Mexican-inspired
Ingredients
- 1 cup fresh pumpkin seeds (from a medium pumpkin)
- 1 tablespoon avocado oil (or other high-heat oil like grapeseed or refined coconut oil)
- 1 teaspoon chili powder
- Zest of 1 medium lime
- 1 tablespoon fresh lime juice
- ½ teaspoon kosher salt (plus more to taste)
- ¼ teaspoon cayenne pepper (optional, for extra heat)
Instructions
- Clean and dry the seeds: Rinse the seeds in a colander under cold water, removing large bits of pulp. Pat them completely dry with a clean kitchen towel. Any moisture will prevent crisping.
- Prep the seasoning: In a small bowl, combine chili powder, kosher salt, and lime zest (add cayenne if using). Rub the zest into the spices with your fingers to release oils. Set aside. Measure out 1 tablespoon of lime juice.
- Toast the seeds: Place a large non-stick or cast iron skillet over medium-high heat. Add avocado oil and let it shimmer. Add the dried seeds in a single layer. Cook undisturbed for 2 minutes, then stir every 30 seconds until golden brown and popping, about 5-7 minutes total.
- Season while hot: Remove the pan from heat. Immediately sprinkle the seasoning mixture over the hot seeds and toss to coat. Drizzle with lime juice and toss again.
- Cool and crisp: Spread the seasoned seeds on a plate or parchment paper in a single layer. Let cool completely (about 2 minutes) before serving. They will crisp up as they cool.
Notes
Dry seeds thoroughly for maximum crispiness. Do not walk away while toasting—seeds can burn quickly. Season immediately after removing from heat for best adhesion. For a spicier version, add cayenne pepper. Store in an airtight container at room temperature for up to 2 weeks; re-crisp in a dry skillet if needed.
Nutrition
- Serving Size: ¼ cup
- Calories: 180
- Sugar: 1
- Sodium: 290
- Fat: 15
- Saturated Fat: 2
- Carbohydrates: 6
- Fiber: 5
- Protein: 8
Keywords: pumpkin seeds, roasted pumpkin seeds, chili lime, easy snack, healthy snack, fall recipe, Halloween snack, crispy seeds


