My niece showed up at my door in full witch costume last October, and I had exactly zero Halloween treats ready. The pantry was bare except for some vanilla wafers, a bag of candy melts I forgot about, and instant pudding mix. I stared at those sad ingredients while she rattled off her candy expectations. So I grabbed the oranges sitting on the counter and decided to pivot hard. These Easy Orange Vanilla Halloween Dirt Cups with Gummy Worms came together in a frantic fifteen minutes before trick-or-treating started, and honestly, they stole the show. The bright citrus cuts through all the sugar in a way that makes sense, and the gummy worms look even creepier poking out of vanilla pudding dirt. My niece ate two before we even left the house. That was the moment I knew this wasn’t just a quick fix — it was a keeper.
The creamy orange vanilla pudding tastes like a creamsicle melted into dessert form, and the crushed cookie topping gives you that dirt texture every Halloween dessert needs. You get the sweetness, the tang, and that satisfying crunch all in one spoonful. Plus, the gummy worms add that playful gross-out factor kids absolutely love. These dirt cups are ridiculously easy, require zero baking, and come together faster than you can say trick-or-treat. Let’s be real — nobody wants to spend hours in the kitchen when Halloween chaos is happening all around you. This recipe is your secret weapon for last-minute parties, classroom treats, or just surprising your family with something fun.
Why You’ll Love This Recipe
I’ve tested this recipe six times with different pudding bases and cookie combinations, and this orange vanilla version wins every single time. Here’s why this one stands out from every other dirt cup recipe floating around the internet.
- No Baking Required : Zero oven time, zero stress. You just mix, layer, and chill. Perfect for hot Halloween afternoons or when your kitchen is already crowded.
- Simple Ingredients : You probably have most of these in your pantry right now. No fancy grocery store trips for obscure ingredients.
- Kid-Friendly Activity : Let the little monsters help crush cookies and place gummy worms. My nephew insisted on arranging his worms in a battle scene, and it was adorable.
- Perfect for Halloween Parties : These look impressive on a dessert table but take almost no effort. Bring them to school parties, potlucks, or family gatherings and watch them disappear.
- Customizable for Dietary Needs : Swap in dairy-free pudding and vegan cookies, and you’ve got a treat almost everyone can enjoy.
What makes this recipe different is the orange vanilla combination. Most dirt cups use chocolate pudding, which is fine, but the citrus adds a brightness that balances all the sweetness. The vanilla wafers give you that classic dirt texture without being too heavy. And the gummy worms? They’re the star of the show, obviously. This is the kind of dessert that makes people close their eyes after the first bite and say, “Wait, what’s in this?” It’s familiar enough to be comforting but different enough to be memorable. Honestly, it’s the easiest way to look like a Halloween hero without breaking a sweat.
What Ingredients You Will Need
This recipe uses simple, wholesome ingredients that come together to create something truly special. The orange vanilla flavor profile is unexpected but absolutely addictive, and every ingredient plays a specific role in making these dirt cups work.
- Instant vanilla pudding mix (two 3.4-ounce boxes) — This is your base, and it creates that creamy, dreamy texture. I prefer Jell-O brand for consistency, but store brands work fine too.
- Cold milk (3 cups, whole milk recommended) — Whole milk gives you the richest, creamiest pudding. You can use 2% in a pinch, but avoid skim milk — the pudding won’t set up as nicely.
- Fresh orange juice (1/4 cup, about 1 large orange) — This is non-negotiable for that bright citrus punch. Bottled juice works in a pinch, but fresh really makes a difference here.
- Orange zest (1 tablespoon, from that same orange) — The zest carries all the aromatic oils that make the orange flavor pop. Don’t skip this.
- Vanilla extract (1 teaspoon, pure vanilla extract preferred) — This deepens the vanilla notes and rounds out the citrus. I use Nielsen-Massey because it’s worth the splurge.
- Vanilla wafer cookies (about 2 cups crushed, Nilla wafers are my go-to) — These create your “dirt” layer. They crush easily and have that perfect buttery vanilla flavor that complements the pudding.
- Chocolate sandwich cookies (about 1 cup crushed, Oreos with filling removed) — Optional but recommended for darker, richer dirt color. The contrast against the pale pudding looks amazing.
- Gummy worms (about 24 worms, or 2 per cup) — The spooky star of the show. Use sour gummy worms for extra tang, or classic ones for pure sweetness.
- Whipped topping (8 ounces, thawed, like Cool Whip) — This lightens the pudding and gives it that mousse-like texture. Homemade whipped cream works too, but Cool Whip holds up better over time.
- Small clear plastic cups (12 cups, 5-ounce size) — Clear cups let you see those beautiful layers. Disposable ones make cleanup a breeze for parties.
- Halloween sprinkles (optional, for garnish) — Little pumpkin and ghost shapes add extra fun. My kids fight over who gets the most pumpkins.
For the best texture, look for instant pudding mix that hasn’t expired — trust me on this one, old pudding mix doesn’t set properly. And if you can find organic oranges, the zest flavor is noticeably brighter.
Equipment Needed
You don’t need fancy equipment for these dirt cups, which is exactly why I love this recipe. Here’s what you’ll need to pull it off.
- Large mixing bowl — For whisking the pudding. A glass or stainless steel bowl works best.
- Whisk — A good balloon whisk helps break up lumps. I’ve used a fork in emergencies, and it worked, but a whisk is better.
- Zester or microplane — For getting that fine orange zest without the bitter white pith. A box grater works too.
- Citrus juicer — Optional but helpful for extracting every drop of juice. I use a handheld reamer.
- Food processor or rolling pin — For crushing cookies. A food processor gives you even crumbs, but a zip-top bag and rolling pin works just as well if you need to release some frustration.
- Measuring cups and spoons — Precision matters here for the pudding to set correctly.
- Small clear cups (12, 5-ounce size) — Clear plastic cups let everyone admire those creepy layers. You can find them at any grocery store or party supply shop.
- Spatula — For scraping every last bit of pudding into the cups. Waste not, want not.
- Piping bag or zip-top bag — For neat pudding layering. Snip the corner off a zip-top bag for a makeshift piping bag.
If you don’t have a food processor, just place the cookies in a sturdy zip-top bag and go to town with a rolling pin. It’s oddly satisfying and a great way to work out any pre-Halloween stress.
Preparation Method
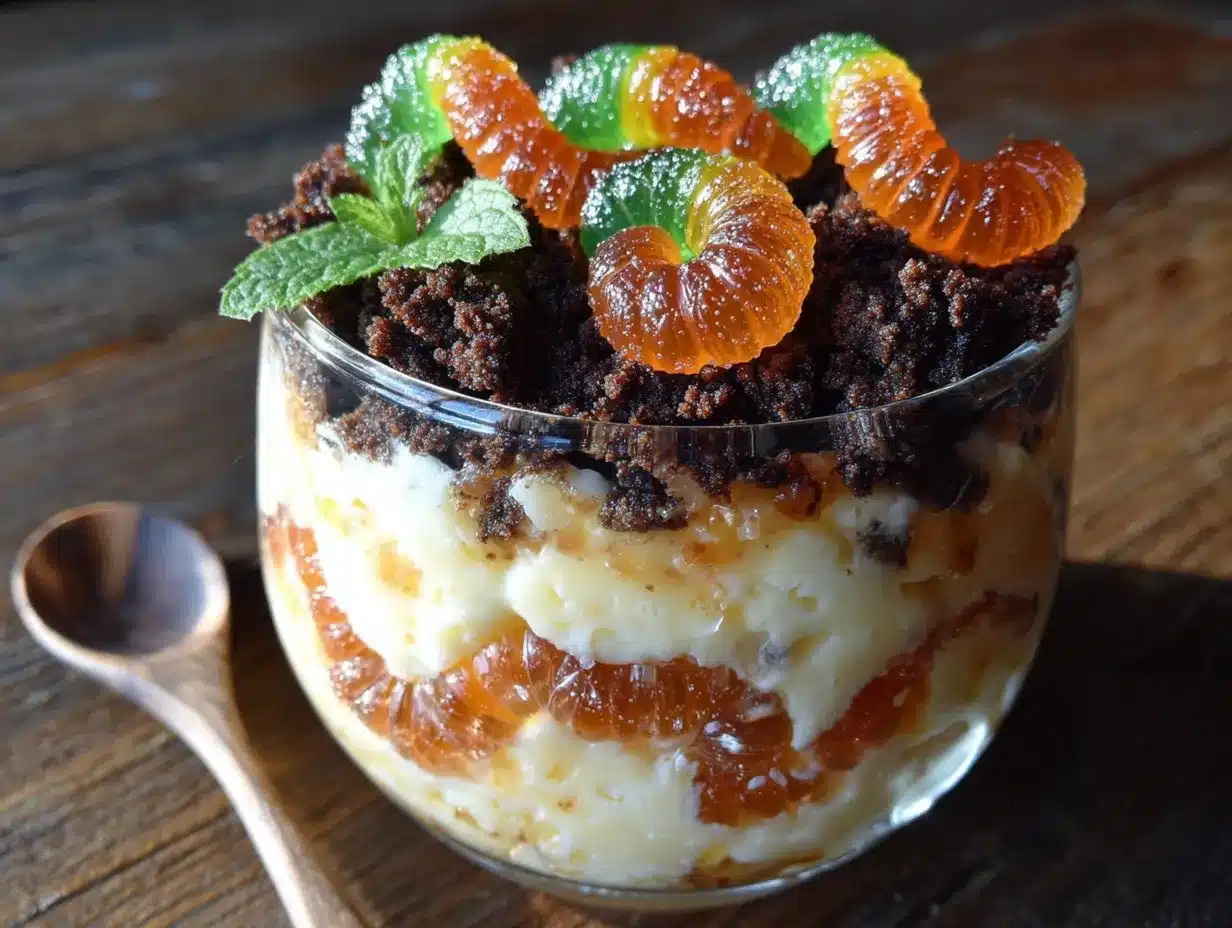
These Easy Orange Vanilla Halloween Dirt Cups with Gummy Worms come together in about 20 minutes of active prep time, plus 30 minutes of chilling. Follow these steps carefully, and you’ll have the creepiest, most delicious dessert on the block.
- Zest and juice your orange first — Wash your orange thoroughly, then zest it before cutting it open. You want about 1 tablespoon of zest and 1/4 cup of fresh juice. Set both aside. The zest adds aromatic oils that bottled juice just can’t replicate.
- Whisk the pudding base — In a large mixing bowl, combine both boxes of instant vanilla pudding mix with 3 cups of cold milk. Whisk vigorously for about 2 minutes until the mixture thickens. It should look glossy and smooth with no lumps. If you see lumps, keep whisking — they’ll break up eventually.
- Add the orange and vanilla — Pour in the fresh orange juice, orange zest, and vanilla extract. Whisk again until everything is fully incorporated. The mixture will thin out slightly, but that’s normal. Taste it here — you should get a bright citrus kick followed by warm vanilla notes. Adjust with more zest if you want a stronger orange flavor.
- Fold in the whipped topping — Gently fold the thawed whipped topping into the pudding mixture using a spatula. Use a slow, sweeping motion to incorporate it without deflating the air. You want a light, mousse-like texture. Stop when you don’t see any white streaks. This should take about 1 minute.
- Crush the cookies — While the pudding sets, crush your vanilla wafers and chocolate sandwich cookies. For the vanilla wafers, pulse them in a food processor until they resemble fine sand. For the chocolate cookies, remove the cream filling first, then crush them separately. You want a mix of textures — some fine crumbs and some slightly larger pieces for that realistic dirt look.
- Layer the cups — Spoon about 2 tablespoons of crushed vanilla wafers into the bottom of each clear cup. This creates the first dirt layer. Tap the cup gently on the counter to settle the crumbs.
- Add the pudding layer — Transfer the orange vanilla pudding mixture to a piping bag or a zip-top bag with the corner snipped off. Pipe the pudding evenly into each cup, filling them about two-thirds full. Piping prevents mess and gives you clean layers. If you don’t have a bag, use a spoon and work carefully.
- Top with more dirt — Sprinkle the remaining crushed cookies over the pudding layer. Use a mix of vanilla wafer crumbs and chocolate cookie crumbs for that authentic dirt appearance. You want enough to completely cover the surface.
- Insert the gummy worms — Gently push 2 gummy worms into each cup so they peek out of the dirt. Position some worms crawling out of the cup for maximum creep factor. My kids love arranging them in different positions — half-buried worms look especially gross.
- Chill before serving — Refrigerate the cups for at least 30 minutes before serving. This allows the pudding to fully set and the flavors to meld together. The texture improves significantly after chilling — the pudding firms up and the cookie crumbs soften slightly, creating that perfect dirt-like consistency.
One note from experience: don’t skip the chilling step. I rushed these once for a classroom party, and the pudding was too loose. The worms kept sliding down, and the dirt layer got mushy. Thirty minutes makes all the difference.
Cooking Tips & Techniques
After making these dirt cups about a dozen times (for every Halloween event within a 20-mile radius), I’ve picked up some tricks that make the process smoother and the results better.
Temperature matters more than you think. Cold milk is essential for instant pudding to set properly. If your milk is room temperature, the pudding will stay runny and never firm up. I keep my milk in the fridge until the last minute. Also, make sure your whipped topping is fully thawed but still cold. Partially frozen topping creates lumps that are impossible to smooth out.
Fresh orange juice is worth the squeeze. I tried bottled juice once when I was out of fresh oranges, and the difference was noticeable. Bottled juice has a flat, slightly metallic taste that doesn’t brighten the pudding the same way. Plus, you need the zest for that aromatic punch, so you’re buying oranges anyway. Just juice one while you’re at it.
Crush cookies strategically. Don’t pulverize all your cookies into fine dust. Leave some slightly larger pieces for texture variation. Real dirt isn’t uniform, and neither should your dirt cups be. I keep about a quarter cup of coarser crumbs aside to sprinkle on top for that authentic look.
Pipe, don’t spoon. I learned this the hard way after making a huge mess spooning pudding into cups. A piping bag (or zip-top bag with a snipped corner) gives you clean layers and keeps the sides of your cups smudge-free. Clear cups show every mistake, so piping is worth the extra minute.
Let the kids get involved. This recipe is practically designed for little hands. My nephew crushes the cookies, my niece arranges the worms, and my job is just mixing and piping. It turns dessert prep into a Halloween activity, and somehow the dirt cups taste better when everyone helped make them.
Make extra cookie crumbs. You’ll want more than you think. The dirt layer settles as the cups sit in the fridge, so having extra crumbs to refresh the tops before serving keeps them looking fresh and creepy.
Variations & Adaptations
One of the best things about this recipe is how easily it adapts to different tastes, dietary needs, and occasions. Here are some variations I’ve tried and loved.
Dairy-Free Version — Use almond milk or oat milk instead of dairy milk, and swap in dairy-free instant pudding mix. Coconut whipped cream works beautifully for the topping. I tested this with oat milk and coconut cream, and the orange flavor actually stood out more. Just make sure your vanilla wafers are vegan-friendly — most are, but check the label.
Chocolate Orange Twist — Add 2 tablespoons of cocoa powder to the pudding mixture for a chocolate orange flavor that tastes like those fancy holiday chocolates. Reduce the vanilla extract to 1/2 teaspoon so the chocolate shines through. My husband requests this version every year.
Pumpkin Spice Dirt Cups — Replace the orange juice and zest with 1/4 cup pumpkin puree and 1 teaspoon pumpkin pie spice. The pumpkin flavor pairs beautifully with the vanilla pudding, and you can still use gummy worms for that Halloween feel. This version pairs perfectly with our Easy No-Bake Pumpkin Cheesecake Bars for a full fall dessert spread.
Spider Edition — Swap gummy worms for gummy spiders or place a plastic spider on top of each cup. The kids at my son’s Halloween party went absolutely wild for spider cups. You can find edible gummy spiders at candy stores or online.
Adult Halloween Version — Add 2 tablespoons of orange liqueur (like Grand Marnier or Triple Sec) to the pudding mixture. The alcohol adds depth without being overpowering. Obviously, skip this version for kids’ parties. I served these at a Halloween dinner party last year, and they were the first thing to disappear.
Gluten-Free Option — Use gluten-free vanilla wafers and certified gluten-free chocolate sandwich cookies. Most instant pudding mixes are gluten-free, but double-check the label. The texture stays exactly the same, and nobody will know the difference.
Serving & Storage Suggestions
These dirt cups are best served cold, straight from the fridge. The contrast between the creamy pudding and the crunchy cookie dirt is at its peak when everything is properly chilled. Here’s how to serve and store them like a pro.
Serving Temperature — Pull the cups out of the fridge right before serving. Let them sit at room temperature for no more than 10 minutes. Any longer, and the cookie crumbs start to soften too much, and the pudding loses its structure. Cold pudding has a firmer, more satisfying texture.
Presentation Tips — Arrange the cups on a platter or tray with extra gummy worms scattered around for a spooky vibe. Add fake spider webs, plastic spiders, or Halloween-themed napkins for extra flair. For parties, I write each guest’s name on a small tag attached to the cup — it doubles as a place setting and a favor.
Complementary Dishes — These dirt cups pair beautifully with other Halloween treats. Serve them alongside our Perfect Pumpkin Cream Cheese Muffins for a dessert table that covers all the fall flavors. For a savory balance, our Cozy One-Pot Pumpkin Chili with Ground Turkey makes an excellent main course before the sweets come out.
Storage Instructions — Store leftover dirt cups covered in the refrigerator for up to 3 days. Cover each cup with plastic wrap or transfer them to an airtight container. The pudding stays creamy, but the cookie crumbs will soften over time. If you’re making these ahead for a party, I recommend adding the cookie dirt layer and gummy worms no more than 4 hours before serving for the best texture.
Freezer Tips — You can freeze these dirt cups for up to 1 month, but the texture changes slightly. The pudding becomes more like ice cream, which honestly isn’t bad — it’s just different. To freeze, wrap each cup tightly in plastic wrap and then foil. Thaw in the refrigerator overnight before serving. Add fresh cookie crumbs after thawing to restore that crunchy dirt layer.
Flavor Development — The orange flavor actually intensifies after a day in the fridge. The zest continues to infuse the pudding, giving you a more pronounced citrus taste. I actually prefer these on day two for that reason. Just refresh the dirt layer before serving.
Nutritional Information & Benefits
Let’s be honest — these are a treat, not a health food. But here’s the nutritional breakdown per serving (one dirt cup) so you can plan accordingly.
| Nutrient | Amount Per Serving |
|---|---|
| Calories | 245 |
| Total Fat | 9g |
| Saturated Fat | 5g |
| Cholesterol | 12mg |
| Sodium | 320mg |
| Total Carbohydrates | 38g |
| Dietary Fiber | 1g |
| Sugars | 26g |
| Protein | 3g |
| Vitamin C | 8% DV |
| Calcium | 10% DV |
Health Benefits — The fresh orange juice and zest provide a decent dose of vitamin C, which supports immune function — perfect for cold and flu season. The calcium from the milk supports bone health. And the vanilla extract contains small amounts of antioxidants. But honestly, this is a fun Halloween dessert meant to bring joy and smiles. Balance it with a healthy meal and don’t stress about the numbers.
Dietary Considerations — This recipe contains dairy and gluten. For dairy-free, use plant-based milk and whipped topping. For gluten-free, use certified gluten-free cookies. The recipe can be made egg-free as written. Always check labels on pudding mix and cookies for specific allergen information.
Conclusion
These Easy Orange Vanilla Halloween Dirt Cups with Gummy Worms have become my go-to Halloween dessert for good reason. They’re ridiculously simple, incredibly delicious, and somehow manage to be both creepy and adorable at the same time. The orange vanilla flavor is unexpected enough to surprise people but familiar enough that everyone loves it. Plus, you can make them in under 20 minutes with ingredients you probably already have.
I love that this recipe brings people together — whether it’s kids helping crush cookies and arrange worms, or adults sneaking seconds at a Halloween party. There’s something about digging into a cup of “dirt” that brings out the kid in everyone. And honestly, that’s what Halloween is all about — a little bit of spooky fun and a whole lot of sweetness.
I’d love to hear how your dirt cups turn out! Did you try any fun variations? Did your kids come up with creative worm arrangements? Drop a comment below and share your Halloween creations. And if you loved this recipe, share it with a friend who needs a last-minute Halloween win. Happy haunting, and happy eating!
Frequently Asked Questions
Can I make these dirt cups the night before?
Yes, absolutely! In fact, the flavors meld together beautifully overnight. Just wait to add the cookie dirt layer and gummy worms until a few hours before serving so the crumbs stay crunchy. The pudding base actually tastes better after chilling overnight.
What can I use instead of gummy worms?
You can use any Halloween-themed gummy candies — gummy spiders, bats, or even gummy bones work great. For a non-candy option, use plastic spider rings (remove the ring part) or edible wafer ghosts. The possibilities are endless!
How do I make these vegan?
Use vegan instant pudding mix, plant-based milk (oat or almond work best), and coconut whipped cream. Most vanilla wafers are accidentally vegan, but check the label. Use vegan gummy worms made without gelatin. The texture stays creamy and delicious.
Why did my pudding not set properly?
This usually happens for one of three reasons: your milk wasn’t cold enough, you didn’t whisk long enough, or your pudding mix was expired. Start with very cold milk and whisk for a full 2 minutes. If your pudding still seems runny, refrigerate it for 15 minutes before layering into cups.
Can I use sugar-free pudding mix?
Yes, sugar-free instant pudding mix works perfectly in this recipe. The texture is slightly less creamy, but the orange vanilla flavor still shines through. Use sugar-free cookies for the dirt layer if you’re watching sugar intake. The gummy worms will add some sugar regardless.
Pin This Recipe!
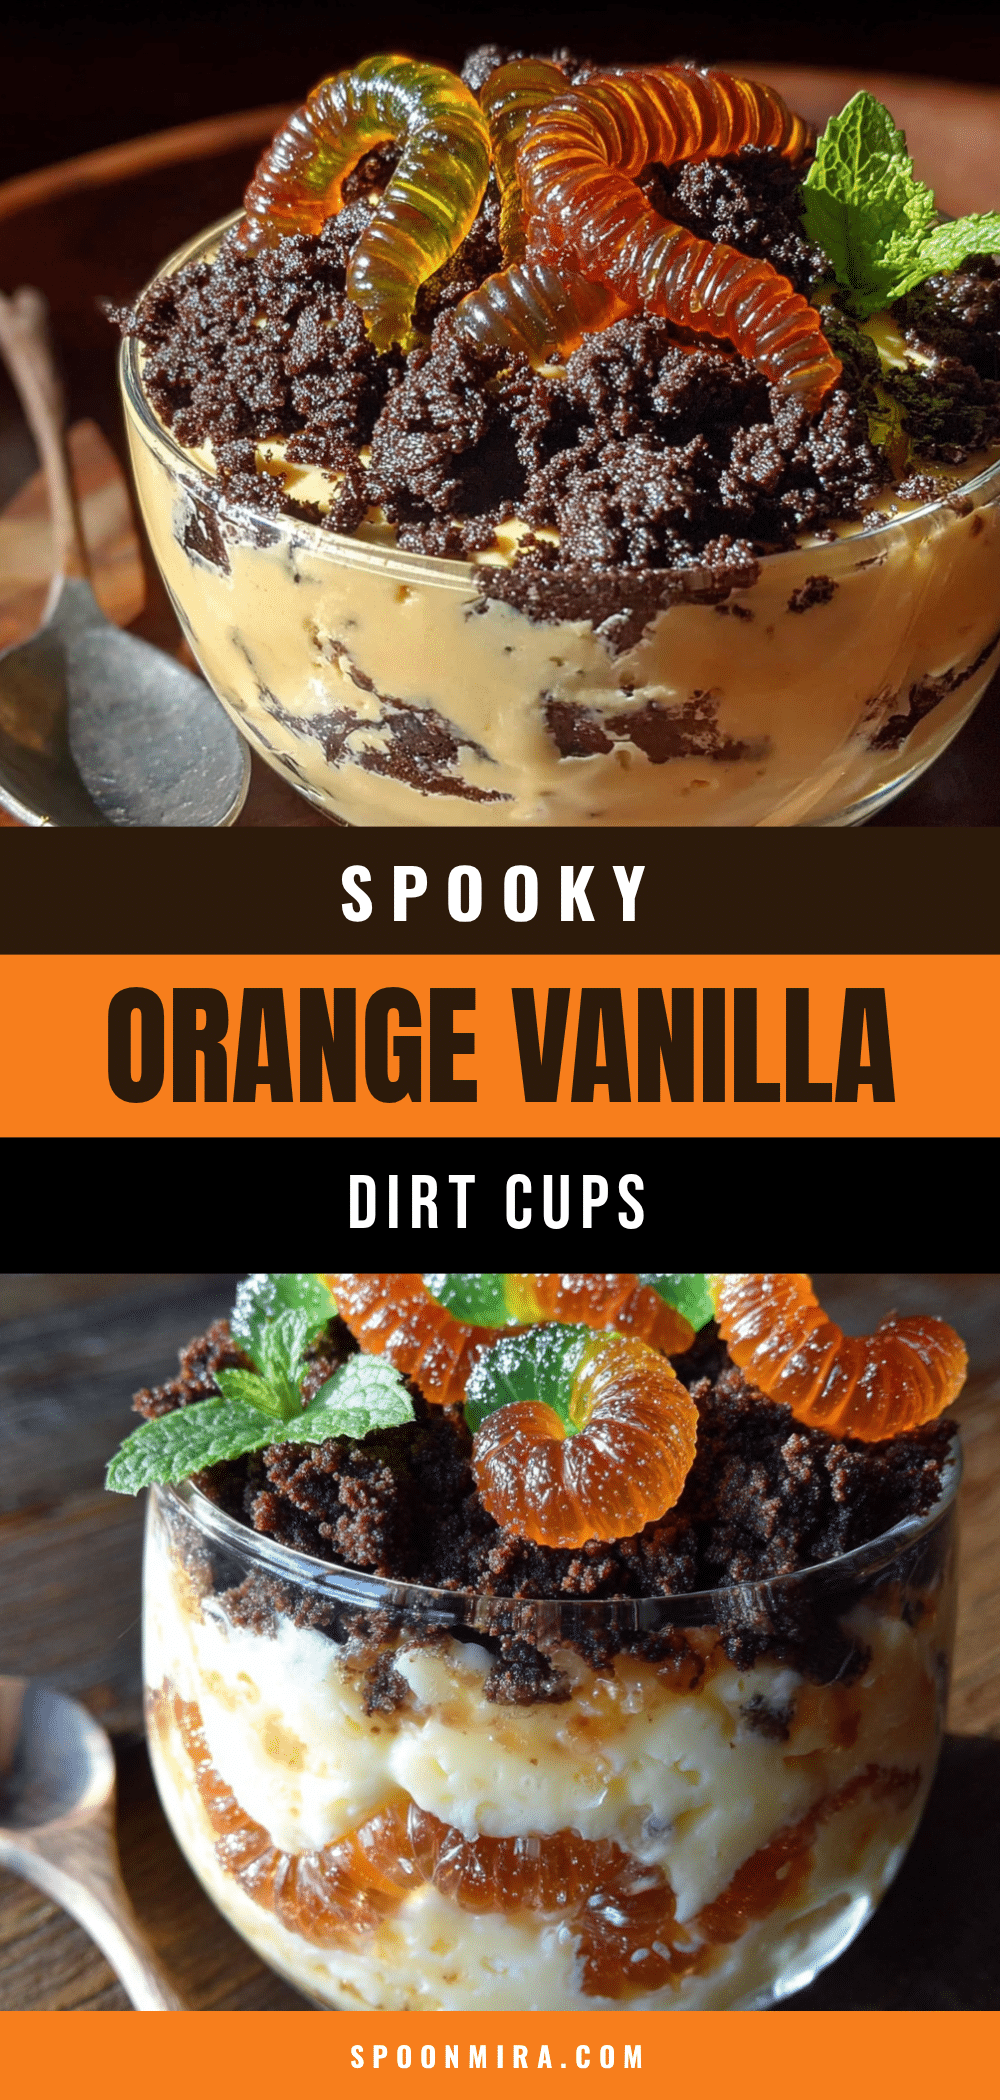
Easy Halloween Dirt Cups with Gummy Worms & Orange Vanilla
These Easy Orange Vanilla Halloween Dirt Cups with Gummy Worms are a no-bake, last-minute Halloween treat that combines creamy orange vanilla pudding with crunchy cookie dirt and playful gummy worms. Perfect for parties, classroom treats, or a fun family activity.
- Prep Time: 20 minutes
- Cook Time: 0 minutes
- Total Time: 50 minutes (including 30 minutes chilling)
- Yield: 12 servings 1x
- Category: Dessert
- Cuisine: American
Ingredients
- 2 (3.4-ounce) boxes instant vanilla pudding mix
- 3 cups cold milk (whole milk recommended)
- 1/4 cup fresh orange juice (about 1 large orange)
- 1 tablespoon orange zest
- 1 teaspoon pure vanilla extract
- 2 cups crushed vanilla wafer cookies (e.g., Nilla wafers)
- 1 cup crushed chocolate sandwich cookies (e.g., Oreos, filling removed)
- 24 gummy worms (about 2 per cup)
- 8 ounces whipped topping (thawed, like Cool Whip)
- 12 small clear plastic cups (5-ounce size)
- Halloween sprinkles (optional, for garnish)
Instructions
- Zest and juice your orange first: Wash the orange, zest it to get 1 tablespoon of zest, then juice it to get 1/4 cup of juice. Set both aside.
- Whisk the pudding base: In a large mixing bowl, combine both boxes of instant vanilla pudding mix with 3 cups of cold milk. Whisk vigorously for about 2 minutes until the mixture thickens and is glossy and smooth.
- Add the orange and vanilla: Pour in the fresh orange juice, orange zest, and vanilla extract. Whisk again until fully incorporated. Taste and adjust with more zest if desired.
- Fold in the whipped topping: Gently fold the thawed whipped topping into the pudding mixture using a spatula, using slow sweeping motions until no white streaks remain. The texture should be light and mousse-like.
- Crush the cookies: Pulse vanilla wafers in a food processor until they resemble fine sand. For chocolate cookies, remove the cream filling first, then crush them separately, leaving some larger pieces for texture.
- Layer the cups: Spoon about 2 tablespoons of crushed vanilla wafers into the bottom of each clear cup. Tap the cup gently to settle the crumbs.
- Add the pudding layer: Transfer the orange vanilla pudding mixture to a piping bag or a zip-top bag with the corner snipped off. Pipe the pudding evenly into each cup, filling them about two-thirds full.
- Top with more dirt: Sprinkle the remaining crushed cookies (mix of vanilla wafer and chocolate cookie crumbs) over the pudding layer to completely cover the surface.
- Insert the gummy worms: Gently push 2 gummy worms into each cup so they peek out of the dirt. Position some worms crawling out of the cup for a spooky effect.
- Chill before serving: Refrigerate the cups for at least 30 minutes before serving to allow the pudding to set and flavors to meld.
Notes
For best results, use cold milk and fully thawed whipped topping. Fresh orange juice and zest are key for bright citrus flavor. Pipe the pudding for clean layers. Chill for at least 30 minutes before serving. Cookie crumbs soften over time, so add the dirt layer and gummy worms no more than 4 hours ahead for optimal texture.
Nutrition
- Serving Size: 1 dirt cup
- Calories: 245
- Sugar: 26
- Sodium: 320
- Fat: 9
- Saturated Fat: 5
- Carbohydrates: 38
- Fiber: 1
- Protein: 3
Keywords: Halloween dirt cups, orange vanilla pudding, gummy worms, no-bake dessert, easy Halloween treat, kid-friendly dessert


