Late October light, that soft amber kind that makes everything look like it’s covered in honey. I was standing in my kitchen, staring at a can of pumpkin puree I’d bought on impulse three weeks earlier, and I just knew I couldn’t turn on the oven. The house was already warm from the radiator hissing in the corner, and the thought of preheating to 350°F felt like a betrayal of the season’s quiet rhythm. What I wanted was something that tasted like fall but didn’t require any of the fuss — no flour dust on the counter, no waiting for butter to soften, no checking if the center was set. I wanted these Easy No-Bake Pumpkin Cheesecake Bars to exist, and I wanted them now.
So I grabbed my food processor, a block of cream cheese that had been sitting out long enough to lose its chill, and that lonely can of pumpkin. I started experimenting — no crust to bake, no water bath, no anxiety about cracks forming on top. Just a press-in gingersnap base, a silky pumpkin-spiced filling, and the kind of patience that only involves waiting for the fridge to do its job. Honestly, I wasn’t sure it would work. I mean, no-bake cheesecake can be tricky — too soft and it won’t slice, too firm and it loses that dreamy texture. But the first time I pulled these bars out of the fridge, cut a clean square, and took a bite, I let out a breath I didn’t know I was holding. The gingersnap crust held firm. The filling was luscious but sliceable. And the pumpkin flavor? It tasted like everything I love about this season, without the heat of the oven changing the mood of my kitchen.
These bars became my fall secret weapon. They’re the kind of dessert you make when you want to impress but also want to stay in your sweatpants. And honestly, that’s the best kind of recipe to have in your back pocket.
Why You’ll Love This Recipe
Let me tell you why these Easy No-Bake Pumpkin Cheesecake Bars have earned a permanent spot in my fall rotation. I’ve tested this recipe about six times — yes, six — to get the texture just right. The first batch was too soft, the second was too dense, and the third? Well, let’s just say I learned that not all cream cheese is created equal. But now I’ve got it dialed in, and I’m so excited to share what makes these bars special.
- No Oven Required: This is the whole point. You don’t need to heat up your kitchen, which means you can make these on a warm October afternoon or when you’re already using the oven for a main dish like my cozy apple cider braised pork shoulder.
- Simple Ingredients: Cream cheese, pumpkin puree, heavy cream, and a few pantry staples. No gelatin, no complicated techniques, no specialty flours.
- Perfect for Fall Gatherings: Whether it’s a Friendsgiving potluck, a Halloween party, or just a Tuesday night when you need something sweet, these bars deliver. They travel well, too — just keep them chilled until you’re ready to serve.
- Crowd-Pleaser: I’ve served these to pumpkin skeptics and cheesecake purists, and every single person went back for seconds. The gingersnap crust is the unsung hero here — it adds just enough spice to complement the filling without overpowering it.
- Make-Ahead Friendly: These bars actually taste better after a full night in the fridge. The flavors meld, the texture sets perfectly, and you can relax knowing dessert is already done. Pair them with a homemade iced pumpkin spice latte for the ultimate fall treat.
What sets this recipe apart is the texture. I use a combination of cream cheese and heavy cream, whipped together until light and airy, then folded into the pumpkin mixture. No condensed milk here — that can make things too sweet and heavy. Instead, the richness comes from the cream cheese, and the lightness comes from the whipped cream. It’s a delicate balance, but once you get it right, you’ll never go back to baked pumpkin cheesecake again.
These bars are comfort food reimagined — no stress, no special equipment, just pure, silky, spiced perfection. And the first time you cut into that perfectly set filling, you’ll understand why I keep making batch after batch.
What Ingredients You Will Need
This recipe uses simple, wholesome ingredients to deliver that rich, creamy pumpkin flavor without any of the fuss. Most of these are pantry staples during fall, but I’ll walk you through each one so you know exactly what to look for.
- Gingersnap Cookies (2 cups, crushed): I use store-bought gingersnaps for convenience — look for a brand that’s crisp and not too soft. Nabisco’s version works well, but any brand will do. You want about 200 grams of crushed cookies. The ginger and molasses flavor is key here; it adds warmth without needing extra spices. If you can’t find gingersnaps, graham crackers mixed with ½ teaspoon of ground ginger and ¼ teaspoon of cinnamon will work in a pinch.
- Unsalted Butter (6 tablespoons, melted): This binds the crust together. I prefer unsalted so I can control the salt level, but salted butter works if you reduce the added salt elsewhere. Melt it gently in the microwave or on the stovetop — you don’t want it bubbling or browning.
- Granulated Sugar (2 tablespoons, for crust): Just a little sweetness to balance the spicy gingersnaps. You can skip this if your cookies are very sweet, but I find it helps the crust hold together better.
- Cream Cheese (16 ounces, softened): Full-fat, block-style cream cheese is non-negotiable here. Don’t use the spreadable kind in a tub — it has too much air and water, and your bars won’t set properly. Let it sit at room temperature for at least an hour before you start. I’ve tested this with Neufchâtel (reduced-fat cream cheese) and it works, but the texture is slightly less rich.
- Pumpkin Puree (1 cup): Not pumpkin pie filling — make sure you grab 100% pure pumpkin puree. Libby’s is my go-to brand because it’s consistently thick and not watery. If your pumpkin puree looks watery, blot it with a paper towel before using. This step can save your cheesecake from being too soft.
- Powdered Sugar (½ cup): This dissolves easily into the cream cheese mixture, giving you a smooth, lump-free filling. No graininess here. Sift it if you’re feeling fancy, but I’ve skipped that step plenty of times and it still works fine.
- Heavy Whipping Cream (1 cup): Cold, straight from the fridge. This gets whipped into stiff peaks and folded into the cream cheese mixture to create that light, mousse-like texture. Don’t substitute with half-and-half or milk — you need the fat content for stability.
- Pumpkin Pie Spice (2 teaspoons): You can use store-bought or make your own with 1 teaspoon cinnamon, ½ teaspoon ginger, ¼ teaspoon nutmeg, ¼ teaspoon allspice, and a pinch of cloves. I always make my own because I like to adjust the ratios — more cinnamon, less clove.
- Vanilla Extract (1 teaspoon): Pure vanilla extract adds depth. Imitation vanilla works in a pinch, but the flavor won’t be as rich.
- Salt (¼ teaspoon): A small pinch brightens all the flavors and balances the sweetness. Don’t skip it.
Equipment Needed
You don’t need a fancy kitchen to make these bars, but a few specific tools will make your life easier. Here’s what I use every time:
- 9×9-inch Baking Pan: This is the perfect size for thick bars. An 8×8-inch pan works too, but your bars will be slightly taller and may need a few extra minutes to set. Line it with parchment paper, leaving some overhang on two sides — this makes lifting the bars out so much easier.
- Food Processor: For crushing the gingersnaps into fine crumbs. You can also use a rolling pin and a zip-top bag, but the food processor gives you a more consistent texture. I’ve used both methods, and honestly, the bag method is great for releasing some frustration.
- Electric Hand Mixer or Stand Mixer: You’ll need this to whip the heavy cream and beat the cream cheese until smooth. A whisk and some elbow grease will work for the cream cheese, but you really need the mixer for the whipped cream.
- Large Mixing Bowls: At least two — one for the crust, one for the filling. Glass or stainless steel works best because they don’t retain odors.
- Spatula: A flexible silicone spatula is perfect for folding the whipped cream into the cream cheese mixture without deflating it.
- Measuring Cups and Spoons: Accurate measurements matter here, especially for the spices and sugar.
If you don’t have a food processor, no worries. I’ve made the crust by crushing gingersnaps in a zip-top bag with a rolling pin, and it worked beautifully. Just make sure the crumbs are fine and uniform — no big chunks that will make the crust crumbly.
Preparation Method
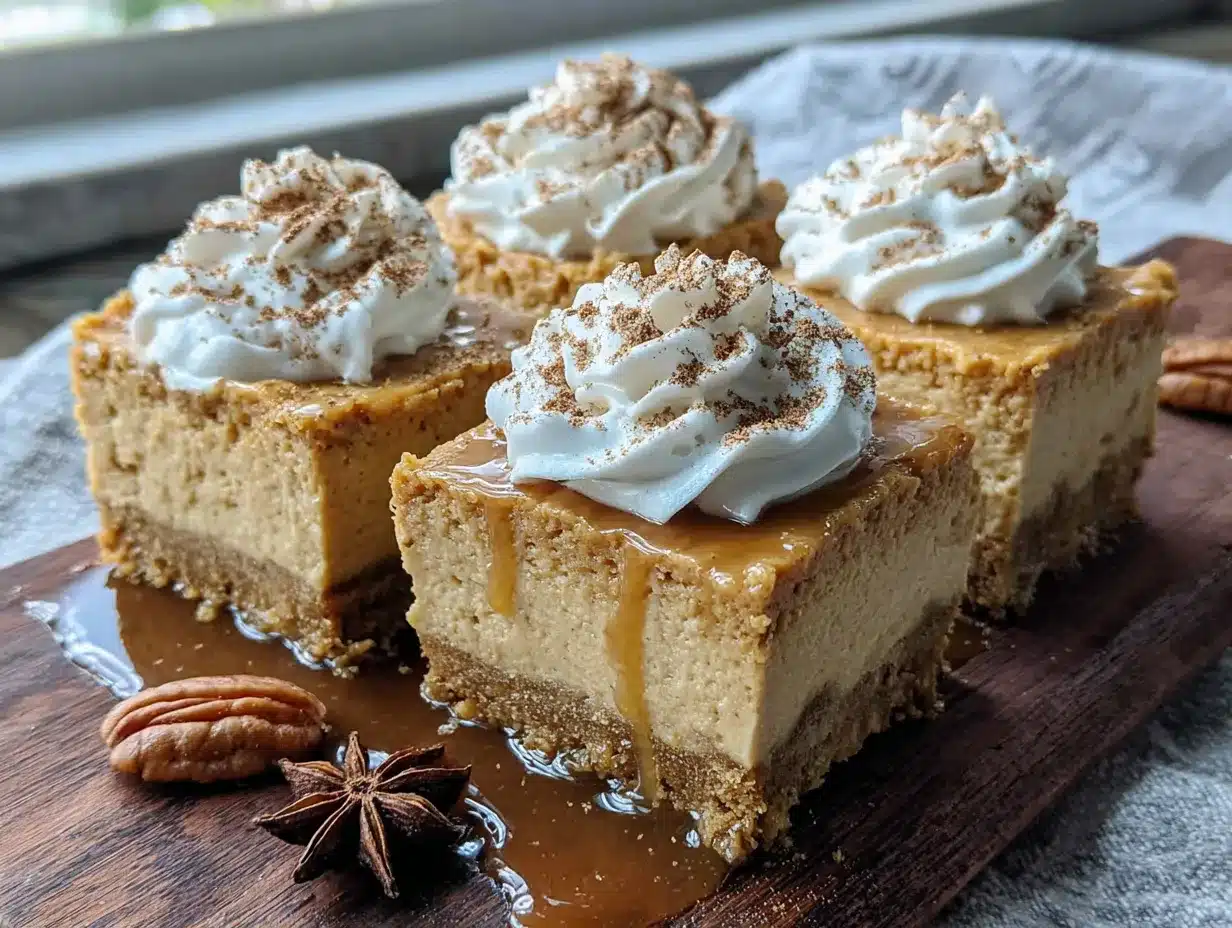
Let’s get to the good part. I’ll walk you through every step so you feel confident, even if this is your first time making a no-bake cheesecake.
Step 1: Prepare the Crust
Line your 9×9-inch baking pan with parchment paper, leaving about 2 inches of overhang on two opposite sides. This will be your handle for lifting the bars out later. In a food processor, pulse the gingersnap cookies until they become fine crumbs — you should have about 2 cups. Add the melted butter and granulated sugar, then pulse again until the mixture looks like wet sand and holds together when you squeeze it. Transfer the mixture to your prepared pan and press it firmly into an even layer. I use the bottom of a measuring cup to really compact it — this prevents the crust from falling apart when you slice the bars. Pop the pan in the fridge while you make the filling. (About 15 minutes, but longer is fine.)
Step 2: Whip the Cream
In a large mixing bowl, pour the cold heavy whipping cream. Using an electric hand mixer or stand mixer with the whisk attachment, beat the cream on medium-high speed until stiff peaks form. This takes about 3-4 minutes. You’ll know it’s ready when you lift the beaters and the cream holds its shape without drooping. Be careful not to over-whip — if it starts looking grainy, you’ve gone too far and it will separate. Set the whipped cream aside in the fridge while you work on the cream cheese mixture.
Step 3: Make the Pumpkin Filling
In another large bowl, beat the softened cream cheese with an electric mixer on medium speed until it’s smooth and creamy — about 2 minutes. Scrape down the sides and the bottom of the bowl with a spatula to make sure there are no lumps. Add the powdered sugar, pumpkin puree, pumpkin pie spice, vanilla extract, and salt. Beat on medium speed until everything is well combined and silky smooth. This should take about 1-2 minutes. The mixture will be thick and luscious at this point. Taste it — yes, go ahead. Adjust the spices if you want more warmth. I sometimes add an extra ¼ teaspoon of cinnamon because I can’t help myself.
Step 4: Fold in the Whipped Cream
Take the whipped cream out of the fridge. Add about one-third of it to the pumpkin mixture and gently fold it in with a spatula. This first addition lightens the mixture and makes it easier to incorporate the rest without deflating everything. Add the remaining whipped cream and fold gently until no white streaks remain. Be patient here — aggressive stirring will knock the air out and leave you with a dense, heavy filling. You want it to stay light and airy. The final mixture should be pale orange, thick, and mousse-like.
Step 5: Assemble and Chill
Pour the filling over the chilled crust and spread it into an even layer with your spatula. Give the pan a few gentle taps on the counter to release any air bubbles. Cover the pan with plastic wrap or aluminum foil and refrigerate for at least 6 hours — but honestly, overnight is best. The longer it sits, the firmer and cleaner your slices will be. I’ve cut into these after 4 hours and they were still a bit soft around the edges. Patience pays off here.
Step 6: Slice and Serve
When you’re ready to serve, lift the bars out of the pan using the parchment overhang. Place them on a cutting board and use a sharp knife to slice into 9 or 16 squares, depending on how generous you’re feeling. Wipe the knife clean between cuts for the neatest slices. I usually get 9 bars because I like them thick and satisfying. Serve cold, straight from the fridge. If you want to get fancy, top each bar with a dollop of whipped cream and a dusting of cinnamon.
Cooking Tips & Techniques
I’ve made this recipe more times than I care to admit, and I’ve learned a few things the hard way. Here are my best tips for success:
- Room Temperature Cream Cheese Is Crucial: Cold cream cheese will leave you with lumpy filling, no matter how long you beat it. Let it sit on the counter for at least an hour. If you’re in a hurry, cut it into small cubes and microwave it in 10-second bursts until it’s soft but not warm.
- Don’t Skip the Parchment Paper: I made this mistake once and spent 20 minutes trying to pry the bars out of the pan without destroying them. The parchment overhang is your best friend.
- Press the Crust Firmly: A loose crust will crumble when you cut the bars. Use the bottom of a measuring cup or a flat glass to press it down evenly and firmly. Really lean into it.
- Chill Time Is Non-Negotiable: I know it’s tempting to rush this, but 6 hours is the minimum. Overnight is ideal. The filling needs time to set and firm up, otherwise you’ll end up with a delicious but messy situation.
- Use a Sharp Knife for Clean Slices: Run the knife under hot water, wipe it dry, then slice. Repeat between cuts. This gives you those beautiful, clean edges that look like they came from a bakery.
- Watch Your Whipped Cream: Over-whipped cream turns into butter, and nobody wants that. Stop as soon as you see stiff peaks. If you accidentally over-whip, add a tablespoon of cold cream and gently fold it in to bring it back.
One time, I forgot to blot the water from my pumpkin puree, and the bars turned out a little softer than usual. They still tasted amazing, but they were harder to slice cleanly. So if your pumpkin puree looks watery, just blot it with a paper towel before mixing. It’s a small step that makes a big difference.
Variations & Adaptations
This recipe is incredibly flexible, and I’ve tried several variations over the years. Here are some of my favorites:
- Gluten-Free Version: Use gluten-free gingersnap cookies or gluten-free graham crackers for the crust. The filling is naturally gluten-free, so this is an easy swap. I’ve tested it with Schär’s gluten-free graham crackers and it worked perfectly.
- Dairy-Free Option: Substitute the cream cheese with a high-quality dairy-free cream cheese (I like Kite Hill or Violife) and use coconut cream instead of heavy whipping cream. Chill the coconut cream overnight, then scoop out the solid part and whip it like regular cream. The texture will be slightly different — a bit softer — but still delicious. Use vegan butter or coconut oil for the crust.
- Pumpkin Spice Latte Twist: Add 1 tablespoon of instant espresso powder dissolved in 1 teaspoon of hot water to the filling. This gives the bars a subtle coffee flavor that pairs beautifully with the pumpkin. I tried this last November and it was a hit with my coffee-loving friends.
- Chocolate Gingersnap Crust: Swap half the gingersnaps for chocolate wafer cookies. The chocolate and pumpkin combination is surprisingly good — think of it as a pumpkin-chocolate mousse bar. My kids went crazy for this version.
- Mini Bar Bites: Use a mini muffin tin lined with paper liners for bite-sized versions. Press about a tablespoon of crust into each liner, then fill with the pumpkin mixture. Chill for 4 hours and you’ve got perfect little treats for parties or lunchboxes.
If you’re feeling adventurous, try topping the bars with a drizzle of salted caramel sauce or a sprinkle of toasted pecans before serving. I’ve done both, and they add a lovely crunch and extra layer of flavor.
Serving & Storage Suggestions
These bars are best served cold, straight from the fridge. The texture is at its peak when they’re fully chilled — firm but creamy, with that perfect sliceable consistency. I like to let them sit at room temperature for about 5 minutes before serving, just to take the chill off, but that’s personal preference.
For presentation, I dust the tops with a light sprinkle of cinnamon or pumpkin pie spice right before serving. A dollop of fresh whipped cream and a few candied pecans make them look extra special for holiday gatherings. They pair beautifully with a warm cup of coffee or a cozy homemade pumpkin chai latte with steamed oat milk.
Storage:
Store any leftovers in an airtight container in the refrigerator for up to 5 days. I usually keep them in the same pan I made them in, covered tightly with plastic wrap. The bars will stay firm and delicious for several days, though the crust may soften slightly over time — that’s normal and still tasty.
Freezing:
These bars freeze beautifully. Once they’re fully set, cut them into individual squares and place them on a baking sheet lined with parchment paper. Freeze for about 2 hours, then transfer the frozen bars to a zip-top freezer bag or airtight container. They’ll keep for up to 3 months. To thaw, transfer a bar to the fridge overnight or let it sit at room temperature for about 30 minutes. I’ve pulled these out for unexpected guests more times than I can count, and nobody ever guesses they were frozen.
Pro tip: If you’re making these for a party, make them two days ahead. The flavors deepen and meld together, and the texture becomes even more luscious. It’s one of those rare desserts that actually improves with time.
Nutritional Information & Benefits
Here’s the estimated nutritional breakdown for one bar (based on 9 servings):
| Nutrient | Amount Per Serving |
|---|---|
| Calories | 380 |
| Total Fat | 26g |
| Saturated Fat | 15g |
| Cholesterol | 80mg |
| Sodium | 280mg |
| Total Carbohydrates | 33g |
| Dietary Fiber | 2g |
| Sugars | 20g |
| Protein | 5g |
These bars are a treat, no doubt about it, but they do offer some nutritional perks. Pumpkin puree is packed with vitamin A (over 200% of your daily needs per cup), which supports eye health and immune function. It’s also a good source of fiber and antioxidants like beta-carotene. The cream cheese provides calcium and protein, while the ginger in the crust has anti-inflammatory properties.
If you’re watching your sugar intake, you can reduce the powdered sugar to ¼ cup and use a sugar-free crust. The bars will be less sweet but still deliciously creamy. For a lower-fat version, use Neufchâtel cream cheese and skip the whipped cream topping — just know the texture will be denser.
As always, these values are estimates and will vary based on the specific brands and ingredients you use. If you have dietary concerns, I recommend calculating the nutrition with your exact ingredients.
Conclusion
These Easy No-Bake Pumpkin Cheesecake Bars have become my go-to fall dessert for a reason. They’re simple enough for a weeknight craving but impressive enough for a holiday table. No oven required, no stress, no complicated techniques — just pure, creamy, spiced perfection that tastes like autumn in every bite.
I love that this recipe lets the pumpkin flavor shine without being overshadowed by too much sugar or spice. The gingersnap crust adds just the right amount of warmth, and the filling is light enough that you can easily go back for seconds (and thirds, honestly). Whether you’re making them for a Thanksgiving potluck, a Halloween party, or just because it’s Tuesday and you deserve something special, these bars deliver every single time.
I’d love to hear how yours turn out! Did you try any fun variations? Did you add a caramel drizzle or swap the crust for chocolate wafers? Drop a comment below and let me know — I read every single one and I’m always looking for new ideas to try. And if you loved this recipe, don’t forget to share it with a friend who needs a little fall comfort in their life. Happy no-baking, friends!
Frequently Asked Questions
Can I use low-fat cream cheese for this recipe?
You can, but the texture won’t be as rich and creamy. Full-fat cream cheese gives the bars that luscious, sliceable consistency. If you use Neufchâtel (reduced-fat), the bars will be slightly softer but still delicious. Avoid fat-free cream cheese — it has too much water and won’t set properly.
How long do these bars need to chill?
At least 6 hours, but overnight is best. The filling needs time to firm up so you can cut clean slices. If you’re in a rush, 4 hours will work for a softer, mousse-like texture, but don’t expect perfect slices.
Can I make this recipe without a food processor?
Absolutely. Place the gingersnap cookies in a zip-top bag and crush them with a rolling pin or the bottom of a heavy pan. It takes a little more elbow grease, but the result is the same. Just make sure the crumbs are fine and uniform.
My filling turned out too soft. What went wrong?
This usually happens if the cream cheese wasn’t softened enough, the pumpkin puree was watery, or the whipped cream wasn’t whipped to stiff peaks. Next time, make sure your cream cheese is at room temperature, blot any excess water from the pumpkin, and whip the cream until it holds its shape firmly.
Can I use homemade pumpkin puree instead of canned?
Yes, but you’ll need to strain it first. Homemade pumpkin puree tends to be more watery than canned. Place it in a fine-mesh strainer lined with cheesecloth and let it drain for at least an hour. You want it to be as thick as possible before using it in the filling.
Pin This Recipe!
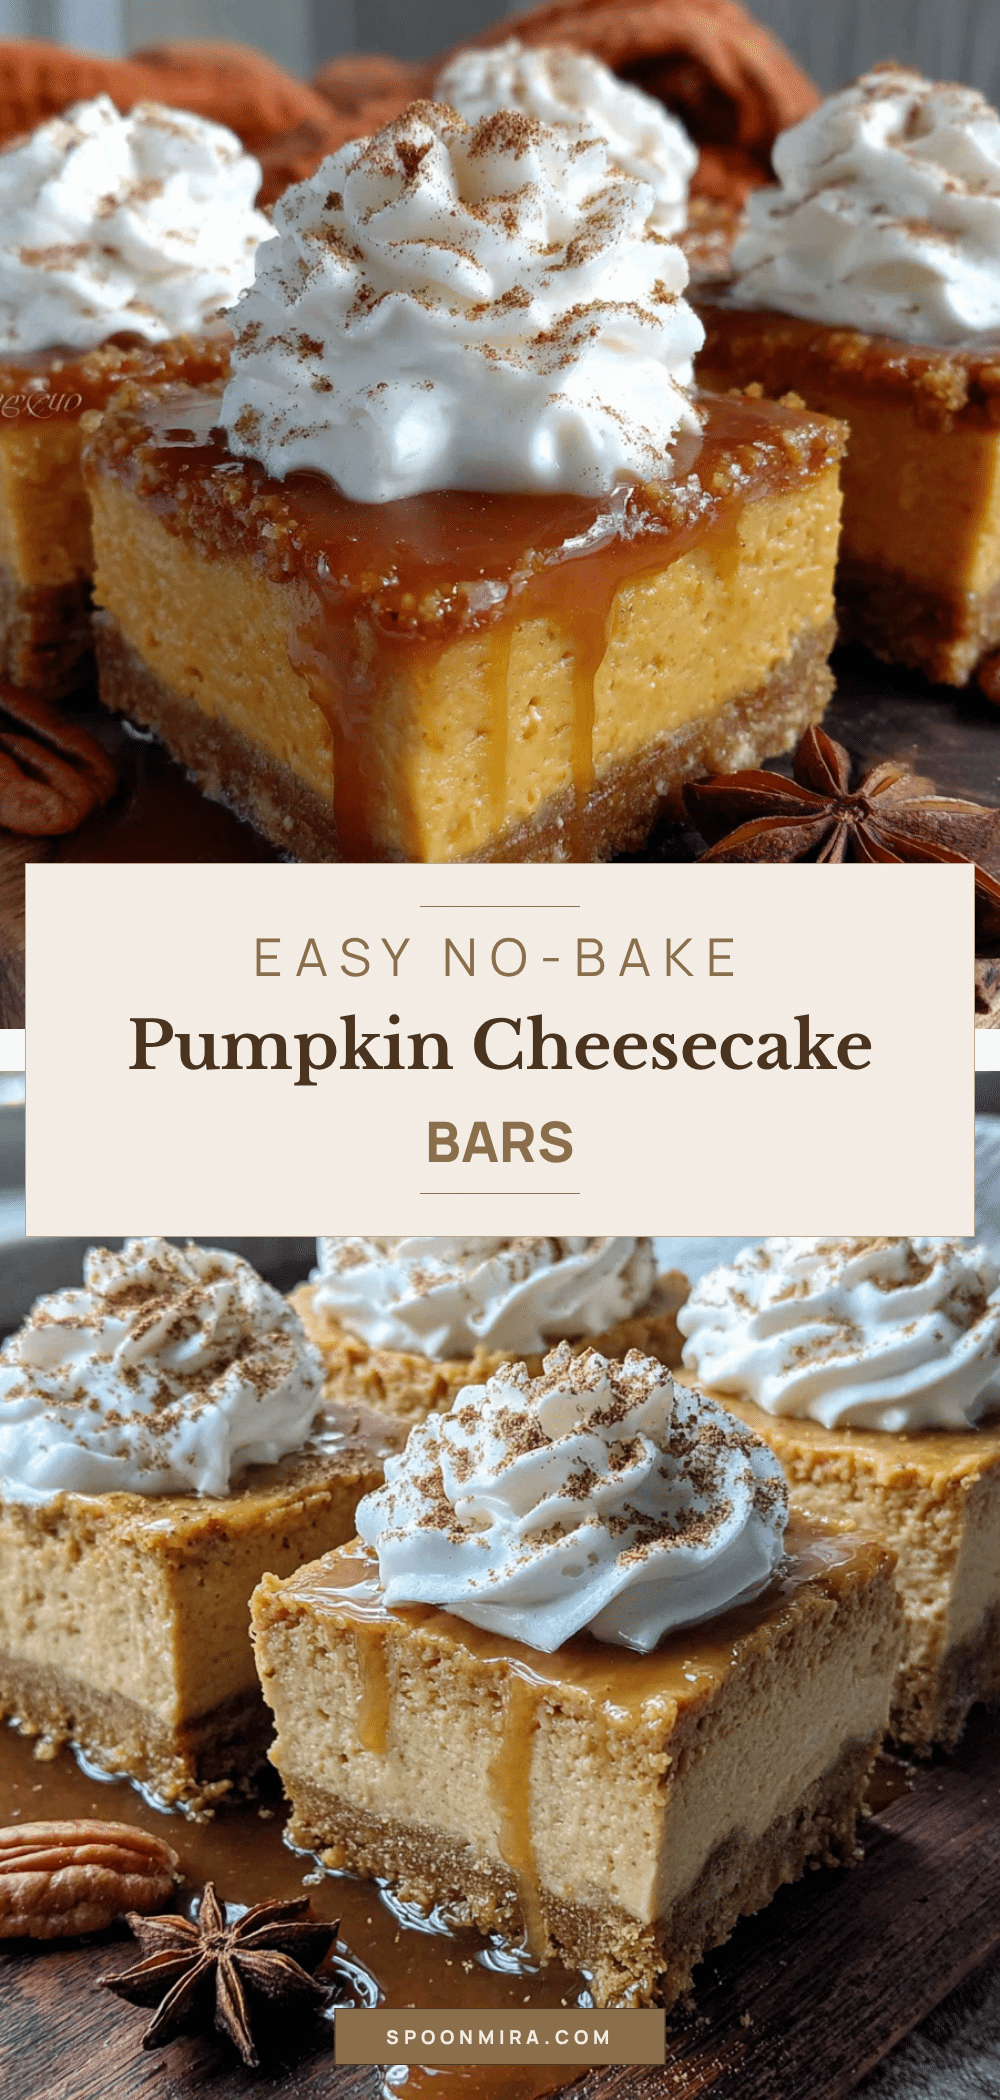
Easy No-Bake Pumpkin Cheesecake Bars: Best Fall Dessert
These no-bake pumpkin cheesecake bars feature a press-in gingersnap crust and a silky pumpkin-spiced filling. No oven required, perfect for fall gatherings, and make-ahead friendly.
- Prep Time: 20 minutes
- Cook Time: 0 minutes
- Total Time: 6 hours 20 minutes (includes chilling)
- Yield: 9 servings 1x
- Category: Dessert
- Cuisine: American
Ingredients
- 2 cups crushed gingersnap cookies (about 200g)
- 6 tablespoons unsalted butter, melted
- 2 tablespoons granulated sugar
- 16 ounces cream cheese, softened
- 1 cup pumpkin puree (not pumpkin pie filling)
- ½ cup powdered sugar
- 1 cup heavy whipping cream, cold
- 2 teaspoons pumpkin pie spice
- 1 teaspoon vanilla extract
- ¼ teaspoon salt
Instructions
- Line a 9×9-inch baking pan with parchment paper, leaving overhang on two sides.
- In a food processor, pulse gingersnap cookies into fine crumbs. Add melted butter and granulated sugar; pulse until mixture resembles wet sand. Press firmly into the prepared pan. Refrigerate while making filling.
- In a large bowl, beat cold heavy whipping cream with an electric mixer on medium-high until stiff peaks form, about 3-4 minutes. Set aside in fridge.
- In another large bowl, beat softened cream cheese until smooth. Add powdered sugar, pumpkin puree, pumpkin pie spice, vanilla extract, and salt; beat until well combined and silky.
- Fold one-third of the whipped cream into the pumpkin mixture to lighten it, then gently fold in the remaining whipped cream until no white streaks remain.
- Pour filling over chilled crust and spread evenly. Cover and refrigerate for at least 6 hours, preferably overnight.
- Lift bars out using parchment overhang, slice into 9 or 16 squares with a sharp knife, and serve cold.
Notes
Cream cheese must be at room temperature. Blot pumpkin puree if watery. Chill at least 6 hours, overnight is best. Use a sharp knife for clean slices.
Nutrition
- Serving Size: 1 bar
- Calories: 380
- Sugar: 20
- Sodium: 280
- Fat: 26
- Saturated Fat: 15
- Carbohydrates: 33
- Fiber: 2
- Protein: 5
Keywords: no-bake pumpkin cheesecake bars, easy fall dessert, pumpkin cheesecake, no-bake cheesecake, gingersnap crust


