The summer I turned thirty, I found myself on a road trip through the Texas panhandle with a friend who swore by a particular gas station’s brisket. Honestly, I was skeptical. We pulled up to a place called The Lonesome Spur, which looked like it hadn’t been updated since 1972. While my buddy was inside negotiating for a sandwich, I got to talking with the owner, an older woman named Carol who was meticulously wiping down the counter. She had this no-nonsense way about her, the kind of person who probably ran her household like a tight ship. I mentioned I was looking for a fun, easy treat to make for my nephew’s Halloween party. She didn’t miss a beat. “You ever make mummies?” she asked, pointing a gnarled finger at a faded photo of her grandkids on the register. “Rice Krispies. White chocolate. Candy eyes. It’s not rocket science, but the kids lose their minds.” I wasn’t expecting a cooking lesson from a gas station proprietor, but there I was, in the middle of nowhere, listening to her describe exactly how to make these Easy No-Bake Mummy Rice Krispie Treats. I scribbled her instructions on a napkin. That napkin is still in my recipe box, a little stained, but totally golden. You know that feeling when you find a recipe that is so simple you almost feel guilty calling it a recipe? That’s this one.
These mummy treats have become my go-to for any spooky gathering. They are ridiculously easy, require zero oven time, and look like you spent way more effort than you actually did. I mean, who doesn’t love a dessert that comes together in under twenty minutes? The best part is watching people’s faces when they realize the “bandages” are just melted white chocolate dripped over a crispy marshmallow square. It’s a little bit of magic, honestly. So, if you are hosting a Halloween bash, a spooky movie night, or just want to surprise the kids, these little guys are your secret weapon. They are the perfect blend of fun and delicious, and I promise, they will steal the show.
Why You’ll Love This Recipe
Let’s be real for a second. Halloween treats can be a hassle. Between carving pumpkins and decorating the house, you don’t need a complicated baking project. That’s where these Easy No-Bake Mummy Rice Krispie Treats come in. They are the perfect solution for the busy host who still wants to impress. Here is why you will absolutely love them:
- Quick & Easy: From start to finish, you are looking at about 20 minutes of active work. The hardest part is waiting for the chocolate to set! Perfect for that last-minute party panic.
- Simple Ingredients: You probably have a box of Rice Krispies in your pantry right now. The rest is just marshmallows, butter, and white chocolate. No crazy grocery store runs needed.
- Perfect for Hosting: These are a guaranteed crowd-pleaser. They are easy to grab, perfectly portioned, and kids absolutely go bonkers for them. Plus, they look fantastic on a dessert table.
- No-Bake Magic: Your oven is free for the main course. This is a huge win when you are juggling multiple dishes for a party. No heating up the kitchen, no worrying about burning anything.
- Unbelievably Adorable: Let’s face it, the “mummy” look is just cute. It’s a fun, playful design that gets everyone in the spooky spirit without being too scary for the little ones.
What makes this version different from the rest? It’s all in the technique. I’ve tested a few ways to get that perfect “bandaged” look. Some people try to use a piping bag, which is a total mess. Others try to dip the whole treat, which hides the Rice Krispie texture. My method—drizzling with a fork—gives you that authentic, slightly messy mummy look every single time. It’s the kind of trick that makes you look like a pro, even if you are just a stressed-out host trying to survive the holiday.
What Ingredients You Will Need
This recipe uses simple, pantry-friendly ingredients to deliver a fun, festive treat without the fuss. You likely already have most of these on hand, which is exactly what you want when you are planning a party. Here is everything you will need:
For the Rice Krispie Base
- 3 tablespoons unsalted butter (plus a little extra for greasing the pan) – I prefer using unsalted so I can control the salt level. If you only have salted butter, just skip adding any extra salt to the mix.
- 1 package (10 oz) mini marshmallows – Standard mini marshmallows melt faster and more evenly than the large ones. Trust me on this one.
- 6 cups Rice Krispies cereal – Make sure you are using the original, not a knock-off brand. The texture is key here. I’ve tried generic brands, and they just don’t hold the same crunch.
- 1/4 teaspoon vanilla extract – This is optional, but I think it rounds out the sweetness. It’s a little trick I picked up from Carol.
For the Mummy Decorations
- 2 cups white chocolate melting wafers or white chocolate chips – Melting wafers (like Ghirardelli or Wilton) are my top pick. They melt silky smooth and set up hard, which is perfect for the bandages. If you use standard white chocolate chips, add a teaspoon of coconut oil to help them melt smoothly.
- Candy eyes – You can find these at any craft store or in the baking aisle of the grocery store. I usually buy a big bag because my kids “borrow” them for other projects. Look for the ones that have a flat back for sticking.
Ingredient Selection Tips: For the best texture, make sure your marshmallows are fresh. Stale marshmallows can be a bit hard and won’t melt as smoothly. Also, when choosing your white chocolate, avoid the “white baking chips” that are mostly oil and sugar. Real white chocolate (with cocoa butter) will give you a much better flavor and a cleaner look. If you are dairy-free, there are some great plant-based white chocolate options available now, though they can be a little trickier to melt.
Substitution Guidance: Need a gluten-free option? Classic Rice Krispies are not gluten-free because they contain malt flavoring. However, you can easily swap in a gluten-free crispy rice cereal like Nature’s Path. The texture will be almost identical, and no one will know the difference. For a nut-free version, just double-check your white chocolate brand to ensure it wasn’t processed on shared equipment. Most standard brands are safe, but it’s always good to check the label.
Equipment Needed
You don’t need any fancy gadgets for this recipe. That’s the beauty of it. Here is what you will need:
- Large Saucepan (4-quart or larger) – You need room to melt the marshmallows and stir in the cereal. A non-stick pot makes cleanup a breeze.
- 9×13-inch Baking Dish – This is the perfect size for getting a good thickness on your treats. If you want them a little thicker, you can use an 8×8 pan, but you will need to adjust the cooking time slightly.
- Parchment Paper – This is non-negotiable for easy removal. I always leave an overhang on two sides so I can lift the whole block out of the pan.
- Large Mixing Bowl – For combining the cereal and marshmallow mixture.
- Rubber Spatula – A good, sturdy spatula is your best friend here. You will need it for stirring the marshmallows and pressing the mixture into the pan.
- Microwave-Safe Bowl or Double Boiler – For melting the white chocolate. I prefer the microwave for speed, but a double boiler gives you more control.
- Fork or Small Offset Spatula – For drizzling the white chocolate. A fork is actually the best tool for getting that messy, bandaged look.
- Wax Paper or Baking Sheet – To place the decorated mummies on while the chocolate sets.
I have a confession: I used to use a plastic spatula for this, and it always melted a little. I finally invested in a good silicone one, and it has made a world of difference. It’s a small upgrade, but it saves you from having melted plastic bits in your treats. Also, if you don’t have a 9×13 pan, you can use a rimmed baking sheet. Just make sure to grease it well.
Preparation Method
Alright, let’s get to the fun part. This is where you turn simple ingredients into the star of your Halloween party. Follow these steps, and you will have a tray of adorable mummies in no time.
- Prepare Your Pan: Line your 9×13-inch baking dish with parchment paper. Make sure the paper overhangs on two opposite sides—this will be your “lift” to get the treats out later. Lightly grease the parchment paper and the exposed sides of the pan with a little butter or non-stick spray. This prevents any sticky situations.
- Melt the Butter and Marshmallows: In your large saucepan, melt the 3 tablespoons of unsalted butter over medium-low heat. Once it’s fully melted, add the entire bag of mini marshmallows. Stir constantly with your rubber spatula until the marshmallows are completely melted and smooth. This should take about 5-7 minutes. Do not walk away! Burnt marshmallows are a tragedy. The mixture will be glossy and stretchy.
- Add the Vanilla: Remove the pan from the heat. Stir in the 1/4 teaspoon of vanilla extract. You will smell it immediately. It adds a lovely depth to the sweetness.
- Mix in the Cereal: Pour the 6 cups of Rice Krispies cereal into the pot with the marshmallow mixture. Fold everything together gently but quickly. You want to coat every piece of cereal without crushing it. A gentle folding motion works best. If the mixture starts to get too stiff, it means it’s cooling down. Work fast!
- Press into the Pan: Scrape the mixture into your prepared baking dish. Now, here is a pro tip: lightly grease your rubber spatula or your hands with a little butter. Use the spatula (or your hands) to press the mixture evenly into the pan. Don’t press too hard—you want them to be tender, not hard and dense. Just get it flat and even.
- Cool Completely: Let the Rice Krispie treats cool at room temperature for at least 30 minutes. You want them to be fully set before you cut them. If you try to cut them while they are warm, they will be a sticky mess. I learned this the hard way at a party once!
- Cut into Shapes: Once cool, use the parchment paper overhang to lift the entire block out of the pan. Place it on a cutting board. Using a sharp knife, cut the block into rectangles. I usually aim for about 2×3-inch pieces, but you can make them any size you like. You should get about 12-16 treats depending on your cutting.
- Melt the White Chocolate: Place your 2 cups of white chocolate melting wafers in a microwave-safe bowl. Microwave in 30-second intervals, stirring well after each interval, until the chocolate is smooth and fully melted. This usually takes about 1.5 to 2 minutes total. Be careful not to overheat it, or it will seize up and become grainy. If it’s too thick, stir in 1/2 teaspoon of coconut oil.
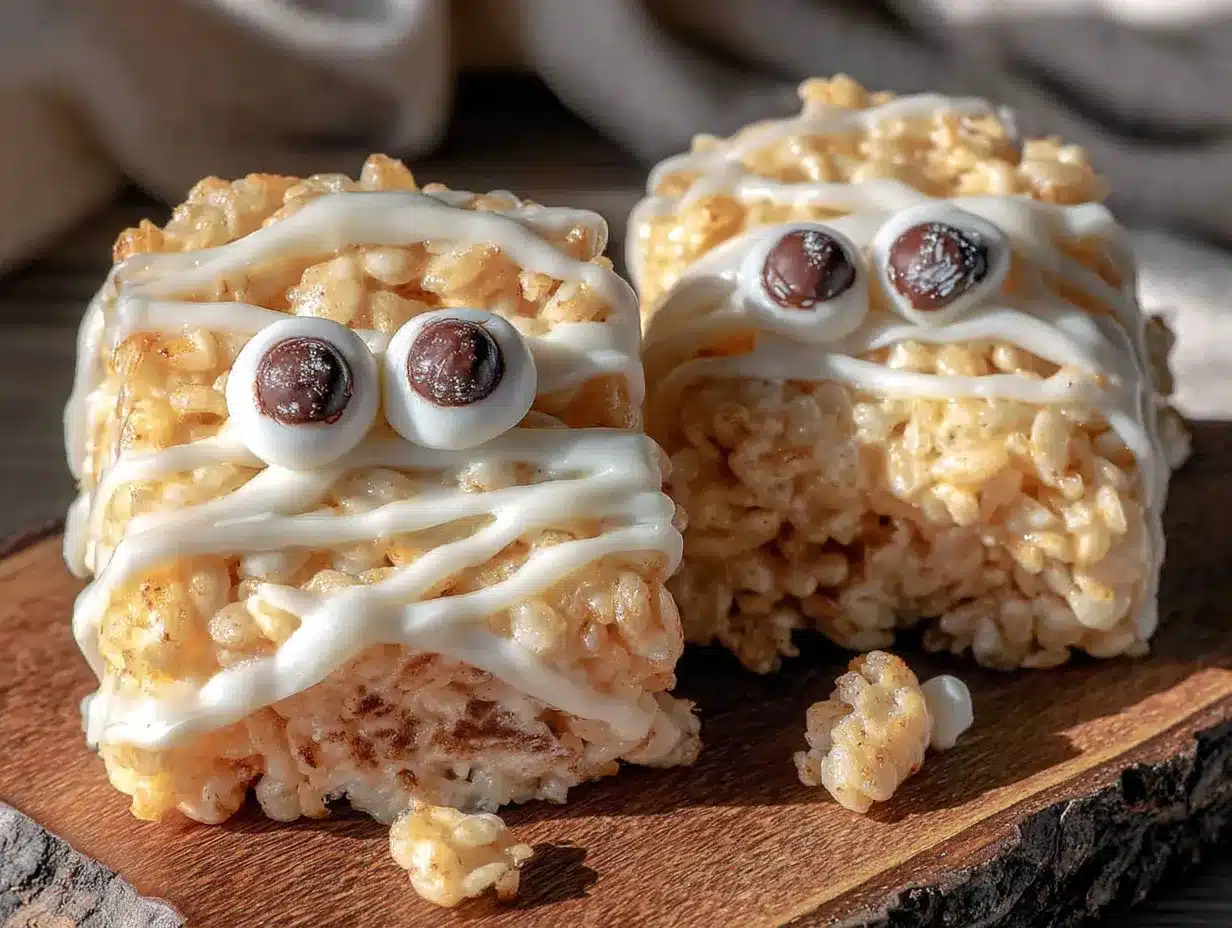
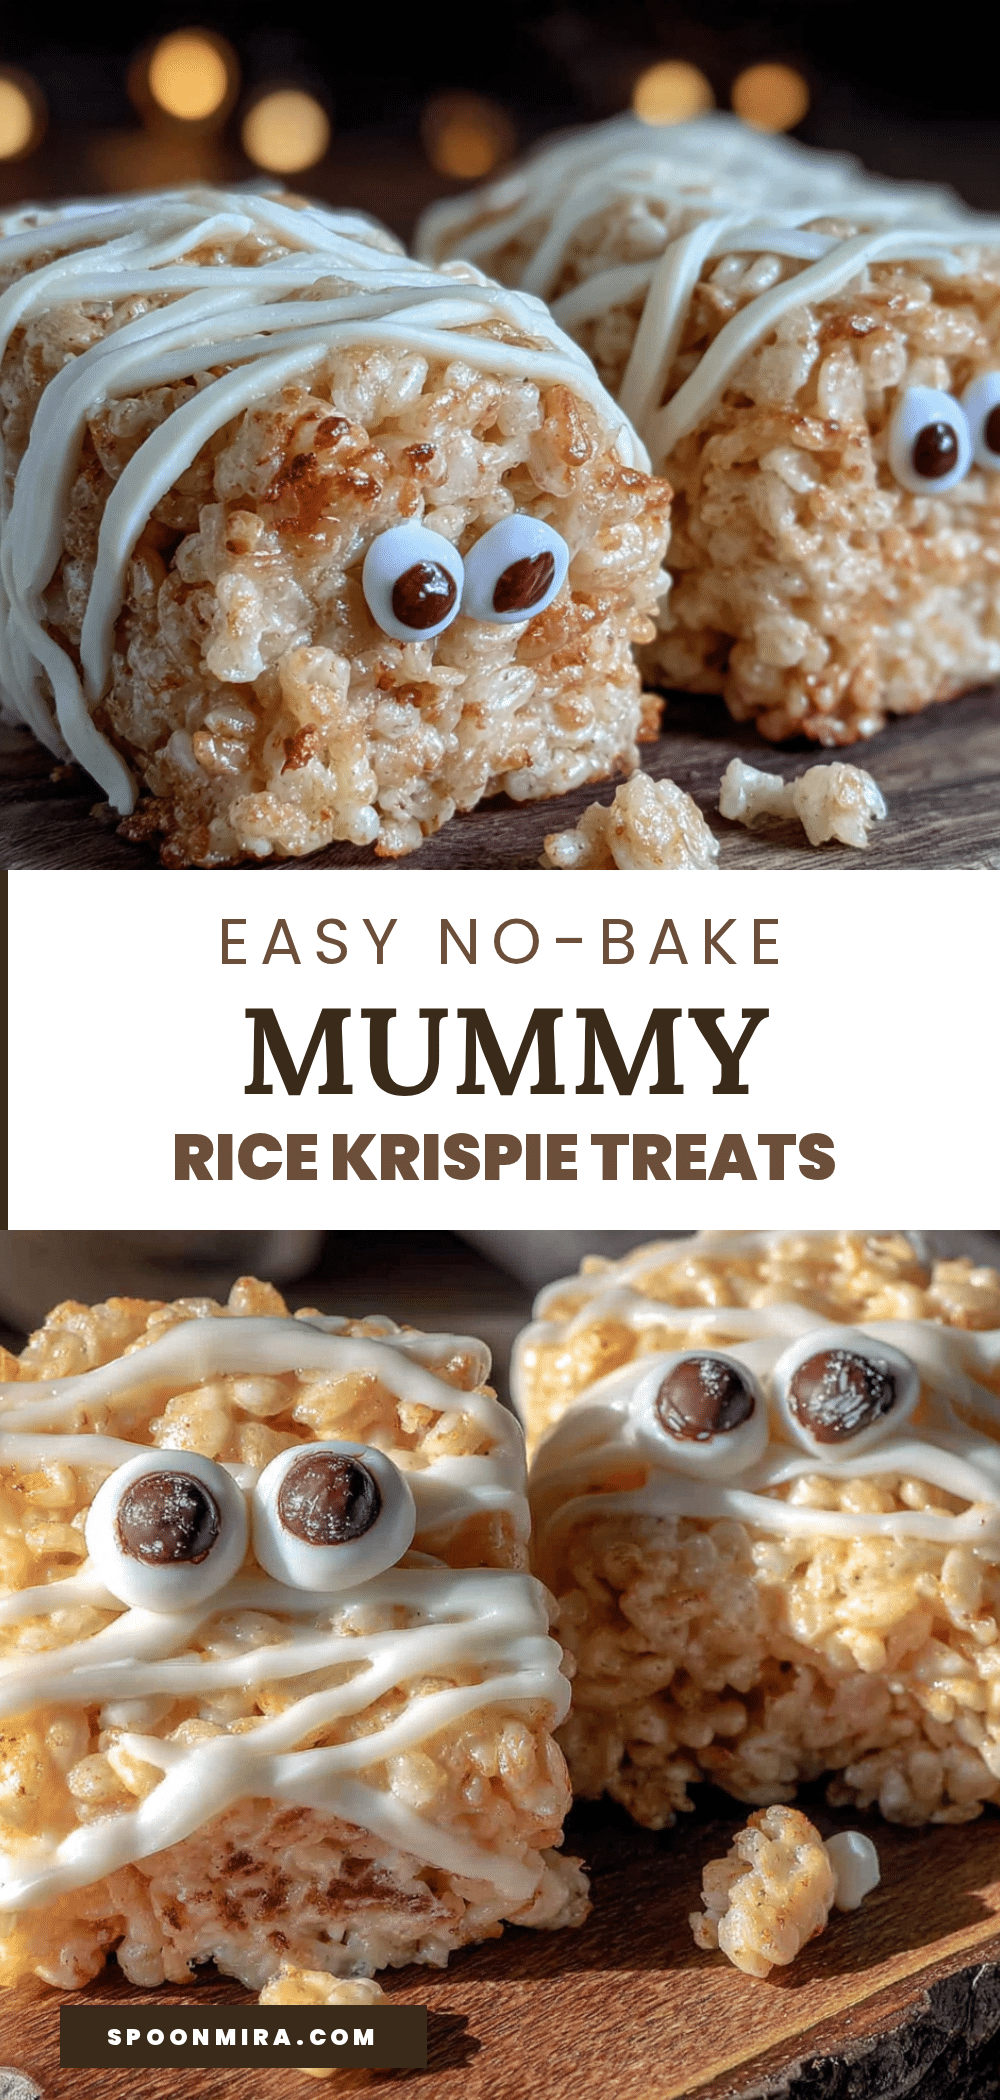
- Drizzle the “Bandages”: This is the fun part. Take a fork and dip it into the melted white chocolate. Hold the fork over a mummy treat and gently shake it back and forth, letting the chocolate drizzle over the treat in uneven lines. You want it to look like wrapped bandages. Don’t cover the whole thing—leave some of the crispy treat showing. It looks more authentic that way.
- Add the Eyes: While the white chocolate is still wet, gently press two candy eyes onto each mummy. Place them near the top of the treat, under the “bandages.” The chocolate will act as glue. Let the mummies sit on a wax paper-lined baking sheet until the chocolate is completely set, about 15-20 minutes. If you are in a hurry, you can pop them in the fridge for 5 minutes.
Troubleshooting Tip: If your white chocolate is too thick to drizzle, it’s either too cool or it seized. A tiny bit of coconut oil or vegetable shortening will loosen it right up. Also, if your candy eyes keep sliding off, you may have drizzled too much chocolate. Just dab a tiny bit of fresh melted chocolate on the back of the eye before placing it.
Cooking Tips & Techniques
Over the years, I have made these Easy No-Bake Mummy Rice Krispie Treats more times than I can count. And let me tell you, I have made every mistake in the book. Here are the lessons I learned so you don’t have to.
The Marshmallow Mistake: My first batch was a disaster because I used large marshmallows. They took forever to melt, and by the time they did, the mixture was scorched on the bottom. Mini marshmallows are the way to go. They melt faster and more evenly, giving you a smooth, silky base. Also, don’t be tempted to use “marshmallow cream” or “fluff.” It has a different water content and will make your treats soggy.
The Drizzle Technique: I tried using a piping bag for the white chocolate. It was a nightmare. The chocolate would either come out in a thick blob or a thin, uneven stream. A fork is genuinely the best tool. It creates those imperfect, thin lines that look exactly like medical bandages. Just dip the tines in the chocolate and wave it over the treat. The messier, the better.
Timing is Everything: When you are hosting a party, timing is crucial. I recommend making the Rice Krispie base the day before. Cut them into rectangles, store them in an airtight container, and then do the decorating the next day. This takes the pressure off and means you are not rushing around right before guests arrive. The treats stay perfectly fresh for 2-3 days.
Consistency is Key: If you live in a humid climate (hello, Texas!), your marshmallows might be a little sticky. That’s okay. Just make sure you are using fresh marshmallows. If they feel hard or crusty, they are old. Fresh marshmallows will give you that perfect, chewy texture that makes Rice Krispie treats so addictive.
Don’t Over-Press: I used to press the mixture into the pan with all my might, thinking it would make them hold together better. Nope. It made them rock hard. A gentle, even press is all you need. You want them to be tender enough to bite into easily.
Variations & Adaptations
One of the best things about this recipe is how easy it is to customize. You can change the flavor, the look, or even make it allergy-friendly. Here are a few of my favorite variations.
- Chocolate Mummies: For the chocolate lovers out there, swap the white chocolate for semi-sweet or milk chocolate. The dark “bandages” against the golden treat look really striking, almost like a different kind of monster. I did this for a “vampire” themed party once, and it was a hit.
- Peanut Butter Twist: Before you add the cereal, stir 1/4 cup of creamy peanut butter into the melted marshmallow mixture. It adds a lovely savory note that balances the sweetness. Just make sure to check for peanut allergies if you are serving a crowd.
- Spooky Color Pop: Add a few drops of orange or purple food coloring to the melted white chocolate. You can create a variegated look by drizzling two colors at the same time. It makes the mummies look even more festive and Halloween-y. Gel food coloring works best as it doesn’t thin out the chocolate.
- Gluten-Free Version: As I mentioned, use a certified gluten-free crispy rice cereal. The process is exactly the same, and the taste is indistinguishable. This is a great option for guests with celiac disease or gluten sensitivity.
- Funfetti Mummies: Sprinkle some Halloween-themed sprinkles over the white chocolate while it’s still wet. It adds a fun pop of color and a little extra crunch. My niece loves this version.
Serving & Storage Suggestions
These mummies are best served at room temperature. The texture is perfect—chewy, crispy, and the white chocolate is set but not rock hard. Here is how to make them the star of your party.
Presentation Tips: Arrange the mummies on a large platter or a wooden board. I like to line the board with black or orange tissue paper for a pop of color. You can also stand them up on their edges to create a “graveyard” effect. Add a few plastic spiders or skeleton hands around the platter for a spooky vibe. It makes for a great photo opportunity!
What to Serve Alongside: These treats are sweet, so I like to balance them with something salty or savory. A bowl of popcorn, some pretzels, or even a platter of mini sliders works perfectly. For drinks, a pitcher of apple cider or a batch of “witches’ brew” punch is a great match. The sweetness of the treats pairs wonderfully with the tartness of the cider.
Storage Instructions: Store any leftover mummies in an airtight container at room temperature. Do not refrigerate them. The fridge will make the Rice Krispie treats hard and stale. They will stay fresh for up to 3 days. If you are making them ahead, store the undecorated treats in an airtight container for up to 2 days, then decorate on the day of your party.
Reheating: Honestly, you shouldn’t need to reheat them. They are best at room temperature. If the white chocolate has softened too much (in a warm room), you can pop them in the fridge for 10 minutes to re-set the chocolate, but let them sit out for 5 minutes before serving.
Flavor Development: Unlike some baked goods, these treats don’t get better with age. The Rice Krispies will start to lose their crunch after about 2 days. That’s why I always recommend making them no more than 24 hours before serving for the best texture.
Nutritional Information & Benefits
Let’s be honest, these are a treat. They are not a health food, but that’s okay! Life is about balance. Here is a rough estimate of the nutritional value per serving (based on 16 treats):
- Calories: Approximately 220-250
- Fat: 8-10g
- Carbohydrates: 35-40g
- Protein: 2-3g
- Sugar: 22-25g
Health Highlights: The Rice Krispies themselves are fortified with iron and B vitamins. The butter and white chocolate do add saturated fat, but a little indulgence now and then is part of a happy life. If you are looking for a slightly lighter version, you can use a reduced-fat butter spread, but I find the texture isn’t as good.
Dietary Considerations: This recipe is not vegan (butter, marshmallows, white chocolate) and not gluten-free (unless you use a GF cereal). It does contain dairy. For a vegan version, use vegan butter, vegan marshmallows (like Dandies), and a plant-based white chocolate. The process is exactly the same.
My Perspective: I believe in enjoying food without guilt. These mummies are a fun, nostalgic treat that brings joy to a party. One or two of these is a perfectly fine indulgence. It’s about the experience, the laughter, and the memories you make while eating them. So go ahead, grab one (or two) and enjoy the moment!
Frequently Asked Questions
Can I use a different cereal?
Absolutely! While Rice Krispies give you that classic texture and crunch, you can experiment with other puffed rice cereals or even Cocoa Pebbles for a chocolatey twist. Just keep in mind that different cereals have different densities, so you might need to adjust the amount slightly. The key is to keep the ratio of cereal to marshmallow mixture about the same.
How do I prevent the white chocolate from seizing?
White chocolate is sensitive to heat and moisture. The number one cause of seizing is water getting into the chocolate. Make sure your bowl and utensils are completely dry. Also, heat it gently. Microwaving in short bursts and stirring often is the safest method. If it does seize, you can sometimes rescue it by stirring in a tablespoon of coconut oil or vegetable shortening.
Can I freeze these mummy treats?
I don’t recommend freezing them. The texture of the Rice Krispies will change dramatically when thawed, becoming soft and soggy. The white chocolate can also develop a white “bloom” (fat separation) when frozen and thawed. These are best made fresh or a day ahead and stored at room temperature.
How do I get the mummy look just right?
The secret is in the messiness. Don’t try to be perfect. Use a fork to drizzle the chocolate in uneven, crisscrossing lines. Leave some gaps so you can see the golden treat underneath. The eyes should be placed near the top, peeking out from under the “bandages.” If you want a more “wrapped” look, you can drizzle the chocolate from side to side, completely covering the treat in thin layers.
Can I make these with kids?
Yes! This is a fantastic recipe for kids. The no-bake aspect means there is no hot oven to worry about. Young children can help press the mixture into the pan (with greased hands), and older kids can handle the drizzling and placing the candy eyes. Just supervise the marshmallow melting on the stove. It’s a great way to get the whole family involved in the Halloween fun.
Conclusion
So there you have it—Easy No-Bake Mummy Rice Krispie Treats that are guaranteed to be the life of your Halloween party. They are simple, fun, and absolutely adorable. I love this recipe because it reminds me of that random gas station in Texas and the unexpected wisdom of a woman named Carol. It proves that good ideas can come from anywhere, even the most unlikely places. These treats are more than just a dessert; they are a conversation starter, a memory maker, and a little bit of spooky joy on a plate.
I encourage you to make these your own. Play with the colors, try different candies for the eyes, or add a sprinkle of sea salt on top for a sweet-salty kick. The best recipes are the ones you adapt to your own taste. I would love to hear how yours turn out! Leave a comment below and tell me about your Halloween party, or share a photo of your mummies. Did you try a variation? Let me know! Your feedback helps other readers discover new ideas, and it makes my day to see your creations. Happy Halloween, and happy cooking! May your treats be spooky and your guests be delighted.
Pin This Recipe!
Easy No-Bake Mummy Rice Krispie Treats: A Spooky Party Favorite
These adorable no-bake mummy treats are made with crispy rice cereal, marshmallows, and white chocolate. They come together in under 20 minutes and are perfect for Halloween parties, spooky movie nights, or any festive gathering.
- Prep Time: 20 minutes
- Cook Time: 10 minutes
- Total Time: 30 minutes
- Yield: 12-16 servings 1x
- Category: Dessert
- Cuisine: American
Ingredients
- 3 tablespoons unsalted butter (plus extra for greasing)
- 1 package (10 oz) mini marshmallows
- 6 cups Rice Krispies cereal
- 1/4 teaspoon vanilla extract (optional)
- 2 cups white chocolate melting wafers or white chocolate chips
- Candy eyes
Instructions
- Line a 9×13-inch baking dish with parchment paper, leaving an overhang on two sides. Lightly grease the parchment and exposed sides with butter or non-stick spray.
- In a large saucepan over medium-low heat, melt 3 tablespoons of unsalted butter. Add the mini marshmallows and stir constantly until completely melted and smooth, about 5-7 minutes.
- Remove from heat and stir in the vanilla extract.
- Pour in the Rice Krispies cereal and fold gently until all cereal is coated.
- Transfer the mixture to the prepared baking dish. Using a lightly greased spatula or hands, press evenly into the pan without pressing too hard.
- Let cool at room temperature for at least 30 minutes until fully set.
- Lift the block out using the parchment overhang and place on a cutting board. Cut into 2×3-inch rectangles (about 12-16 pieces).
- Melt the white chocolate in a microwave-safe bowl in 30-second intervals, stirring after each, until smooth (about 1.5-2 minutes).
- Dip a fork into the melted white chocolate and drizzle it over each treat in uneven lines to resemble bandages. Leave some of the treat visible.
- While the chocolate is still wet, press two candy eyes onto each mummy near the top. Let set on a wax paper-lined baking sheet for 15-20 minutes (or 5 minutes in the fridge).
Notes
For best results, use fresh mini marshmallows and real white chocolate (with cocoa butter). If using standard white chocolate chips, add 1 teaspoon of coconut oil to help them melt smoothly. To make gluten-free, use a certified gluten-free crispy rice cereal. Store in an airtight container at room temperature for up to 3 days; do not refrigerate.
Nutrition
- Serving Size: 1 treat
- Calories: 235
- Sugar: 24
- Sodium: 180
- Fat: 9
- Saturated Fat: 5
- Carbohydrates: 38
- Protein: 2
Keywords: Halloween treats, no-bake, Rice Krispie treats, mummy, easy dessert, party food, spooky


