The television was on, but nobody was watching it. My brother-in-law had shown up twenty minutes early—which in our family means an hour before food is actually ready—and the smell of stale chips from the bag he brought was honestly depressing. I opened the fridge, hoping for a miracle, and found a pack of chicken wings I’d bought on a whim, a jar of honey that was crystallizing at the edges, and a head of garlic that was starting to sprout. Not exactly a winning lineup for the big game.
I stared at those wings for a solid minute. Game day food is supposed to feel like an event, you know? Not like a desperate scramble. But I had a bottle of soy sauce, some butter, and a feeling that if I got the timing right, this could actually work. I started the oil heating before I even had a plan—sometimes you just have to trust the process. The wings went in, and that sizzle was the first good thing that happened all afternoon.
I whisked together a honey garlic sauce while they cooked, tasting it off the spoon and adjusting until it had that perfect balance—sweet, salty, a little sticky, with garlic that would cling to every bite. When I tossed the crispy wings in that glossy glaze, something shifted in the room. People started paying attention. The first wing disappeared before I even set the bowl down, and honestly, I knew right then this was going to be one of those recipes that sticks.
This crispy honey garlic chicken wings recipe for game day isn’t fancy. It came together from what I had, and that’s exactly why it works. Sometimes the best recipes aren’t the ones you plan—they’re the ones that show up when you need them most.
Why You’ll Love This Recipe
These wings have a reputation now in my house, and not just because of that first accidental batch. I’ve tested this recipe at least six times since then, tweaking the temperature, the sauce ratio, the timing—because that’s what you do when something has potential. Here is why I keep coming back to it.
- Perfectly crispy without deep frying: The double-cooking method gives you that crackly skin without needing a vat of oil. I’m honestly amazed at how well this works.
- That honey garlic glaze: It’s sticky, it’s savory, and it clings to every wing like it belongs there. Not too sweet, not too garlicky—the balance is everything.
- Simple pantry ingredients: You probably have most of this already. No special trips to the store required, which is exactly what you want on game day.
- Prep-friendly for parties: You can bake the wings ahead and toss them in the sauce right before serving. That means less stress when people show up early.
- Crowd-pleaser guaranteed: I have watched picky eaters, wing snobs, and people who “don’t eat sticky food” devour these without shame.
This isn’t just another wing recipe. The secret is in the baking powder trick—it dries out the skin so it crisps up like it was fried, but without the mess. I learned that technique from a chef friend years ago, and it has never let me down. Plus, the sauce has a little kick from red pepper flakes that wakes everything up without overwhelming the honey. It’s comfort food that feels special, and honestly, that’s the best kind of game day food.
What Ingredients You Will Need
This recipe uses simple, honest ingredients that work together to create something way bigger than the sum of their parts. Most of these are pantry staples, which makes this a perfect last-minute option when the game sneaks up on you.
- Chicken wings (2 lbs): About 10 to 12 whole wings, separated into drums and flats. I prefer fresh over frozen for better texture, but thawed frozen wings work fine—just pat them really dry.
- Baking powder (1½ teaspoons): This is the secret to crispy skin. Make sure it’s baking powder, not baking soda, or your wings will taste metallic. I use aluminum-free for a cleaner flavor.
- Cornstarch (1 tablespoon): Adds an extra layer of crunch. You can skip it in a pinch, but don’t—it makes a real difference.
- Salt (1 teaspoon): Use kosher salt if you have it. It distributes better and doesn’t clump like table salt.
- Black pepper (½ teaspoon): Freshly ground is best, but pre-ground works too.
- Garlic powder (½ teaspoon): Adds depth to the dry rub without burning like fresh garlic would during baking.
- Honey (⅓ cup): Use a runny, mild honey. I like clover or orange blossom for this—they’re sweet without being too floral.
- Soy sauce (3 tablespoons): Low-sodium is ideal so you can control the salt level. Tamari or coconut aminos work for gluten-free.
- Butter (2 tablespoons): Unsalted, melted. It gives the sauce a silky finish and helps it coat the wings evenly.
- Garlic (4 cloves, minced): Fresh garlic is non-negotiable here. The jarred stuff won’t give you that punchy, aromatic kick.
- Rice vinegar (1 tablespoon): Adds a little tang to balance the sweetness. Apple cider vinegar works as a substitute.
- Red pepper flakes (½ teaspoon): Optional, but I love the subtle heat. Add more if you like it spicy.
- Sesame seeds and green onions: For garnish. Not mandatory, but they make the wings look like they came from a restaurant.
I recommend using a good-quality soy sauce like Kikkoman or San-J—it makes a noticeable difference in the sauce depth. And if you can find local honey, even better. The flavor is usually more complex than the mass-produced stuff, and it supports your local beekeepers too.
Equipment Needed
You don’t need a lot of fancy gear for this recipe, which is one of the reasons I love it. Here is what you will need:
- Baking sheet: A rimmed baking sheet works best. Line it with foil for easy cleanup, then place a wire rack on top for maximum air circulation.
- Wire rack: This is key for crispy wings. It lets the heat circulate underneath so the skin dries out evenly. If you don’t have one, flip the wings halfway through baking.
- Large mixing bowl: For tossing the wings with the dry ingredients. Glass or stainless steel works great.
- Small saucepan: For making the honey garlic glaze. A nonstick pan makes cleanup easier.
- Tongs: For flipping the wings and tossing them in sauce. Silicone-tipped ones won’t scratch your pans.
- Whisk: To combine the sauce ingredients smoothly.
- Pastry brush (optional): If you prefer brushing the glaze on instead of tossing, this works well for a more even coat.
I use a half-sheet pan from Nordic Ware—it doesn’t warp at high heat, which is important for even cooking. And if you don’t have a wire rack, you can flip the wings every 15 minutes to get similar results, though it’s a little more work.
Preparation Method
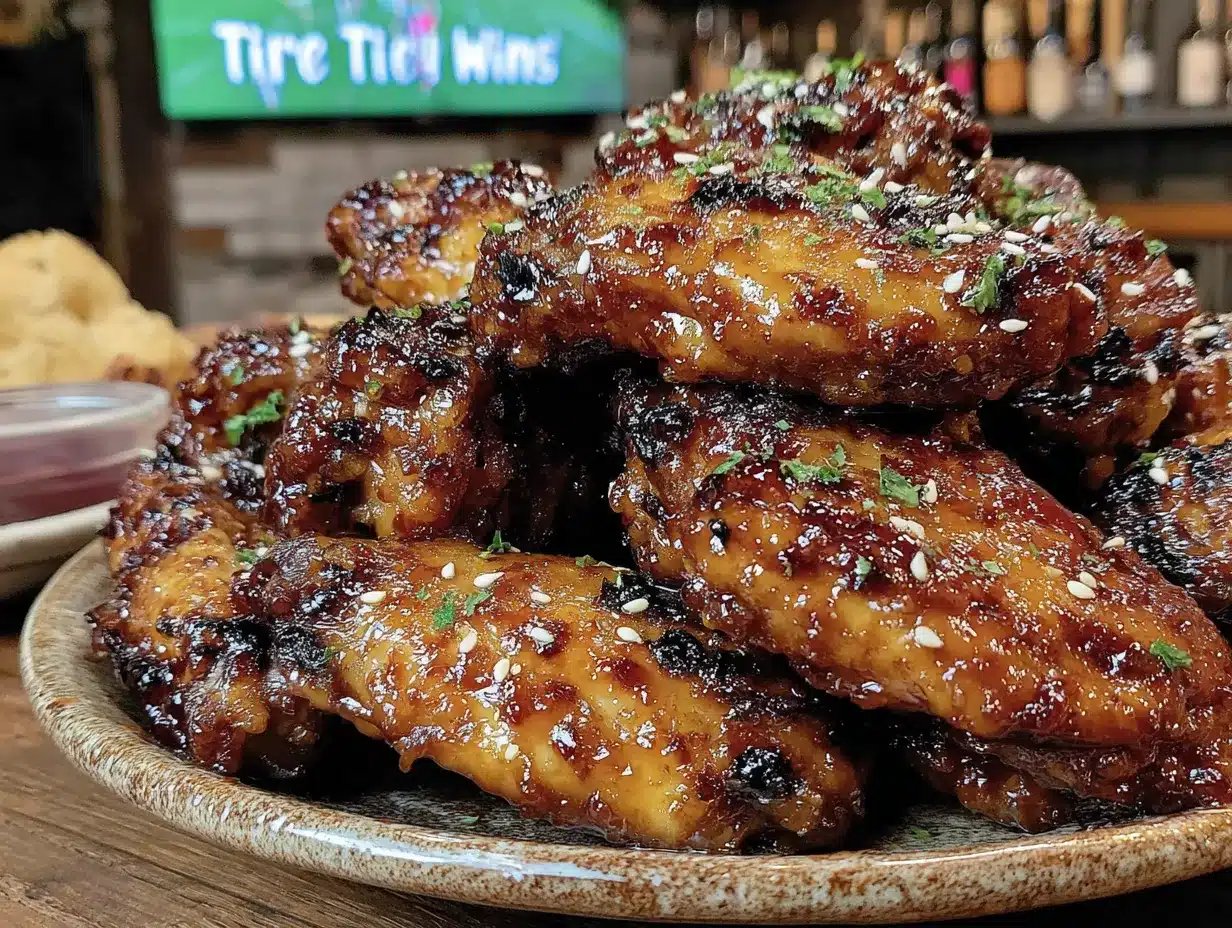
These crispy honey garlic chicken wings for game day come together in about an hour, with most of that time being hands-off baking. Here is how to make them perfect every time.
- Preheat your oven to 400°F (200°C). Place a wire rack on a foil-lined baking sheet and spray it lightly with cooking spray. This prevents sticking and makes cleanup a breeze.
- Prep the wings: If your wings are whole, separate the drums from the flats using a sharp knife. Cut through the joint—it’s easier than trying to hack through bone. Pat the pieces completely dry with paper towels. This step is crucial. Wet skin won’t crisp up, so take your time here.
- Mix the dry rub: In a large bowl, combine the baking powder, cornstarch, salt, black pepper, and garlic powder. Whisk them together so the baking powder is evenly distributed.
- Coat the wings: Add the dried wings to the bowl and toss them with your hands until every piece is coated. The mixture should look powdery and dry—that’s exactly what you want. Let them sit for 5 minutes so the baking powder can start working.
- Arrange on the rack: Place the wings on the wire rack in a single layer, leaving a little space between each piece. Crowding them will trap steam and ruin the crispiness. If you have to, use two baking sheets.
- Bake for 45-50 minutes: Bake for 25 minutes, then flip each wing with tongs. Bake for another 20-25 minutes until the skin is golden brown and crispy. The internal temperature should reach 165°F (74°C). Your kitchen will smell incredible at this point.
- Make the sauce: While the wings bake, combine the honey, soy sauce, melted butter, minced garlic, rice vinegar, and red pepper flakes in a small saucepan. Simmer over medium-low heat for 5-7 minutes, stirring occasionally, until the sauce thickens slightly and the garlic becomes fragrant. Don’t let it boil hard or the honey can burn.
- Toss the wings: Transfer the baked wings to a large bowl. Pour the warm sauce over them and toss gently with tongs until every wing is coated. The sauce will cling to the crispy skin beautifully.
- Garnish and serve: Sprinkle with sesame seeds and sliced green onions. Serve immediately while the wings are still hot and the glaze is sticky.
The first time I made these, I skipped the drying step and ended up with soggy wings. Don’t be like me. Pat those wings dry like your game day reputation depends on it—because honestly, it kind of does.
Cooking Tips & Techniques
I have made these wings more times than I can count, and I’ve learned a few things the hard way. Here are my best tips to make sure yours turn out perfect.
The baking powder trick is real, but only if you use it right. Make sure your baking powder is fresh—test it by dropping a pinch in hot water; if it fizzes, you’re good. And remember, it’s baking powder, not baking soda. I made that mistake once and the wings tasted like a science experiment gone wrong.
Don’t skip the resting time. After you coat the wings, let them sit for 5-10 minutes before baking. This gives the baking powder time to start drying out the skin, which is what creates that crackly texture. I usually prep the wings first, then make the sauce while they rest.
Watch the sauce carefully. Honey burns fast. Keep the heat at medium-low and stir frequently. If the sauce starts bubbling aggressively, pull it off the heat immediately. A burnt honey garlic sauce is bitter and there’s no saving it—I’ve tried.
Use a meat thermometer. Chicken wings are small and cook fast, but doneness matters. Insert the thermometer into the thickest part of the drum, away from the bone. 165°F (74°C) is the target, and you’ll get consistent results every time.
Double batch? Double the rack space. If you’re making wings for a crowd, use two baking sheets on separate oven racks. Swap their positions halfway through for even cooking. Crowding the pan is the number one reason wings turn out steamed instead of crispy.
Toss wings in sauce right before serving. If you coat them too early, the glaze will soften the crispy skin. I like to bake the wings ahead and keep them warm in a low oven, then toss them with the sauce just before putting the bowl out. It makes a huge difference.
Variations & Adaptations
One of the best things about this recipe is how easy it is to adapt. Here are some of my favorite variations.
Spicy honey garlic wings: Double the red pepper flakes and add a teaspoon of sriracha or gochujang to the sauce. The heat cuts through the sweetness beautifully, and it’s perfect if you like a little sweat with your wings.
Air fryer version: Cook the wings at 375°F (190°C) in the air fryer for 20-25 minutes, shaking the basket halfway through. The air fryer gets the skin even crispier than the oven, and it’s faster too. I use this method when I’m only making a small batch.
Smoked wings: If you have a smoker, try these at 225°F (107°C) for about 2 hours with cherry or apple wood. The smoky flavor pairs amazingly with the honey garlic glaze. Finish them under the broiler for 2 minutes to crisp the skin.
Gluten-free adaptation: Use tamari or coconut aminos instead of soy sauce, and check that your baking powder is gluten-free (most are, but some brands add wheat starch). The wings themselves are naturally gluten-free, so it’s an easy swap.
Lemon honey garlic wings: Add the zest of one lemon and a tablespoon of lemon juice to the sauce. The citrus brightens everything up and makes the wings feel lighter—great for summer game days or outdoor parties.
I tried a version last summer with fresh grated ginger added to the sauce, and it was incredible. The ginger gave the glaze a warm, slightly peppery kick that worked perfectly with the honey. If you have fresh ginger on hand, definitely give it a try.
Serving & Storage Suggestions
These wings are best served hot, right after they’ve been tossed in the glaze. The contrast between the crispy skin and the sticky sauce is at its peak within the first 15 minutes. I like to pile them on a large platter and garnish with extra sesame seeds and sliced green onions for color.
For game day spreads, these wings pair beautifully with classic sides like celery and carrot sticks with ranch or blue cheese dressing. They also go great with easy 3 ingredient peanut butter energy balls for a sweet-savory snack combo that keeps everyone happy through halftime. If you’re hosting a bigger crowd, consider serving them alongside creamy hatch chili corn chowder with bacon for a hearty game day menu.
Storage: Leftover wings can be stored in an airtight container in the refrigerator for up to 4 days. The glaze will soften the skin over time, but they’re still delicious cold or reheated.
Reheating: The best way to bring back some crispiness is to reheat them in the oven at 375°F (190°C) for 8-10 minutes on a wire rack. The air fryer works even better—5 minutes at 350°F (175°C) and they’ll be almost as good as fresh. Skip the microwave unless you’re okay with soft, steamed wings.
Freezing: You can freeze the baked wings (without sauce) for up to 3 months. Thaw in the refrigerator overnight, then reheat and toss with fresh sauce. I do this often for last-minute gatherings, and nobody ever notices they were frozen.
The flavors actually deepen a bit overnight—the honey and garlic meld together in a way that’s really satisfying. I’ve been known to eat leftover wings cold straight from the fridge the next morning, and I’m not ashamed of it.
Nutritional Information & Benefits
Here is the approximate nutritional breakdown for a serving of 3-4 wings (about 6 ounces or 170 grams):
| Nutrient | Amount |
|---|---|
| Calories | 380 |
| Protein | 28g |
| Fat | 20g |
| Saturated Fat | 7g |
| Carbohydrates | 18g |
| Sugar | 15g |
| Sodium | 720mg |
| Fiber | 0g |
Chicken wings are a good source of protein, which helps keep you full and supports muscle recovery—great for active game day celebrations. The honey provides quick energy from natural sugars, while garlic offers antioxidants that support immune health. If you’re watching your sodium, use low-sodium soy sauce and reduce the added salt in the dry rub.
These wings are naturally gluten-free with the right soy sauce swap, and they’re keto-friendly if you skip the honey and use a sugar-free sweetener instead. I’ve made them for friends with different dietary needs, and the recipe adapts really well.
Conclusion
These crispy honey garlic chicken wings for game day started as a last-minute kitchen scramble, but they’ve become one of those recipes I genuinely look forward to making. The crackly skin, the sticky-sweet glaze, that little kick of garlic and heat—it all comes together in a way that feels special without being complicated.
I love that this recipe doesn’t require a deep fryer or a long list of hard-to-find ingredients. It’s accessible, it’s forgiving, and it delivers every single time. Whether you’re hosting a Super Bowl party, a casual weekend gathering, or just treating yourself to something delicious, these wings will not let you down.
Try them as written first, then feel free to play with the variations. Add more heat, swap in different citrus, go heavy on the garlic—make them yours. And when you do, come back and let me know how they turned out. I love hearing about your kitchen wins, especially the ones that start with a fridge full of nothing and end with an empty platter.
Frequently Asked Questions
Can I use frozen chicken wings for this recipe?
Yes, but thaw them completely in the refrigerator first. Pat them very dry with paper towels before coating—frozen wings release more moisture as they thaw, so drying is extra important.
Why are my wings not crispy?
Most likely, the skin wasn’t dry enough before baking, or the wings were crowded on the pan. Make sure you pat them dry thoroughly, use a wire rack, and leave space between each piece. Also check that your baking powder is fresh and not expired.
Can I make the sauce ahead of time?
Absolutely. The honey garlic sauce can be made up to a week in advance and stored in an airtight container in the refrigerator. Reheat it gently on the stovetop or in the microwave before tossing with the wings.
How do I make these wings less sweet?
Reduce the honey to ¼ cup and add an extra tablespoon of soy sauce or rice vinegar. You can also add a splash of lime juice to brighten the flavor and cut the sweetness.
Can I grill these wings instead of baking?
Yes! Grill the wings over medium heat for about 20-25 minutes, turning frequently, until the skin is charred and crispy. Toss with the sauce after grilling—brushing it on during cooking can cause the honey to burn.
If you loved these wings, you might also enjoy crispy air fryer boneless chicken thighs with honey mustard sauce for another easy, crowd-pleasing chicken recipe. And for a complete game day spread, don’t miss creamy hatch green chile chicken enchilada casserole—it’s the kind of dish that disappears fast.
Pin This Recipe!
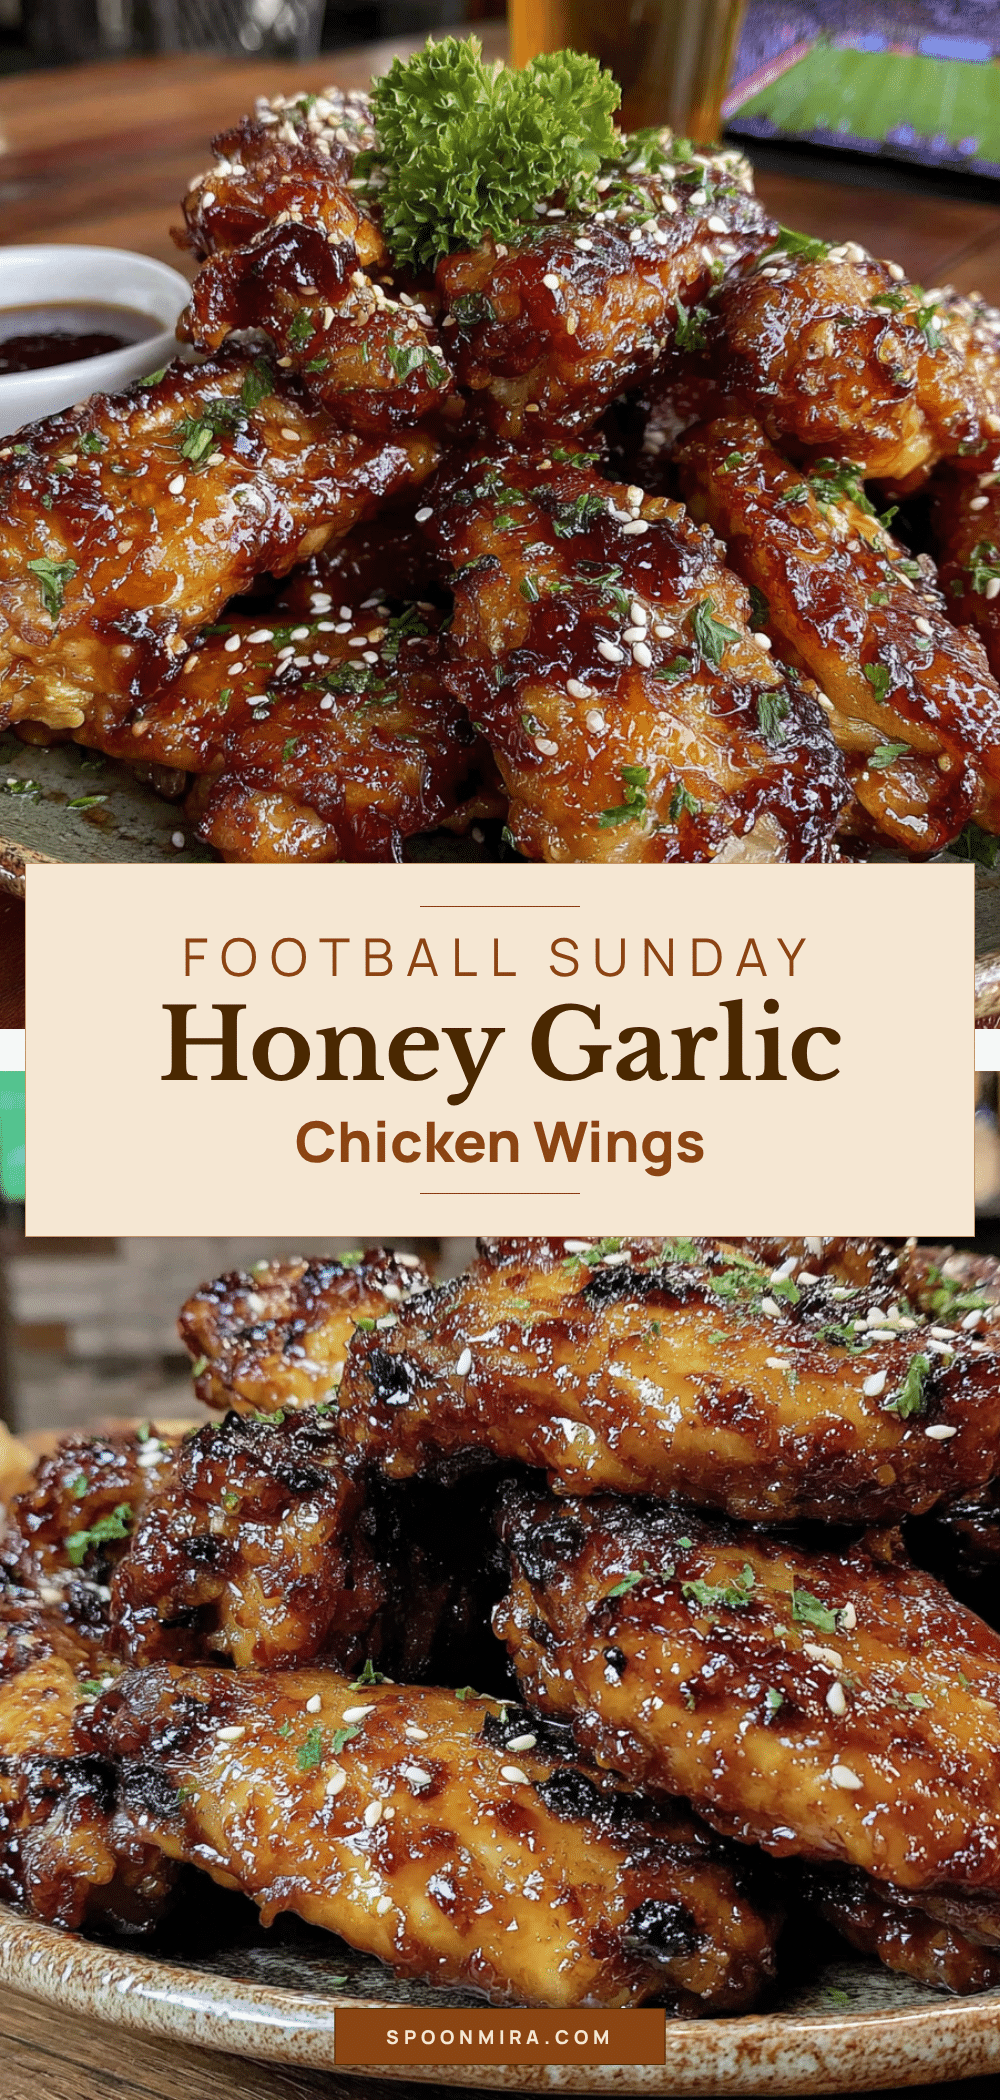
Best Crispy Honey Garlic Chicken Wings Recipe for Game Day

These crispy honey garlic chicken wings are perfectly baked with a crackly skin and a sticky-sweet glaze. Made with simple pantry ingredients, they are the ultimate crowd-pleaser for game day.
- Prep Time: 15 minutes
- Cook Time: 45 minutes
- Total Time: 1 hour
- Yield: 4 servings 1x
- Category: Appetizer
- Cuisine: American
Ingredients
- 2 lbs chicken wings (about 10–12 whole wings, separated into drums and flats)
- 1½ teaspoons baking powder (aluminum-free)
- 1 tablespoon cornstarch
- 1 teaspoon kosher salt
- ½ teaspoon black pepper (freshly ground)
- ½ teaspoon garlic powder
- ⅓ cup honey (mild, runny like clover or orange blossom)
- 3 tablespoons low-sodium soy sauce (or tamari/coconut aminos for gluten-free)
- 2 tablespoons unsalted butter, melted
- 4 cloves garlic, minced
- 1 tablespoon rice vinegar (or apple cider vinegar)
- ½ teaspoon red pepper flakes (optional)
- Sesame seeds and sliced green onions for garnish
Instructions
- Preheat your oven to 400°F (200°C). Place a wire rack on a foil-lined baking sheet and spray it lightly with cooking spray.
- If your wings are whole, separate the drums from the flats using a sharp knife, cutting through the joint. Pat the pieces completely dry with paper towels.
- In a large bowl, combine the baking powder, cornstarch, salt, black pepper, and garlic powder. Whisk together.
- Add the dried wings to the bowl and toss with your hands until every piece is coated. Let them sit for 5 minutes.
- Arrange the wings on the wire rack in a single layer, leaving space between each piece.
- Bake for 25 minutes, then flip each wing with tongs. Bake for another 20-25 minutes until the skin is golden brown and crispy (internal temperature reaches 165°F/74°C).
- While the wings bake, combine honey, soy sauce, melted butter, minced garlic, rice vinegar, and red pepper flakes in a small saucepan. Simmer over medium-low heat for 5-7 minutes, stirring occasionally, until the sauce thickens slightly.
- Transfer the baked wings to a large bowl. Pour the warm sauce over them and toss gently with tongs until every wing is coated.
- Sprinkle with sesame seeds and sliced green onions. Serve immediately.
Notes
Pat the wings very dry for maximum crispiness. Use fresh baking powder (not baking soda). Toss wings in sauce right before serving to keep the skin crispy. For a double batch, use two baking sheets on separate racks and swap positions halfway through.
Nutrition
- Serving Size: 3-4 wings (about 6 o
- Calories: 380
- Sugar: 15
- Sodium: 720
- Fat: 20
- Saturated Fat: 7
- Carbohydrates: 18
- Protein: 28
Keywords: crispy honey garlic chicken wings, game day wings, baked chicken wings, honey garlic wings, easy wing recipe


