My husband claimed to hate stuffed peppers for fifteen years. Fifteen years of me making them for myself, eating them over the sink while he had a sandwich, muttering something about “soggy peppers” and “weird fillings.” Then last October, I was carving pumpkins with the kids and had this stupid idea—what if I carved the peppers like jack-o-lanterns before stuffing them? I made a batch “just for the kids’ Halloween dinner” and went to set the table. That’s when I found him standing over the baking dish, fork in hand, halfway through his second pepper. “These aren’t stuffed peppers,” he said with his mouth full. “These are different.” I didn’t say a word. I just smiled and handed him a napkin.
Honestly, that moment changed everything. I mean, here was a guy who had built an entire identity around hating stuffed peppers, caught red-handed with orange juice running down his chin. And the best part? He was right—these Jack-O-Lantern Stuffed Bell Peppers are different. The carving isn’t just cute; it actually helps the peppers cook more evenly and lets the filling peek through those little faces. It’s the kind of recipe that makes you wonder why you didn’t try it sooner, you know? Maybe you’ve been there with a dish someone in your family swears they hate, and you’re looking for that one twist that changes everything. Well, this is it. This is the Halloween dinner that converts skeptics, makes kids actually excited about vegetables, and honestly tastes incredible. Let me show you how it’s done.
Why You’ll Love This Recipe
I’ve tested this recipe more times than I care to admit—probably eight or nine batches before I got the carving technique just right. Here’s why I keep coming back to it, and why I think you will too:
- Fun for Kids and Adults: The jack-o-lantern faces make dinner feel like a craft project. My kids argue over who gets to design the face, and I’ve caught grown adults doing the same at Halloween parties.
- Surprisingly Easy: Don’t let the carving part intimidate you. Once you do one pepper, you’ll breeze through the rest. I’m talking about 10 minutes of prep time, tops.
- Customizable Filling: This recipe works with ground beef, turkey, chicken, or a plant-based crumble. I’ve made it all three ways, and each version has its own charm.
- Make-Ahead Friendly: You can stuff and carve these peppers a day ahead, then just bake them when you’re ready. Perfect for busy Halloween nights when you’re also wrangling costumes and candy.
- Hidden Veggie Win: The peppers themselves are packed with vitamin C, and you can sneak extra veggies into the filling without anyone noticing. My kids have no idea there’s finely chopped zucchini in there.
What really sets this recipe apart is the carving technique. Instead of just cutting off the top like traditional stuffed peppers, you’re creating a face that lets steam escape and helps the filling cook through faster. Plus, the little pepper “lid” you cut off becomes a cute hat. It’s these small details that turn a weeknight dinner into something memorable. And honestly? The first time you pull a tray of these glowing orange faces out of the oven, you’ll feel like a kitchen wizard.
What Ingredients You Will Need
This recipe uses simple, wholesome ingredients that you probably already have in your kitchen. The magic is in how they come together, not in fancy or hard-to-find items.
- 6 large orange bell peppers – Look for peppers that are as round and squat as possible. They sit better on the baking dish and give you more surface area for carving. I’ve found that the ones with a flat bottom work best. (Avoid tall, pointy peppers—they tip over during baking.)
- 1 pound ground beef (85/15) – I prefer this fat ratio because it stays juicy without being greasy. Ground turkey or chicken works too, just add a tablespoon of olive oil to keep it moist.
- 1 cup cooked white rice – Leftover rice is perfect here. You can also use brown rice, quinoa, or cauliflower rice for a low-carb option. I’ve done all of them, and honestly, brown rice is my favorite for texture.
- 1 small onion, finely diced – Yellow or white onion works. If you’re short on time, frozen diced onion is fine—just don’t thaw it first.
- 2 cloves garlic, minced – Fresh garlic is best, but jarred minced garlic works in a pinch. I use about 1 teaspoon.
- 1 can (15 ounces) tomato sauce – I recommend Hunt’s or Muir Glen for consistent flavor. Avoid seasoned tomato sauce; you want plain so you can control the seasoning yourself.
- 1 cup shredded mozzarella cheese – Part-skim works fine. For a dairy-free version, use Violife mozzarella shreds—they melt surprisingly well.
- 1 teaspoon dried oregano – Italian seasoning works too, but I like oregano specifically for that classic stuffed pepper taste.
- 1 teaspoon salt – Kosher salt is best. If you’re using table salt, reduce to ¾ teaspoon.
- ½ teaspoon black pepper – Freshly ground if you have it.
- ½ teaspoon smoked paprika – This is my secret ingredient. It adds a subtle smokiness that makes the filling taste like it cooked all day.
- Optional: ½ cup finely chopped zucchini or mushrooms – I add these to sneak in extra veggies. You can’t taste them, I promise.
Equipment Needed
You don’t need anything fancy for this recipe, which is part of why I love it. Here’s what you’ll need:
- Sharp paring knife – This is crucial for carving the faces. A dull knife will tear the pepper skin. I use a $10 Kuhn Rikon paring knife and it works perfectly.
- Large baking dish (9×13 inches) – You want something with sides to catch any juices that bubble out. A glass or ceramic dish works best.
- Large skillet – For cooking the filling. A 12-inch skillet gives you plenty of room.
- Cutting board – Preferably one with a groove to catch pepper juice.
- Small spoon – For scooping out seeds and membranes. A melon baller works great too.
- Mixing bowl – For combining the filling ingredients.
- Aluminum foil – For covering the dish during the first part of baking.
If you don’t have a paring knife, a small serrated knife works too. I’ve even used a clean X-Acto knife in a pinch (don’t judge me—it was a camping trip). The key is having something sharp enough to cut through pepper skin without crushing it.
Preparation Method
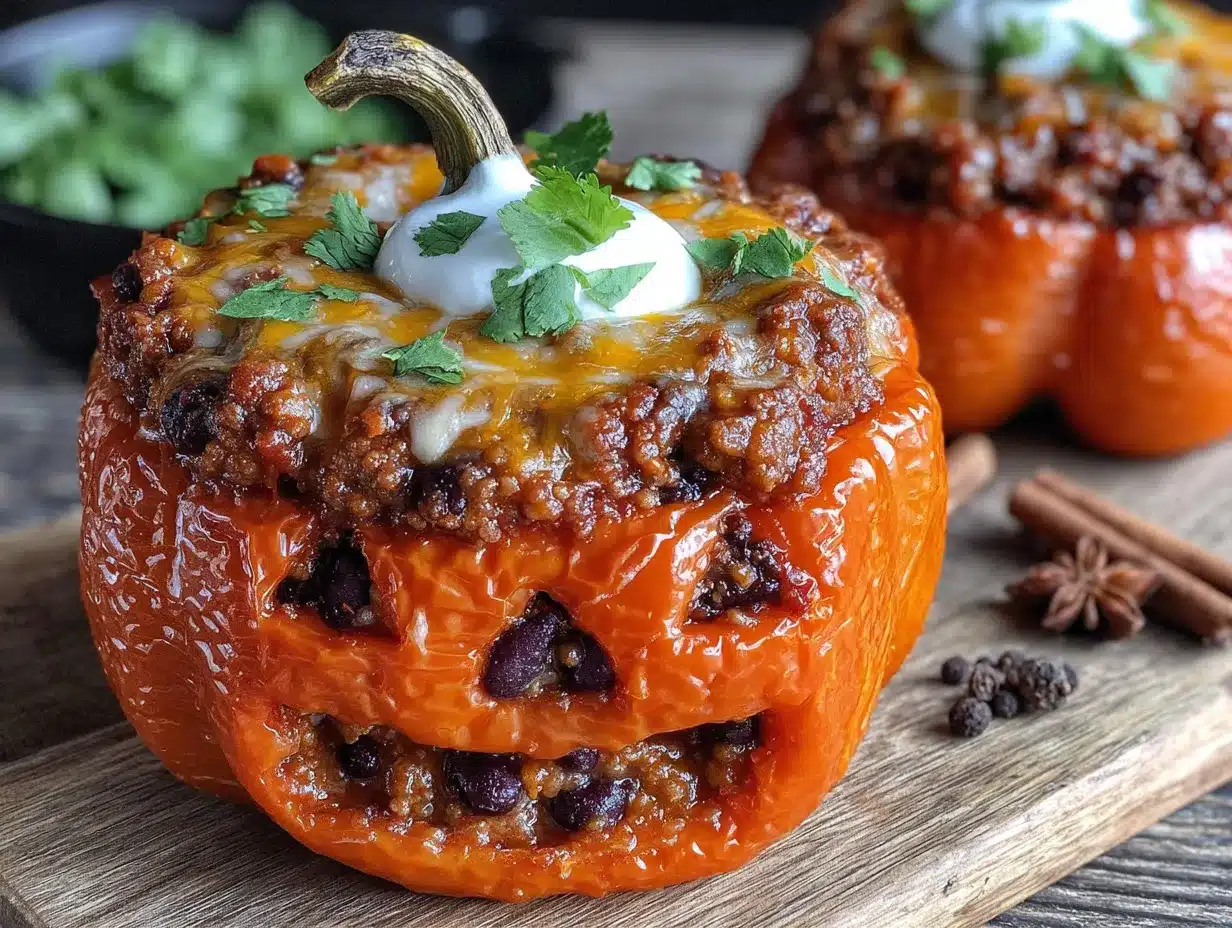
Let’s get into the nitty-gritty. This recipe takes about 45 minutes from start to finish, and most of that is hands-off baking time.
- Preheat your oven to 375°F (190°C). While it’s heating, bring a large pot of water to a boil. You’ll blanch the peppers briefly to soften them for carving.
- Prepare the peppers. Wash your orange bell peppers and pat them dry. Using a sharp paring knife, cut a small circle around the stem on top—about 1 inch in diameter. Pull the stem out gently. This is your pepper’s “hat.” Set the hats aside. Use your fingers or a small spoon to scoop out the seeds and white membranes inside. Don’t rinse them with water; just shake out any loose seeds.
- Blanch the peppers. Drop the hollowed peppers into the boiling water for exactly 2 minutes. This softens them just enough that carving is easy, but they won’t fall apart. Use tongs to transfer them to a plate lined with paper towels. Let them cool for about 5 minutes—you don’t want to burn your fingers while carving.
- Carve the faces. This is the fun part. Using your paring knife, cut triangle eyes and a jagged mouth into each pepper. Think of it like carving a pumpkin, but smaller and edible. I like to cut the eyes first, then the mouth. Keep the cut-out pieces if you want—you can bake them alongside the peppers for a crispy snack. Pro tip: Cut the mouth wider than you think you need. The pepper shrinks slightly during baking, and a narrow mouth will close up.
- Cook the filling. In your large skillet over medium-high heat, cook the ground beef for 5-7 minutes, breaking it up with a wooden spoon, until it’s browned and no longer pink. Drain off any excess fat. Add the diced onion and cook for 2-3 minutes until it softens. Add the minced garlic and cook for 30 seconds until fragrant. If you’re using zucchini or mushrooms, add them now and cook for another 2 minutes.
- Combine the filling. Reduce heat to low. Stir in the cooked rice, tomato sauce, oregano, salt, pepper, and smoked paprika. Let it simmer for 3-4 minutes until everything is heated through and the flavors meld. Taste it and adjust seasoning—I usually add another pinch of salt here. Remove from heat and stir in half of the shredded mozzarella cheese.
- Stuff the peppers. Spoon the filling into each carved pepper, packing it gently but firmly. Don’t overstuff—you want the filling to be level with the top of the pepper, not mounded. Place the stuffed peppers in your baking dish. If they wobble, you can trim a tiny slice off the bottom to make them sit flat (just don’t cut through the bottom).
- Bake covered. Sprinkle the remaining mozzarella cheese over the tops of the peppers. Place the little pepper “hats” next to each pepper in the dish (or on top if you prefer). Cover the dish tightly with aluminum foil. Bake for 20 minutes.
- Bake uncovered. Remove the foil and bake for another 10 minutes. The cheese should be melted and bubbly, and the peppers should be tender but still holding their shape. If you want browner cheese, switch to broil for the last 2 minutes—watch carefully so it doesn’t burn.
- Rest and serve. Let the peppers sit in the dish for 5 minutes before serving. This helps the filling set and makes them easier to handle. Serve with the little pepper hats on top for maximum cuteness.
Cooking Tips & Techniques
I’ve made this recipe about a dozen times now, and I’ve learned a few things the hard way. Here’s what I wish someone had told me:
Choose peppers carefully. Not all orange bell peppers are created equal. Look for ones that are squat and round, like a pumpkin shape. Tall, narrow peppers tip over in the baking dish and leak filling everywhere. I learned this during batch number three, when I spent 20 minutes cleaning burnt tomato sauce off the bottom of my oven.
Don’t skip the blanching step. I know it seems like extra work, but trust me on this. Raw peppers are too stiff to carve cleanly, and the knife slips. I have a scar on my thumb from trying to carve a raw pepper (okay, it’s a tiny scar, but still). The two-minute blanch softens the skin just enough that your knife glides through like butter.
Cut the mouth wide. This is the mistake I made most often. The pepper shrinks as it bakes, and a cute little grin becomes a tiny slit. Cut the mouth at least ½ inch wide, and make the eyes big enough to see through. Your jack-o-lantern will look much more expressive after baking.
Multitask wisely. While the peppers are blanching, you can start cooking the filling. While the filling simmers, you can carve the faces. This recipe comes together in about 30 minutes of active time if you keep things moving. I usually get the rice cooking first (if I’m not using leftovers), then prep everything else while it simmers.
Don’t overbake. The peppers should be tender but still have some structure. If you bake them too long, they’ll collapse and lose their jack-o-lantern faces. The 20-minute covered bake followed by 10 minutes uncovered is the sweet spot. If your peppers are on the smaller side, check them at 15 minutes covered.
Variations & Adaptations
One of the best things about this recipe is how flexible it is. Here are some variations I’ve tried and loved:
Vegetarian Version: Swap the ground beef for 1½ cups of cooked lentils or a 12-ounce package of plant-based crumbles. I use brown lentils cooked until tender, and they mimic the texture of ground meat beautifully. Add an extra ¼ teaspoon of smoked paprika to make up for the missing meaty flavor.
Spicy Southwest Style: Add 1 diced jalapeño (seeds removed if you want less heat) to the filling along with ½ cup of corn kernels and ½ cup of black beans. Replace the oregano with cumin and chili powder. Top with pepper jack cheese instead of mozzarella. This version is incredible for a Halloween party where adults want something with a kick.
Low-Carb/Keto Friendly: Skip the rice and use 1½ cups of riced cauliflower instead. I’ve tested this twice, and it works perfectly—just make sure to squeeze the excess moisture out of the cauliflower rice before adding it to the filling. Use full-fat cheese and ground beef with a higher fat content to keep it satisfying.
Italian-Inspired: Replace the tomato sauce with 1 cup of marinara sauce, add ½ teaspoon of dried basil, and use provolone or Parmesan cheese on top. This version tastes like a deconstructed stuffed pepper Italian-style. I made this for a Halloween dinner party and everyone asked for the recipe.
Make it a Freezer Meal: Assemble the stuffed peppers completely but don’t bake them. Place them in a freezer-safe dish, cover tightly with foil, and freeze for up to 3 months. To bake, thaw overnight in the refrigerator, then follow the baking instructions. I keep a batch in my freezer for those nights when Halloween sneaks up on me.
Serving & Storage Suggestions
These Jack-O-Lantern Stuffed Bell Peppers are a complete meal on their own, but here’s how I like to serve them for maximum Halloween vibes:
Serve the peppers warm, right out of the baking dish, with the little pepper hats perched on top. I arrange them on a platter lined with black or orange napkins for a festive look. For a full Halloween dinner, pair them with a simple side salad dressed with a tangy vinaigrette—the acidity cuts through the richness of the filling. Roasted broccoli or green beans also work well.
For beverages, a glass of red wine (like a Zinfandel or Merlot) complements the beef and tomato sauce beautifully. For kids, serve with “witches’ brew” (sparkling apple cider with a splash of cranberry juice).
Leftovers keep beautifully. Store any uneaten peppers in an airtight container in the refrigerator for up to 4 days. The flavors actually meld and deepen overnight, so they taste even better the next day. Reheat in the microwave for 1-2 minutes, or in a 350°F oven for 10 minutes if you want to maintain the pepper’s texture.
To freeze leftovers, wrap each pepper individually in plastic wrap, then place them in a freezer bag. They’ll keep for up to 3 months. Thaw in the refrigerator overnight and reheat in the oven. I wouldn’t recommend freezing them after baking if you can help it—the peppers get a bit mushy on thawing. It’s better to freeze them before baking as I mentioned above.
One thing I love about this recipe is that the peppers hold up surprisingly well for leftovers. The filling stays moist, and the jack-o-lantern faces remain visible even after reheating. My husband has been known to take cold peppers to work for lunch the next day—he says they’re delicious at room temperature.
Nutritional Information & Benefits
Here’s the approximate nutritional breakdown for one stuffed pepper (using 85/15 ground beef, white rice, and mozzarella cheese):
| Nutrient | Amount per Serving |
|---|---|
| Calories | 385 |
| Protein | 28g |
| Fat | 18g |
| Saturated Fat | 8g |
| Carbohydrates | 28g |
| Fiber | 5g |
| Sugar | 8g |
| Sodium | 680mg |
| Vitamin C | 190% DV |
| Vitamin A | 45% DV |
| Iron | 20% DV |
| Calcium | 15% DV |
One bell pepper provides more than 100% of your daily vitamin C needs—that’s more than an orange. The combination of protein from the meat and fiber from the peppers and rice makes this a satisfying meal that keeps you full for hours. If you’re watching your sodium, use low-sodium tomato sauce and reduce the added salt to ½ teaspoon.
This recipe is naturally gluten-free (just make sure your rice is certified gluten-free if needed). It’s also nut-free and egg-free, making it a safe option for many common allergies. For a dairy-free version, use vegan cheese or omit the cheese entirely—the filling is flavorful enough on its own.
Conclusion
These Jack-O-Lantern Stuffed Bell Peppers are proof that a simple twist can turn a family dinner into a Halloween tradition. They’re fun enough to make the kids giggle, delicious enough to satisfy the adults, and easy enough that you won’t dread making them on a busy October weeknight. Whether you’re serving them for a Halloween party, a spooky family dinner, or just because you want to eat something that looks like a pumpkin, this recipe delivers.
I love this recipe because it brings people together. There’s something about carving those little faces that makes everyone want to join in, and watching someone take their first bite of a pepper they helped design is pure joy. Plus, it’s a great way to get picky eaters to actually eat their vegetables—I mean, who can resist a food that’s literally smiling at you?
Now I want to hear from you. Have you tried making stuffed peppers with jack-o-lantern faces? What faces did you carve? Did your family love them as much as mine did? Drop a comment below and share your creations—I’d love to see photos of your pepper jack-o-lanterns. And if you have a variation that you think I should try, let me know. Until next time, happy cooking and happy Halloween!
Frequently Asked Questions
Can I use different colored bell peppers?
Technically yes, but orange peppers work best for the jack-o-lantern look. Red peppers turn a brownish color when baked, and yellow peppers just don’t have that same pumpkin glow. Green peppers are too bitter and don’t soften the same way. Stick with orange for the full Halloween effect.
How do I keep the peppers from tipping over in the baking dish?
This is a common issue. If your peppers are wobbly, trim a thin slice off the bottom—just enough to create a flat surface. Don’t cut through the bottom or the filling will leak out. You can also nestle them together in the dish so they support each other.
Can I make these in an air fryer?
Yes! Preheat your air fryer to 350°F. Place the stuffed peppers in the basket (you might need to do them in batches). Cook for 12-15 minutes, checking for doneness. The air fryer gives the peppers a slightly firmer texture, which I actually prefer. Just make sure your peppers fit without touching the heating element.
Why are my peppers still hard after baking?
Two possible reasons: either you didn’t blanch them long enough, or they needed more baking time. The blanching step is crucial—it starts the cooking process and ensures the peppers are tender by the time the filling is hot. If you skip blanching, increase the covered baking time by 10 minutes.
Can I use leftover filling for something else?
Absolutely! The filling is delicious on its own. I’ve used leftovers to make stuffed zucchini boats, as a topping for baked potatoes, or even as a quick pasta sauce. It also freezes beautifully for up to 3 months. Just store it in an airtight container and thaw when needed.
Pin This Recipe!
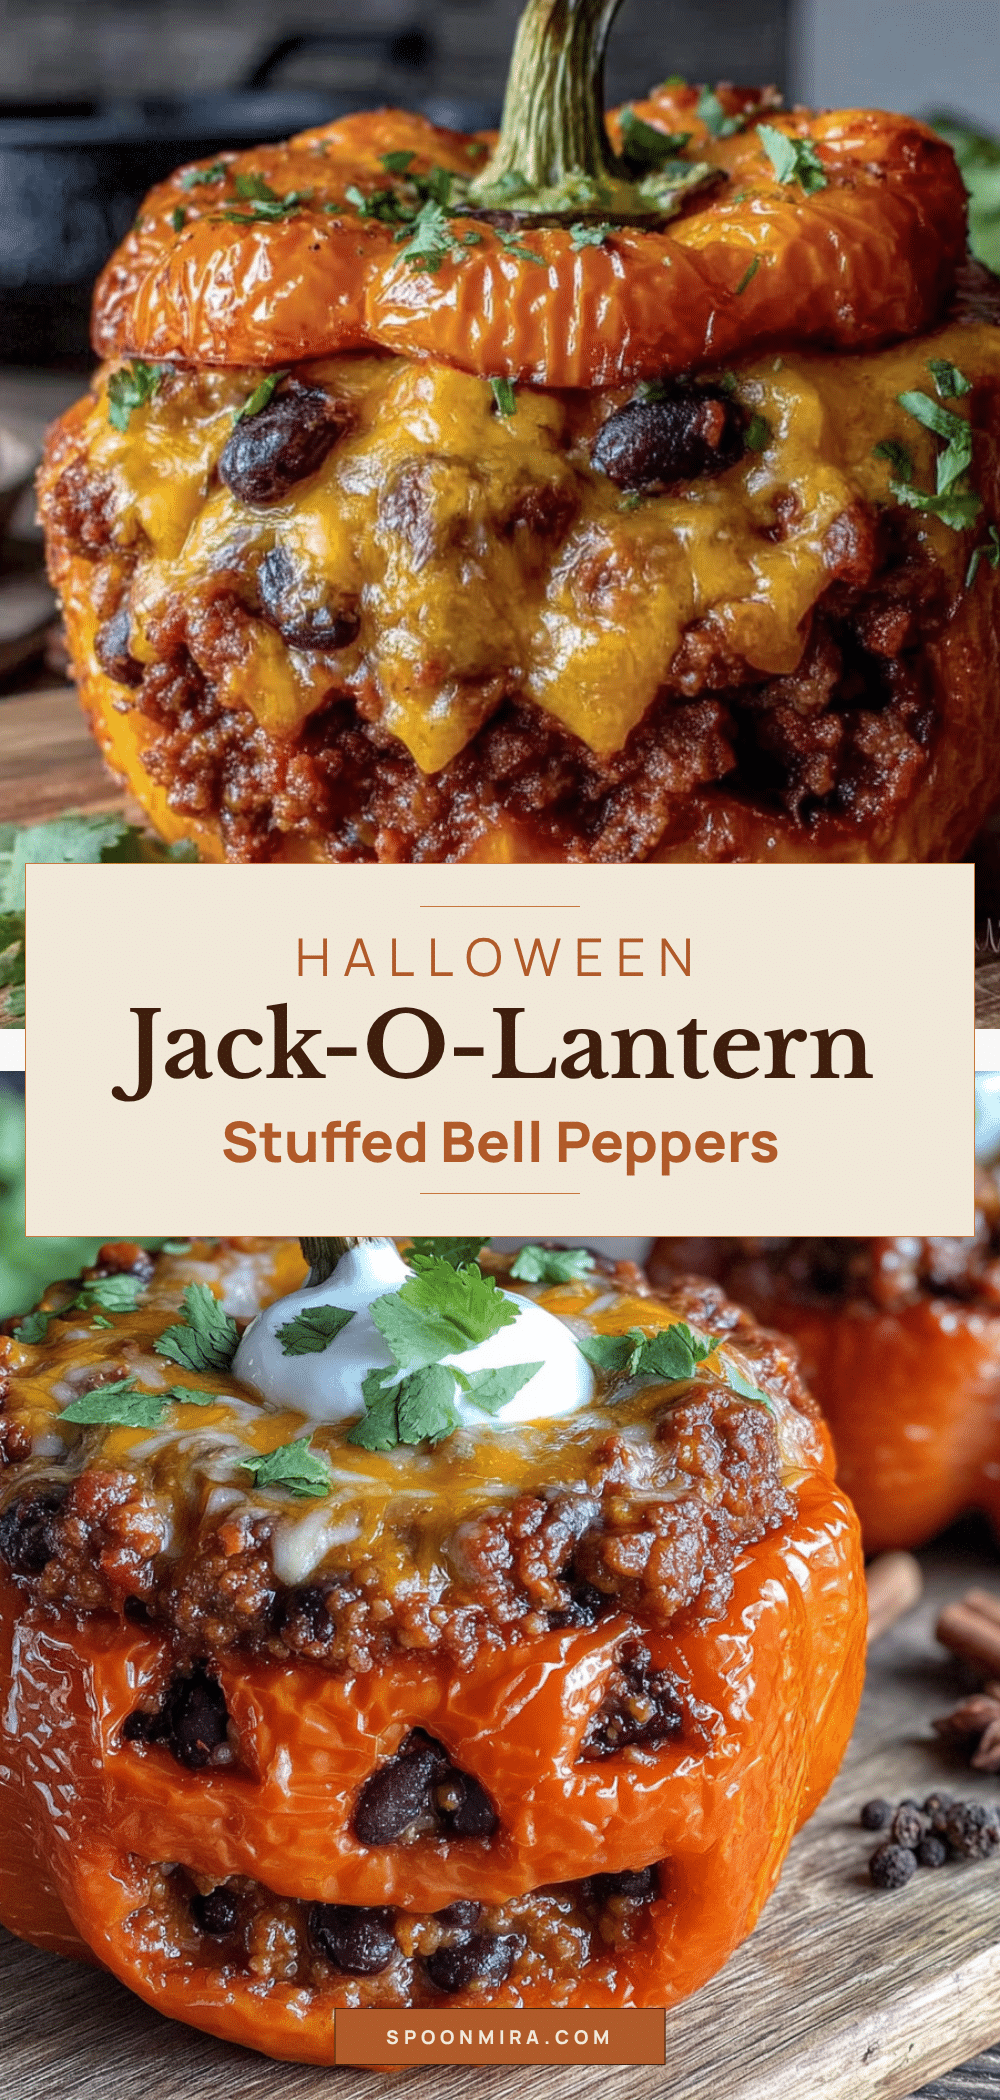
Best Easy Jack-O-Lantern Stuffed Bell Peppers Recipe
These Jack-O-Lantern Stuffed Bell Peppers are a fun Halloween twist on classic stuffed peppers. Carved like little pumpkins, they’re filled with a savory beef and rice mixture, topped with melted cheese, and baked to perfection—a family-friendly dinner that converts skeptics and delights kids.
- Prep Time: 15 minutes
- Cook Time: 30 minutes
- Total Time: 45 minutes
- Yield: 6 servings 1x
- Category: Main Course
- Cuisine: American
Ingredients
- 6 large orange bell peppers
- 1 pound ground beef (85/15)
- 1 cup cooked white rice
- 1 small onion, finely diced
- 2 cloves garlic, minced
- 1 can (15 ounces) tomato sauce
- 1 cup shredded mozzarella cheese
- 1 teaspoon dried oregano
- 1 teaspoon salt
- ½ teaspoon black pepper
- ½ teaspoon smoked paprika
- ½ cup finely chopped zucchini or mushrooms (optional)
Instructions
- Preheat your oven to 375°F (190°C). Bring a large pot of water to a boil.
- Wash and dry the orange bell peppers. Cut a small circle around the stem on top (about 1 inch in diameter) and pull out the stem to create a ‘hat.’ Scoop out seeds and membranes.
- Blanch the hollowed peppers in boiling water for exactly 2 minutes. Transfer to a paper towel-lined plate and let cool for 5 minutes.
- Using a sharp paring knife, carve triangle eyes and a jagged mouth into each pepper. Cut the mouth at least ½ inch wide to prevent closing during baking.
- In a large skillet over medium-high heat, cook the ground beef for 5-7 minutes until browned. Drain excess fat. Add diced onion and cook 2-3 minutes until softened. Add minced garlic and cook 30 seconds. If using zucchini or mushrooms, add and cook 2 more minutes.
- Reduce heat to low. Stir in cooked rice, tomato sauce, oregano, salt, pepper, and smoked paprika. Simmer 3-4 minutes. Remove from heat and stir in half of the shredded mozzarella cheese.
- Spoon the filling into each carved pepper, packing gently but firmly. Place stuffed peppers in a 9×13-inch baking dish. Sprinkle remaining mozzarella cheese on top. Place pepper ‘hats’ next to each pepper in the dish.
- Cover tightly with aluminum foil and bake for 20 minutes. Remove foil and bake for another 10 minutes until cheese is melted and bubbly. For browner cheese, broil for the last 2 minutes.
- Let peppers rest in the dish for 5 minutes before serving. Serve with pepper hats on top.
Notes
Choose squat, round orange bell peppers for best results. Don’t skip blanching—it softens the peppers for easier carving. Cut the mouth wider than you think to prevent it from closing during baking. For a vegetarian version, swap ground beef with 1½ cups cooked lentils or plant-based crumbles. To make ahead, assemble and refrigerate unbaked for up to 24 hours, then bake as directed. Freeze unbaked peppers for up to 3 months.
Nutrition
- Serving Size: 1 stuffed pepper
- Calories: 385
- Sugar: 8
- Sodium: 680
- Fat: 18
- Saturated Fat: 8
- Carbohydrates: 28
- Fiber: 5
- Protein: 28
Keywords: stuffed bell peppers, jack-o-lantern peppers, Halloween dinner, stuffed peppers recipe, ground beef recipe, fun dinner for kids, fall recipe


