There used to be a little bakery tucked between a laundromat and a used bookstore on the corner of Elm and 4th that made the most incredible pumpkin brownies. They weren’t just any pumpkin brownies—they had this perfect ribbon of cheesecake running through the middle, like someone had taken a paintbrush and carefully swirled gold into chocolate. When they closed their doors two years ago (the landlord raised the rent, the story goes), I honestly felt a little lost. I mean, I’d stop by every single Friday afternoon on my way home from work, and that little square of swirled perfection was my official “the weekend starts now” ritual.
After maybe twelve tries—some were too dry, some were too pumpkin-y, and one batch turned into a complete cheesecake-and-brownie muddle that I shame-ate over three days—I finally cracked the code. And let me tell you, this version is better than the original. It’s richer, the swirl is more defined, and you don’t have to leave your house or put on real pants to get one. The key was getting the brownie base right first—fudgy but sturdy enough to hold the cheesecake—and then treating the cream cheese mixture like it’s the star of the show, not just a backup dancer. You know that feeling when you take a bite and everything just clicks? That’s this recipe.
Maybe you’ve had your own version of this story—a bakery that closed, a grandma’s recipe that got lost, a café that changed their menu. That’s why I’m sharing this. Because good food shouldn’t disappear. It should get recreated, shared, and eaten on a Tuesday night with a cup of coffee while you finally sit down.
Why You’ll Love This Recipe
Look, I’ve tested a lot of pumpkin brownie recipes over the years. Some were overly complicated, requiring you to separate eggs and whip cream into stiff peaks. Others were so simple they tasted like boxed mix with a spoonful of pumpkin stirred in. This one hits the sweet spot—and I mean that literally.
- Quick & Easy: From start to oven in about 20 minutes. No stand mixer required. No weird techniques. If you can stir, you can make these.
- Simple Ingredients: You probably have most of this in your kitchen right now. The pumpkin puree and cream cheese are the only things you might need to grab, and both are available year-round at any grocery store.
- Perfect for Fall Baking: But honestly? I make these year-round. Pumpkin isn’t just for October. These brownies work for Thanksgiving dessert, bake sales, potlucks, or just a regular Wednesday.
- Crowd-Pleaser: I brought a batch to my neighbor’s barbecue last August (yes, August) and three people asked for the recipe before the burgers were even done. Kids love the chocolate, adults love the sophisticated swirl.
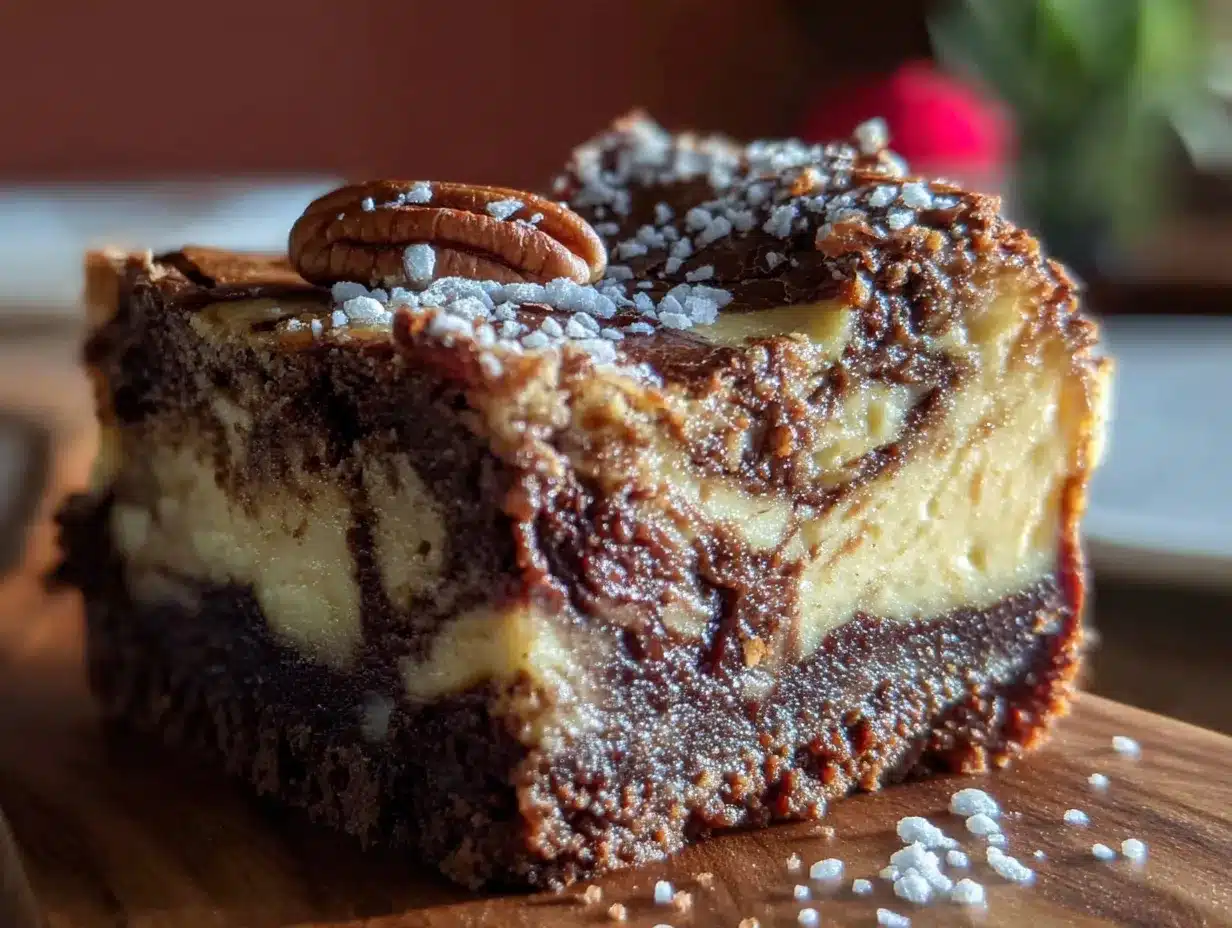
- Unbelievably Delicious: The brownie layer is deeply chocolatey with that signature crackly top. The cheesecake layer is tangy, creamy, and spiced just right. Together? It’s the kind of dessert that makes you close your eyes after the first bite.
What makes this recipe different from all the others out there is the technique. I spent weeks figuring out the perfect ratio of pumpkin to cream cheese so the swirl stays distinct and doesn’t just blend into a muddy mess. The brownie base uses melted butter instead of oil for a richer flavor, and a tiny bit of instant espresso powder (trust me on this) that doesn’t make it taste like coffee at all—it just makes the chocolate taste more like chocolate. Plus, I swapped out some of the sugar in the cheesecake layer for a touch of maple syrup, which adds a subtle warmth that pairs perfectly with the pumpkin spice.
This recipe isn’t just good—it’s the kind of dessert that makes people think you spent hours in the kitchen when you really didn’t. It’s comfort food reimagined: familiar enough to feel nostalgic, but special enough to feel like an occasion.
What Ingredients You Will Need
This recipe uses simple, pantry-friendly ingredients to deliver that perfect balance of rich chocolate, creamy cheesecake, and warm pumpkin spice. Nothing fancy here—just smart combinations that work.
For the Brownie Layer
- Unsalted butter – ½ cup (113g), melted and slightly cooled. I use Challenge or Kerrygold for the best flavor.
- Granulated sugar – 1 cup (200g). Regular white sugar gives the brownies that crackly top.
- Large eggs – 2, at room temperature. Cold eggs can seize the melted butter.
- Vanilla extract – 1 teaspoon. Pure, not imitation, if you can swing it.
- All-purpose flour – ¾ cup (96g). Spoon and level it—don’t scoop directly from the bag.
- Unsweetened cocoa powder – ⅓ cup (40g). I prefer Dutch-process for a deeper color, but natural works fine too.
- Salt – ½ teaspoon. Balances the sweetness.
- Baking powder – ¼ teaspoon. Just enough for a little lift.
- Instant espresso powder – ½ teaspoon (optional but highly recommended). You won’t taste coffee, I promise.
For the Pumpkin Cheesecake Swirl
- Cream cheese – 8 ounces (226g), softened to room temperature. Full-fat is non-negotiable here for the best texture.
- Granulated sugar – ¼ cup (50g).
- Maple syrup – 2 tablespoons. Real maple syrup, not pancake syrup. Adds a subtle warmth.
- Pumpkin puree – ½ cup (120g). Not pumpkin pie filling—make sure it’s 100% pure pumpkin. Libby’s is my go-to.
- Large egg yolk – 1, at room temperature. Adds richness and helps the swirl set properly.
- Vanilla extract – ½ teaspoon.
- Pumpkin pie spice – 1 teaspoon. Or make your own: ½ teaspoon cinnamon, ¼ teaspoon ginger, ⅛ teaspoon nutmeg, ⅛ teaspoon cloves.
- Cinnamon – ¼ teaspoon extra, because I like a little more warmth.
Ingredient Selection Tips: For the cream cheese, Philadelphia is the gold standard—it has the right fat content and stabilizers for a smooth swirl. Avoid low-fat or whipped versions, which can make the cheesecake layer watery. For the pumpkin puree, look for a brand that lists only pumpkin as the ingredient. Some store brands can be a bit watery; if yours seems thin, pat it gently with a paper towel before measuring.
Substitution Guidance: If you’re dairy-free, you can try a plant-based cream cheese (Miyoko’s works best), but the texture will be slightly softer. For a gluten-free version, swap the all-purpose flour with a 1:1 gluten-free baking blend that contains xanthan gum. And if you don’t have maple syrup, just use an extra 2 tablespoons of granulated sugar in the cheesecake layer instead.
Equipment Needed
- 8×8-inch square baking pan – Glass, ceramic, or metal all work. I prefer metal for more even browning.
- Parchment paper – For easy lifting and clean removal. Don’t skip this.
- Mixing bowls – One medium for the brownie batter, one small for the cheesecake swirl.
- Whisk – For the brownie batter. A wooden spoon or spatula works too, but whisking incorporates air better.
- Hand mixer or stand mixer – For the cream cheese mixture. A whisk and some elbow grease will also work, but it takes a minute.
- Spatula – Rubber or silicone for scraping bowls clean.
- Butter knife or skewer – For creating the swirl pattern. A toothpick works for smaller swirls.
- Measuring cups and spoons – Accurate measurements matter in baking.
- Cooling rack – So the bottom of the pan doesn’t stay hot and continue cooking the brownies.
Don’t have an 8×8 pan? A 9×9 will work, but the brownies will be slightly thinner and may bake a few minutes faster. Just check them at the 22-minute mark. No parchment paper? You can grease the pan well with butter and dust it with cocoa powder instead of flour to avoid white spots on the brownies.
Preparation Method
Preheat your oven to 350°F (175°C). Line your 8×8 baking pan with parchment paper, leaving an overhang on two opposite sides. This creates handles for lifting the brownies out later. Lightly grease the parchment with cooking spray or butter.
- Make the brownie batter. In a medium mixing bowl, pour the melted butter and add the granulated sugar. Whisk them together until well combined—it’ll look a bit grainy, that’s normal. Add the eggs one at a time, whisking vigorously after each addition until the mixture is smooth and glossy. Stir in the vanilla extract. In a separate small bowl, whisk together the flour, cocoa powder, salt, baking powder, and instant espresso powder. Add the dry ingredients to the wet ingredients and fold gently with a spatula until just combined. Don’t overmix—a few streaks of flour are okay. The batter will be thick and fudgy.
- Make the pumpkin cheesecake swirl. In a small bowl, beat the softened cream cheese with a hand mixer (or by hand with a wooden spoon) until smooth and creamy with no lumps. Add the granulated sugar and beat until incorporated. Add the maple syrup, pumpkin puree, egg yolk, vanilla extract, pumpkin pie spice, and extra cinnamon. Beat until everything is smooth and uniform. The mixture should be thick but spreadable—if it looks too runny, your cream cheese might have been too soft or your pumpkin puree was watery.
- Assemble the layers. Spread about two-thirds of the brownie batter into the prepared pan. It will seem like a thin layer—that’s okay. Use a spatula to spread it evenly all the way to the edges. Now spoon the pumpkin cheesecake mixture on top of the brownie layer, spreading it gently into an even layer. Drop the remaining brownie batter in small spoonfuls over the cheesecake layer. Don’t worry if it doesn’t cover everything—you want some gaps.
- Create the swirl. Take a butter knife or a skewer and drag it through the layers in a figure-eight pattern. Start at one end and work your way across the pan. Don’t over-swirl! About 6-8 passes is plenty. Too much swirling and the layers will blend together and you’ll lose that beautiful contrast. You want distinct ribbons of cheesecake and brownie.
- Bake. Place the pan in the preheated oven and bake for 30-35 minutes. The edges should look set and the top should be slightly puffed and crackled. A toothpick inserted into the center should come out with a few moist crumbs—not wet batter. The cheesecake part might still jiggle slightly; that’s fine, it will set as it cools.
- Cool completely. This is the hardest part. Let the brownies cool in the pan on a wire rack for at least 1 hour, then transfer to the refrigerator and chill for another 2 hours minimum. I know you want to eat them now, but the cheesecake layer needs time to set properly. Warm brownies with cheesecake swirl are a gooey mess. Cold brownies with cheesecake swirl are a work of art.
- Slice and serve. Use the parchment overhang to lift the entire block of brownies out of the pan onto a cutting board. Use a sharp knife to slice into 16 squares. For clean cuts, wipe the knife clean between each slice with a damp paper towel.
Cooking Tips & Techniques
Let me save you from my own mistakes. The first time I made these, I was impatient and skipped the chilling step. The result? A delicious but structurally tragic puddle of brownie-cheesecake soup that looked like a crime scene. The swirl was completely gone—just a sad, muddy beige. Learn from my impatience.
The temperature of your ingredients matters. Cold cream cheese creates lumps that no amount of beating will fix. Leave it on the counter for at least 30 minutes before you start. Same with the eggs—if you forget to take them out, place them in a bowl of warm water for 5 minutes. Room temperature ingredients emulsify better and give you a smoother, creamier cheesecake layer.
Don’t overmix the brownie batter. I know it’s tempting to keep stirring until it’s perfectly smooth, but overmixing develops the gluten and gives you cakey, tough brownies instead of fudgy ones. Stop as soon as you don’t see any more streaks of flour. A few lumps are fine—they’ll bake out.
The swirl is an art, not a science. Here’s the trick I learned after that first muddy disaster: use a light hand. You’re not trying to mix the two layers together—you’re just trying to create a pattern. Think of it like marbleizing. Drag the knife through in long, slow strokes. If you’re aggressive, the layers blend. If you’re gentle, they stay distinct.
Multitasking strategy: While the brownie batter is resting (it doesn’t really need to rest, but you can let it sit while you make the cheesecake layer), get your cream cheese softening. By the time you’ve mixed the brownie batter, the cream cheese should be ready to go. This saves you about 10 minutes of waiting.
For consistent results every time, use a kitchen scale for your dry ingredients. Flour is notoriously tricky to measure by volume—one person’s “cup” can be 20% more than another’s. Weighing eliminates the guesswork and ensures your brownies turn out the same way every single time.
Variations & Adaptations
One of the best things about this recipe is how flexible it is. I’ve made it at least a dozen different ways depending on what I have in the pantry or who I’m feeding.
Gluten-Free Version: Swap the all-purpose flour with a 1:1 gluten-free baking blend that contains xanthan gum. I’ve used Bob’s Red Mill and King Arthur Measure for Measure with great results. The texture is slightly more delicate, so let them cool completely before slicing.
Dairy-Free Version: Use a high-quality vegan butter (Miyoko’s or Earth Balance) in the brownie base and a plant-based cream cheese for the swirl. Miyoko’s cream cheese works best—it has the right tang and consistency. The texture will be a bit softer, so refrigerate for at least 3 hours before slicing.
Extra Chocolate Lover’s Version: Fold ½ cup of semi-sweet chocolate chips into the brownie batter before layering. The pockets of melted chocolate add another dimension of richness. I did this for a friend’s birthday and she said it was the best brownie she’d ever had.
Spiced Pumpkin Version: Double the pumpkin pie spice in the cheesecake layer and add ¼ teaspoon of cardamom. The cardamom adds this unexpected floral note that pairs beautifully with the pumpkin. This is my personal favorite for Thanksgiving.
Nutty Twist: Sprinkle ¼ cup of toasted pecans or walnuts over the top of the brownies before baking. The crunch contrasts nicely with the creamy swirl. Just make sure the nuts are finely chopped so they don’t interfere with the swirl pattern.
White Chocolate Pumpkin: Melt ¼ cup of white chocolate chips and drizzle it over the cooled brownies. The sweetness of the white chocolate plays off the tangy cheesecake and rich brownie beautifully. This one looks especially pretty on a dessert platter.
Serving & Storage Suggestions
These brownies are best served cold, straight from the refrigerator. The cheesecake layer is firm and creamy, the brownie layer is dense and fudgy, and the flavors have had time to meld together. If you prefer a softer texture, let them sit at room temperature for about 10 minutes before serving. I like to cut them into small squares—about 2 inches each—because they’re rich enough that a little goes a long way.
Presentation ideas: For a pretty dessert plate, dust the brownies with a light sprinkle of powdered sugar and add a small dollop of whipped cream on the side. A few fresh cranberries or a cinnamon stick make a nice fall-themed garnish. For a holiday platter, arrange them on a white serving dish with some fresh rosemary sprigs and dried orange slices.
What to serve with them: A cup of hot coffee or spiced chai is the obvious choice, and it’s perfect. For a dessert spread, pair them with vanilla ice cream or a salted caramel sauce. They also go surprisingly well with a glass of cold milk—sometimes simple is best.
Storage instructions: Store leftover brownies in an airtight container in the refrigerator for up to 5 days. The flavors actually get better on day two, as the pumpkin and chocolate have time to meld. I always make these a day ahead if I’m serving them for a gathering.
Freezing instructions: These freeze beautifully. Wrap individual brownie squares tightly in plastic wrap, then place them in a freezer-safe bag or container. They’ll keep for up to 3 months. To thaw, transfer to the refrigerator overnight or let sit at room temperature for about 30 minutes. I always keep a stash in the freezer for unexpected guests or late-night cravings.
Reheating tips: I don’t recommend microwaving these—it melts the cheesecake layer and makes everything soggy. If you want them warm, place them in a 300°F oven for 5-7 minutes, then let them cool for a minute before eating. The edges get slightly crisp while the center stays soft.
Flavor development note: The pumpkin spice flavor becomes more pronounced after a day or two in the fridge. If you’re making these for a special occasion, prepare them 24 hours in advance for the best flavor.
Nutritional Information & Benefits
Per brownie (based on 16 servings): Approximately 220 calories, 12g fat, 28g carbohydrates, 3g protein, 18g sugar, 1g fiber. These are estimates and will vary based on specific ingredients used.
Health highlights: Pumpkin is packed with vitamin A (over 200% of your daily needs per cup) and is a great source of fiber and antioxidants. The cream cheese provides calcium and protein, while the cocoa powder is rich in flavonoids that support heart health. Yes, these are still a treat, but there’s some nutritional value hiding in that delicious swirl.
Dietary considerations: This recipe contains gluten, dairy, and eggs. For gluten-free and dairy-free adaptations, see the variations section above. The brownies are nut-free as written (unless you add the pecan variation), making them a good option for school bake sales.
My perspective: I believe dessert should be enjoyed without guilt. These brownies aren’t health food, but they’re made with real ingredients—butter, eggs, cream cheese, pumpkin—which is a lot better than anything that comes from a box with ingredients you can’t pronounce. One brownie is a perfectly reasonable indulgence. Two is a celebration. No judgment here.
Conclusion
These Easy Pumpkin Cheesecake Swirl Brownies are everything I loved about that little bakery on Elm Street, only better because I can make them in my own kitchen whenever the craving hits. They’re rich, they’re beautiful, and they taste like fall in the best possible way. The brownie base is fudgy and deeply chocolatey, the cheesecake swirl is creamy and spiced just right, and together they create something that’s greater than the sum of its parts.
I hope you’ll try these and make them your own—maybe add extra cinnamon, swap in dark chocolate, or double the pumpkin layer. That’s the beauty of baking: once you have a solid base recipe, the possibilities are endless. And if you do make them, I’d love to hear about it. Drop a comment below and tell me how they turned out, or share a photo on Pinterest and tag me. Honestly, seeing your creations is my favorite part of this whole recipe-sharing thing.
Go ahead, preheat that oven. Your new favorite fall dessert is waiting.
Frequently Asked Questions
Can I use pumpkin pie filling instead of pumpkin puree?
No, please don’t. Pumpkin pie filling is already sweetened and spiced, which will throw off the sugar and spice balance in the cheesecake layer. Stick with 100% pure pumpkin puree. If you accidentally bought pie filling, save it for making actual pumpkin pie.
Why did my cheesecake swirl disappear into the brownie?
This usually happens for one of two reasons: either you over-swirled (more than 8 passes with the knife), or your cheesecake layer was too warm and thin. Make sure your cream cheese is softened but not runny, and use a light hand when swirling. Less is more.
Can I make these brownies in a 9×13 pan?
Yes, but you’ll need to double the recipe. A 9×13 pan has about twice the surface area of an 8×8 pan. Bake time will be similar—start checking at 28 minutes. The brownies will be thinner, so they may bake a little faster.
How do I know when the brownies are done baking?
The edges should look set and slightly pulling away from the pan. The top should have that classic crackly brownie appearance. A toothpick inserted into the center (avoiding the cheesecake layer if possible) should come out with a few moist crumbs. If it comes out wet with batter, bake for another 3-5 minutes.
Can I skip the chilling step?
Technically yes, but I strongly recommend against it. Warm cheesecake swirl is soft and messy, and your brownies will fall apart when you try to cut them. Chilling for at least 2 hours allows the cream cheese to firm up so you get clean, beautiful slices. Trust me on this one—I learned the hard way.
Pin This Recipe!
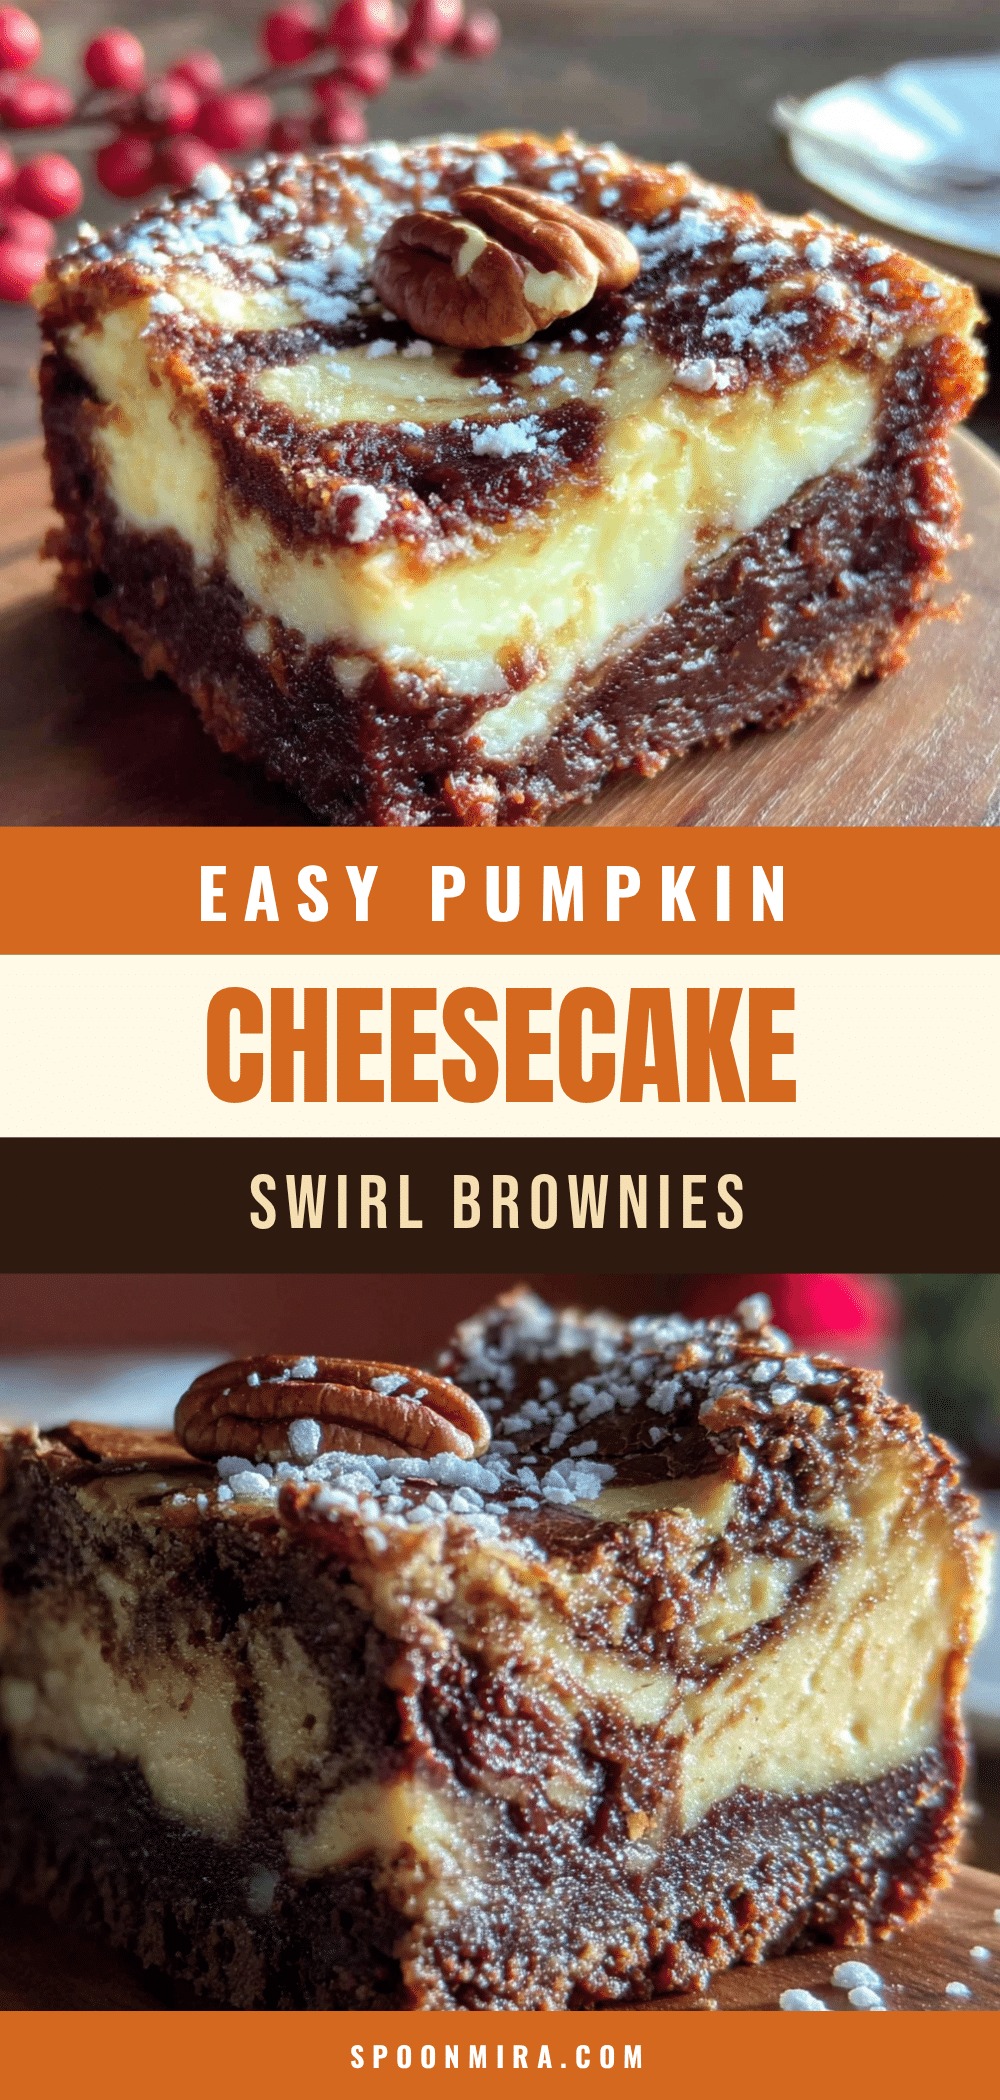
Best Easy Pumpkin Cheesecake Swirl Brownies Recipe
Fudgy brownies with a creamy pumpkin cheesecake swirl, inspired by a beloved bakery recipe. This easy fall dessert features a rich chocolate base and a perfectly spiced cheesecake layer for a stunning and delicious treat.
- Prep Time: 20 minutes
- Cook Time: 30-35 minutes
- Total Time: 2 hours 50 minutes (includes chilling)
- Yield: 16 servings 1x
- Category: Dessert
- Cuisine: American
Ingredients
- ½ cup (113g) unsalted butter, melted and slightly cooled
- 1 cup (200g) granulated sugar
- 2 large eggs, at room temperature
- 1 teaspoon vanilla extract
- ¾ cup (96g) all-purpose flour
- ⅓ cup (40g) unsweetened cocoa powder (Dutch-process preferred)
- ½ teaspoon salt
- ¼ teaspoon baking powder
- ½ teaspoon instant espresso powder (optional)
- 8 ounces (226g) cream cheese, softened to room temperature
- ¼ cup (50g) granulated sugar
- 2 tablespoons real maple syrup
- ½ cup (120g) pumpkin puree (not pumpkin pie filling)
- 1 large egg yolk, at room temperature
- ½ teaspoon vanilla extract
- 1 teaspoon pumpkin pie spice
- ¼ teaspoon ground cinnamon
Instructions
- Preheat oven to 350°F (175°C). Line an 8×8-inch baking pan with parchment paper, leaving overhang on two sides. Lightly grease the parchment.
- Make the brownie batter: In a medium bowl, whisk together melted butter and 1 cup sugar until combined. Add eggs one at a time, whisking vigorously after each. Stir in 1 teaspoon vanilla. In a separate bowl, whisk together flour, cocoa powder, salt, baking powder, and espresso powder. Fold dry ingredients into wet until just combined (do not overmix).
- Make the pumpkin cheesecake swirl: In a small bowl, beat softened cream cheese until smooth. Add ¼ cup sugar and beat until incorporated. Add maple syrup, pumpkin puree, egg yolk, ½ teaspoon vanilla, pumpkin pie spice, and cinnamon. Beat until smooth and uniform.
- Assemble: Spread about two-thirds of the brownie batter into the prepared pan. Spoon the pumpkin cheesecake mixture on top and spread evenly. Drop remaining brownie batter in small spoonfuls over the cheesecake layer.
- Create the swirl: Using a butter knife or skewer, drag through the layers in a figure-eight pattern, making 6-8 passes. Do not over-swirl.
- Bake for 30-35 minutes, until edges are set and top is crackled. A toothpick inserted into the center should come out with moist crumbs.
- Cool completely in the pan on a wire rack for 1 hour, then refrigerate for at least 2 hours (or overnight) before slicing.
- Use parchment overhang to lift brownies out. Slice into 16 squares with a sharp knife, wiping clean between cuts.
Notes
For best results, chill brownies for at least 2 hours before slicing to allow the cheesecake layer to set. Use room temperature ingredients for a smooth swirl. Do not over-swirl—6-8 passes is enough. Brownies can be stored in an airtight container in the refrigerator for up to 5 days, or frozen for up to 3 months.
Nutrition
- Serving Size: 1 brownie (1/16 of r
- Calories: 220
- Sugar: 18
- Sodium: 150
- Fat: 12
- Saturated Fat: 7
- Carbohydrates: 28
- Fiber: 1
- Protein: 3
Keywords: pumpkin brownies, cheesecake swirl brownies, fall dessert, pumpkin cheesecake, easy brownie recipe, chocolate pumpkin


