My niece walked into the kitchen while I was pulling pretzel rods out of the oven, and she froze mid-step. Her eyes went wide, and she whispered, “Auntie, your fingers fell off.” That’s when I knew I was onto something good. I had a bag of pretzel rods, some leftover almond slivers from making a batch of creamy overnight oats with brown sugar cinnamon and toasted almonds, and a vague memory of a Halloween snack I’d seen online years ago. The pretzels were meant to be a quick after-school snack, but suddenly they looked like something else entirely. Long, knobby, slightly twisted — add a little almond at the tip and you’ve got a witch’s finger staring back at you.
I dipped the first one in melted green candy coating, pressed an almond sliver onto the end for the nail, and let it set on parchment paper. When I bit into it, the crunch was perfect. Salty pretzel, sweet coating, nutty finish. My niece demanded I make a whole batch for her classroom Halloween party. And honestly? I couldn’t say no. There’s something about food that looks a little gross but tastes amazing that hits different for kids (and let’s be real, for adults too). These spooky witch finger pretzel rods are exactly that kind of treat — creepy looking, but absolutely delicious.
They’re the kind of snack that makes people do a double-take before grinning and grabbing one. The green coating gives them that eerie, witchy vibe, and the almond nail adds just enough realism to be unsettling. But the flavor? Pure comfort. Salty-sweet, crunchy, and dangerously snackable. I’ve made these for three Halloweens now, and they never last more than an hour on the snack table. They’re simple enough for kids to help with, fun enough to be the centerpiece of a Halloween spread, and easy enough that you won’t stress yourself out during the holiday chaos. This recipe stuck because it’s not just cute — it’s genuinely good.
Why You’ll Love This Recipe
These spooky witch finger pretzel rods check every box for a Halloween treat. They’re fun to make, fun to eat, and impossible to resist. Here’s why they’ll become your go-to holiday snack:
- Quick & Easy : From start to finish, you’re looking at about 20 minutes of active time. The candy coating sets in under 15 minutes, so you can whip up a batch between trick-or-treaters.
- Simple Ingredients : Pretzel rods, candy melts, and almond slivers. That’s it. No weird specialty items, no last-minute grocery store runs for obscure decorations.
- Perfect for Halloween Parties : Whether it’s a classroom celebration, a costume party, or just a spooky movie night at home, these fit right in. They’re portable, mess-free, and visually striking.
- Crowd-Pleaser : I’ve watched kids grab these over full-sized candy bars. The combination of salty pretzel and sweet coating hits that universal snack craving.
- Unbelievably Delicious : The texture is what gets people. That initial crunch of the candy shell gives way to the dense, salty pretzel, and then the almond adds a buttery finish. It’s way more satisfying than a plain candy bar.
What makes these different from other Halloween treats is the attention to detail. The almond isn’t just stuck on randomly — it’s positioned to look like a real fingernail, complete with a little ridge where it meets the “skin.” I use a toothpick to create knuckle wrinkles before the coating sets. It’s those small touches that make people stop and say, “Wait, that’s actually creepy.” And isn’t that the whole point of Halloween?
This recipe is the kind that makes you feel like a holiday hero without spending hours in the kitchen. It’s comfort food reimagined — spooky, but with the same soul-soothing satisfaction as a warm pretzel from the mall. Perfect for impressing guests without stress, or turning a simple snack into something memorable.
What Ingredients You Will Need
This recipe uses just three main ingredients, plus a tiny bit of oil for thinning the coating. The beauty is in the simplicity — each component plays a specific role in creating that creepy, delicious result.
For the Pretzel Base:
- Pretzel rods (1 standard 12-ounce bag, about 12-15 rods) — Look for thick, sturdy rods that won’t break easily during dipping. I prefer Snyder’s of Hanover for their consistent shape and salt distribution. The saltier the pretzel, the better the contrast with the sweet coating.
- Almond slivers (about 30-40 pieces) — These become the fingernails. You want slivers that are flat on one side and slightly curved on the other, which mimics the natural shape of a nail. I use Blue Diamond brand because they’re consistently sized and don’t have broken edges.
For the Coating:
- Green candy melts (12 ounces, about 2 cups) — The green color is essential for that witchy, sickly skin tone. Wilton brand green candy melts give the best color payoff without needing additional food coloring. If you can only find white candy melts, you can add green gel food coloring to achieve the same effect.
- Coconut oil or vegetable shortening (1 teaspoon) — This thins the candy coating so it coats the pretzels evenly without clumping. Don’t skip this — straight candy melts are too thick and will give you lumpy, uneven fingers.
For Decoration (Optional but Recommended):
- Black gel food coloring (small tube) — For creating knuckle wrinkles and nail beds. A little goes a long way.
- Edible glitter or luster dust (optional) — Gives the fingers a slightly magical, sparkly finish that catches the light. Kids love this.
Ingredient Selection Tips:
When choosing pretzel rods, avoid the thin, fragile ones that snap in half when you dip them. You want rods that feel substantial in your hand. The thicker ones also look more realistic as fingers. For the almonds, look for slivers that are roughly the same size and shape — you’ll want them to look uniform when placed on the pretzel tips. If your almond slivers are too small, they’ll look like broken nails instead of witchy talons.
Substitution Guidance:
If you can’t find green candy melts, use white chocolate chips or vanilla candy coating and add green gel food coloring until you reach the desired shade. Start with a drop, mix thoroughly, and add more until it looks appropriately eerie. For a dairy-free version, use vegan white chocolate chips and coconut oil. Almond slivers can be replaced with whole almonds cut in half lengthwise, though they won’t have the same flat, nail-like shape. If you’re nut-free, use sliced dried apricots or banana chips trimmed to shape — they give a similar visual effect with a different texture.
Equipment Needed
You don’t need fancy kitchen tools for this recipe. Most of what you need is probably already in your kitchen drawers.
- Microwave-safe bowl (medium size) — For melting the candy coating. Glass or ceramic works best; plastic can retain heat unevenly.
- Parchment paper or silicone baking mat — The coated pretzels need a non-stick surface to set on. Wax paper can work in a pinch, but parchment is more reliable.
- Baking sheet — To hold the parchment paper and give the pretzels a stable surface while they set.
- Toothpicks or small skewers — For creating knuckle wrinkles and adjusting almond placement. A toothpick is also useful for removing air bubbles from the coating.
- Spatula or butter knife — For spreading the coating if you’re not dipping the pretzels fully.
- Small piping bag or zip-top bag — For adding detail lines if you want extra creepy knuckles or nail beds.
- Tweezers — This sounds silly, but tweezers make placing the almond slivers much easier, especially if you’re making a large batch. Your fingers will get sticky otherwise.
Budget-Friendly Options:
If you don’t have a piping bag, a sandwich bag with a tiny corner snipped off works perfectly. No baking sheet? A cutting board covered in parchment paper does the job. And if you don’t have tweezers, clean your hands thoroughly and use your fingers — just work quickly before the coating sets.
Maintenance Tip:
If you use a silicone baking mat, wash it immediately after use. Candy coating can leave a residue that’s hard to remove once fully set. Hot water and dish soap does the trick, but don’t use abrasive scrubbers — they’ll damage the silicone surface.
Preparation Method

This recipe comes together fast, so I recommend setting up all your ingredients and tools before you start melting anything. Once the coating is melted, you want to work quickly before it starts to thicken.
- Prepare your workspace. Line a baking sheet with parchment paper or a silicone mat. Arrange your pretzel rods in a single layer nearby. Have your almond slivers in a small bowl within easy reach. If you’re using tweezers, keep them handy. This setup takes two minutes and saves you from frantically searching for things with melted candy on your hands.
- Melt the candy coating. Place the green candy melts in a microwave-safe bowl. Microwave in 30-second intervals at 50% power, stirring thoroughly between each interval. This prevents the coating from burning or seizing. After about 2 minutes total, the coating should be mostly melted with a few small lumps. Stir until completely smooth. Add 1 teaspoon of coconut oil or shortening and stir again. The coating should be thin enough to coat a pretzel rod evenly but thick enough to cling without dripping off. If it’s too thick, add another ½ teaspoon of oil. If it’s too thin, let it sit for a minute to cool and thicken slightly.
- Dip the pretzel rods. Hold a pretzel rod by one end and dip the other two-thirds into the melted coating. Gently twist as you pull it out to allow excess coating to drip back into the bowl. You want a thin, even layer — not a thick, gloppy one. The coating should cover about ¾ of the pretzel, leaving the top end bare so it looks like a wrist or the base of a finger. Place the dipped pretzel on the parchment paper. Repeat with the remaining pretzels, working in batches of 3-4 at a time so the coating doesn’t set before you add the almond.
- Attach the almond nails. While the coating is still wet, press an almond sliver onto the tip of the dipped end. The flat side of the almond should face up, and the pointed end should extend slightly past the pretzel tip — like a fingernail growing past the fingertip. Press gently but firmly so the almond adheres. Position it so it looks natural, with a slight curve matching the shape of a real nail. If the coating has started to set, dip the almond sliver in the melted coating before pressing it onto the pretzel — this helps it stick.
- Create knuckle wrinkles. Working quickly before the coating sets completely, use a toothpick to draw horizontal lines across the pretzel at intervals that look like knuckles. Make 2-3 lines per pretzel, spaced about an inch apart. Press firmly enough to create a visible indent but not so hard that you break through the coating. These small details make a huge difference in the final look. If you want extra creepy results, add a few tiny dots along the knuckle lines to look like joint creases.
- Add nail bed details (optional). Using a toothpick dipped in black gel food coloring, draw a thin crescent shape at the base of each almond sliver. This creates the illusion of a nail bed and makes the almond look more like a real fingernail. You can also add a thin line along the edge of the almond where it meets the pretzel to define the cuticle area. This step is purely aesthetic but takes the creep factor from “cute” to “genuinely unsettling.”
- Let the coating set. Allow the pretzels to sit at room temperature until the coating is completely firm. This takes about 10-15 minutes depending on the temperature of your kitchen. Don’t rush this by putting them in the refrigerator — condensation can form on the coating and make it look dull or streaky. If you’re in a hurry, a cool, dry area works best.
- Add final touches. Once the coating is set, you can add edible glitter for a magical finish. Lightly brush luster dust over the knuckle areas to give them a slightly aged, wrinkled appearance. This is entirely optional but adds a professional touch that makes the pretzels look like they came from a specialty bakery.
Cooking Tips & Techniques
I’ve made these spooky witch finger pretzel rods more times than I care to count, and I’ve learned a few things the hard way. Here’s what I wish someone had told me before my first batch.
Temperature matters. Candy coating is finicky about heat. If you melt it at full power, it can seize up and turn into a grainy, unusable mess. Always use 50% power and stir frequently. If the coating does seize, add a teaspoon of coconut oil and stir vigorously — sometimes you can save it. But honestly, it’s better to start fresh than to fight with seized coating.
Work in small batches. Don’t dip all the pretzels at once. The coating starts to set after about 2-3 minutes, and you need it wet to attach the almonds and create knuckle details. Dip 3-4 pretzels, add their almonds, draw their knuckles, then move to the next batch. This keeps everything looking fresh and prevents the coating from hardening before you’re done decorating.
Watch the almond placement. The first time I made these, I pressed the almonds too far onto the pretzel, and they looked like weird, flat toes instead of witchy fingers. The almond should extend slightly past the tip of the pretzel — about ¼ inch is perfect. Think of how your own fingernails extend past your fingertips. That’s the look you’re going for.
Don’t skip the oil. I made the mistake of using straight candy melts once, and the coating was so thick that it looked like I’d dipped the pretzels in play-doh. The coconut oil or shortening thins the coating just enough to give you a smooth, even finish. It also helps the coating adhere to the pretzel without cracking later.
Multitasking strategy. While the first batch of coated pretzels is setting, start melting the next round of coating if you’re making a large batch. The coating can be reheated in 15-second bursts to keep it liquid. Just don’t overheat it — repeated microwaving can change the texture.
Common mistake to avoid. Don’t use too much coating. A thick layer looks lumpy and artificial, plus it takes forever to set. You want a thin, even coat that lets the pretzel shape show through. Think of it as a sheer stocking, not a winter sock.
Variations & Adaptations
One of the best things about this recipe is how easy it is to customize. I’ve tried several variations over the years, and each one brings something different to the table.
Witch Finger Colors: Green is classic, but you can use any color that fits your Halloween theme. Purple candy melts give a bruised, zombie-like look. Orange works for a more playful, pumpkin-spice vibe. White coating with red drips makes them look like bloody fingers — perfect for a gory horror movie night. I once made a batch with black coating and silver luster dust, and they looked like something from a gothic fantasy novel.
Different Nail Options: Almond slivers are my go-to, but you can experiment. Sunflower seeds work for smaller, more delicate nails. Pistachios give a greenish tint that matches the witch theme. For a truly creepy effect, use whole blanched almonds and paint them with red food coloring before attaching — they look like bloody, broken nails. If you’re making these for a nut-free classroom, use trimmed banana chips or dried apple slices cut into nail shapes.
Flavor Twists: Add a pinch of sea salt to the melted coating for a salted caramel effect. Sprinkle the coated pretzels with crushed graham crackers or cookie crumbs before the coating sets for a textured finish. Drizzle melted white chocolate over the finished pretzels for a two-tone look. I tried a batch with a dash of cinnamon in the coating, and the warm spice paired surprisingly well with the salty pretzel.
Dietary Adaptations: Use vegan white chocolate and coconut oil for a dairy-free version. The pretzels themselves are typically vegan, but check the label to be sure. For a gluten-free option, use gluten-free pretzel rods — they’re available at most health food stores and online. The texture is slightly different (a bit more crumbly), but the final result is just as delicious.
Presentation Variations: Arrange the finished pretzels in a jar or vase with the “fingers” sticking up like a witch’s hand reaching out of a potion bottle. Or lay them on a platter with a spooky cheesecloth draped underneath. I once served them sticking out of a hollowed-out pumpkin, and it was the hit of the party.
Serving & Storage Suggestions
These spooky witch finger pretzel rods are best served at room temperature. The coating is firm but not hard, and the pretzel stays crunchy. If you’ve refrigerated them, let them sit out for 10 minutes before serving to take the chill off — cold coating can be brittle and might crack when bitten into.
Presentation Ideas: Arrange the pretzels on a black platter or dark wooden board for maximum visual impact. The green coating pops against a dark background. You can also stand them up in a jar filled with black beans or coffee grounds (unbrewed) to look like a witch’s hand reaching up. For a classroom party, place them in a paper cone lined with parchment — they look like a bouquet of creepy fingers.
Complementary Dishes: These pair well with other Halloween snacks. Serve them alongside creamy grilled buffalo chicken dip for a savory-sweet contrast. They also work great on a dessert table with cozy brown butter snickerdoodle crinkle cookies — the warm cinnamon notes balance the salty pretzel. For drinks, apple cider or hot chocolate with a cinnamon stick makes the perfect Halloween pairing.
Storage Instructions: Store the finished pretzels in an airtight container at room temperature for up to 5 days. Layer them between sheets of parchment paper to prevent the coating from sticking together. Do not store them in the refrigerator — the moisture can cause the coating to sweat and become sticky. If you live in a humid climate, add a food-safe silica gel packet to the container to absorb excess moisture.
Freezer Tips: These pretzels freeze surprisingly well. Place them in a single layer on a baking sheet and freeze for 30 minutes, then transfer to a freezer-safe bag or container. They’ll keep for up to 2 months. Thaw at room temperature for 15 minutes before serving. The coating might develop a slight bloom (white streaks) if frozen for long periods, but the flavor remains unchanged.
Flavor Development: These are best eaten within the first 2 days. After that, the pretzel starts to absorb moisture from the coating and loses some of its crunch. The almond slivers can also soften slightly over time. If you’re making them ahead for a party, I recommend making them no more than 2 days in advance for the best texture.
Nutritional Information & Benefits
Let’s be real — these are a treat, not a health food. But knowing what’s in them helps you enjoy them mindfully.
Estimated Nutritional Values (per pretzel rod):
- Calories: 180-200
- Total Fat: 8-10g
- Saturated Fat: 5-6g
- Carbohydrates: 24-28g
- Sugar: 14-16g
- Protein: 3-4g
- Sodium: 350-400mg
Health Highlights: The almonds provide a small amount of vitamin E, healthy fats, and magnesium. Pretzels are lower in fat than many other snack options (before the coating, anyway). The green candy coating contains no real vegetables — it’s just food coloring — but it does make you smile, and that counts for something.
Dietary Considerations: These are vegetarian. For a vegan version, use dark chocolate or vegan white chocolate instead of candy melts. They contain gluten (from the pretzels) and tree nuts (from the almonds). If you’re serving them at a party with allergy concerns, make a separate batch with sunflower seed butter coating and seed-based “nails” to accommodate everyone.
Personal Wellness Perspective: I believe in balance. Halloween comes once a year, and these pretzels are part of the fun. They’re not an everyday snack, and they shouldn’t be. Enjoy them at the party, share them with friends, and don’t stress about the numbers. The joy of creating something that makes people laugh and gasp is its own kind of nutrition.
Conclusion
These spooky witch finger pretzel rods are proof that Halloween treats don’t have to be complicated to be memorable. Three ingredients, 20 minutes of work, and you’ve got a snack that stops people in their tracks. They’re salty, sweet, crunchy, and just creepy enough to be fun without being genuinely gross. My niece still asks for them every October, and I still get a kick out of watching people’s faces when they realize what they’re about to eat.
I encourage you to make these your own. Experiment with different colors, try different nail shapes, or add your own creepy details. The best part of this recipe is how forgiving it is — even imperfect batches look intentional and spooky. If the coating cracks, call it aged witch skin. If the almonds fall off, call it a broken nail from digging graves. There’s no wrong way to make something this fun.
If you try these spooky witch finger pretzel rods, I’d love to hear about it. Drop a comment below with your favorite color combination or any creative twists you added. Share a photo of your finished batch — I always love seeing how different people interpret the same recipe. And if you’re looking for more Halloween inspiration, check out the creamy hatch green chile corn chowder for a savory fall option that pairs beautifully with these creepy treats. Happy Halloween, and happy snacking!
Frequently Asked Questions
Can I make these spooky witch finger pretzel rods ahead of time?
Yes! They stay fresh in an airtight container at room temperature for up to 5 days. For best results, make them no more than 2 days before your event to maintain maximum crunch.
What if I can’t find green candy melts?
Use white candy melts or white chocolate chips and add green gel food coloring. Start with one drop, mix well, and add more until you reach the desired shade. Avoid liquid food coloring — it can cause the chocolate to seize.
How do I keep the almond nails from falling off?
Press the almond sliver into the coating while it’s still wet. If the coating has started to set, dip the almond in melted coating first before attaching. A gentle press with tweezers helps it adhere without smudging the coating.
Can I use pretzel sticks instead of pretzel rods?
You can, but they’re much thinner and more fragile. The final result looks more like tiny baby fingers than witch fingers. If you use pretzel sticks, reduce the dipping time and work very gently to avoid breakage.
Are these safe for school Halloween parties?
Check with the school about nut allergies first, since they contain almonds. If nuts are allowed, they’re a huge hit with kids. For nut-free classrooms, use dried banana chips or apple slices trimmed to nail shapes instead of almonds.
Pin This Recipe!

Best Halloween Spooky Witch Finger Pretzels Recipe
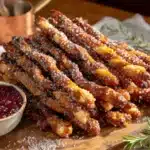
These spooky witch finger pretzel rods are a fun and easy Halloween treat made with pretzel rods, green candy coating, and almond slivers for fingernails. They’re salty, sweet, crunchy, and just creepy enough to be a hit at any Halloween party.
- Prep Time: 20 minutes
- Cook Time: 0 minutes
- Total Time: 35 minutes
- Yield: 12-15 servings 1x
- Category: Dessert
- Cuisine: American
Ingredients
- 1 standard 12-ounce bag pretzel rods (about 12–15 rods)
- 30–40 almond slivers
- 12 ounces green candy melts (about 2 cups)
- 1 teaspoon coconut oil or vegetable shortening
- Black gel food coloring (optional, for knuckle wrinkles)
- Edible glitter or luster dust (optional)
Instructions
- Prepare your workspace. Line a baking sheet with parchment paper or a silicone mat. Arrange pretzel rods in a single layer nearby. Have almond slivers in a small bowl within easy reach.
- Melt the candy coating. Place green candy melts in a microwave-safe bowl. Microwave in 30-second intervals at 50% power, stirring thoroughly between each interval, until mostly melted (about 2 minutes total). Stir until completely smooth. Add 1 teaspoon of coconut oil or shortening and stir again. If too thick, add another ½ teaspoon of oil.
- Dip the pretzel rods. Hold a pretzel rod by one end and dip the other two-thirds into the melted coating. Gently twist as you pull it out to allow excess coating to drip back into the bowl. Place the dipped pretzel on the parchment paper. Repeat with remaining pretzels, working in batches of 3-4 at a time.
- Attach the almond nails. While the coating is still wet, press an almond sliver onto the tip of the dipped end, flat side up and pointed end extending slightly past the pretzel tip. Press gently but firmly. If coating has started to set, dip the almond in melted coating before attaching.
- Create knuckle wrinkles. Working quickly before the coating sets, use a toothpick to draw 2-3 horizontal lines across the pretzel at intervals that look like knuckles, spaced about an inch apart. Press firmly enough to create a visible indent but not so hard that you break through the coating.
- Add nail bed details (optional). Using a toothpick dipped in black gel food coloring, draw a thin crescent shape at the base of each almond sliver to create the illusion of a nail bed.
- Let the coating set. Allow the pretzels to sit at room temperature until the coating is completely firm, about 10-15 minutes. Do not refrigerate.
- Add final touches (optional). Once set, add edible glitter or luster dust for a magical finish.
Notes
Work in small batches to keep coating wet for decorating. Use thick pretzel rods for best results. For nut-free version, use dried banana chips or apple slices trimmed to nail shapes. Store in an airtight container at room temperature for up to 5 days; best within 2 days for maximum crunch.
Nutrition
- Serving Size: 1 pretzel rod
- Calories: 190
- Sugar: 15
- Sodium: 375
- Fat: 9
- Saturated Fat: 5.5
- Carbohydrates: 26
- Fiber: 1
- Protein: 3.5
Keywords: Halloween, witch fingers, pretzel rods, candy melts, almond, spooky, easy, party snack


