Introduction
My friend Jen asked why I couldn’t just stir the pumpkin puree straight into the flour mixture instead of fussing with cutting cold butter into the dry ingredients. I started to explain why that wouldn’t work — then stopped. Honestly, I had no good reason except “that’s how scones are made.” So I shrugged and handed her the bowl.
She dumped the pumpkin in, gave it a few stirs, and the dough came together in about thirty seconds flat. The scones baked up tender, flaky, and impossibly moist. I stood there with my wooden spoon, feeling equal parts delighted and humbled. That was three autumns ago, and I haven’t made scones the traditional way since.
These Guest-Favorite Pumpkin Scones with Maple Glaze have become my secret weapon for fall gatherings. They’re the first thing to disappear at brunch, the treat people ask for by name, and the recipe I’ve scribbled on napkins for friends more times than I can count. Maybe you’ve been there — standing over a mixing bowl, convinced your way is the only way, only to discover a shortcut that actually works better.
The glaze situation got messy that first time, by the way. Jen drizzled it straight from the measuring cup and it pooled everywhere. But you know what? Nobody cared. We ate those misshapen, over-glazed scones with coffee and talked until the candles burned down. That’s the energy this recipe brings — imperfect, generous, and worth making a little mess for.
Why You’ll Love This Recipe
These aren’t your average dry, crumbly scones that leave you reaching for coffee to wash them down. These are bakery-quality treats with a soft, almost biscuit-like interior and a crackly maple glaze that sets up perfectly. Here is why they keep showing up at my table — and yours soon:
- One-Bowl Wonder: No cutting in butter, no pastry blender, no chilling the dough. Stir everything in one bowl and you are ten minutes from the oven.
- Pumpkin Perfected: The pumpkin keeps these scones incredibly moist without making them heavy. You get all the fall flavor without that dense, gummy texture some pumpkin baked goods have.
- Maple Magic: Real maple syrup in the glaze adds a deep, woodsy sweetness that pairs beautifully with pumpkin pie spice. Skip the imitation stuff — this is where the flavor shines.
- Make-Ahead Friendly: Form the dough into wedges, freeze them on a baking sheet, then bake straight from frozen when guests show up. Fresh scones in twenty minutes with zero morning stress.
- Crowd-Pleasing Size: This recipe makes eight generous scones — perfect for a brunch table or afternoon coffee date. Double it for bigger gatherings without any fuss.
What makes these different from every other pumpkin scone recipe? That sticky-finger moment when you realize you can skip the cold butter step entirely. The texture comes out lighter, the mixing goes faster, and you save yourself a sink full of dirty dishes. It is the kind of kitchen shortcut that feels like cheating until you taste the results.
These scones are the ones that make people close their eyes after the first bite. The ones that get texted around the next day: “Can you send me that recipe?” They are comfort food reimagined — quicker, easier, but with the same soul-soothing satisfaction that makes autumn baking feel like coming home.
What Ingredients You Will Need
This recipe uses simple, wholesome ingredients to deliver bold flavor and satisfying texture without the fuss. Most of these are pantry staples, especially once pumpkin season rolls around.
For the Scones:
- 2 cups all-purpose flour (spooned and leveled — scooping straight from the bag packs it too tight)
- 1/3 cup granulated sugar (adds just enough sweetness without overpowering the pumpkin)
- 1 tablespoon baking powder (make sure it’s fresh — old baking powder means flat scones)
- 1 teaspoon pumpkin pie spice (I prefer the McCormick blend for its balanced cinnamon-nutmeg-clove profile)
- 1/2 teaspoon ground cinnamon (for extra warmth — because you can never have too much cinnamon in fall baking)
- 1/2 teaspoon salt (enhances all the flavors and balances the sweetness)
- 1/2 cup cold unsalted butter (cut into small cubes — keep it in the fridge until the last minute)
- 1/2 cup canned pumpkin puree (not pumpkin pie filling — look for 100% pure pumpkin, like Libby’s)
- 1/3 cup heavy cream (plus extra for brushing the tops — whole milk works in a pinch)
- 1 large egg (room temperature if you remember, straight from the fridge if you don’t — both work)
- 1 teaspoon vanilla extract (pure vanilla, not imitation — it makes a difference here)
For the Maple Glaze:
- 1 cup powdered sugar (sifted if it’s lumpy — nobody wants gritty glaze)
- 3 tablespoons pure maple syrup (grade A dark amber for the strongest maple flavor — I use Maple Grove Farms)
- 1-2 tablespoons milk or heavy cream (adjust for desired consistency — start with one tablespoon and add more slowly)
- Pinch of salt (optional but recommended — it cuts the sweetness and makes the maple pop)
Substitution Notes: For a dairy-free version, use cold coconut oil instead of butter and full-fat coconut milk in place of heavy cream. The texture will be slightly different — more tender, less flaky — but still delicious. If you don’t have pumpkin pie spice, mix 1/2 teaspoon cinnamon, 1/4 teaspoon nutmeg, 1/4 teaspoon ginger, and a pinch of cloves. Fresh pumpkin puree works too, just drain it in a fine-mesh strainer for an hour first — canned is more consistent and less watery.
Equipment Needed
You don’t need fancy equipment for these scones. Here is what gets the job done:
- Large mixing bowl (any bowl works — I use a ceramic one that belonged to my grandmother)
- Whisk (for combining dry ingredients evenly)
- Pastry cutter or two forks (for cutting in the butter — or just use your fingertips if you work fast)
- Baking sheet (line it with parchment paper for easy cleanup — I love the pre-cut sheets from If You Care)
- Bench scraper or sharp knife (for cutting the dough into wedges)
- Pastry brush (for brushing cream on top — a silicone one works great and is easy to clean)
- Cooling rack (lets air circulate so the glaze sets properly — a wire rack from any kitchen supply store is fine)
- Small whisk or fork (for mixing the glaze — no need to dirty a separate bowl if you whisk it right in a measuring cup)
If you don’t have a pastry cutter, don’t worry. Two knives crossed in an X motion work perfectly, or just rub the butter into the flour with your fingers. The trick is to work quickly so the butter stays cold — warm butter means dense scones.
Preparation Method
Preheat your oven to 400°F (200°C) and line a baking sheet with parchment paper. Here is how these come together — no stress, no fuss, just good scones.
- Mix the dry ingredients: In your large bowl, whisk together the flour, sugar, baking powder, pumpkin pie spice, cinnamon, and salt. Make sure everything is evenly distributed — nobody wants a pocket of baking powder in their scone.
- Cut in the butter: Scatter the cold butter cubes over the flour mixture. Use your pastry cutter, two knives, or fingertips to work the butter into the flour until it resembles coarse meal with some pea-sized butter pieces remaining. These little butter bits create flaky layers as the scones bake. Work quickly — if the butter starts feeling soft, pop the bowl in the fridge for five minutes.
- Add the pumpkin mixture: In a separate small bowl, whisk together the pumpkin puree, heavy cream, egg, and vanilla extract until smooth. Here is where Jen’s method comes in — pour this wet mixture directly into the flour-butter mixture. Stir with a fork or spatula until just combined. A few streaks of flour are fine; overmixing makes tough scones.
- Form the dough: Turn the shaggy dough out onto a lightly floured surface. It will look messy and not quite like dough yet — that is normal. Gently bring it together with your hands, folding it over itself a few times until it holds. Pat it into a circle about 3/4-inch thick and 8 inches across. Don’t roll it with a pin — just use your hands.
- Cut the scones: Use a bench scraper or sharp knife to cut the circle into 8 wedges, like slicing a pizza. Transfer the wedges to your prepared baking sheet, spacing them about 2 inches apart. They will spread slightly, so give them room to breathe.
- Brush and bake: Brush the tops of the scones with a little extra heavy cream — this helps them brown beautifully and gives a slight sheen. Bake for 14-17 minutes, until the edges are golden brown and a toothpick inserted in the center comes out clean. The kitchen will smell like a pumpkin spice candle, only better.
- Cool completely: Transfer the scones to a wire rack and let them cool for at least 15-20 minutes before glazing. Warm scones will absorb the glaze rather than let it sit on top, so patience here pays off.
- Make the glaze: While the scones cool, whisk together the powdered sugar, maple syrup, and 1 tablespoon of milk in a small bowl. Add more milk, a teaspoon at a time, until the glaze is thick but pourable — it should coat the back of a spoon but still drip off. Stir in the pinch of salt if using.
- Glaze the scones: Once the scones are completely cool, drizzle the glaze over the tops using a spoon or a small whisk. Let it set for about 10 minutes before serving — the glaze will firm up into a crackly, sweet shell that shatters when you bite into it.
Pro tip: If you want picture-perfect scones, place the wedges on the baking sheet and freeze them for 30 minutes before baking. This firms up the butter even more and gives you taller, flakier scones. I do this whenever I have the time, but honestly, they come out great either way.
Cooking Tips & Techniques
After making these scones more times than I can count, here are the lessons I learned the hard way so you don’t have to:
Keep everything cold: Cold butter is non-negotiable. If your kitchen is warm, chill your mixing bowl and flour for 10 minutes before starting. I once made these on a hot September afternoon and the butter melted before I got the scones in the oven — they spread into flat, greasy discs. Not my finest baking moment.
Don’t overmix: Stir until the flour is just moistened. Lumps are fine. Overmixing develops gluten, which makes scones tough and chewy instead of tender and flaky. Think of it like making biscuits — gentle hands, light touch.
Measure flour correctly: Spoon the flour into your measuring cup and level it off with a knife. Scooping directly from the bag can add up to 25% more flour, which makes dry, crumbly scones. I learned this one from a baking class years ago and it changed everything.
Watch the bake time: Ovens vary wildly. Start checking at 14 minutes. The scones should be golden on the edges and just set in the center. Overbaked scones are dry, so err on the side of slightly underdone — they continue cooking from residual heat as they cool.
Glaze strategically: If you are serving these at a party, drizzle the glaze in a zigzag pattern for a rustic look. For a cleaner presentation, dip the tops of the scones directly into the glaze and let the excess drip off. Both methods work — it depends on the vibe you want.
Multitask like a pro: While the scones bake, clean up your workspace and make the glaze. This way, by the time the scones cool, you are ready to glaze and serve. I usually set out plates, brew a pot of coffee, and arrange a little serving platter — makes the whole process feel effortless when guests arrive.
Variations & Adaptations
These scones are wonderfully adaptable. Here are a few ways I have tweaked them over the years:
Chocolate Chip Pumpkin Scones: Fold 1/2 cup of semi-sweet chocolate chips into the dough right before shaping. The combination of pumpkin spice and chocolate is surprisingly perfect — the bitterness of the chocolate cuts through the sweetness. My niece requests these every Thanksgiving.
Gluten-Free Version: Substitute the all-purpose flour with a 1:1 gluten-free baking flour blend (I like King Arthur Measure for Measure). Add an extra tablespoon of heavy cream since gluten-free flours absorb more liquid. The texture will be slightly more tender and less flaky, but still delicious.
Vegan Adaptation: Use cold coconut oil instead of butter, full-fat oat milk instead of heavy cream, and a flax egg (1 tablespoon ground flaxseed mixed with 3 tablespoons water, rested for 5 minutes). The scones will be a bit denser but still flavorful. For the glaze, use maple syrup and coconut milk.
Spiced Maple Walnut: Toast 1/2 cup of chopped walnuts and fold them into the dough along with an extra 1/2 teaspoon of cinnamon. The crunch adds wonderful texture, and walnuts pair beautifully with maple. I made this version for a fall brunch and they vanished in minutes.
Savory-Sweet Twist: Reduce the sugar to 2 tablespoons, omit the vanilla, and add 1/2 cup of shredded sharp cheddar cheese and 2 tablespoons of chopped fresh sage. Skip the maple glaze and serve warm with honey butter. This is a fantastic option for a brunch spread alongside eggs and bacon.
Serving & Storage Suggestions
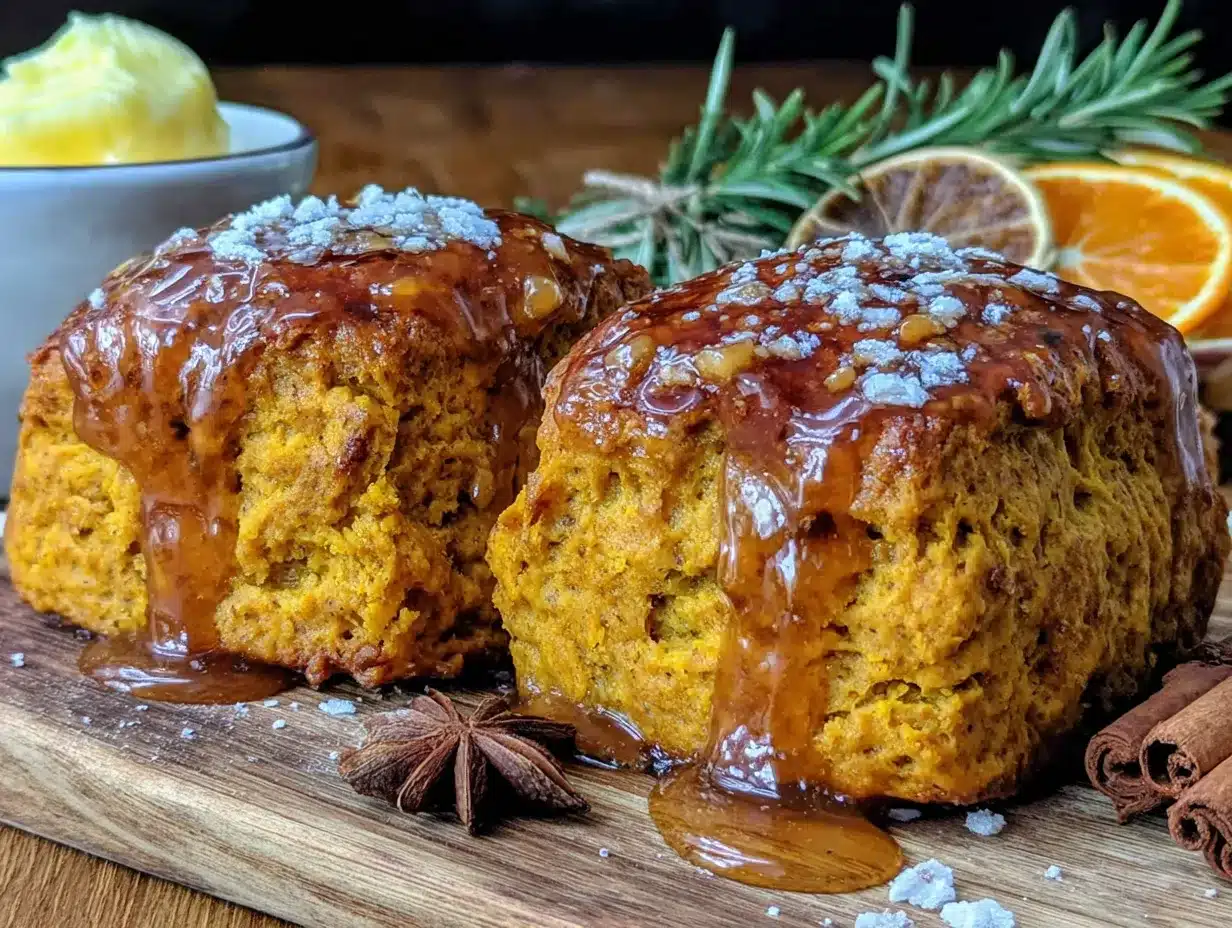
These scones are best served slightly warm or at room temperature, with the glaze fully set. Arrange them on a pretty platter or wooden board — the golden-brown tops with the white maple drizzle look stunning against a dark surface. I like to serve them with a side of fresh fruit, a dollop of clotted cream or mascarpone, and a hot cup of coffee or chai tea.
For a brunch spread, pair these scones with a savory sausage and egg casserole and a fresh arugula salad with lemon vinaigrette. The sweetness of the scones balances the savory elements beautifully. They also work wonderfully alongside a creamy tomato soup for a cozy fall lunch.
Storage: Store unglazed scones in an airtight container at room temperature for up to 3 days. Glazed scones should be stored in a single layer (not stacked) to prevent the glaze from smearing. If you must stack them, place a piece of parchment paper between layers.
Freezing: These scones freeze beautifully. Freeze unglazed baked scones on a baking sheet, then transfer to a freezer bag for up to 3 months. Thaw at room temperature and reheat in a 300°F oven for 5-7 minutes before glazing. You can also freeze the unbaked wedges — bake straight from frozen, adding 2-3 minutes to the baking time.
Reheating: For that fresh-from-the-oven experience, warm scones in a 300°F oven for 5 minutes. The microwave works in a pinch (15-20 seconds), but the texture will be softer and less crisp. The glaze stays intact better with oven reheating.
The flavors actually deepen overnight — the pumpkin spice melds with the maple glaze, and the texture softens slightly. I sometimes make these a day ahead for parties, and honestly, they might even be better the next day.
Nutritional Information & Benefits
Here is the estimated nutritional breakdown per scone (based on 8 servings, with glaze):
- Calories: 345
- Total Fat: 16g
- Saturated Fat: 10g
- Cholesterol: 65mg
- Sodium: 320mg
- Total Carbohydrates: 48g
- Dietary Fiber: 2g
- Sugars: 26g
- Protein: 5g
These scones are a treat, but they do offer some nutritional benefits. Pumpkin is packed with vitamin A (in the form of beta-carotene), which supports eye health and immune function. It also provides fiber and potassium. The maple syrup contains antioxidants and minerals like zinc and manganese, though in small amounts. The butter and cream add calcium and vitamin D.
For a lighter version, reduce the butter to 1/3 cup and replace the heavy cream with whole milk or buttermilk. The texture will be less rich but still satisfying. I make this adjustment when I am serving them for a weekday breakfast rather than a special occasion.
Dietary Considerations: This recipe contains wheat (gluten), dairy (butter, cream), and eggs. It can be adapted to be gluten-free, dairy-free, or vegan using the substitutions listed in the variations section. Always check labels for allergen information if serving guests with sensitivities.
Conclusion
These Guest-Favorite Pumpkin Scones with Maple Glaze have earned their place in my fall baking rotation for good reason. They are forgiving enough for a beginner baker, impressive enough for a holiday brunch, and delicious enough to make you forget all about that coffee shop version with the long line and the premium price tag.
The best part? That moment when someone takes their first bite and their eyebrows go up. That little smile. The way they reach for a second one before finishing the first. That is why I keep making these — not for the compliments (though those are nice), but for the way food brings people together around a table.
I would love to hear how these turn out for you. Did you try a variation? Did you double the glaze? Did someone ask for the recipe? Drop a comment below and let me know — your stories make this whole thing worthwhile. And if you snap a photo, tag me so I can see your beautiful scones.
Now go preheat that oven. Your kitchen is about to smell amazing.
Frequently Asked Questions
Can I use fresh pumpkin instead of canned?
Yes, but you need to roast and puree it first, then drain it in a fine-mesh strainer for at least an hour. Fresh pumpkin has more water content than canned, which can make the dough too sticky. Canned pumpkin is more consistent and convenient, so I recommend it for this recipe.
Why did my scones turn out dry?
Dry scones usually come from one of three things: overmixing the dough, overbaking, or using too much flour. Make sure to measure your flour correctly (spoon and level, don’t scoop) and check the scones at the 14-minute mark. Also, don’t skip the cream — the fat is crucial for moisture.
Can I make the glaze ahead of time?
Absolutely. The glaze can be made up to 3 days in advance and stored in an airtight container in the refrigerator. Let it come to room temperature and whisk well before using. If it has thickened, add a teaspoon of milk to thin it out.
How do I get the glaze to set properly?
Make sure the scones are completely cool before glazing — warm scones will absorb the glaze instead of letting it sit on top. Also, use enough powdered sugar to create a thick consistency. The glaze should coat the back of a spoon but still drip off. Let it set at room temperature for 10-15 minutes before serving.
Can I double this recipe for a crowd?
Yes, this recipe doubles beautifully. Just use two separate bowls to avoid overmixing — it is easier to manage two batches of dough than one giant one. You will need two baking sheets, and you may need to bake them in batches or rotate the sheets halfway through baking for even browning.
Pin This Recipe!
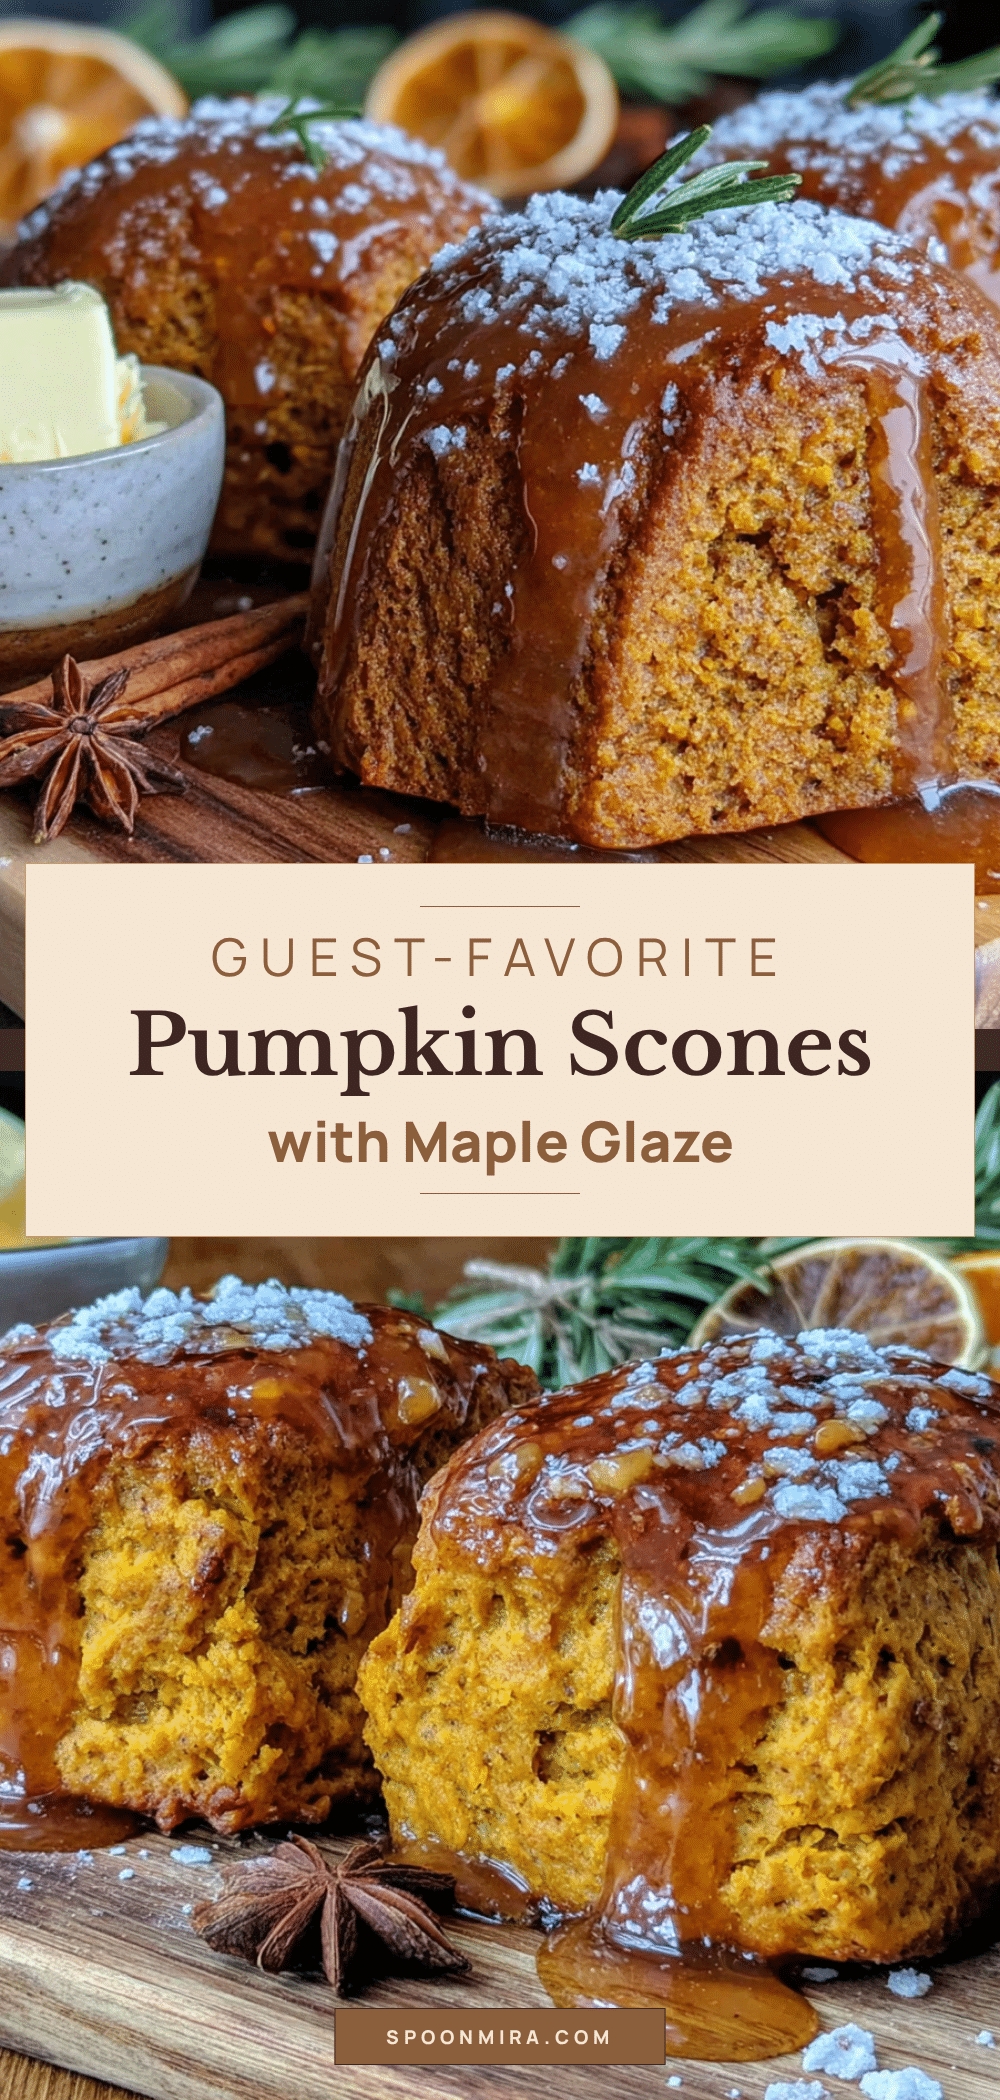
Best Homemade Pumpkin Scones with Maple Glaze
These tender, flaky pumpkin scones are made with a one-bowl shortcut that skips the traditional cold butter method, resulting in impossibly moist scones topped with a crackly maple glaze. Perfect for fall brunches and gatherings.
- Prep Time: 15 minutes
- Cook Time: 17 minutes
- Total Time: 32 minutes
- Yield: 8 servings 1x
- Category: Dessert
- Cuisine: American
Ingredients
- 2 cups all-purpose flour (spooned and leveled)
- 1/3 cup granulated sugar
- 1 tablespoon baking powder
- 1 teaspoon pumpkin pie spice
- 1/2 teaspoon ground cinnamon
- 1/2 teaspoon salt
- 1/2 cup cold unsalted butter (cut into small cubes)
- 1/2 cup canned pumpkin puree (100% pure, not pumpkin pie filling)
- 1/3 cup heavy cream (plus extra for brushing tops)
- 1 large egg
- 1 teaspoon vanilla extract
- 1 cup powdered sugar (sifted if lumpy)
- 3 tablespoons pure maple syrup
- 1–2 tablespoons milk or heavy cream (for glaze consistency)
- Pinch of salt (optional, for glaze)
Instructions
- Preheat oven to 400°F (200°C) and line a baking sheet with parchment paper.
- In a large bowl, whisk together flour, sugar, baking powder, pumpkin pie spice, cinnamon, and salt.
- Scatter cold butter cubes over flour mixture. Use a pastry cutter, two knives, or fingertips to cut butter into flour until it resembles coarse meal with some pea-sized butter pieces remaining.
- In a separate small bowl, whisk together pumpkin puree, heavy cream, egg, and vanilla extract until smooth.
- Pour wet mixture into flour-butter mixture. Stir with a fork or spatula until just combined (a few streaks of flour are fine).
- Turn dough out onto a lightly floured surface. Gently bring together with hands, folding over itself a few times until it holds. Pat into a circle about 3/4-inch thick and 8 inches across.
- Use a bench scraper or sharp knife to cut the circle into 8 wedges. Transfer wedges to prepared baking sheet, spacing about 2 inches apart.
- Brush tops of scones with extra heavy cream. Bake for 14-17 minutes, until edges are golden brown and a toothpick inserted in center comes out clean.
- Transfer scones to a wire rack and cool completely (at least 15-20 minutes) before glazing.
- While scones cool, whisk together powdered sugar, maple syrup, and 1 tablespoon milk in a small bowl. Add more milk, a teaspoon at a time, until glaze is thick but pourable. Stir in pinch of salt if using.
- Once scones are completely cool, drizzle glaze over tops using a spoon or small whisk. Let set for about 10 minutes before serving.
Notes
For taller, flakier scones, freeze the cut wedges on the baking sheet for 30 minutes before baking. Keep butter cold to avoid flat scones. Measure flour correctly by spooning and leveling. Scones can be frozen unbaked or baked; bake frozen wedges straight from freezer, adding 2-3 minutes to bake time. Glaze can be made up to 3 days ahead and stored in the refrigerator.
Nutrition
- Serving Size: 1 scone
- Calories: 345
- Sugar: 26
- Sodium: 320
- Fat: 16
- Saturated Fat: 10
- Carbohydrates: 48
- Fiber: 2
- Protein: 5
Keywords: pumpkin scones, maple glaze, fall baking, brunch recipe, easy scones, one-bowl scones


