My oldest child had refused deviled eggs for years. “They’re weird,” she’d say, wrinkling her nose at the sight of them at potlucks and family gatherings. I’d given up trying to convince her. Then last Halloween, I made a batch for a neighborhood party—just a quick appetizer to bring along. I decorated the tops with a simple sour cream spider web pattern, threw some olive “spiders” on top, and set the platter on the counter before heading out the door. When I came back to grab my jacket, I caught her standing at the kitchen island, a half-eaten deviled egg in one hand and another already picked up in the other. She had a smear of sour cream on her cheek. “These are actually good,” she mumbled, not making eye contact. I just nodded, trying not to look too pleased with myself. Honestly, that moment was better than any compliment from an adult guest. It was the kind of small victory that makes you feel like a kitchen genius without even trying.
These Budget Spider Web Deviled Eggs are exactly that kind of recipe. They look impressive enough for a Halloween party spread, but they’re made with the simplest, most affordable ingredients you probably already have. No fancy piping bags, no expensive food coloring, no specialty tools. Just eggs, mayo, mustard, and a little sour cream for that signature web effect. You know that feeling when you need a Halloween dish that’s fun but won’t break the bank? This is it. The kids get a kick out of the spider webs, the adults appreciate the classic deviled egg flavor, and your wallet stays happy. I’ve made these for three Halloweens now, and they never fail to disappear. Let me tell you—there’s something deeply satisfying about watching a plate of something this simple vanish in minutes.
Why You’ll Love This Recipe
I’ve tested this recipe through multiple Halloweens, tweaking the filling ratios and the web technique until it was foolproof. Here’s why it works so well for busy families on a budget:
- Budget-Friendly: A dozen eggs costs a few dollars, and the other ingredients are pantry staples. You can feed a crowd for under $10.
- Kid-Approved: My own skeptical child was converted. The fun spider web design makes them less intimidating for picky eaters.
- Quick & Easy: From start to finish, you’re looking at about 30 minutes of active time. Perfect for last-minute Halloween prep.
- Simple Ingredients: Nothing fancy here. Eggs, mayonnaise, mustard, sour cream, and a few olives. You probably have everything already.
- Crowd-Pleaser: They disappear at every party. Adults love the classic deviled egg taste, and kids love the spooky design.
- Make-Ahead Friendly: You can prep the eggs and filling a day ahead, then assemble the webs right before serving.
What sets this recipe apart from other Halloween deviled eggs is the technique. I figured out the perfect sour cream-to-mayo ratio so the web piping holds its shape without being too runny. The olive “spiders” are a simple touch, but they add that extra wow factor without any extra cost. This isn’t just another deviled egg recipe—it’s the one that’ll have people asking for the secret.
There’s something special about serving a dish that looks like you spent hours on it when you really didn’t. That first bite of creamy, tangy filling against the smooth egg white is pure comfort. And when you see your kids grinning at the spider webs? That’s the real payoff.
What Ingredients You Will Need
This recipe relies on simple, affordable ingredients that come together to create something genuinely impressive. Each component plays a specific role in the flavor and texture, so here’s what to look for and why it matters.
- Large Eggs (12): The foundation of the whole dish. I recommend using large eggs because they’re the standard size for deviled eggs—not too small, not too big. Look for eggs that are fresh but not brand-new; slightly older eggs peel more easily after boiling. If you can, buy eggs a week ahead and let them sit in the fridge. It makes a real difference when you’re peeling.
- Mayonnaise (1/3 cup): This is the backbone of the creamy filling. I prefer Duke’s or Hellmann’s for their tangy flavor and smooth texture. Don’t use Miracle Whip unless you know your family likes that sweeter, tangier taste. The mayo binds everything together and gives that classic deviled egg richness.
- Yellow Mustard (1 tablespoon): Adds a subtle tang and that familiar deviled egg flavor. You can use Dijon for a sharper kick, but yellow mustard is milder and more kid-friendly. I’ve tried both, and my family always votes for the yellow.
- Sour Cream (2 tablespoons, plus extra for the web): This is the secret ingredient that makes the filling extra creamy and light. It also helps thin the mixture just enough for smooth piping. For the spider web design, you’ll need about 1/4 cup of sour cream on its own—it needs to be thick enough to hold the web lines but thin enough to pipe easily.
- White Vinegar (1 teaspoon): A tiny splash brightens up the filling and cuts through the richness. Don’t skip it—it makes a surprising difference. Apple cider vinegar works too if that’s what you have.
- Salt (1/4 teaspoon): Enhances all the flavors. I use fine sea salt for even distribution. Adjust to taste, but remember the mayo and mustard already have salt in them.
- Black Pepper (1/8 teaspoon): A pinch of freshness. Freshly ground is best, but pre-ground works fine. Go easy if you’re serving kids.
- Paprika (for garnish): That classic red dusting on top. Smoked paprika adds a deeper flavor, but regular works perfectly. I use sweet paprika for a milder taste that kids enjoy.
- Black Olives (for the spiders): You’ll need about 6-8 large black olives, sliced in half lengthwise for the bodies, then sliced into thin strips for the legs. Canned sliced black olives work in a pinch, but whole pitted olives give you more control over the spider shapes.
Substitution Guidance: Need a dairy-free option? Use vegan mayo and dairy-free sour cream. The texture will be slightly different, but the flavor still works. For a lighter version, swap half the mayo with plain Greek yogurt—just note the filling will be a bit tangier. If you’re out of yellow mustard, Dijon or even a pinch of dry mustard powder will do the trick.
Equipment Needed
You don’t need a professional pastry kit for these. Most of this stuff is already in your kitchen drawers:
- Medium Saucepan: For boiling the eggs. Any size works as long as it holds the eggs in a single layer.
- Mixing Bowls: One for the filling, one for the sour cream web mixture. Small bowls are fine.
- Fork or Potato Masher: For mashing the egg yolks. A fork works perfectly; no need for a food processor.
- Piping Bag or Zip-Top Bag: A disposable piping bag is nice, but a simple zip-top bag with the corner snipped off works just as well. I’ve used both, and honestly, the zip-top bag is easier to clean.
- Small Round Piping Tip (optional): If you want perfectly smooth web lines, a small round tip (like a Wilton #2 or #3) helps. But snipping a tiny hole in a zip-top bag works fine too.
- Sharp Knife and Cutting Board: For halving the eggs and slicing olives. A sharp knife makes clean cuts.
- Serving Platter: Any flat platter works. A dark-colored plate makes the white spider webs pop visually.
Budget-Friendly Tip: Don’t have a piping bag? A clean zip-top bag is your best friend. Just fill it, seal it, and snip a tiny corner. I’ve been doing this for years and it works every time. For the spider web design, you’ll want the hole to be very small—start with a tiny snip and test it on a plate before piping on the eggs.
Preparation Method
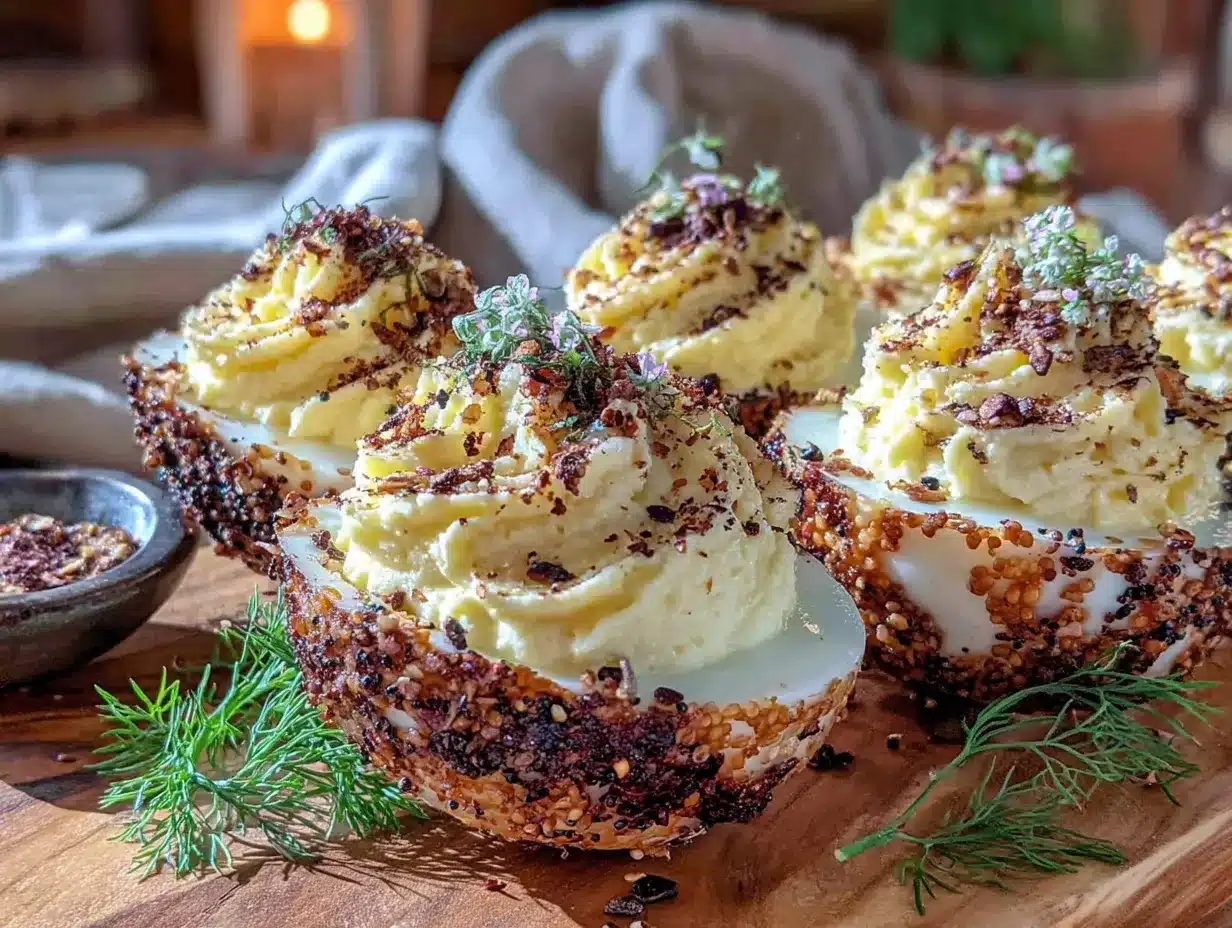
Let’s walk through this step by step. I’ve included all the little tricks I’ve learned from making these eggs more times than I can count.
Step 1: Boil the Eggs (15-20 minutes)
Place the eggs in a single layer in your saucepan. Cover them with cold water by about an inch. Bring the water to a rolling boil over high heat—you’ll see big bubbles breaking the surface. Once it’s boiling, turn off the heat, cover the pan, and let it sit for exactly 12 minutes. This method gives you hard-boiled eggs with firm yolks and no green ring. While they sit, prepare a bowl of ice water. After 12 minutes, transfer the eggs to the ice bath using a slotted spoon. Let them cool for at least 5 minutes. This stops the cooking and makes peeling much easier.
Step 2: Peel the Eggs (5 minutes)
Gently tap each egg on the counter to crack the shell all over. Start peeling from the wider end where the air pocket is—the shell comes off more easily there. Run the eggs under cold water as you peel to help remove stubborn bits. If you’re struggling, try peeling under a thin stream of water. I’ve had batches where the shells practically fall off and others where I’m picking off tiny pieces for ten minutes. Fresh eggs are harder to peel, so older eggs really are better here.
Step 3: Halve the Eggs (2 minutes)
Using a sharp knife, slice each egg in half lengthwise. Wipe the knife clean between cuts for neat edges. Gently pop out the yolks into a medium mixing bowl. Arrange the white halves on your serving platter, cut side up. If they wobble, trim a tiny sliver off the bottom to create a flat surface.
Step 4: Make the Filling (5 minutes)
Add the mayonnaise, yellow mustard, sour cream, vinegar, salt, and pepper to the bowl with the egg yolks. Mash everything together with a fork until smooth and creamy. Taste it—adjust the salt or mustard to your preference. I like mine with a little extra mustard for tang. The filling should be thick but spreadable. If it’s too thick, add another teaspoon of sour cream. If it’s too thin, add another yolk if you have one.
Step 5: Prepare the Sour Cream Web Mixture (2 minutes)
In a small bowl, combine about 1/4 cup of sour cream with a tiny pinch of salt. Stir until smooth. This needs to be thick enough to hold its shape when piped. If it seems runny, add a teaspoon of cream cheese to thicken it. Transfer this mixture to a small piping bag or zip-top bag with a tiny snipped corner.
Step 6: Fill the Eggs (5 minutes)
Spoon the yolk filling into a piping bag or zip-top bag with a larger snipped corner. Pipe the filling into each egg white half, mounding it slightly above the edge. You can also use two spoons to fill them if you prefer—just spoon the filling in and smooth the top. I find piping gives a cleaner look, but spooning works fine for a rustic style.
Step 7: Create the Spider Webs (10 minutes)
Here’s the fun part. Using your sour cream mixture, pipe a small dot in the center of each filled egg. Then pipe concentric circles around it—like a bullseye pattern. You want 3-4 rings. Then, using a toothpick or the tip of a knife, drag lines from the center outward through the rings. Start at the center and pull outward, wiping the toothpick clean between each line. Do this 4-6 times around the egg, spacing the lines evenly. The sour cream rings will pull into a web pattern. It’s almost magical to watch. If the lines blur together, your sour cream is too thin. Add a bit more cream cheese or sour cream to thicken it.
Step 8: Make the Olive Spiders (5 minutes)
Slice the olives in half lengthwise. For each spider body, take one half and slice it into thin strips lengthwise, leaving the rounded end intact so the “legs” are attached. You’ll have a fan of olive strips. Place one spider on top of each web, pressing gently so it sticks. The legs should splay out naturally. If you’re using sliced olives, just place a slice on each egg and arrange thin strips around it for legs—it’s less neat but still cute.
Step 9: Garnish and Chill (2 minutes + 30 minutes rest)
Lightly dust the finished eggs with paprika. I use a fine-mesh strainer for even sprinkling. Cover the platter loosely with plastic wrap and refrigerate for at least 30 minutes before serving. This lets the flavors meld and the webs set. Don’t skip this step—the texture improves noticeably.
Cooking Tips & Techniques
I’ve made plenty of mistakes with deviled eggs over the years, so let me save you some trouble.
Perfect Hard-Boiled Eggs Every Time: The cold-start method works best. Put eggs in the pot, cover with cold water, bring to a boil, then cover and let sit for 12 minutes. No more guessing. If you’re serving these at a party, boil an extra egg or two in case one cracks or peels badly. Trust me on this.
The Peel Trick: Add a teaspoon of baking soda to the boiling water. It raises the pH of the water and helps the shells separate from the whites. I started doing this after a particularly frustrating peeling session, and it really works. Also, peel under running water—it helps loosen stubborn shell bits.
Filling Consistency: The filling should be smooth and creamy but firm enough to hold a peak. If it’s too runny, add another yolk. If it’s too thick, add a tiny splash of pickle juice or vinegar. I once added too much mayo and ended up with soupy filling. I fixed it by mashing in another hard-boiled yolk. Problem solved.
Web Technique Practice: Before piping on the eggs, practice the web pattern on a plate or paper towel. Get a feel for how the sour cream flows and how the toothpick drags. It takes two tries to get comfortable. I always do a test web on the edge of the platter before starting the actual eggs.
Make-Ahead Strategy: Boil and peel the eggs up to two days ahead. Store them unpeeled in the fridge. You can also make the filling a day ahead and store it in a piping bag in the fridge. Assemble the webs and spiders no more than 4 hours before serving—the sour cream webs can start to blur if they sit too long.
Transporting to a Party: If you’re bringing these to a Halloween gathering, assemble them on a sturdy platter and cover with plastic wrap. Place the platter on a flat surface in your car—not on a seat where it might slide. I learned this the hard way when a batch slid off the passenger seat and ended up on the floor. Deviled eggs on the floor is a sad sight.
Variations & Adaptations
One of the best things about this recipe is how easy it is to customize. Here are some twists I’ve tried and loved:
Spicy Southwest Version: Add 1/4 teaspoon of cumin and a pinch of cayenne to the filling. Top with a tiny slice of pickled jalapeño instead of the olive spider. The heat is subtle but adds a nice kick. My husband loves this version for Halloween parties with adult guests.
Bacon Cheddar Version: Mix 2 tablespoons of finely shredded cheddar cheese and 2 tablespoons of crumbled cooked bacon into the filling. Skip the sour cream web and just sprinkle with paprika and extra bacon bits. This one disappears fastest at any gathering. I’ve made it for non-Halloween parties too.
Avocado Deviled Eggs: Replace the mayo with mashed avocado (about 1/2 an avocado). Add a squeeze of lime juice instead of vinegar. The filling turns a lovely green color, and the flavor is fresh and creamy. Use the sour cream web on top for contrast. This version is a hit with health-conscious friends.
Gluten-Free Note: This recipe is naturally gluten-free as written. Just double-check your mustard and mayo labels if you’re serving someone with celiac disease. Most brands are safe, but it’s worth verifying.
Dairy-Free Adaptation: Use vegan mayo and dairy-free sour cream. The texture will be slightly less creamy, but the flavor still works. I’ve tested this with a store-brand vegan sour cream, and the web pattern held up fine.
Extra Spooky Touch: Add a drop of black food coloring to the sour cream web mixture for a darker web effect. You can also use red food coloring to create “bloodshot” webs. My kids went crazy for the red version last year—though I admit it looked a little gruesome.
Serving & Storage Suggestions
These deviled eggs are best served chilled, straight from the fridge. The cold temperature keeps the filling firm and the webs crisp. Arrange them on a dark-colored platter to make the white spider webs pop. A black or dark purple plate works perfectly for Halloween.
Complementary Dishes: These eggs pair beautifully with other Halloween finger foods. Try them alongside my spooky mummy pizza bites for a full appetizer spread. They also go well with a simple veggie tray featuring “witch’s fingers” (carrot sticks) and “goblin guts” (green pepper strips). For drinks, a batch of Halloween punch bowl adds festive flair without breaking the budget.
Storage Instructions: Store leftover deviled eggs in an airtight container in the refrigerator for up to 2 days. The webs will soften slightly, but the flavor remains good. I don’t recommend freezing them—the texture of the egg whites becomes watery and unpleasant after thawing.
Reheating: Deviled eggs are served cold, so no reheating needed. If you’ve stored them, just let them sit at room temperature for 10 minutes before serving to take off the chill. This brings out the flavor.
How Flavors Develop: The filling actually tastes better after a few hours in the fridge. The mustard and vinegar mellow out, and the flavors meld together. That’s why I always make the filling a day ahead when I can. The sour cream webs, however, are best fresh—they start to blur after about 6 hours. So if you’re making these for a party, assemble the webs no more than 4 hours before serving.
Leftover Ideas: If you have extra filling (which happens if you boil extra eggs), use it as a sandwich spread or a dip for crackers. It’s delicious on toast with a sprinkle of paprika. The leftover sour cream web mixture can be stirred into salad dressing or used as a dip for vegetables.
Nutritional Information & Benefits
Here’s the estimated nutritional breakdown for one deviled egg (based on a batch of 24 halves):
| Nutrient | Amount per Serving |
|---|---|
| Calories | 65 |
| Protein | 4g |
| Fat | 5g |
| Saturated Fat | 1.5g |
| Carbohydrates | 1g |
| Fiber | 0g |
| Sugar | 0.5g |
| Sodium | 120mg |
| Cholesterol | 95mg |
Eggs are an excellent source of high-quality protein and contain important nutrients like choline, which supports brain health. The yolks are rich in vitamin D and B vitamins. Using sour cream instead of extra mayo reduces the fat content slightly while adding calcium. This recipe is naturally low in carbohydrates and sugar-free, making it suitable for low-carb and keto diets.
Dietary Considerations: As written, this recipe is gluten-free and vegetarian. For dairy-free, use vegan substitutes as noted. For lower cholesterol, you can use two egg whites per yolk in the filling, but the texture will be less creamy. I’ve tried this, and it works, but it’s not as rich.
From a wellness perspective, I love that these deviled eggs are a protein-packed appetizer that doesn’t rely on processed ingredients. They’re a smarter choice than most party snacks, and they keep you full without weighing you down. Plus, the portion control is built in—one or two eggs is a satisfying serving.
Conclusion
These Budget Spider Web Deviled Eggs are proof that Halloween fun doesn’t have to cost a fortune or require hours in the kitchen. With just a dozen eggs and a few pantry staples, you can create an appetizer that looks like it came from a fancy catering spread. The spider web design is surprisingly easy to pull off, and the olive spiders add that extra touch of whimsy that kids absolutely love.
I encourage you to make this recipe your own. Maybe you’ll add a dash of hot sauce for heat, or swap the olives for tiny pretzel sticks as spider legs. Maybe you’ll skip the webs entirely and just dust with black salt for a simpler look. The beauty of deviled eggs is their flexibility—they’re a blank canvas for your creativity.
For me, this recipe is special because of that moment I caught my daughter sneaking one. It reminded me that sometimes the simplest dishes can change someone’s mind. Whether you’re serving these at a Halloween party, a fall potluck, or just a fun family dinner, I hope they bring you the same kind of small, satisfying joy.
If you make these, I’d love to hear how they turned out. Drop a comment below or tag me in your photos. And if you’re looking for more budget-friendly Halloween ideas, don’t miss my easy pumpkin dip recipe—it’s another crowd-pleaser that won’t break the bank. Happy Halloween, and happy cooking!
Frequently Asked Questions
1. Can I make these deviled eggs a day ahead?
Yes, you can boil and peel the eggs up to two days ahead. You can also make the filling a day ahead and store it in a piping bag in the fridge. However, I recommend adding the sour cream webs and olive spiders no more than 4 hours before serving for the best visual effect. The webs can start to blur if they sit too long.
2. How do I keep the sour cream webs from blurring?
Make sure your sour cream is thick enough. If it seems runny, stir in a teaspoon of cream cheese or a tiny pinch of cornstarch. Also, pipe the webs onto chilled, filled eggs and refrigerate immediately. The cold helps the webs set quickly. If you’re in a humid environment, the webs may blur faster, so assemble them as close to serving time as possible.
3. Can I use a different design instead of spider webs?
Absolutely! You can pipe simple spider shapes with the olive bodies, or create a “bloodshot” effect by adding a drop of red food coloring to the sour cream. You can also skip the design entirely and just sprinkle with paprika and black sesame seeds for a simpler look. The filling is the star—the design is just for fun.
4. What if I don’t have a piping bag?
No problem. Use a zip-top bag with a tiny corner snipped off. For the filling, snip a slightly larger corner. For the sour cream web, snip a very tiny corner—start small and test it on a plate first. You can also use a small spoon to dollop the filling into the egg whites and smooth it with the back of the spoon. It won’t be as neat, but it’ll taste the same.
5. How long do these deviled eggs last in the fridge?
They’ll keep for up to 2 days in an airtight container. The texture of the filling stays good, but the egg whites may become slightly watery after 24 hours. I recommend eating them within 24 hours for the best quality. Don’t leave them at room temperature for more than 2 hours if you’re serving them at a party—food safety first!
Pin This Recipe!

Budget Spider Web Deviled Eggs: Easy Halloween Recipe

These Budget Spider Web Deviled Eggs are a fun, affordable Halloween appetizer made with simple ingredients. The creamy filling is topped with a sour cream spider web and olive spiders, creating a spooky yet delicious dish that kids and adults love.
- Prep Time: 30 minutes
- Cook Time: 15 minutes
- Total Time: 45 minutes
- Yield: 24 servings 1x
- Category: Appetizer
- Cuisine: American
Ingredients
- 12 large eggs
- 1/3 cup mayonnaise
- 1 tablespoon yellow mustard
- 2 tablespoons sour cream (plus extra for the web)
- 1 teaspoon white vinegar
- 1/4 teaspoon salt
- 1/8 teaspoon black pepper
- Paprika for garnish
- 6–8 large black olives (for the spiders)
Instructions
- Place eggs in a single layer in a saucepan. Cover with cold water by about an inch. Bring to a rolling boil over high heat, then turn off the heat, cover, and let sit for exactly 12 minutes.
- Prepare a bowl of ice water. Transfer eggs to the ice bath using a slotted spoon and let cool for at least 5 minutes.
- Peel the eggs under cold running water, starting from the wider end. Slice each egg in half lengthwise and pop out the yolks into a medium bowl. Arrange the whites on a serving platter.
- Add mayonnaise, yellow mustard, 2 tablespoons sour cream, vinegar, salt, and pepper to the yolks. Mash with a fork until smooth and creamy. Adjust seasoning to taste.
- In a small bowl, combine about 1/4 cup sour cream with a tiny pinch of salt. Stir until smooth. Transfer to a small piping bag or zip-top bag with a tiny snipped corner.
- Spoon the yolk filling into a piping bag or zip-top bag with a larger snipped corner. Pipe the filling into each egg white half, mounding slightly above the edge.
- Pipe a small dot of sour cream mixture in the center of each filled egg. Pipe concentric circles around it (3-4 rings). Using a toothpick, drag lines from the center outward through the rings, wiping the toothpick clean between each line. Repeat 4-6 times around the egg.
- Slice olives in half lengthwise. For each spider, take one half and slice into thin strips lengthwise, leaving the rounded end intact. Place one spider on top of each web, pressing gently.
- Lightly dust the eggs with paprika using a fine-mesh strainer. Cover loosely with plastic wrap and refrigerate for at least 30 minutes before serving.
Notes
For perfect hard-boiled eggs, use the cold-start method: place eggs in pot, cover with cold water, bring to a boil, then cover and let sit for 12 minutes. Add a teaspoon of baking soda to the water for easier peeling. The sour cream webs are best assembled no more than 4 hours before serving. If the sour cream mixture is too runny, add a teaspoon of cream cheese to thicken it.
Nutrition
- Serving Size: 1 deviled egg half
- Calories: 65
- Sugar: 0.5
- Sodium: 120
- Fat: 5
- Saturated Fat: 1.5
- Carbohydrates: 1
- Protein: 4
Keywords: Halloween deviled eggs, spider web deviled eggs, budget Halloween appetizer, easy deviled eggs, kid-friendly Halloween recipe


