I was at the hardware store last October, of all places, picking up a new rake because mine had snapped in half mid-leaf-pile, when the cashier—a guy named Frank who I’d only ever exchanged pleasantries with about the weather—started talking about pumpkin seeds. Not just any pumpkin seeds, but the kind you bake with cinnamon and sugar until they get all cozy and caramelized. Frank was ringing up my rake and a bag of birdseed when he just looked at me and said, “You’re gonna carve pumpkins this weekend, right? Don’t you dare throw those seeds away. You gotta make my wife’s cinnamon sugar baked pumpkin seeds.” And I stood there, holding my broken rake, genuinely surprised that this was the culinary advice I was getting from the man who sells me snow shovels.
Honestly, I almost didn’t listen. I mean, I’ve made roasted pumpkin seeds before, and they were always fine. Salty, a little chewy, the kind of thing you eat absentmindedly while handing out candy. But Frank insisted. He even scribbled the basic idea on the back of a receipt—“don’t boil ’em, soak ’em, and use real butter”—and handed it to me like it was a secret treasure map. I shoved it in my pocket and forgot about it for two days. Then, on a rainy Saturday afternoon, I found the crumpled receipt while looking for a pen, and I thought, why not? You know that feeling when you have nothing to lose because the alternative is just another batch of mediocre snacks? That was me.
So I tried it. And let me tell you, the first batch barely made it to the bowl. I was standing at the counter, picking them off the baking sheet while they were still warm, and I had that moment where you close your eyes and just chew slowly. The cinnamon and sugar had turned into this brittle, crunchy shell around the nutty seed, and the butter gave it this richness that made it feel like a real treat, not a health-food compromise. It was the kind of snack that makes you forget you’re eating something that came out of a gourd. I called Frank the next day to thank him, and he just laughed and said, “Told ya. My wife’s been making those for thirty years.” That’s the thing about unexpected sources—sometimes the best recipes come from the most unlikely people. And now, every time I carve a pumpkin, I think of Frank, the hardware store, and that crumpled receipt.
Why You’ll Love This Recipe
Let’s be real for a second. Most pumpkin seed recipes are an afterthought. You carve the jack-o’-lantern, toss the seeds in salt, bake them until they’re dry, and call it a day. But these cozy cinnamon sugar baked pumpkin seeds? They’re a whole different story. They’re the snack you actually look forward to making, not just the thing you do to avoid waste.
- Quick & Easy: From pumpkin to snack in about 45 minutes, with only 10 minutes of active prep. Perfect for a lazy fall afternoon when the air gets crisp and you want something warm to nibble on.
- Simple Ingredients: You probably have everything in your pantry right now. Cinnamon, sugar, butter, salt—that’s it. No trips to a specialty store for weird extracts or hard-to-find spices.
- Perfect for Fall Gatherings: Set a bowl of these out at a Halloween party, Thanksgiving dinner, or just a cozy movie night, and watch them disappear. They’re the kind of snack that makes people stand around the kitchen island and chat.
- Crowd-Pleaser: Kids love the sweet crunch, and adults appreciate that it’s not another sugary candy. I’ve seen people who swear they hate pumpkin seeds go back for thirds.
- Unbelievably Delicious: The texture is the real star here. The seeds get perfectly crunchy, but the cinnamon-sugar coating creates this delicate, crackly shell that shatters when you bite into it. It’s next-level comfort food that happens to be naturally gluten-free and packed with nutrients.
What makes this recipe different from all the others? It’s the soaking method. Most recipes tell you to boil the seeds first, which can make them tough. But soaking them in salted water overnight (or even just for a few hours) plumps them up gently, so when you bake them, they get crispy all the way through without burning the sugar coating. I tested this side-by-side with the boiling method, and honestly, the soaked seeds were noticeably more tender and flavorful. This isn’t just another version of roasted seeds—it’s the best version, the one you’ll come back to year after year.
What Ingredients You Will Need
This recipe relies on a handful of simple, wholesome ingredients that work together to create something truly special. The magic is in the balance—enough sweetness to feel indulgent, but enough salt to keep it from being cloying. Here’s what you’ll need:
- Fresh pumpkin seeds: About 1 ½ cups, scooped straight from a medium-sized pumpkin. You want the seeds that are still coated in the stringy pumpkin guts—don’t rinse them too aggressively yet. The pulp adds a little extra flavor that bakes off beautifully. If you’re using seeds from a sugar pumpkin (the smaller, sweeter ones), even better.
- Water, for soaking: Enough to cover the seeds by about an inch. Tap water is fine, but if your tap water has a strong chlorine taste, use filtered water instead.
- Salt: 1 tablespoon of kosher salt for the soaking brine, plus a pinch for the coating. I recommend Diamond Crystal kosher salt for its clean flavor and easy dissolving. Don’t skip the salt in the soak—it seasons the seeds from the inside out.
- Unsalted butter: 2 tablespoons, melted. Butter adds richness and helps the cinnamon-sugar mixture stick to the seeds. I prefer unsalted so I can control the salt level, but if all you have is salted butter, just reduce the added salt in the coating by a tiny pinch.
- Granulated sugar: 3 tablespoons. White sugar gives the coating that classic crunchy texture. You could use coconut sugar for a deeper flavor, but the crunch won’t be quite as pronounced.
- Ground cinnamon: 1 ½ teaspoons. Use a good-quality cinnamon here—it’s the star of the show. I really like Saigon cinnamon for its bold, slightly spicy warmth, but regular grocery store cinnamon works beautifully too.
- Vanilla extract: ½ teaspoon (optional, but highly recommended). This adds a subtle warmth that rounds out the cinnamon and sugar. It’s not traditional, but Frank’s wife swears by it, and after trying it both ways, I agree with her.
Ingredient Selection Tips: When you’re cleaning your pumpkin, try to remove as much of the big, stringy pulp as possible without washing the seeds too thoroughly. A little bit of pumpkin flesh clinging to the seeds is totally fine—it will crisp up in the oven. If you’re buying pre-cleaned pumpkin seeds from the store, look for ones that are raw and unroasted. They should be a pale greenish-white color, not brown or toasted.
Substitution Guidance: If you need this to be dairy-free, swap the butter for melted coconut oil or a vegan butter stick. The flavor will change slightly—coconut oil adds a faint tropical note—but the texture will still be excellent. For a lower-sugar version, use 2 tablespoons of sugar and add 1 tablespoon of a sugar-free sweetener like monk fruit granulated sweetener. Just know that the coating won’t get quite as crunchy. And if you’re out of cinnamon? Pumpkin pie spice works in a pinch, though the flavor will be more complex and less purely cinnamon-y.
Equipment Needed
You don’t need a fancy kitchen to make these seeds shine. Here’s what you’ll need:
- Large bowl: For soaking the seeds. Any mixing bowl will do, but a glass or ceramic bowl is ideal because it won’t retain any odors.
- Colander or fine-mesh strainer: For rinsing the seeds after soaking. A standard colander works fine, but a fine-mesh strainer catches the smaller seeds better.
- Kitchen towel or paper towels: For drying the seeds. A clean, lint-free kitchen towel is best, but paper towels work in a pinch.
- Baking sheet: A rimmed half-sheet pan (about 13×18 inches) is perfect. The rim keeps the seeds from rolling off, and the large surface area lets them spread out in a single layer.
- Parchment paper or silicone baking mat: Highly recommended. The sugar coating can stick to bare metal, and parchment makes cleanup a breeze. I’ve ruined a few baking sheets before I learned this lesson.
- Small bowl: For mixing the cinnamon-sugar coating.
- Spatula or wooden spoon: For stirring the seeds on the baking sheet halfway through baking.
- Measuring spoons: For the sugar, cinnamon, and salt.
Budget-Friendly Options: If you don’t have parchment paper, you can grease the baking sheet lightly with butter or cooking spray. Just be aware that the sugar might stick a little more. And if you don’t have a silicone baking mat, don’t worry—parchment paper is cheap and works just as well. The most important tool here is patience, not pricey equipment.
Preparation Method
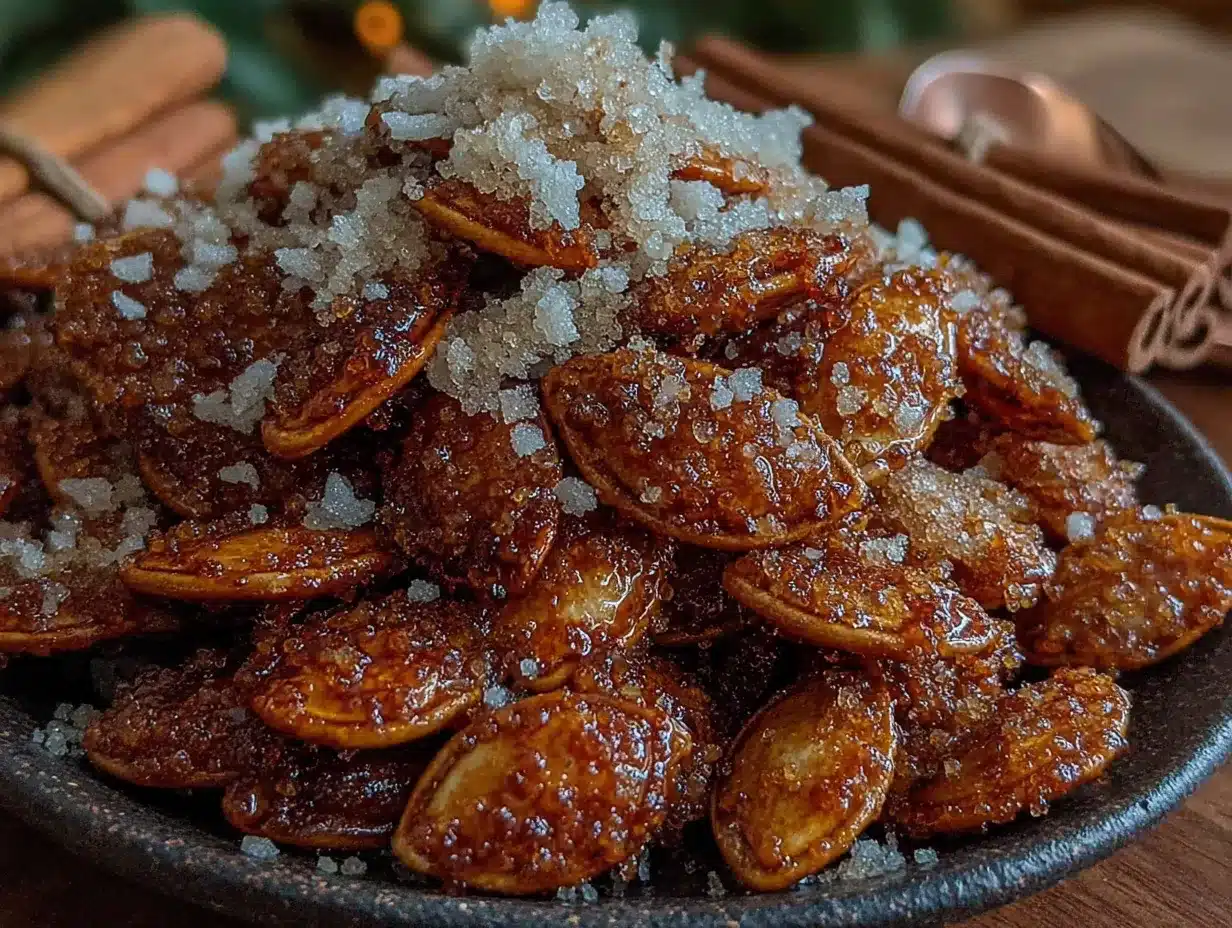
- Clean the seeds (5 minutes): After carving your pumpkin, separate the seeds from the stringy pulp as best you can. Place the seeds in a colander and rinse them under cool running water, using your fingers to remove any remaining pumpkin guts. Don’t worry about getting them perfectly clean—a little bit of pulp adds flavor. Drain well.
- Soak the seeds (8-12 hours, or overnight): Transfer the rinsed seeds to a large bowl. Add 1 tablespoon of kosher salt and enough water to cover the seeds by about an inch. Stir to dissolve the salt. Cover the bowl with plastic wrap or a plate and let it sit at room temperature for at least 8 hours, or overnight. This step is crucial—the salt water plumps the seeds and seasons them from the inside, so they bake up tender and flavorful instead of tough and chewy.
- Preheat and prep (10 minutes): When you’re ready to bake, preheat your oven to 300°F (150°C). Line a rimmed baking sheet with parchment paper or a silicone baking mat. Drain the seeds in a colander and rinse them briefly with fresh water. Spread them out on a clean kitchen towel or a double layer of paper towels and pat them very dry. This is important—excess moisture will steam the seeds instead of roasting them, and you want them crispy, not soggy.
- Make the coating (5 minutes): In a small bowl, whisk together 3 tablespoons of granulated sugar, 1 ½ teaspoons of ground cinnamon, and a pinch of salt. Set aside.
- First bake (20 minutes): Place the dried seeds in a medium bowl. Pour 2 tablespoons of melted unsalted butter over them and toss to coat evenly. If you’re using the vanilla extract, add it now and toss again. Spread the buttered seeds in a single layer on the prepared baking sheet. Bake for 20 minutes, stirring once halfway through. The seeds should be starting to look dry and slightly puffed.
- Add the coating (5 minutes): Remove the baking sheet from the oven. Sprinkle the cinnamon-sugar mixture evenly over the hot seeds. Use a spatula to toss the seeds gently, making sure every seed gets coated. The residual heat will help the sugar stick and start to caramelize.
- Second bake (10-15 minutes): Return the baking sheet to the oven and bake for another 10 to 15 minutes, stirring once more after 7 minutes. Keep a close eye on them during the last few minutes—the sugar can go from golden to burnt very quickly. The seeds are done when they look dry, feel firm to the touch, and the coating is bubbly and lightly caramelized. Your kitchen will smell like a fall candle factory.
- Cool completely (20 minutes): Remove the baking sheet from the oven and let the seeds cool right on the pan. They will continue to crisp up as they cool. Don’t be tempted to eat them right away—they’ll be soft and chewy straight out of the oven. Give them at least 20 minutes to set. Once cool, they should shatter when you bite into them.
- Break apart and serve: Once completely cool, break apart any clusters that formed during baking. Some clumping is normal and actually desirable—those little clusters are the best part. Transfer to a bowl and try not to eat the entire batch in one sitting.
Sensory Cues: At the end of the first bake, the seeds should look dry and pale, with no visible moisture. When you stir them, they should feel light and slightly hollow. During the second bake, you’ll see the sugar coating start to bubble and turn a deep amber color around the edges of the pan. The smell is unmistakable—warm, sweet, and spicy, like a bakery in autumn. When you take them out, the seeds will feel soft, but they’ll firm up dramatically as they cool.
Cooking Tips & Techniques
I’ve made these seeds at least a dozen times now, and I’ve learned a few things the hard way. Here are my best tips for getting them perfect every time:
Don’t skip the soak. I know it’s tempting to rush this step, especially if you’re carving pumpkins at 9 PM on a school night. But trust me on this one. The first time I made these, I was impatient and only soaked the seeds for two hours. They were okay, but they had a slight chewiness that I didn’t love. The next batch, I soaked them overnight, and the difference was night and day. The seeds were tender, crunchy, and evenly seasoned. The soak is non-negotiable.
Dry the seeds thoroughly. This is another step that’s easy to overlook. If the seeds are still wet when they go into the oven, they’ll steam instead of roast, and you’ll end up with soggy, leathery seeds instead of crispy ones. After you drain them, spread them on a towel and pat them dry, then let them air-dry for another 10 minutes if you have the time. It makes a huge difference.
Watch the sugar carefully. The second bake is where things can go wrong. The sugar coating can burn in the blink of an eye, especially if your oven runs hot. I burned my first batch because I walked away to answer the phone. Now I set a timer for 7 minutes, stir, then set another timer for 5 minutes and watch them like a hawk. If you see the sugar starting to smoke or turn dark brown, pull them out immediately.
Use a rimmed baking sheet. I learned this one the messy way. The first time I made these, I used a flat cookie sheet without a rim, and when I stirred the seeds, a few rolled right off onto the oven floor. They burned instantly and filled my kitchen with acrid smoke. A rimmed sheet pan keeps everything contained and makes stirring much easier.
Let them cool completely. I know, I know—they smell incredible, and you want to taste them right away. But if you eat them warm, they’ll be soft and the sugar coating won’t have set yet. Give them the full 20 minutes. I promise it’s worth the wait. The first time I made these, I burned my tongue on a hot seed because I couldn’t wait. Learn from my mistakes.
Variations & Adaptations
One of the best things about this recipe is how easy it is to customize. Here are a few variations I’ve tried and loved:
Spiced Chai Version: Add ½ teaspoon of ground cardamom, ¼ teaspoon of ground ginger, and a pinch of ground cloves to the cinnamon-sugar mixture. The warm, aromatic spices make these taste like a chai latte in seed form. I made this version for a book club meeting, and everyone asked for the recipe.
Maple Pecan Twist: Replace the granulated sugar with 3 tablespoons of maple sugar (or 2 tablespoons of maple syrup, but reduce the butter by 1 tablespoon to compensate for the extra moisture). Add ¼ cup of chopped pecans to the baking sheet during the last 5 minutes of the second bake. The maple and pecan combination is pure autumn magic.
Savory-Sweet Hybrid: If you want something that straddles the line between sweet and savory, reduce the sugar to 2 tablespoons and add ½ teaspoon of smoked paprika and ¼ teaspoon of cayenne pepper to the cinnamon-sugar mixture. The heat from the cayenne plays beautifully with the sweet coating, and the smoky paprika adds depth. I served these at a Halloween party alongside a cheese board, and they were a hit.
Dietary Adaptations: For a vegan version, use melted coconut oil or vegan butter in place of the dairy butter. The coconut oil version has a subtle tropical note that pairs surprisingly well with the cinnamon. For a nut-free version, skip any nut additions and just enjoy the seeds as-is. They’re naturally nut-free, so this is an easy one. For a lower-sugar version, use a monk fruit-based granulated sweetener, but know that the coating won’t get as crunchy.
Different Pumpkin Varieties: I’ve made these with seeds from sugar pumpkins, carving pumpkins, and even butternut squash. Sugar pumpkin seeds are smaller and more tender, with a slightly sweeter flavor. Carving pumpkin seeds are larger and heartier, with a more neutral taste. Butternut squash seeds are tiny and delicate, so reduce the baking time by 5 minutes. All three work beautifully, so use whatever you have on hand.
Serving & Storage Suggestions
These cinnamon sugar baked pumpkin seeds are best served at room temperature, straight from the bowl. I like to pile them into a wooden serving bowl or a rustic ceramic dish for a cozy, fall-inspired presentation. They’re perfect for snacking on their own, but they also make a fantastic topping for yogurt, oatmeal, or even a simple green salad with apple slices and goat cheese.
Complementary Dishes: Serve these alongside a warm mug of apple cider or a pumpkin spice latte for the ultimate fall snack experience. They also pair beautifully with a cheese board—try them with sharp cheddar, creamy brie, or tangy blue cheese. The sweetness of the seeds balances the saltiness of the cheese perfectly. For a dessert board, add them to a platter with dark chocolate, dried figs, and candied ginger.
Storage Instructions: Store the cooled seeds in an airtight container at room temperature for up to 2 weeks. Don’t refrigerate them—the moisture in the fridge will make them soft. If you live in a humid climate, add a silica gel packet to the container to help absorb excess moisture. I keep mine in a glass jar with a tight-fitting lid, and they stay crunchy for at least 10 days.
Freezer Instructions: These seeds freeze beautifully. Place the completely cooled seeds in a freezer-safe zip-top bag, squeeze out as much air as possible, and freeze for up to 3 months. To refresh them, spread the frozen seeds on a baking sheet and warm them in a 300°F oven for 5 minutes. They’ll crisp right back up.
Reheating Tips: If your seeds have lost their crunch after a few days, spread them on a baking sheet and bake at 300°F for 5 minutes. Let them cool completely before eating. This works like a charm and brings back that fresh-from-the-oven texture.
Flavor Development: Interestingly, these seeds actually taste better on the second day. The cinnamon and sugar have time to fully meld with the seeds, and the texture becomes even crunchier. So if you can resist eating them all on day one, you’re in for a treat on day two.
Nutritional Information & Benefits
These cozy cinnamon sugar baked pumpkin seeds aren’t just delicious—they’re packed with surprising nutritional benefits. Here’s a rough estimate per ¼-cup serving:
- Calories: ~180
- Fat: 14g (mostly healthy unsaturated fats)
- Protein: 8g
- Carbohydrates: 12g (including 7g sugar)
- Fiber: 3g
- Iron: 10% of the daily value
- Magnesium: 20% of the daily value
- Zinc: 15% of the daily value
Health Benefits: Pumpkin seeds are a fantastic source of magnesium, which supports muscle function, sleep quality, and heart health. They’re also rich in zinc, a mineral that’s essential for immune function and skin health. The fiber content helps keep you full and supports healthy digestion. And the healthy fats? They’re great for brain health and hormone balance.
Dietary Considerations: This recipe is naturally gluten-free, nut-free, and vegetarian. For a vegan version, simply swap the butter for coconut oil. It’s also low-carb friendly if you use a sugar substitute, though the texture will be slightly different. The main allergens here are dairy (from the butter) and—obviously—pumpkin seeds themselves.
Personal Wellness Perspective: I love that this snack feels indulgent but is actually pretty good for you. It’s the kind of treat I can feel good about eating while watching a movie or packing in my kids’ lunchboxes. It’s real food, minimally processed, and full of nutrients. That’s a win in my book.
Conclusion
So there you have it—the story of how a hardware store cashier changed my entire approach to pumpkin seeds. These cozy cinnamon sugar baked pumpkin seeds are proof that the best recipes often come from the most unexpected places. They’re simple enough for a Tuesday afternoon snack but special enough to serve at a holiday gathering. And honestly, they might just become your new favorite fall tradition.
I’d love to hear how they turn out for you. Did you stick with the classic version, or did you try one of the variations? Maybe you came up with your own twist—like adding a pinch of nutmeg or swapping the butter for brown butter (yes, I’ve done that, and yes, it’s incredible). Drop a comment below and let me know. And if you share a photo on social media, tag me—I want to see your crunchy, cinnamon-coated creations. Happy fall, friends. Go make some seeds.
Frequently Asked Questions
Can I use pre-cleaned pumpkin seeds from the store?
Absolutely! Just make sure you buy raw, unroasted seeds. Look for them in the bulk section or near the baking supplies. You’ll still need to soak them, even if they’re pre-cleaned—the soak is what makes them tender and crispy.
Do I have to soak the seeds overnight, or is there a shortcut?
You can get away with a 4-hour soak in a pinch, but overnight is best. If you’re really short on time, try a “quick soak”: bring the salted water to a boil, pour it over the seeds, and let them sit for 1 hour. It’s not quite as good as the overnight soak, but it’s better than nothing.
Why did my seeds turn out chewy instead of crunchy?
This usually happens for one of three reasons: you didn’t soak them long enough, you didn’t dry them thoroughly before baking, or you didn’t bake them long enough. Next time, try soaking for the full 8 hours, patting them very dry with a towel, and baking until they feel firm and dry to the touch.
Can I double this recipe for a big batch?
Yes, but don’t overcrowd the baking sheet. Use two sheets if you’re doubling the recipe, and rotate them halfway through baking. Overcrowding traps steam and prevents the seeds from getting crispy. Spread them in a single layer with a little space between each seed.
How do I prevent the sugar coating from burning?
Keep a close eye on the seeds during the second bake. Set a timer for 7 minutes, stir, then watch them for the remaining time. If your oven runs hot, reduce the temperature to 275°F. And if you see the sugar starting to smoke, pull them out immediately—even if the timer hasn’t gone off yet.
Pin This Recipe!
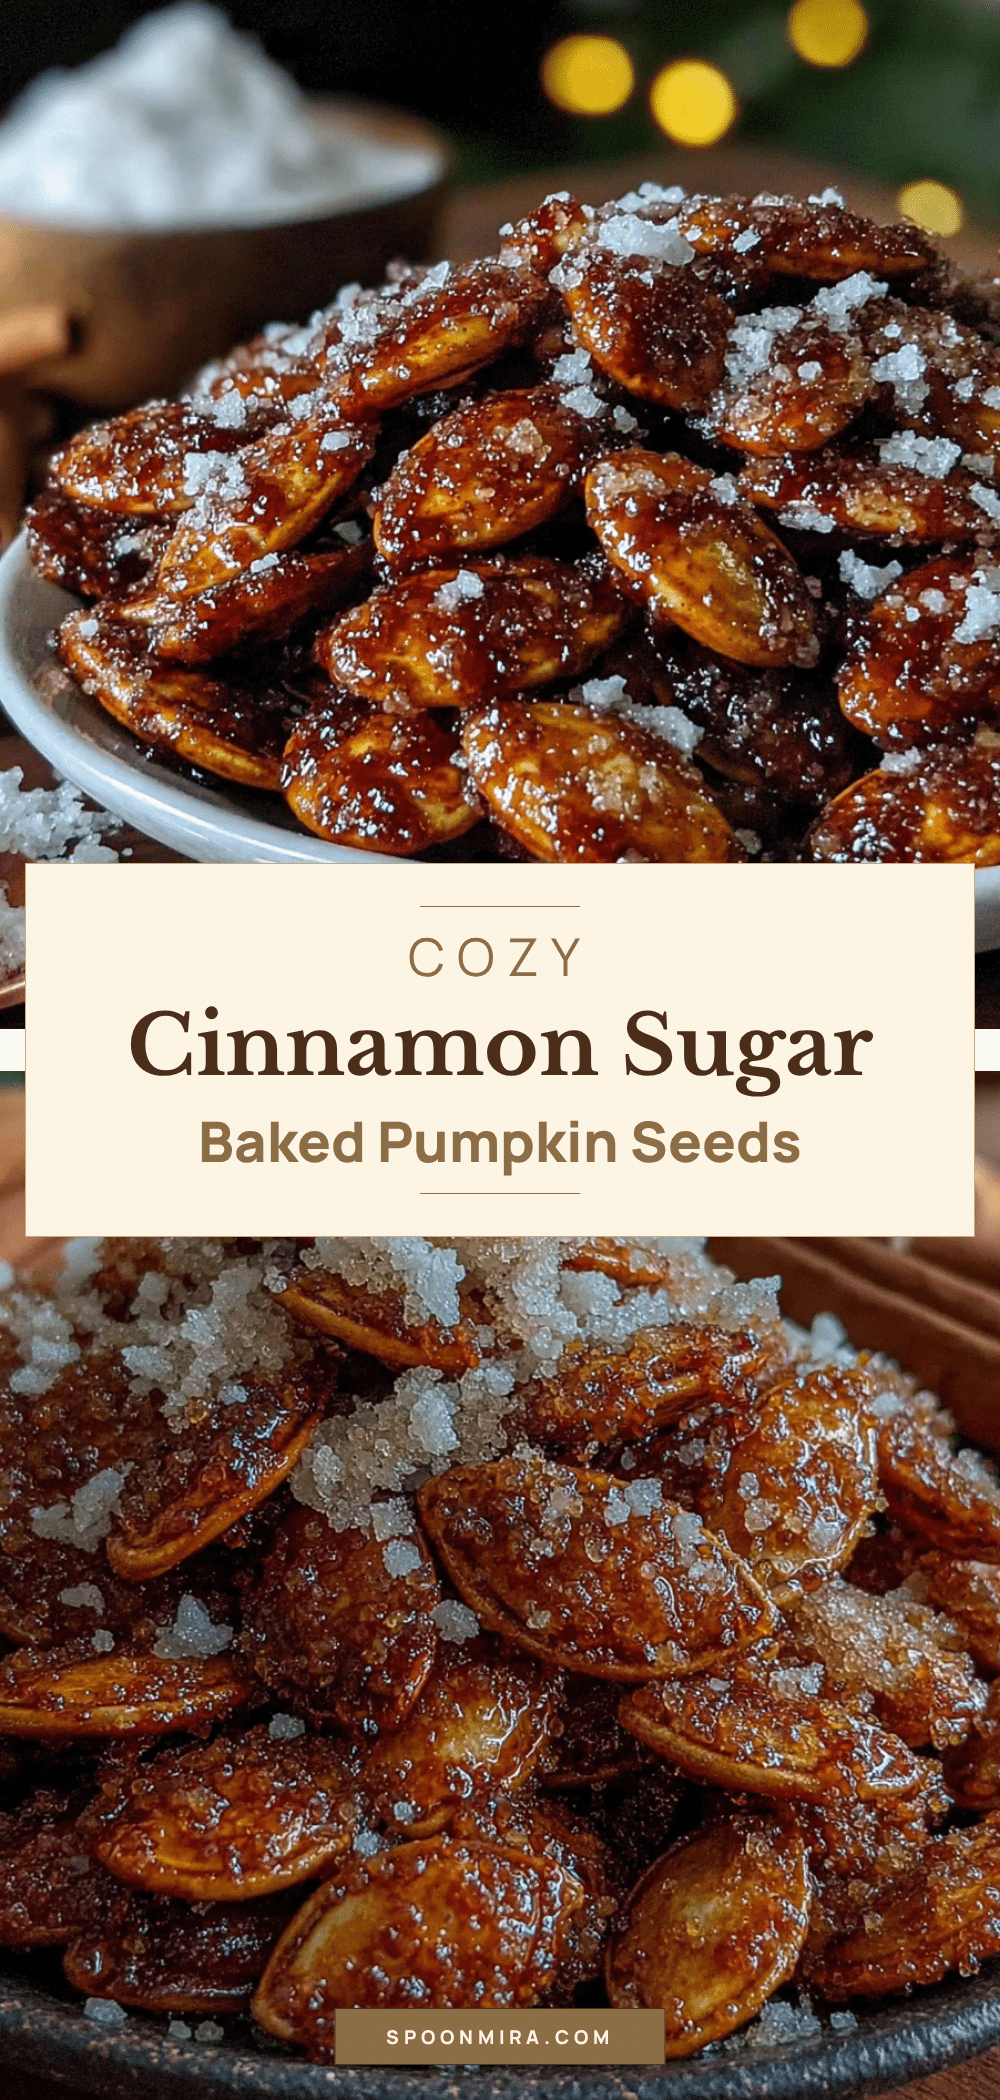
Cozy Cinnamon Sugar Baked Pumpkin Seeds: Easy Fall Snack
These cinnamon sugar baked pumpkin seeds are a crunchy, sweet, and cozy fall snack. Soaked in salted water for tenderness, then baked with a buttery cinnamon-sugar coating, they’re the perfect treat for Halloween, Thanksgiving, or any autumn day.
- Prep Time: 10 minutes (plus 8-12 hours soaking)
- Cook Time: 30-35 minutes
- Total Time: 45 minutes (plus soaking time)
- Yield: 4 servings 1x
- Category: Snack
- Cuisine: American
Ingredients
- 1 ½ cups fresh pumpkin seeds (from a medium pumpkin)
- Water, for soaking (enough to cover seeds by 1 inch)
- 1 tablespoon kosher salt (for soaking brine), plus a pinch for coating
- 2 tablespoons unsalted butter, melted
- 3 tablespoons granulated sugar
- 1 ½ teaspoons ground cinnamon
- ½ teaspoon vanilla extract (optional)
Instructions
- Clean the seeds: After carving your pumpkin, separate seeds from stringy pulp. Rinse in a colander under cool water, removing any remaining pumpkin guts. Drain well.
- Soak the seeds: Transfer rinsed seeds to a large bowl. Add 1 tablespoon kosher salt and enough water to cover seeds by 1 inch. Stir to dissolve salt. Cover and let sit at room temperature for 8-12 hours (or overnight).
- Preheat and prep: Preheat oven to 300°F (150°C). Line a rimmed baking sheet with parchment paper or a silicone baking mat. Drain seeds in a colander and rinse briefly with fresh water. Spread on a clean kitchen towel or paper towels and pat very dry.
- Make the coating: In a small bowl, whisk together 3 tablespoons granulated sugar, 1 ½ teaspoons ground cinnamon, and a pinch of salt. Set aside.
- First bake: Place dried seeds in a medium bowl. Pour 2 tablespoons melted unsalted butter over them and toss to coat evenly. If using vanilla extract, add it now and toss again. Spread buttered seeds in a single layer on prepared baking sheet. Bake for 20 minutes, stirring once halfway through.
- Add the coating: Remove baking sheet from oven. Sprinkle cinnamon-sugar mixture evenly over hot seeds. Use a spatula to toss gently, ensuring every seed is coated.
- Second bake: Return baking sheet to oven and bake for another 10-15 minutes, stirring once after 7 minutes. Watch carefully to prevent burning. Seeds are done when dry, firm to the touch, and coating is bubbly and lightly caramelized.
- Cool completely: Remove from oven and let seeds cool on the pan for at least 20 minutes. They will continue to crisp up as they cool.
- Break apart and serve: Once completely cool, break apart any clusters. Transfer to a bowl and serve.
Notes
Soaking the seeds overnight is crucial for tenderness. Dry seeds thoroughly before baking to ensure crispiness. Watch the sugar coating carefully during the second bake to prevent burning. Let seeds cool completely before eating for best texture. Store in an airtight container at room temperature for up to 2 weeks.
Nutrition
- Serving Size: 1/4 cup
- Calories: 180
- Sugar: 7
- Sodium: 200
- Fat: 14
- Saturated Fat: 4
- Carbohydrates: 12
- Fiber: 3
- Protein: 8
Keywords: pumpkin seeds, cinnamon sugar, fall snack, Halloween, Thanksgiving, easy, gluten-free, vegetarian


