I was standing in line at the hardware store, of all places, clutching a new showerhead I didn’t really need, when the woman in front of me—an older lady with a purple coat and a no-nonsense haircut—turned around and asked if I had a good recipe for fall. I blinked. I was holding a showerhead. But she just kept talking, describing this dessert she’d made for her grandkids the night before. Something about pumpkin, cake, and pops. I scribbled it on the back of my receipt. That’s how I ended up here, with a batch of these Cozy Pumpkin Pie Cake Pops cooling on my counter, realizing that sometimes the best recipes come from the most unexpected places. Honestly, I’d been searching for a way to capture that warm, spiced feeling of autumn without spending hours in the kitchen, and this was it. Let me tell you, this recipe is a keeper.
These aren’t just any cake pops. They’re little bites of comfort, rolled into perfect spheres and dipped in creamy coating. The pumpkin keeps them moist, the spices make your kitchen smell like a holiday, and the whole thing comes together with just five ingredients. I mean, five. You probably have most of them right now. Maybe you’ve been there—standing in your pantry, wanting something cozy but not wanting to wrestle with a complicated pie crust. That’s where these come in. They’re the kind of treat that makes you close your eyes after the first bite, the kind you’ll want to share with everyone you know. And honestly, they’re so easy, you’ll wonder why you haven’t been making them all along.
Why You’ll Love This Recipe
I’ve tested this one more times than I can count, and I can tell you with full confidence: it works. Every time. The texture is spot-on, the flavor is cozy and familiar, and it’s forgiving enough for a beginner. Here’s what makes it stand out:
- Quick & Easy: From start to finish, you’re looking at about 45 minutes of active time. The hardest part is waiting for them to chill.
- Simple Ingredients: You need a box of cake mix, a can of pumpkin, cream cheese, white chocolate coating, and a little oil. That’s it.
- Perfect for Fall Gatherings: These are a hit at Halloween parties, Thanksgiving dessert tables, or just a cozy night in with a movie.
- Crowd-Pleaser: Kids love them. Adults love them. I’ve seen a plate of these disappear in under ten minutes.
- Unbelievably Delicious: The pumpkin and cream cheese create this ridiculously moist, rich center. The coating adds a satisfying snap. It’s next-level comfort food in a bite-sized package.
What makes this recipe different from the rest? It’s the simplicity. Most cake pop recipes have you bake a cake, crumble it, mix it with frosting, and then roll. That’s a lot of steps. Here, you skip the frosting entirely. The pumpkin and cream cheese do the work, giving you a denser, more flavorful pop without the extra sugar. It’s comfort food reimagined—faster, simpler, but with the same soul-soothing satisfaction. Perfect for impressing guests without stress, or turning a simple Tuesday into something memorable.
What Ingredients You Will Need
This recipe uses simple, everyday ingredients to deliver bold, spiced flavor and a satisfying texture without the fuss. Most of these are pantry staples, especially if you bake during the fall. Let’s break it down.
- 1 box (15.25 oz) yellow cake mix (I prefer Betty Crocker or Duncan Hines for consistent results. You can also use a spice cake mix for extra warmth.)
- 1 can (15 oz) pure pumpkin purée (Not pumpkin pie filling—make sure it’s 100% pumpkin. Libby’s is my go-to. It’s thick and not watery, which is key.)
- 4 oz cream cheese, softened (Full-fat works best for richness, but reduced-fat is fine too. Let it sit out for 30 minutes so it blends smoothly.)
- 1 cup white melting wafers or white chocolate chips (I like Ghirardelli white chocolate melting wafers—they melt evenly and set up nicely. For a dairy-free option, use vegan white chocolate chips.)
- 1 teaspoon coconut oil or vegetable oil (This thins the coating just enough for easy dipping. Coconut oil adds a subtle flavor; vegetable oil is neutral.)
Optional add-ins for extra flavor: a pinch of pumpkin pie spice, a dash of cinnamon, or a few drops of vanilla extract. If you want to get fancy, you can stir in a handful of mini chocolate chips or chopped pecans into the pumpkin mixture before baking.
For the coating, you can also use milk chocolate, dark chocolate, or even a flavored candy melt like caramel or butterscotch. If you’re avoiding white chocolate, try a dark chocolate coating with a sprinkle of sea salt—it’s a gorgeous contrast to the sweet pumpkin center.
Ingredient selection tip: Look for a cake mix with a simple ingredient list—no artificial colors or flavors if you can help it. It makes a difference in the final taste. And for the pumpkin, always check the label. You want pure pumpkin, not pumpkin pie mix, which has added sugar and spices that will throw off the balance.
Equipment Needed
You don’t need a ton of fancy tools for this one, which is part of the charm. Here’s what you’ll want on hand:
- Mixing bowls: One large bowl for the cake batter, one small bowl for the cream cheese.
- 9×13-inch baking pan: Or an 8×8-inch pan if you want a thicker cake layer. Just adjust baking time slightly.
- Electric hand mixer or stand mixer: A whisk works too, but a mixer makes it faster and smoother.
- Cookie scoop or melon baller: For uniform cake pop sizes. I use a 1-tablespoon scoop—perfect bite-sized balls.
- Baking sheet lined with parchment paper: For chilling the cake pops.
- Microwave-safe bowl or double boiler: For melting the white chocolate. I prefer the microwave—it’s faster and less cleanup.
- Lollipop sticks or cake pop sticks: Optional, but they make them look adorable. If you’re skipping sticks, just roll into balls and dip.
- Styrofoam block or a cardboard box with holes: For drying the pops upright. If you don’t have one, you can lay them flat on parchment and just turn them once.
If you don’t have a cookie scoop, just use your hands—lightly oil them so the mixture doesn’t stick. And if you’re new to cake pops, don’t stress about perfection. They’ll taste amazing no matter what.
Preparation Method
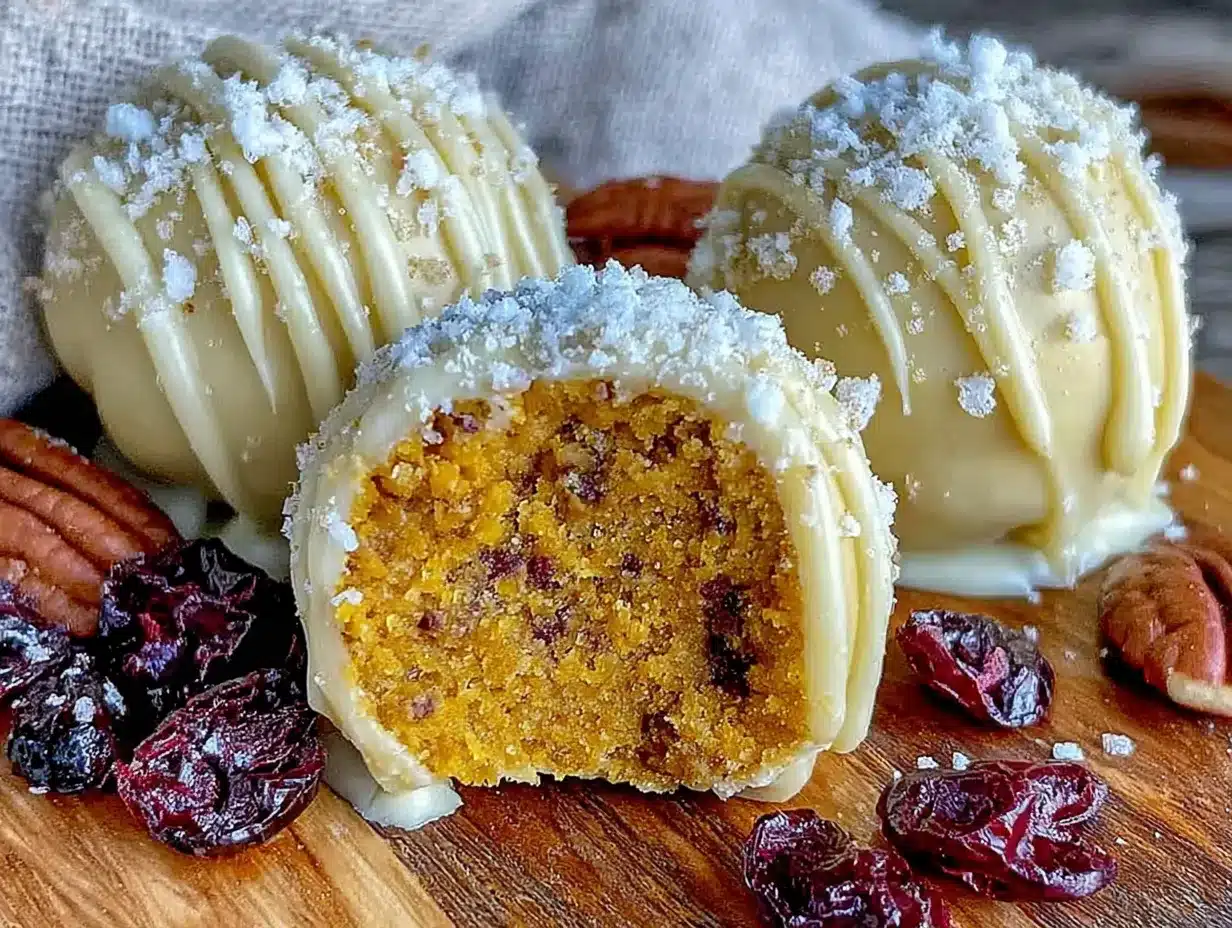
Let’s get to the fun part. This method is straightforward, but I’ll walk you through every step so you feel confident. There’s a little waiting time for chilling, but the active work is minimal.
- Preheat and prep. Preheat your oven to 350°F (175°C). Grease a 9×13-inch baking pan or line it with parchment paper. I like using parchment—it makes lifting the cake out so much easier.
- Mix the cake batter. In a large bowl, combine the yellow cake mix and the entire can of pumpkin purée. That’s it. No eggs, no oil, no water. Stir until just combined. The batter will be thick and a little sticky—that’s normal. Don’t overmix, or the cake might be tough.
- Bake the cake. Spread the batter evenly into the prepared pan. Bake for 20-25 minutes, or until a toothpick inserted in the center comes out clean. The cake will be dense and moist, not fluffy like a traditional cake. Let it cool in the pan for 10 minutes, then transfer to a wire rack to cool completely. This is important—if the cake is still warm, it will be too soft to roll.
- Make the cream cheese binder. While the cake cools, place the softened cream cheese in a small bowl. Beat it with a hand mixer or a sturdy spoon until it’s smooth and creamy. You want it lump-free. Set aside.
- Crumble the cake. Once the cake is completely cool, crumble it into a large bowl. Use your hands or a fork to break it into fine crumbs. There shouldn’t be any large chunks. This takes a few minutes, but it’s oddly satisfying.
- Combine and roll. Add the cream cheese to the crumbled cake. Mix with your hands until everything is evenly combined. The mixture should hold together when pressed—like damp sand. If it’s too dry, add a teaspoon of milk or melted butter. If it’s too wet, add a tablespoon of cake crumbs or graham cracker crumbs. Roll the mixture into 1-inch balls (about 1 tablespoon each) and place them on a parchment-lined baking sheet. You should get around 24-30 pops.
- Chill the balls. Place the baking sheet in the refrigerator for at least 30 minutes, or up to 1 hour. This firms them up so they hold their shape when dipped. If you’re in a hurry, pop them in the freezer for 15 minutes.
- Melt the coating. In a microwave-safe bowl, combine the white melting wafers and the oil. Microwave in 30-second intervals, stirring after each, until smooth and fully melted. Don’t overheat—white chocolate can seize up. If it’s too thick, add another ½ teaspoon of oil.
- Dip the pops. If using lollipop sticks, dip the tip of each stick into the melted coating, then insert it into a chilled cake ball. This helps the stick stay in place. Then, dip the entire ball into the melted coating, turning to coat evenly. Gently tap the stick on the edge of the bowl to let excess coating drip off. Place upright in a styrofoam block or on parchment paper. If you’re not using sticks, just drop the balls into the coating, roll them with a fork, and lift them out. Let the excess drip off, then place on parchment.
- Set and decorate. Let the coated pops set at room temperature for about 10 minutes, or speed it up in the fridge for 5 minutes. If you want to add sprinkles, crushed graham crackers, or a dusting of cinnamon, do it right after dipping while the coating is still wet. Once set, they’re ready to serve.
Sensory cue: When you roll the mixture, it should feel cohesive but not greasy. The coating should have a glossy, smooth finish. If it looks streaky, the coating was too thick—add a little more oil.
Cooking Tips & Techniques
I’ve made my share of mistakes with cake pops, so let me save you some trouble. Here are the tips I wish someone had told me the first time.
- Don’t skip the chill. I once tried to dip unchilled balls, and they fell apart in the coating. The cold firmness is what keeps them intact. Trust the process.
- Watch the coating temperature. If your white chocolate is too hot, it can crack the cake balls. Let it cool for a minute after melting. It should be warm, not scorching.
- Use a deep, narrow bowl for dipping. A tall glass or a small ceramic bowl works better than a wide, shallow one. It lets you submerge the pop fully without wasting coating.
- Tap off excess gently. Too much coating makes the pop heavy and lopsided. A few gentle taps on the stick is all you need.
- If the coating thickens while you work, reheat it. Just 10 seconds in the microwave will bring it back to a dip-able consistency. Don’t add more oil unless it’s really thick.
- For a smoother finish, double-dip. Dip once, let it set for 5 minutes, then dip again. It gives a thicker, more even shell that hides any imperfections.
One time, I forgot to add the cream cheese and ended up with a bowl of dry cake crumbs. I had to start over. Now I always double-check my ingredients before mixing. Learn from my chaos.
Variations & Adaptations
This recipe is endlessly adaptable. Here are a few ways to make it your own.
- Gluten-Free Version: Use a gluten-free yellow cake mix. The rest of the ingredients are naturally gluten-free. Just check the labels on your white chocolate—some brands add wheat starch.
- Vegan Version: Use a vegan yellow cake mix and vegan cream cheese. For the coating, use vegan white chocolate chips. Coconut oil works perfectly as the thinning agent.
- Spiced Up: Add 1 teaspoon of pumpkin pie spice and ½ teaspoon of cinnamon to the cake mix before baking. It amplifies the cozy factor.
- Chocolate Lover’s Twist: Swap the white chocolate coating for dark or milk chocolate. Drizzle with melted white chocolate for a marbled look.
- Crunchy Coating: Roll the dipped pops in crushed graham crackers, crushed ginger snaps, or toasted pecans before the coating sets. The texture is incredible.
- Mini Version: Use a ½-teaspoon scoop to make mini pops. Great for parties or snacking without guilt.
I once made a batch with a spice cake mix and a dark chocolate coating, and it tasted like a pumpkin churro. Highly recommend that combo.
Serving & Storage Suggestions
These cake pops are best served at room temperature, straight from the fridge or counter. The coating stays firm, and the inside is soft and creamy. If you’re serving them at a party, arrange them on a platter with a sprinkle of cinnamon on top. They look gorgeous on a cake stand.
For storage, place them in an airtight container in the refrigerator. They’ll keep for up to 5 days. The flavor actually deepens after a day—the spices meld together even more. If you want to freeze them, do it before dipping. Freeze the uncoated balls on a baking sheet for 1 hour, then transfer to a freezer bag. They’ll keep for up to 3 months. When you’re ready, thaw them in the fridge, then dip as directed.
To reheat, let them sit at room temperature for 15 minutes. Don’t microwave them—the coating will melt and the texture will get weird. They’re best enjoyed cold or at room temp.
Over time, the coating may develop a slight bloom (white streaks) if stored too long. That’s just the cocoa butter separating—still safe to eat, but less pretty. If you want to avoid bloom, store them in a cool, dark place, not the fridge, but note they won’t last as long.
Nutritional Information & Benefits
Here’s an approximate breakdown per cake pop (based on 24 pops):
- Calories: 145
- Fat: 7g
- Carbohydrates: 19g
- Protein: 2g
- Fiber: 1g
- Sugar: 12g
These numbers are estimates. Actual values depend on your specific ingredients and portion sizes.
Health benefits: Pumpkin is packed with vitamin A, which supports eye health and immune function. It’s also a good source of fiber, which helps with digestion. Cream cheese adds a little protein and calcium. While these are a treat, they’re a more nutrient-dense option than many other desserts—especially if you use a whole-grain or lower-sugar cake mix.
Dietary considerations: This recipe is nut-free if you use nut-free white chocolate. It contains dairy and gluten unless modified. For a lower-sugar version, use a sugar-free cake mix and sugar-free white chocolate. The pumpkin adds natural sweetness, so you might not miss the extra sugar.
Conclusion
These Cozy Pumpkin Pie Cake Pops are everything I want in a fall dessert: easy, comforting, and ridiculously delicious. They come together with just five ingredients, they’re forgiving enough for beginners, and they always impress. Whether you’re making them for a Halloween party, a Thanksgiving dessert table, or just a quiet evening with a cup of tea, they deliver that warm, spiced feeling we all crave this time of year.
I love that this recipe came from a random conversation in a hardware store. It reminds me that the best things often show up when you least expect them. So go ahead, make a batch. Customize them with your favorite coating or add-in. And when you do, I’d love to hear about it. Leave a comment below, share a photo, or tag me in your post. Let’s spread a little cozy magic, one cake pop at a time.
Frequently Asked Questions
Can I use a different cake mix flavor?
Absolutely. Spice cake, carrot cake, or even vanilla bean cake mix work beautifully. Just adjust the spices to your taste.
Why did my cake pops crack?
Cracking usually happens when the coating is too hot or the cake balls are too cold. Let the coating cool slightly after melting, and don’t freeze the balls for more than 30 minutes.
Can I make these ahead of time?
Yes! Make the uncoated balls up to 3 months ahead and freeze them. Dip them the day you plan to serve.
How do I get a smooth coating?
Use a deep bowl, tap off excess gently, and consider double-dipping. Also, make sure your coating is fully melted and not too thick.
Can I skip the cream cheese?
You can, but the texture will be drier. If you need a dairy-free option, use vegan cream cheese or a thick coconut cream instead.
Pin This Recipe!
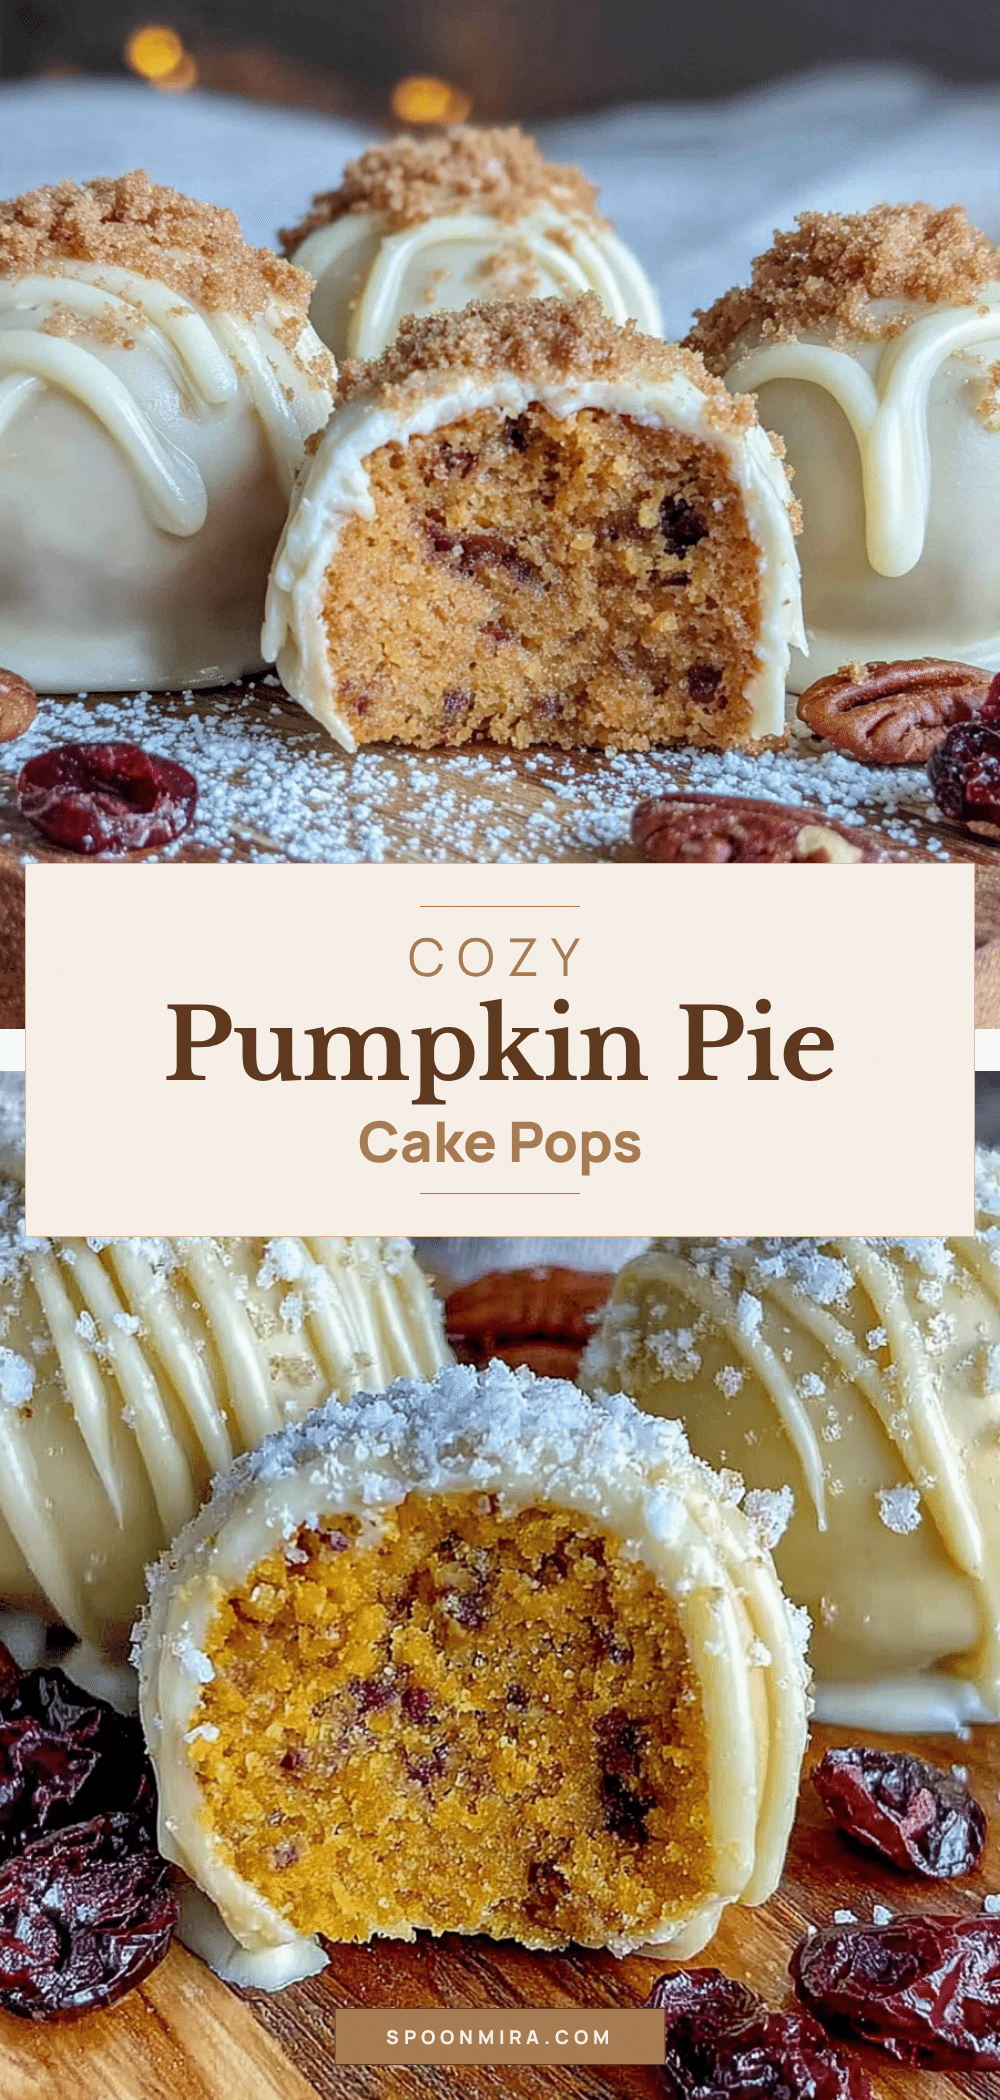
Cozy Pumpkin Pie Cake Pops: Easy 5-Ingredient Recipe
These Cozy Pumpkin Pie Cake Pops are little bites of comfort, rolled into perfect spheres and dipped in creamy coating. With just five ingredients, they’re quick, easy, and perfect for fall gatherings.
- Prep Time: 45 minutes
- Cook Time: 25 minutes
- Total Time: 1 hour 10 minutes
- Yield: 24-30 cake pops 1x
- Category: Dessert
- Cuisine: American
Ingredients
- 1 box (15.25 oz) yellow cake mix
- 1 can (15 oz) pure pumpkin purée
- 4 oz cream cheese, softened
- 1 cup white melting wafers or white chocolate chips
- 1 teaspoon coconut oil or vegetable oil
Instructions
- Preheat oven to 350°F (175°C). Grease a 9×13-inch baking pan or line with parchment paper.
- In a large bowl, combine yellow cake mix and entire can of pumpkin purée. Stir until just combined. Batter will be thick and sticky.
- Spread batter evenly into prepared pan. Bake for 20-25 minutes, or until a toothpick inserted in center comes out clean. Let cool in pan for 10 minutes, then transfer to wire rack to cool completely.
- While cake cools, beat softened cream cheese in a small bowl until smooth and creamy.
- Once cake is completely cool, crumble it into a large bowl into fine crumbs.
- Add cream cheese to crumbled cake. Mix with hands until evenly combined. Mixture should hold together when pressed. Roll into 1-inch balls (about 1 tablespoon each) and place on parchment-lined baking sheet. You should get 24-30 pops.
- Chill balls in refrigerator for at least 30 minutes, or up to 1 hour. For quicker chill, freeze for 15 minutes.
- In a microwave-safe bowl, combine white melting wafers and oil. Microwave in 30-second intervals, stirring after each, until smooth and fully melted.
- If using lollipop sticks, dip tip of each stick into melted coating, then insert into a chilled cake ball. Dip entire ball into melted coating, turning to coat evenly. Gently tap stick on edge of bowl to let excess drip off. Place upright in styrofoam block or on parchment paper. If not using sticks, drop balls into coating, roll with a fork, lift out, and place on parchment.
- Let coated pops set at room temperature for about 10 minutes, or speed up in fridge for 5 minutes. If adding sprinkles or decorations, do so right after dipping while coating is still wet.
Notes
Don’t skip the chill step—it keeps the balls intact when dipping. If coating thickens while working, reheat for 10 seconds. For a smoother finish, double-dip. Store in airtight container in refrigerator for up to 5 days. Uncoated balls can be frozen for up to 3 months.
Nutrition
- Serving Size: 1 cake pop
- Calories: 145
- Sugar: 12
- Sodium: 180
- Fat: 7
- Saturated Fat: 4
- Carbohydrates: 19
- Fiber: 1
- Protein: 2
Keywords: pumpkin, cake pops, fall dessert, easy recipe, 5 ingredients, white chocolate, cream cheese


