“Are these for us?” my neighbor asked, peeking over the fence as I stood on my porch holding a plate of cookies. It was late September, the air had that crisp edge, and I had just pulled a tray of tiny, cinnamon-smelling clouds from the oven. I hadn’t even dusted the powdered sugar off my shirt yet. “They smell like my grandmother’s kitchen,” she said, “but smaller. And… pumpkiny?” That was it. That moment. I realized I had stumbled onto something that felt both totally familiar and entirely new.
I wasn’t trying to reinvent the wheel. I just wanted a cookie. A single, perfect, fall-flavored cookie that wouldn’t leave me with a mountain of dough I’d eat alone over three days. I wanted the soft, buttery chew of a snickerdoodle, but with that unmistakable warmth of pumpkin and spice. Honestly, I was tired of big batches. I live alone, and sometimes you just want six cookies, not six dozen. So I started tinkering. I scaled down my favorite snickerdoodle recipe, swapped in some pumpkin puree, and held my breath.
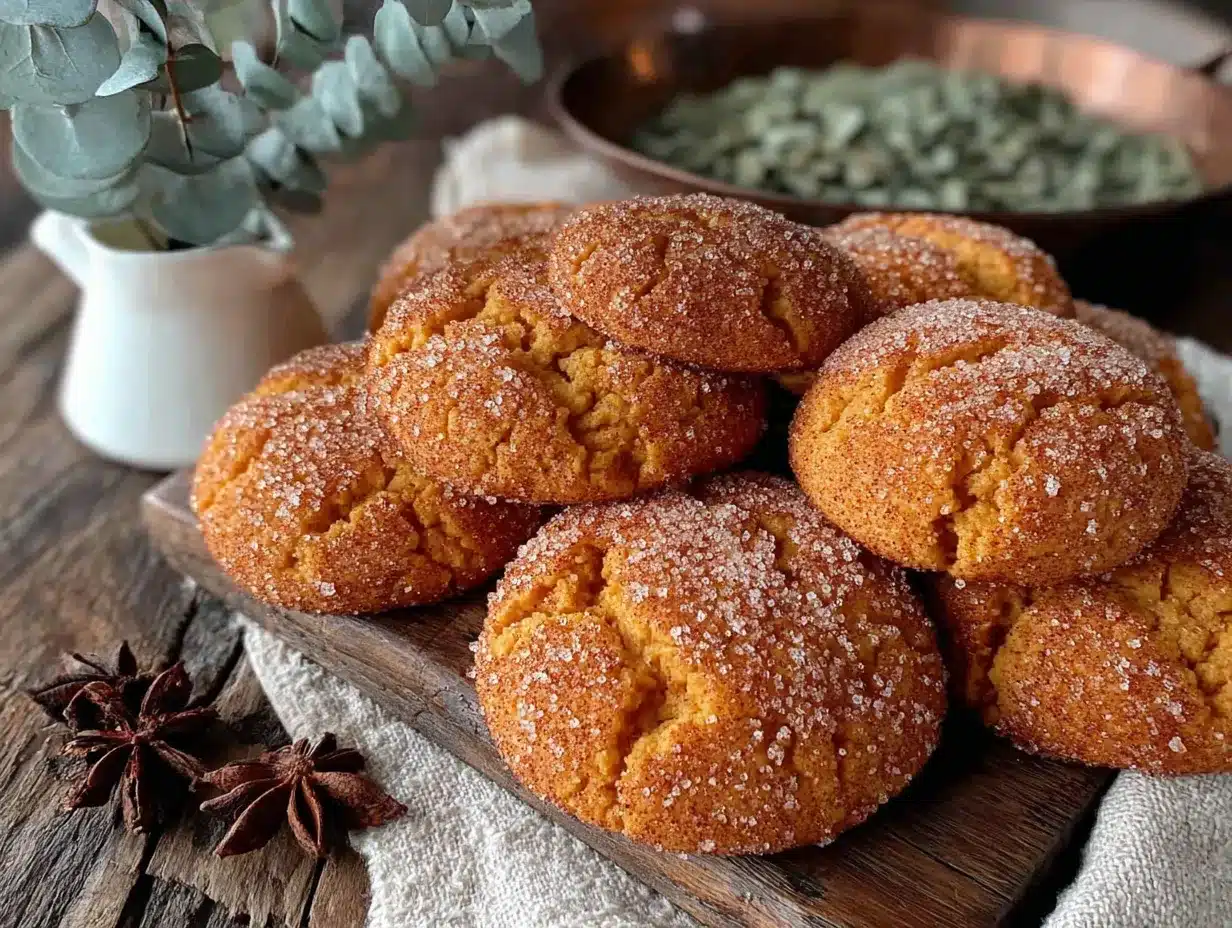
The first batch came out of the oven, and I knew. They were puffy, crackled on top, and coated in a cinnamon-sugar blanket that made the whole apartment smell like a candle shop. The pumpkin doesn’t scream at you—it whispers. It adds a tenderness, a little bit of moisture, and that gorgeous orange hue. This recipe isn’t about making a huge statement. It’s about having a quiet, cozy moment with a warm cookie and a cup of tea. It’s about baking for the sake of baking, not for a crowd. And honestly? It’s the kind of cookie that makes you close your eyes after the first bite. No hype. Just truth.
Why You’ll Love This Recipe
I’ve tested this recipe about five times now, and each time I tweaked something—a little more spice, a little less sugar, a slightly longer chill time. I wanted it to be perfect for you. Not just good, but the kind of recipe you bookmark and come back to every single fall. Here’s why this one is a keeper.
- Small Batch, Big Flavor: This recipe makes exactly six cookies. No leftovers tempting you all week, no wasted ingredients. It’s just enough to satisfy a craving.
- Simple Pantry Ingredients: You probably have everything already. Flour, butter, sugar, an egg, pumpkin puree, and a few spices. No weird, expensive specialty items.
- Perfect for a Cozy Night In: These are the cookies you make when you want to curl up with a good book or watch a movie. They’re not for a party—they’re for you.
- Soft, Chewy, and Crackly: The texture is spot on. They’re soft in the middle with a slightly crisp edge, and that classic snickerdoodle crackle on top is so satisfying.
- Beginner-Friendly: If you can stir, you can make these. No electric mixer required. No complicated techniques. Just a bowl, a spoon, and a little patience.
What makes this recipe different from the dozens of other pumpkin snickerdoodle recipes out there? It’s the balance. I use just enough pumpkin to add moisture and flavor without making the dough sticky or cakey. I also use a blend of cream of tartar and baking soda for that signature tangy snickerdoodle flavor, and I let the dough chill so the cookies don’t spread into flat pancakes. It’s not just another version—it’s the best version for a quiet, cozy moment.
This is the cookie you make when you need a little hug. It’s the one that reminds you why fall is the best season. And honestly, it’s the one that makes you feel like a genius even if you’ve never baked a cookie in your life.
What Ingredients You Will Need
This recipe uses simple, wholesome ingredients to deliver that classic snickerdoodle chew with a cozy pumpkin twist. No fuss, just flavor. Here’s what you’ll need and why each one matters.
For the Cookie Dough
- All-Purpose Flour (1 cup / 120g): The backbone of the cookie. I use unbleached all-purpose for a slightly sturdier texture. Spoon and level your flour—don’t scoop directly from the bag, or you’ll get too much and end up with dry cookies.
- Unsalted Butter (¼ cup / 57g, softened): I always use unsalted so I can control the salt level. Make sure it’s truly softened, not melted. You want it at room temperature so it creams properly with the sugar.
- Granulated Sugar (⅓ cup / 65g): Adds sweetness and helps create that slightly crisp edge. I’ve tried coconut sugar here, and it works, but the cookies are darker and less sweet.
- Pumpkin Puree (3 tablespoons / 45g): Not pumpkin pie filling! Make sure you grab 100% pure pumpkin puree. I like Libby’s for its consistent texture. The pumpkin adds moisture and a subtle earthy sweetness.
- Large Egg Yolk (1): Just the yolk. It adds richness and tenderness without making the dough too wet. Save the egg white for an omelet or scramble the next morning.
- Vanilla Extract (½ teaspoon): A little goes a long way. It rounds out the pumpkin and spice flavors beautifully.
- Cream of Tartar (½ teaspoon): This is the secret to a true snickerdoodle. It gives the cookies that signature tangy flavor and helps stabilize the dough. Don’t skip it!
- Baking Soda (¼ teaspoon): Works with the cream of tartar to give the cookies a little lift. Not too much—we want them puffy, not cakey.
- Salt (¼ teaspoon): Balances the sweetness and enhances all the flavors. I use fine sea salt.
- Pumpkin Pie Spice (½ teaspoon): A warm blend of cinnamon, nutmeg, ginger, and cloves. If you don’t have it, use ¼ teaspoon cinnamon + ⅛ teaspoon nutmeg + a pinch of ginger and cloves.
- Cinnamon (¼ teaspoon): For an extra layer of warmth. It pairs perfectly with the pumpkin pie spice.
For the Cinnamon-Sugar Coating
- Granulated Sugar (2 tablespoons / 25g): The base of the coating. It gives the cookies that sparkly, crackly finish.
- Ground Cinnamon (1 teaspoon): The star of the show. I prefer Saigon cinnamon for its bold, sweet flavor.
Ingredient Selection Tip: For the best texture, make sure your butter is truly softened—you should be able to press a finger into it and leave a dent. Cold butter won’t cream properly, and melted butter will make the cookies spread too much. Also, if your pumpkin puree looks watery, blot it with a paper towel to remove excess moisture. This helps prevent the cookies from being too soft.
Substitution Guidance: Need a dairy-free option? Use a high-quality vegan butter stick (like Earth Balance) in place of the regular butter. For a gluten-free version, swap the all-purpose flour for a 1:1 gluten-free baking flour blend. I’ve tested this with Bob’s Red Mill, and it works great—just add an extra tablespoon of flour if the dough feels too sticky.
Equipment Needed
You don’t need a fancy kitchen to make these cookies. In fact, I made my first batch with a whisk and a cereal bowl. Here’s what you’ll actually need.
- Mixing Bowls: One medium bowl for the dry ingredients and one small bowl for the wet ingredients. I use glass bowls because they’re easy to clean and don’t hold onto odors.
- Whisk: For combining the dry ingredients. A fork works in a pinch, but a whisk is faster.
- Spatula or Wooden Spoon: For mixing the dough. I prefer a silicone spatula because it scrapes the bowl clean.
- Measuring Cups and Spoons: Accurate measurements matter in baking. Use dry measuring cups for flour and sugar, and liquid measuring cups for the pumpkin puree.
- Baking Sheet: A standard half-sheet pan works perfectly. I line mine with parchment paper for easy cleanup.
- Parchment Paper or Silicone Baking Mat: Prevents sticking and helps the cookies bake evenly. I’m team parchment paper all the way.
- Cookie Scoop (1.5-tablespoon size): Not essential, but it helps you get evenly sized cookies. A regular tablespoon works too.
- Cooling Rack: Lets the cookies cool evenly so they don’t get soggy on the bottom. If you don’t have one, just transfer the cookies to a plate after a few minutes.
Budget-Friendly Tip: You don’t need a stand mixer or hand mixer for this recipe. Everything comes together with a spatula and a little elbow grease. Also, skip the fancy cookie scoop and just use two spoons to portion the dough. It works like a charm.
Preparation Method
Alright, let’s get to the good part. Here’s how to make these cozy little cookies step by step. I’ll include all the little details I’ve learned from my many test batches.
Step 1: Prepare Your Workspace
Preheat your oven to 350°F (175°C). Line a baking sheet with parchment paper or a silicone mat. Set it aside. Take your butter out of the fridge and let it soften on the counter while you gather your ingredients. This usually takes about 15-20 minutes.
Step 2: Mix the Dry Ingredients
In a medium bowl, whisk together the all-purpose flour, cream of tartar, baking soda, salt, pumpkin pie spice, and cinnamon. Whisk for about 15 seconds to make sure everything is evenly distributed. This step is important—you don’t want a pocket of baking soda in one cookie. Set the bowl aside.
Step 3: Cream the Butter and Sugar
In a separate small bowl, combine the softened butter and granulated sugar. Use a spatula or wooden spoon to mash them together until they’re light and fluffy. This takes about 2 minutes of vigorous stirring. You’re looking for a paste-like consistency. It won’t be perfectly smooth, and that’s okay. Scrape down the sides of the bowl once or twice.
Step 4: Add the Wet Ingredients
Add the egg yolk, pumpkin puree, and vanilla extract to the butter-sugar mixture. Stir until everything is fully combined. The mixture will look a little bit curdled at first—that’s normal. Keep stirring until it comes together into a smooth, orange-tinted paste. It should smell amazing already.
Step 5: Combine Wet and Dry Ingredients
Pour the wet mixture into the bowl with the dry ingredients. Use your spatula to fold everything together gently. Stir just until no streaks of flour remain. Do not overmix! Overmixing develops gluten and makes the cookies tough. The dough will be soft and slightly sticky, but it should hold together when you press it.
Step 6: Chill the Dough
This is the most important step. Cover the bowl with plastic wrap and pop it in the refrigerator for at least 30 minutes. I know you want to bake them right now, but trust me. Chilling the dough solidifies the butter, which prevents the cookies from spreading into flat discs. It also allows the flavors to meld together. I’ve forgotten this step before, and the cookies turned into sad, flat puddles. Don’t be like me. Chill the dough.
Step 7: Prepare the Cinnamon-Sugar Coating
While the dough chills, mix the granulated sugar and ground cinnamon in a small shallow bowl. Use a fork to break up any clumps. Set it aside.
Step 8: Shape and Coat the Cookies
After the dough has chilled, use a cookie scoop or a tablespoon to portion out 6 equal balls of dough. Each ball should be about 1.5 tablespoons in size (roughly 30-35g). Roll each ball between your palms until smooth. Then, roll each ball in the cinnamon-sugar mixture until fully coated. Place them on the prepared baking sheet, spacing them about 2 inches apart. They will spread a little, so give them room to breathe.
Step 9: Bake
Bake the cookies at 350°F (175°C) for 10-12 minutes. At 10 minutes, they will look puffy and slightly underdone in the center. That’s exactly what you want. The tops should be crackled and the edges should be set. If you bake them until they look fully done, they will be overbaked and dry. Remember, they continue to cook on the hot baking sheet after you take them out.
Step 10: Cool and Enjoy
Let the cookies cool on the baking sheet for 5 minutes. This allows them to set up properly. Then, transfer them to a cooling rack to cool completely. Or, if you’re like me, eat one warm after about 3 minutes. The texture is unreal—soft, chewy, and perfectly spiced.
Cooking Tips & Techniques
I’ve made these cookies about five times now, and I’ve learned a few things the hard way. Here are my best tips to make sure your batch turns out perfect every single time.
Don’t Skip the Chill Time
I cannot stress this enough. The first time I made these, I was impatient and skipped the chill. The cookies spread into thin, crispy discs that barely held together. The pumpkin puree adds extra moisture, and without chilling, that moisture causes the dough to spread like crazy. Thirty minutes in the fridge makes all the difference. I’ve even chilled the dough overnight, and the cookies were even better the next day.
Use a Cookie Scoop for Even Sizing
I used to just eyeball it, and I’d end up with one giant cookie and two tiny ones. A 1.5-tablespoon cookie scoop gives you perfectly even portions, which means they all bake at the same rate. No more burnt edges on the small ones and raw centers on the big ones.
Watch the Oven Like a Hawk
Oven temperatures vary wildly. My oven runs a little hot, so I start checking at 9 minutes. If the edges are golden and the centers are still soft and puffy, they’re done. If you wait until the centers look fully set, you’ve gone too far. Pull them out when they look slightly underdone, and trust the carryover cooking.
Rotate the Baking Sheet Halfway Through
If your oven has hot spots (and most do), rotate the baking sheet halfway through the baking time. This ensures even browning. I learned this after I pulled out a batch with one perfectly golden cookie and one pale one sitting right next to it.
Let Them Cool on the Sheet
I know it’s tempting to move them to a rack immediately, but those 5 minutes on the hot baking sheet are crucial. The cookies are fragile when they come out of the oven, and moving them too soon can cause them to break. Plus, the residual heat helps the centers finish setting up.
Variations & Adaptations
One of the best things about this recipe is how easy it is to tweak. Here are a few of my favorite variations, all tested and approved.
Vegan Pumpkin Snickerdoodles
Swap the butter for a high-quality vegan butter stick (like Earth Balance or Miyoko’s). Replace the egg yolk with 1 tablespoon of aquafaba (the liquid from a can of chickpeas) or 1 tablespoon of unsweetened applesauce. The cookies will be slightly softer, but they’ll still be delicious. I’ve made this version for a friend who’s vegan, and she couldn’t tell the difference.
Gluten-Free Option
Use a 1:1 gluten-free baking flour blend (I like Bob’s Red Mill). The dough will be a bit more delicate, so be gentle when rolling the balls. Add an extra tablespoon of flour if the dough feels too sticky. The texture is slightly more tender, but the flavor is spot on.
Extra Spicy Pumpkin Snickerdoodles
If you love a bold spice profile, add an extra ¼ teaspoon of pumpkin pie spice and a pinch of ground ginger to the dough. You can also add a pinch of cayenne pepper for a subtle heat that pairs beautifully with the cinnamon-sugar coating. This is my personal favorite version for chilly November evenings.
Maple Glazed Variation
After the cookies have cooled, drizzle them with a simple maple glaze. Mix ½ cup of powdered sugar with 1 tablespoon of maple syrup and 1 teaspoon of milk (or plant-based milk). Drizzle over the cookies and let set for 10 minutes. It adds a lovely sweetness and a beautiful finish.
Pumpkin Chocolate Chip Snickerdoodles
Fold in ¼ cup of mini chocolate chips into the dough before chilling. The chocolate adds a rich contrast to the warm spices. I recommend dark chocolate chips for a less sweet option. This variation is perfect for when you can’t decide between a snickerdoodle and a chocolate chip cookie.
Serving & Storage Suggestions
These cookies are best enjoyed warm, fresh from the oven, with a tall glass of cold milk or a steaming mug of coffee. But they’re also pretty amazing the next day, especially if you know how to store them properly.
Serving Ideas
Serve these cookies slightly warm for the best texture. I like to pair them with a cozy homemade pumpkin chai latte with steamed oat milk for the ultimate fall treat. They’re also fantastic alongside a homemade iced pumpkin spice latte if you’re in the mood for something cold. For a fun dessert board, arrange the cookies on a plate with fresh apple slices, a handful of candied pecans, and a dollop of whipped cream.
Storage Instructions
Store the cookies in an airtight container at room temperature for up to 3 days. To keep them soft, add a slice of plain bread to the container. The bread absorbs excess moisture and releases it back to the cookies, keeping them perfectly chewy. Replace the bread slice every day if you’re storing them longer.
Freezer Instructions
These cookies freeze beautifully. To freeze baked cookies, let them cool completely, then place them in a single layer in a freezer-safe bag or container. They’ll keep for up to 3 months. To thaw, let them sit at room temperature for about 15 minutes. I like to warm them in the microwave for 10 seconds before serving.
You can also freeze the unbaked dough. Roll the dough into balls, coat them in cinnamon-sugar, and place them on a baking sheet lined with parchment paper. Freeze until solid, then transfer the dough balls to a freezer bag. When you’re ready to bake, add 2-3 minutes to the baking time. No need to thaw—just bake straight from frozen.
How Flavors Develop Over Time
Honestly, these cookies taste even better the next day. The spices meld together, and the pumpkin flavor becomes more pronounced. If you can resist eating them all on day one, you’ll be rewarded with a deeper, more complex flavor on day two.
Nutritional Information & Benefits
While these are definitely a treat (and meant to be enjoyed as such), there are a few nutritional highlights worth mentioning. Here’s the estimated breakdown for one cookie (based on the recipe making 6 cookies).
| Nutrient | Amount Per Cookie |
|---|---|
| Calories | 175 |
| Total Fat | 8g |
| Saturated Fat | 5g |
| Cholesterol | 35mg |
| Sodium | 125mg |
| Total Carbohydrates | 24g |
| Dietary Fiber | 1g |
| Sugars | 14g |
| Protein | 2g |
| Vitamin A | 15% DV |
Health Benefits: Pumpkin is packed with vitamin A, which supports eye health and immune function. The cinnamon in the coating has anti-inflammatory properties and can help regulate blood sugar levels. Plus, the smaller batch size means you’re less likely to overindulge—portion control built right in!
Dietary Considerations: This recipe is vegetarian and can easily be made vegan or gluten-free with the substitutions mentioned above. It contains dairy (butter), eggs, and gluten in its standard form. For a nut-free version, simply skip any nut-based toppings or additions.
I’m not a nutritionist, and I don’t pretend to be one. But I do believe in balance. These cookies are a treat, and they’re meant to be enjoyed without guilt. One cookie with a cup of tea is a beautiful thing.
Conclusion
So there you have it—a small batch of cozy pumpkin snickerdoodle cookies that are perfectly spiced, wonderfully chewy, and just enough to satisfy a craving without overwhelming you with leftovers. This recipe has become my go-to for quiet fall evenings, lazy Sunday afternoons, and any time I need a little warmth in my kitchen.
I love this recipe because it’s forgiving. It doesn’t demand perfection. It just asks for a little patience (that chill time, remember?) and a willingness to enjoy the process. Baking should feel good, not stressful. And these cookies? They’re pure comfort.
I’d love to hear how yours turn out. Did you add chocolate chips? Try the maple glaze? Bake them for a cozy movie night? Drop a comment below and let me know. And if you tweak the recipe and discover something amazing, share that too. We’re all in this together, learning and baking one small batch at a time.
Now go preheat your oven. Your six perfect cookies are waiting.
Frequently Asked Questions
Can I make these cookies without cream of tartar?
Cream of tartar is what gives snickerdoodles their signature tangy flavor and helps with texture. If you don’t have it, you can substitute it with ½ teaspoon of lemon juice or white vinegar mixed into the wet ingredients. The flavor will be slightly different, but the cookies will still be delicious.
Why did my cookies spread too much?
This usually happens for one of two reasons: the dough wasn’t chilled long enough, or the butter was too soft or melted. Make sure your butter is softened but not melted, and don’t skip the 30-minute chill time. If your kitchen is warm, chill the dough for a full hour.
Can I double this recipe?
Absolutely! This recipe scales beautifully. Simply double all the ingredients, and you’ll have 12 cookies. The baking time stays the same. Just make sure your mixing bowl is big enough to hold the larger batch.
Can I use pumpkin pie filling instead of pumpkin puree?
No, please don’t. Pumpkin pie filling is pre-sweetened and spiced, which will throw off the sugar and spice balance in this recipe. Stick with 100% pure pumpkin puree for the best results.
How do I know when the cookies are done?
Look for puffy, crackled tops and set edges. The centers will look slightly underdone and soft. That’s exactly what you want. If the centers look fully set and dry, you’ve overbaked them. Remember, they continue to cook on the hot baking sheet for 5 minutes after you pull them out.
Pin This Recipe!
Cozy Small-Batch Pumpkin Snickerdoodle Cookies (6 Cookies)
These small-batch pumpkin snickerdoodle cookies are perfectly spiced, wonderfully chewy, and just enough to satisfy a fall craving without overwhelming you with leftovers. They’re soft, buttery, and coated in a cinnamon-sugar blanket, making them the perfect treat for a quiet, cozy moment.
- Prep Time: 15 minutes
- Cook Time: 12 minutes
- Total Time: 57 minutes
- Yield: 6 cookies 1x
- Category: Dessert
- Cuisine: American
Ingredients
- 1 cup (120g) all-purpose flour
- ¼ cup (57g) unsalted butter, softened
- ⅓ cup (65g) granulated sugar
- 3 tablespoons (45g) pumpkin puree (100% pure, not pie filling)
- 1 large egg yolk
- ½ teaspoon vanilla extract
- ½ teaspoon cream of tartar
- ¼ teaspoon baking soda
- ¼ teaspoon fine sea salt
- ½ teaspoon pumpkin pie spice
- ¼ teaspoon ground cinnamon
- 2 tablespoons (25g) granulated sugar (for coating)
- 1 teaspoon ground cinnamon (for coating)
Instructions
- Preheat your oven to 350°F (175°C). Line a baking sheet with parchment paper or a silicone mat.
- In a medium bowl, whisk together the all-purpose flour, cream of tartar, baking soda, salt, pumpkin pie spice, and cinnamon.
- In a separate small bowl, cream together the softened butter and granulated sugar until light and fluffy, about 2 minutes.
- Add the egg yolk, pumpkin puree, and vanilla extract to the butter-sugar mixture. Stir until fully combined and smooth.
- Pour the wet mixture into the dry ingredients. Fold gently with a spatula until just combined. Do not overmix.
- Cover the bowl with plastic wrap and refrigerate for at least 30 minutes.
- While the dough chills, mix the 2 tablespoons of granulated sugar and 1 teaspoon of ground cinnamon in a small shallow bowl.
- After chilling, portion the dough into 6 equal balls (about 1.5 tablespoons or 30-35g each). Roll each ball smooth, then coat in the cinnamon-sugar mixture.
- Place the coated dough balls on the prepared baking sheet, spacing them about 2 inches apart.
- Bake for 10-12 minutes, until the edges are set and the tops are crackled but the centers still look slightly underdone.
- Let the cookies cool on the baking sheet for 5 minutes, then transfer to a cooling rack to cool completely.
Notes
Chilling the dough is essential to prevent spreading. For best results, use 100% pure pumpkin puree, not pumpkin pie filling. If your pumpkin puree is watery, blot it with a paper towel. The cookies continue to cook on the hot baking sheet after removal, so pull them out when the centers still look slightly underdone.
Nutrition
- Serving Size: 1 cookie
- Calories: 175
- Sugar: 14
- Sodium: 125
- Fat: 8
- Saturated Fat: 5
- Carbohydrates: 24
- Fiber: 1
- Protein: 2
Keywords: pumpkin snickerdoodle, small batch cookies, fall cookies, pumpkin cookies, snickerdoodle recipe, easy pumpkin cookies


