Okay, I want mummy stuffed peppers. Not just any stuffed peppers—I want the ones that look like little bandaged zombies sitting in a pool of sauce, grinning up at me with googly eyes. And I want them on a Tuesday night in October because honestly, Halloween dinner shouldn’t be limited to October 31st. The problem is, I have bell peppers, black beans, and exactly zero motivation to make something complicated. So here we are. I grab the peppers from the crisper drawer—three red, two yellow—and I start thinking about how to make this feel festive without requiring a trip to the store for weird ingredients. The answer is obvious once I spot the mozzarella string cheese in the back of the fridge. Cut them into strips, drape them across the peppers like gauze, and suddenly dinner looks like it crawled out of a tomb. It’s ridiculous. It’s perfect. And my kids are going to lose their minds.
I’ve been making stuffed peppers for years—they’re one of those meals that feels fancy but takes about fifteen minutes of actual effort. But the mummy version? That came from a moment of pure desperation last Halloween when I forgot to buy candy and needed something to distract the kids before trick-or-treating. The black bean filling is hearty enough that nobody misses the meat, and the smoky cumin-chili seasoning gives it this deep, comforting flavor that makes you forget you’re eating vegetables shaped like monsters. I’ve tweaked the recipe every year since, and this version is the one I keep coming back to. It’s the kind of dinner that makes people smile before they even take a bite—and that’s really the whole point, isn’t it?
The best part is how simple it is to pull together. You don’t need any special equipment or hard-to-find ingredients. Just beans, spices, cheese, and a little creativity. The mummy wrapping takes maybe two minutes per pepper, and the result is so visually fun that even the pickiest eaters will want to dig in. I’ve served these at Halloween parties, family dinners, and even a grown-up game night where everyone pretended to be too cool for the googly eyes but then quietly asked for the recipe. Trust me on this one—you need these peppers in your life.
Why You’ll Love This Recipe
This isn’t just another stuffed pepper recipe. Here’s why it deserves a permanent spot in your fall dinner rotation:
- Quick & Easy: From start to finish, you’re looking at about 45 minutes. Most of that is hands-off baking time, so you can wrangle kids, set out decorations, or just sit down for five seconds.
- Simple Ingredients: Black beans, rice, cheese, spices, and bell peppers. That’s it. No weird grocery store runs or specialty items that’ll sit in your pantry for three years.
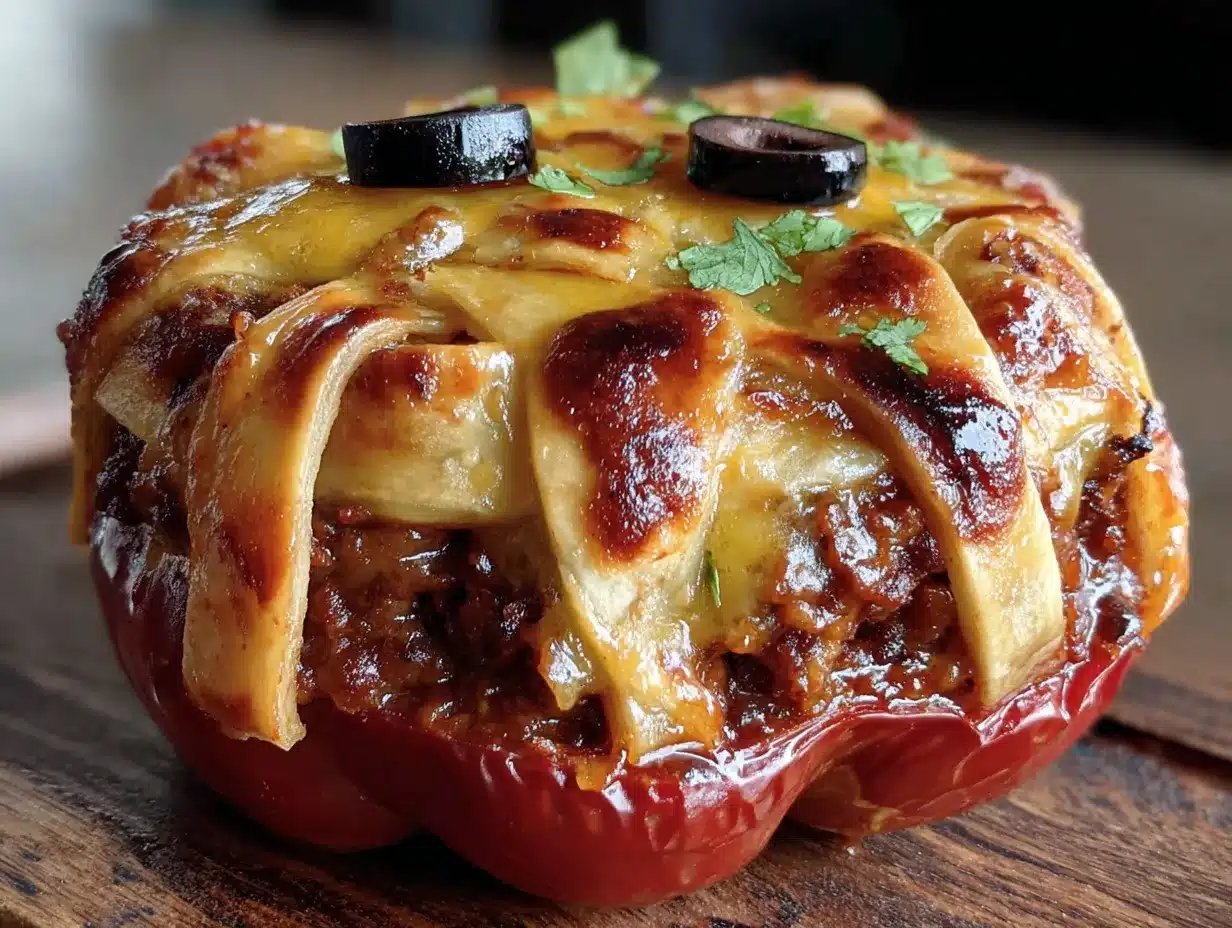
- Perfect for Halloween: These look like adorable mummies! The googly eyes and cheese bandages make them the star of any Halloween spread, whether it’s a school party or a family dinner.
- Crowd-Pleaser: I’ve served these to kids, vegetarians, and skeptical meat-eaters who swore they needed ground beef. Everyone goes back for seconds. The smoky, savory filling is just that good.
- Unbelievably Delicious: The combination of creamy black beans, melted cheese, and tender roasted pepper is pure comfort food. The cumin and smoked paprika add a warmth that feels like a cozy blanket in food form.
What makes this recipe different from the dozens of stuffed pepper recipes out there? It’s the presentation, sure—but it’s also the filling. I spent a lot of time testing the seasoning balance so the black beans don’t taste boring or one-dimensional. The smoked paprika adds a subtle depth that mimics the richness you’d get from meat, and the fire-roasted tomatoes bring a slight sweetness that ties everything together. This isn’t a compromise version of stuffed peppers. It’s the version I actually crave.
And honestly? The emotional payoff here is huge. These peppers make people happy. They make kids giggle. They turn an ordinary Tuesday into something memorable. That’s the kind of cooking I live for—food that does double duty as dinner and entertainment.
What Ingredients You Will Need
This recipe uses simple, pantry-friendly ingredients to create something that looks way more complicated than it actually is. Here’s what you’ll need:
For the Filling
- 2 cans (15 oz each) black beans, drained and rinsed (I prefer Goya or Bush’s for consistent texture)
- 1 cup cooked rice (white, brown, or cauliflower rice works—leftover rice is perfect here)
- 1 cup shredded Mexican blend cheese or cheddar, divided (reserve half for topping)
- 1/2 cup diced onion (yellow or white)
- 2 cloves garlic, minced
- 1 can (14.5 oz) fire-roasted diced tomatoes, drained (look for Muir Glen or Hunt’s Fire Roasted)
- 1 teaspoon ground cumin
- 1 teaspoon smoked paprika (regular paprika works too, but smoked adds so much depth)
- 1/2 teaspoon chili powder
- 1/2 teaspoon salt (plus more to taste)
- 1/4 teaspoon black pepper
- 1 tablespoon olive oil
For the Mummy Wrapping & Decoration
- 4-6 medium bell peppers (any color—red, yellow, orange are sweeter; green is more savory)
- 6-8 sticks mozzarella string cheese (unwrapped and pulled into thin strips)
- Small candy eyes or black olive slices (for the googly eyes—candy eyes are easier, olive slices are more savory)
Ingredient Tips & Substitutions: If you want to add more protein, you can stir in 1 cup of cooked ground turkey or beef along with the black beans. For a vegan version, use dairy-free cheese shreds and skip the string cheese—you can use strips of roasted zucchini or bell pepper for the mummy wraps instead. The fire-roasted tomatoes are non-negotiable in my book; they add a subtle smokiness that regular diced tomatoes just can’t match. But if you only have regular tomatoes, add an extra 1/4 teaspoon of smoked paprika to compensate.
I’ve made these with quinoa instead of rice, and it works great—just make sure your quinoa is cooked and slightly cooled so it doesn’t turn the filling into mush. For a low-carb option, skip the rice entirely and double the black beans or add riced cauliflower. The texture will be a little different, but the flavor is still fantastic.
Equipment Needed
You don’t need a fancy kitchen to make these mummy peppers. Here’s what you’ll need:
- Large skillet or sauté pan: For cooking the onion, garlic, and filling. A 10- or 12-inch skillet works perfectly.
- Baking dish: A 9×13-inch dish fits 4-6 peppers comfortably. You can also use a square 8×8 dish for 4 peppers.
- Sharp knife and cutting board: For prepping the peppers and onions.
- Mixing bowl: For combining the filling ingredients.
- Measuring spoons and cups: Standard set for spices and rice.
- Can opener: Unless you’re using the pull-tab cans (bless those).
- Aluminum foil: For covering the peppers during the first part of baking.
If you don’t have a skillet, you can sauté the filling in a saucepan—just watch the heat so nothing burns. I’ve also made these in a cast-iron skillet that goes straight into the oven, which saves on dishes. If you’re using a glass baking dish, be careful about temperature shock; let it come to room temperature before putting it in a hot oven. I learned that one the hard way when a dish cracked right as I was about to serve dinner. Not my finest moment.
For the candy eyes, you can find them at any grocery store in the baking aisle, or you can use sliced black olives for a savory version. I keep a bag of candy eyes in my pantry year-round because you never know when you’ll need to make something look ridiculous and wonderful.
Preparation Method
Let’s get these mummies assembled. The process is straightforward, but I’ll walk you through every step so you feel confident.
- Preheat your oven to 375°F (190°C). While it’s heating, bring a large pot of water to a boil. You’ll blanch the peppers briefly to soften them—this makes them easier to stuff and cuts down on baking time.
- Prep the bell peppers. Slice the tops off each pepper and remove the seeds and membranes from the inside. If the peppers won’t stand upright, trim a thin slice off the bottom—but don’t cut through, or the filling will leak out. I like to leave the stems attached to the tops for presentation, but you can discard them if you prefer.
- Blanch the peppers. Drop the hollowed peppers into the boiling water and let them cook for 3-4 minutes. You want them slightly softened but still firm enough to hold their shape. Remove them with tongs and set them upside down on a paper towel to drain. Pro tip: Don’t skip this step. I tried it once to save time, and the peppers were so crunchy they cracked when I tried to stuff them.
- Cook the filling. Heat the olive oil in a large skillet over medium heat. Add the diced onion and cook for 3-4 minutes until translucent. Add the minced garlic and cook for another 30 seconds until fragrant—don’t let it burn, or it’ll turn bitter. Stir in the drained black beans, fire-roasted tomatoes, cumin, smoked paprika, chili powder, salt, and pepper. Cook for 5 minutes, stirring occasionally, until the mixture is heated through and slightly thickened.
- Combine the filling. Remove the skillet from heat and stir in the cooked rice and half of the shredded cheese (about 1/2 cup). Mix until everything is well combined. Taste and adjust seasoning—I usually add another pinch of salt and a dash more cumin at this point. The filling should be savory, smoky, and slightly creamy from the beans.
- Stuff the peppers. Stand the blanched peppers upright in your baking dish. Spoon the filling into each pepper, pressing down gently to pack it in. Don’t overstuff—you want the filling to be level with the top of the pepper, not mounded over. If you have extra filling, you can spoon it around the peppers in the dish (it’s delicious that way).
- Add the first layer of cheese. Sprinkle the remaining shredded cheese over the tops of the stuffed peppers. This will melt into a golden, gooey layer that the mummy wraps will stick to.
- Create the mummy wraps. Unwrap each mozzarella string cheese stick and pull it apart into thin strips. You can do this by pinching the ends and gently pulling, or by using your fingers to peel the cheese lengthwise. Drape the strips across the stuffed peppers in a crisscross pattern, like you’re wrapping a mummy. Leave a small gap near the top where the eyes will go. Don’t worry about being perfect—mummies are supposed to look a little messy.
- Bake the peppers. Cover the baking dish with aluminum foil and bake for 20 minutes. Then remove the foil and bake for another 10-15 minutes, until the cheese is bubbly and the peppers are tender when pierced with a fork. The mummy wraps should be slightly golden on the edges.
- Add the eyes. Remove the peppers from the oven and let them cool for 3-5 minutes. While they’re still warm, press the candy eyes (or olive slices) into the gap you left in the cheese wraps. The residual heat will help them stick. If you’re using olive slices, you can secure them with a tiny dab of cream cheese or just press them into the melted cheese.
- Serve immediately. These peppers are best hot out of the oven, when the cheese is still stretchy and the filling is steaming. Use a spatula to transfer them to plates, being careful not to disturb the eyes.
Sensory cues to watch for: The peppers should look slightly wrinkled and feel tender when you poke them with a fork. The cheese should be fully melted and starting to brown in spots. The filling should be hot throughout—if you’re unsure, stick a knife into the center of a pepper and feel the tip. It should be warm to the touch.
Cooking Tips & Techniques
I’ve made these mummy peppers at least a dozen times, and I’ve learned some things the hard way. Here are my best tips:
Don’t over-blanch the peppers. Three to four minutes in boiling water is perfect. If you go longer, the peppers will collapse during baking and your mummies will look more like deflated zombies. I speak from experience—my first batch looked like they’d been through a battle.
Let the filling cool slightly before stuffing. If the filling is piping hot, it can make the peppers mushy before they even hit the oven. Give it five minutes to cool down while you prep the cheese strips. This also makes it easier to handle the peppers without burning your fingers.
Use room-temperature string cheese. Cold string cheese is brittle and tends to snap when you try to pull it into strips. Let it sit on the counter for 10 minutes before you start. If you’re in a hurry, you can microwave the unwrapped cheese sticks for 5-7 seconds—just enough to take the chill off without melting them.
Leave space for the eyes. I learned this one the hard way too. If you wrap the cheese strips all the way to the top of the pepper, there’s nowhere to put the eyes, and they’ll just slide off. Leave a 1-inch gap near the top of each pepper where the face will go.
Multitask like a pro. While the peppers are blanching, you can start cooking the filling. While the peppers are baking, you can set the table or make a quick side salad. The active cooking time is only about 20 minutes total—the rest is waiting.
Make extra filling. The black bean mixture is delicious on its own, and you’ll probably have a little leftover even after stuffing the peppers. I like to serve it alongside the peppers or save it for lunch the next day. It’s great on toast with a fried egg on top.
Variations & Adaptations
One of the best things about this recipe is how adaptable it is. Here are some ways to make it your own:
Vegan Mummy Peppers: Use dairy-free shredded cheese and skip the string cheese wraps. Instead, use thin strips of roasted zucchini or yellow squash to create the mummy bandages. The zucchini will soften during baking and look surprisingly mummy-like. For the eyes, use sliced black olives.
Spicy Southwest Version: Add 1/2 cup of corn kernels (fresh, frozen, or canned) to the filling along with a diced jalapeño (seeds removed if you want less heat). Top the finished peppers with a dollop of sour cream or Greek yogurt and a sprinkle of fresh cilantro. This version is my husband’s favorite.
Meat-Lover’s Mummies: Brown 1/2 pound of ground beef, turkey, or chorizo in the skillet before adding the onion. Drain the excess fat, then proceed with the recipe as written. The meat adds extra richness and protein—perfect for feeding hungry teenagers or skeptical meat-eaters.
Cheesy Inside-Out Mummies: Mix 1/2 cup of cream cheese into the filling for an ultra-creamy texture. This makes the filling almost like a black bean dip inside the pepper. It’s decadent and delicious, and I only make this version when I’m not planning to wear anything with an elastic waistband.
Air Fryer Method: If you want a faster version, you can cook these in the air fryer. Stuff the peppers as directed, then place them in the air fryer basket (you may need to work in batches). Cook at 375°F for 12-15 minutes, until the peppers are tender and the cheese is bubbly. Add the cheese wraps halfway through cooking so they don’t burn. This method cuts the cooking time almost in half.
I’ve tried all of these variations, and they each have their own charm. The vegan version surprised me the most—I honestly didn’t miss the cheese at all with the zucchini wraps. The spicy Southwest version is what I make when I want something with a little kick. Play around and find your favorite.
Serving & Storage Suggestions
These mummy peppers are best served hot, straight from the oven, when the cheese is still stretchy and the filling is steaming. But here’s how to make the most of them at any temperature:
Serving Temperature: Serve immediately after baking. The peppers should be hot all the way through, and the cheese should be melted and slightly golden. If you’re serving them at a party, you can keep them warm in a 200°F oven for up to 30 minutes—just cover them loosely with foil so the cheese doesn’t dry out.
Presentation Ideas: Arrange the peppers on a platter with a sprinkle of fresh parsley or cilantro for color. You can also drizzle a little sour cream or Greek yogurt around the base of the peppers for a “ghostly” effect. For a Halloween party, serve them on a black or orange platter with a sign that says “Mummy’s Favorite Dinner.”
Complementary Dishes: These peppers pair beautifully with a simple side salad dressed with lime vinaigrette. The acidity cuts through the richness of the cheese and beans. You could also serve them with creamy green chile corn chowder for a full fall meal. For a lighter option, try them alongside hidden veggie pesto pasta salad—the flavors complement each other beautifully.
Storage Instructions: Store leftover peppers in an airtight container in the refrigerator for up to 4 days. The peppers will soften slightly as they sit, but the flavor actually gets better. The mummy eyes may slide off during storage—just reattach them before reheating.
Reheating Methods: For best results, reheat in the oven at 350°F for 10-12 minutes, or in the air fryer at 350°F for 5-7 minutes. The microwave works in a pinch (2-3 minutes on high), but the cheese won’t be as stretchy. If reheating in the microwave, cover the peppers with a damp paper towel to prevent them from drying out.
Freezer Instructions: You can freeze the stuffed peppers before baking. Assemble them completely (without the candy eyes), wrap each pepper individually in plastic wrap, then place them in a freezer bag. They’ll keep for up to 3 months. To bake from frozen, add 15-20 minutes to the cooking time. Add the eyes after baking.
Flavor Development: The filling actually tastes even better the next day, as the spices have time to meld together. If you’re making these for a party, you can prepare the filling a day ahead and stuff the peppers just before baking. The peppers themselves are best fresh, though—they lose their crunch after a day in the fridge.
Nutritional Information & Benefits
Here’s the estimated nutritional breakdown for one stuffed pepper (based on 6 servings):
| Nutrient | Amount per Serving |
|---|---|
| Calories | 285 |
| Total Fat | 12g |
| Saturated Fat | 6g |
| Cholesterol | 30mg |
| Sodium | 680mg |
| Total Carbohydrates | 32g |
| Dietary Fiber | 9g |
| Sugars | 6g |
| Protein | 15g |
| Vitamin C | 150% DV |
| Iron | 20% DV |
| Calcium | 25% DV |
Health Benefits: Black beans are a fantastic source of plant-based protein and fiber, which helps keep you full and supports digestive health. Bell peppers are packed with vitamin C—one pepper provides more than your daily requirement. The lycopene in cooked tomatoes is more bioavailable than in raw tomatoes, so the fire-roasted tomatoes in this recipe are doing double duty. And the cheese adds calcium and protein, which makes this a well-rounded meal.
Dietary Considerations: This recipe is naturally vegetarian and can easily be made vegan (see variations above). It’s also gluten-free as written. If you’re watching your sodium, use no-salt-added canned beans and tomatoes, and reduce the added salt. The smoked paprika and cumin provide plenty of flavor without relying on salt.
Potential Allergens: This recipe contains dairy (cheese). For a dairy-free version, use vegan cheese and skip the string cheese wraps (use zucchini strips instead). The recipe is free of nuts, eggs, and soy, making it suitable for most common allergies.
I’m not a nutritionist, and these numbers are estimates, but I feel good about serving these to my family. They’re filling without being heavy, and the vegetable content is legitimately impressive for something that looks like a Halloween decoration.
Conclusion
These Easy Black Bean Mummy Stuffed Peppers are everything I want in a Halloween dinner—fun, festive, and genuinely delicious. They’re the kind of recipe that makes people stop and smile, and then go back for seconds because the filling is just that good. The black bean and rice mixture is hearty and satisfying, the smoky spices warm you from the inside out, and the googly eyes? Pure joy on a plate.
I love that this recipe doesn’t sacrifice flavor for fun. So many holiday-themed recipes are all about the presentation and completely forget about taste. Not these peppers. They’re a complete meal that happens to look like it crawled out of a sarcophagus, and that’s exactly the energy I want in my kitchen.
I’d love to hear how yours turn out! Did you use candy eyes or olive slices? Did your kids help with the mummy wrapping? Drop a comment below and let me know—I read every single one, and I’m always looking for new ideas. And if you’re in the mood for more cozy fall dinners, don’t miss my creamy garlic parmesan chicken or brown sugar peach cobbler for dessert. Happy Halloween cooking, friends—may your mummies be spooky and your bellies be full.
Frequently Asked Questions
Can I make these mummy peppers ahead of time?
Absolutely! You can assemble the peppers completely (minus the candy eyes) up to 24 hours in advance. Cover and refrigerate, then add 10 minutes to the baking time. Add the eyes after baking so they don’t melt or slide off.
Can I use a different type of bean?
Yes! Pinto beans, kidney beans, or even chickpeas work great in this recipe. Just make sure to drain and rinse them well. Black beans are my favorite for their creamy texture and mild flavor, but feel free to experiment.
How do I keep the mummy wraps from falling off?
The key is to press the cheese strips gently into the melted cheese layer underneath. The cheese acts like glue. If you’re still having trouble, you can secure the strips with a toothpick before baking—just remember to remove them before serving.
Can I grill these peppers instead of baking them?
You can! Preheat your grill to medium heat. Place the stuffed peppers on a piece of heavy-duty aluminum foil and fold the edges up to create a packet. Grill for 20-25 minutes, until the peppers are tender and the cheese is melted. The smoke from the grill adds a really nice flavor.
What can I use instead of rice in the filling?
Quinoa, farro, or cauliflower rice all work beautifully. You can also use cooked lentils for extra protein, or simply omit the rice altogether and double the beans. The texture will be slightly different, but the flavor will still be fantastic.
Pin This Recipe!
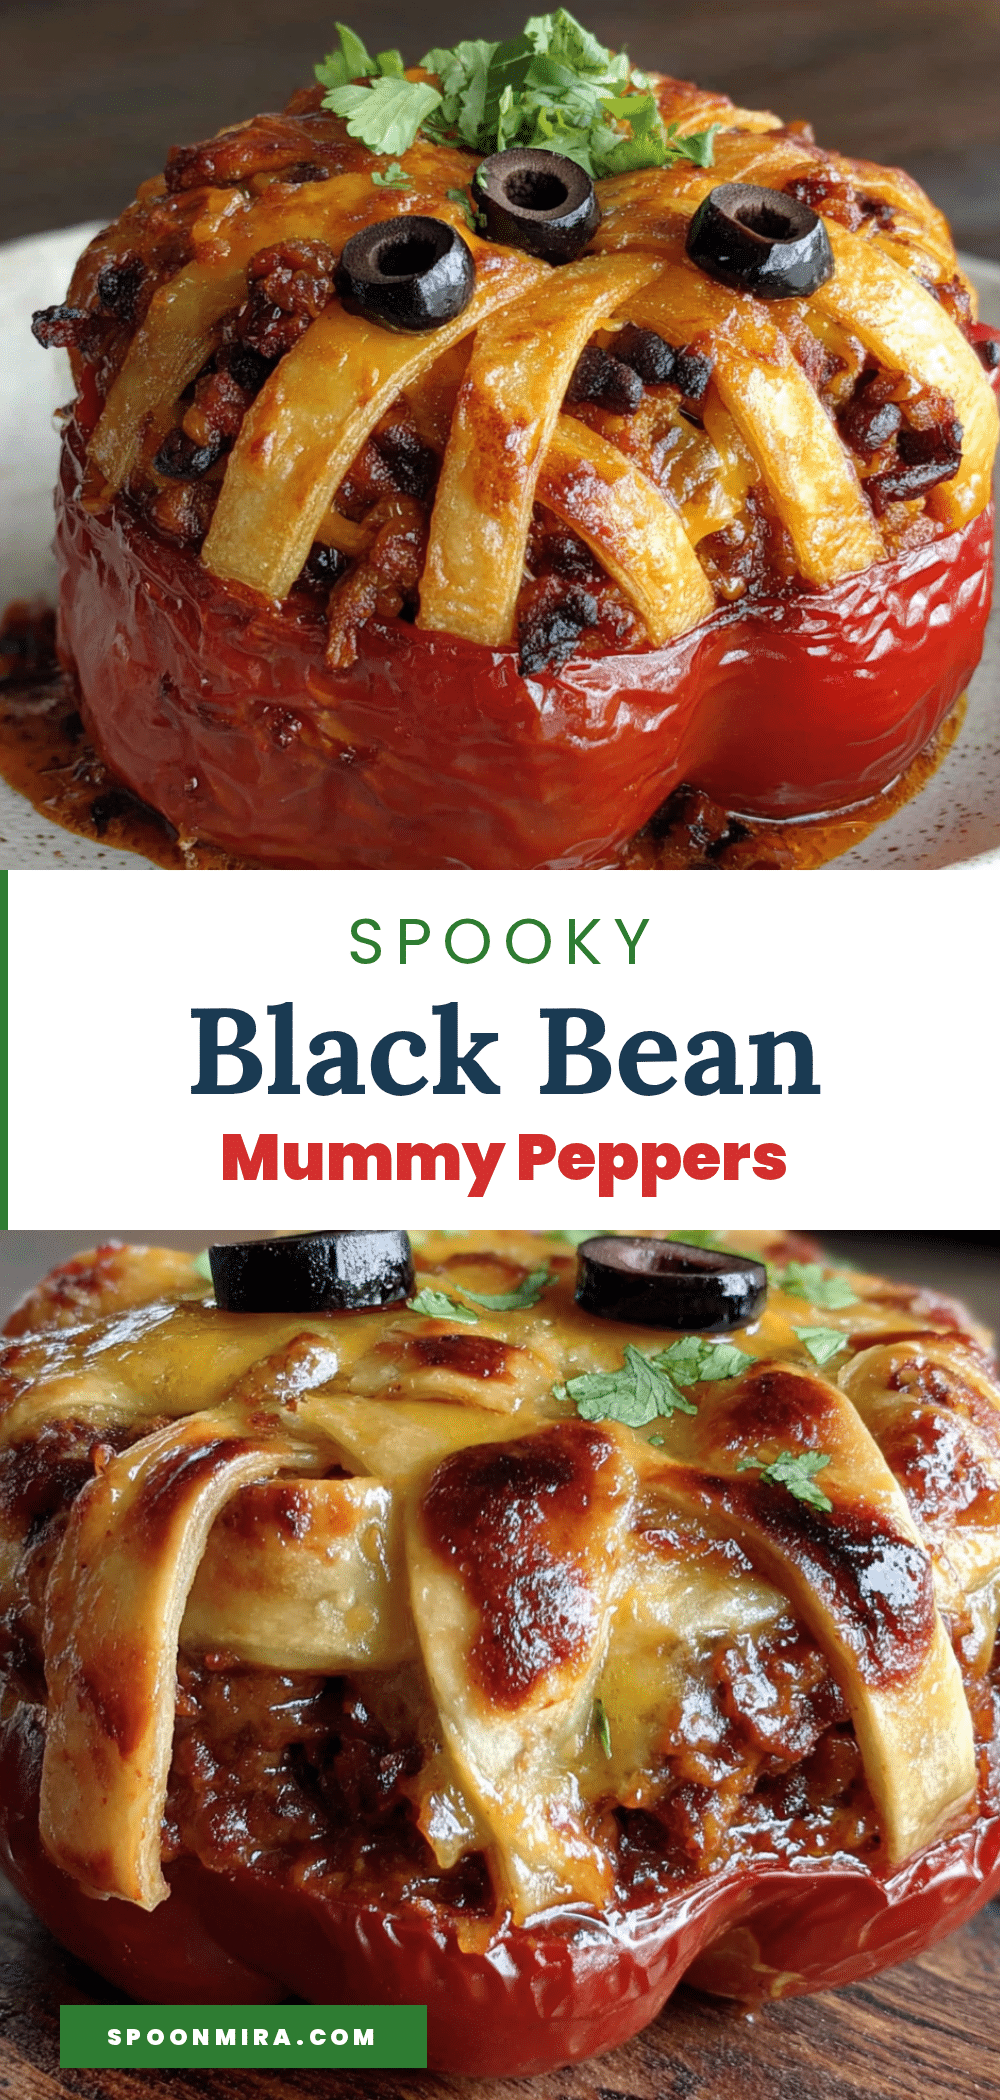
Easy Black Bean Mummy Stuffed Peppers: Best Halloween Dinner
These adorable mummy stuffed peppers are filled with a smoky black bean and rice mixture, wrapped in mozzarella string cheese bandages, and topped with googly eyes. They’re a fun, festive, and delicious Halloween dinner that’s easy to make and sure to delight kids and adults alike.
- Prep Time: 15 minutes
- Cook Time: 30 minutes
- Total Time: 45 minutes
- Yield: 4-6 servings 1x
- Category: Main Course
- Cuisine: American
Ingredients
- 2 cans (15 oz each) black beans, drained and rinsed
- 1 cup cooked rice (white, brown, or cauliflower rice)
- 1 cup shredded Mexican blend cheese or cheddar, divided
- 1/2 cup diced onion (yellow or white)
- 2 cloves garlic, minced
- 1 can (14.5 oz) fire-roasted diced tomatoes, drained
- 1 teaspoon ground cumin
- 1 teaspoon smoked paprika
- 1/2 teaspoon chili powder
- 1/2 teaspoon salt
- 1/4 teaspoon black pepper
- 1 tablespoon olive oil
- 4–6 medium bell peppers (any color)
- 6–8 sticks mozzarella string cheese, unwrapped and pulled into thin strips
- Small candy eyes or black olive slices (for decoration)
Instructions
- Preheat oven to 375°F (190°C). Bring a large pot of water to a boil.
- Slice tops off bell peppers and remove seeds and membranes. If needed, trim a thin slice off the bottom so they stand upright.
- Blanch peppers in boiling water for 3-4 minutes until slightly softened. Drain upside down on paper towels.
- Heat olive oil in a large skillet over medium heat. Cook onion for 3-4 minutes until translucent. Add garlic and cook 30 seconds until fragrant.
- Stir in black beans, fire-roasted tomatoes, cumin, smoked paprika, chili powder, salt, and pepper. Cook 5 minutes until heated through and slightly thickened.
- Remove from heat and stir in cooked rice and half of the shredded cheese. Adjust seasoning to taste.
- Stand blanched peppers upright in a baking dish. Spoon filling into each pepper, pressing gently to pack. Sprinkle remaining shredded cheese on top.
- Drape mozzarella string cheese strips across the peppers in a crisscross pattern, leaving a small gap near the top for eyes.
- Cover dish with aluminum foil and bake for 20 minutes. Remove foil and bake another 10-15 minutes until cheese is bubbly and peppers are tender.
- Let cool 3-5 minutes, then press candy eyes or olive slices into the gap. Serve immediately.
Notes
Don’t over-blanch the peppers or they’ll collapse. Let filling cool slightly before stuffing. Use room-temperature string cheese for easier handling. Leave a 1-inch gap near the top for eyes. The filling tastes even better the next day.
Nutrition
- Serving Size: 1 stuffed pepper
- Calories: 285
- Sugar: 6
- Sodium: 680
- Fat: 12
- Saturated Fat: 6
- Carbohydrates: 32
- Fiber: 9
- Protein: 15
Keywords: Halloween dinner, stuffed peppers, mummy peppers, black bean stuffed peppers, vegetarian dinner, easy Halloween recipe, fun dinner for kids


