There used to be a tiny wine bar tucked behind a vintage clothing shop in my neighborhood that made the most perfect little snack boards. When they closed their doors two summers ago—just a handwritten sign on the door one Tuesday morning—I honestly felt a little lost. That place was my go-to for meeting friends, celebrating small wins, and decompressing after long weeks. Their charcuterie cups were legendary in my circle. Little clear cups layered with salami rosettes, cheese cubes, olives, and the most perfectly placed fig jam dollop. After maybe seven attempts—some embarrassingly lopsided, a few where the meat wouldn’t stay put—I finally cracked the code.
Let me tell you, there’s something about individual portions that just works for a crowd. You know that awkward moment at a party when everyone hovers around a big board, reaching over each other, double-dipping by accident? These cups solve all of that. Plus, they’re just plain cute. I brought a batch to my first Friendsgiving last November, and they disappeared before the turkey even hit the table. My friend Jen actually asked for the recipe while still chewing, which I took as the highest compliment.
These Easy Friendsgiving Charcuterie Cups are my little tribute to that wine bar. The one that taught me good food doesn’t have to be complicated—it just has to be thoughtful. And honestly? These are easier to make than arranging a full board, they travel better, and everyone gets their own perfect little bite of everything. No fighting over the last piece of prosciutto. Maybe you’ve been to a party where the snack situation got a little chaotic. These cups are the fix.
Why You’ll Love This Recipe
I’ve tested these cups for three different gatherings now, tweaking the layering order and the cheese-to-meat ratio each time. What I’m sharing with you is the final, crowd-tested version. Here’s why it works so well for Friendsgiving—or honestly, any get-together where you want to look put-together without spending all day in the kitchen.
- Quick & Easy: Each cup takes about 3 minutes to assemble. For a batch of 12, you’re looking at 30 minutes tops. That leaves you plenty of time to focus on the main dishes.
- Simple Ingredients: Everything comes from one trip to the grocery store. No weird specialty items, no hunting down obscure cheeses. Your local market has everything you need.
- Perfect for Friendsgiving: These are the ultimate shareable appetizer. Everyone grabs one (or two), and there’s no communal touching of food. Plus they look gorgeous on the table.
- Crowd-Pleaser: I’ve yet to meet someone who doesn’t love a mini charcuterie situation. They’re approachable, fun to eat, and satisfy both savory and sweet cravings.
- Unbelievably Delicious: The combination of salty meats, creamy cheese, tangy pickles, and sweet jam in one bite is next-level. It’s the whole grazing board experience in a cup.
What makes these different from every other charcuterie cup recipe out there? It’s the layering technique. I spent way too long figuring out the order that keeps everything looking fresh and prevents the meat from getting soggy. The trick is putting the wet ingredients (jam, honey) at the very bottom, then building up with sturdy items before adding the delicate meats on top. It’s not just another version—it’s the one that actually works for make-ahead entertaining.
This recipe is comfort food reimagined for sharing. It’s faster than a full board, more personal than a communal platter, and it has that same soul-soothing satisfaction of grazing with people you love. Perfect for impressing your Friendsgiving crew without any stress.
What Ingredients You Will Need
This recipe uses simple, high-quality ingredients to deliver maximum flavor and visual appeal. Most of these are pantry staples for anyone who loves entertaining, and they’re easy to customize based on what you find at the store.
For the Meat Layer
- 8 ounces salami, thinly sliced (I prefer the genoa style from Boar’s Head for the right balance of fat and spice)
- 4 ounces prosciutto, thinly sliced (look for it pre-sliced at the deli counter to save time)
- 4 ounces soppressata, thinly sliced (optional but adds a nice spicy kick)
For the Cheese Layer
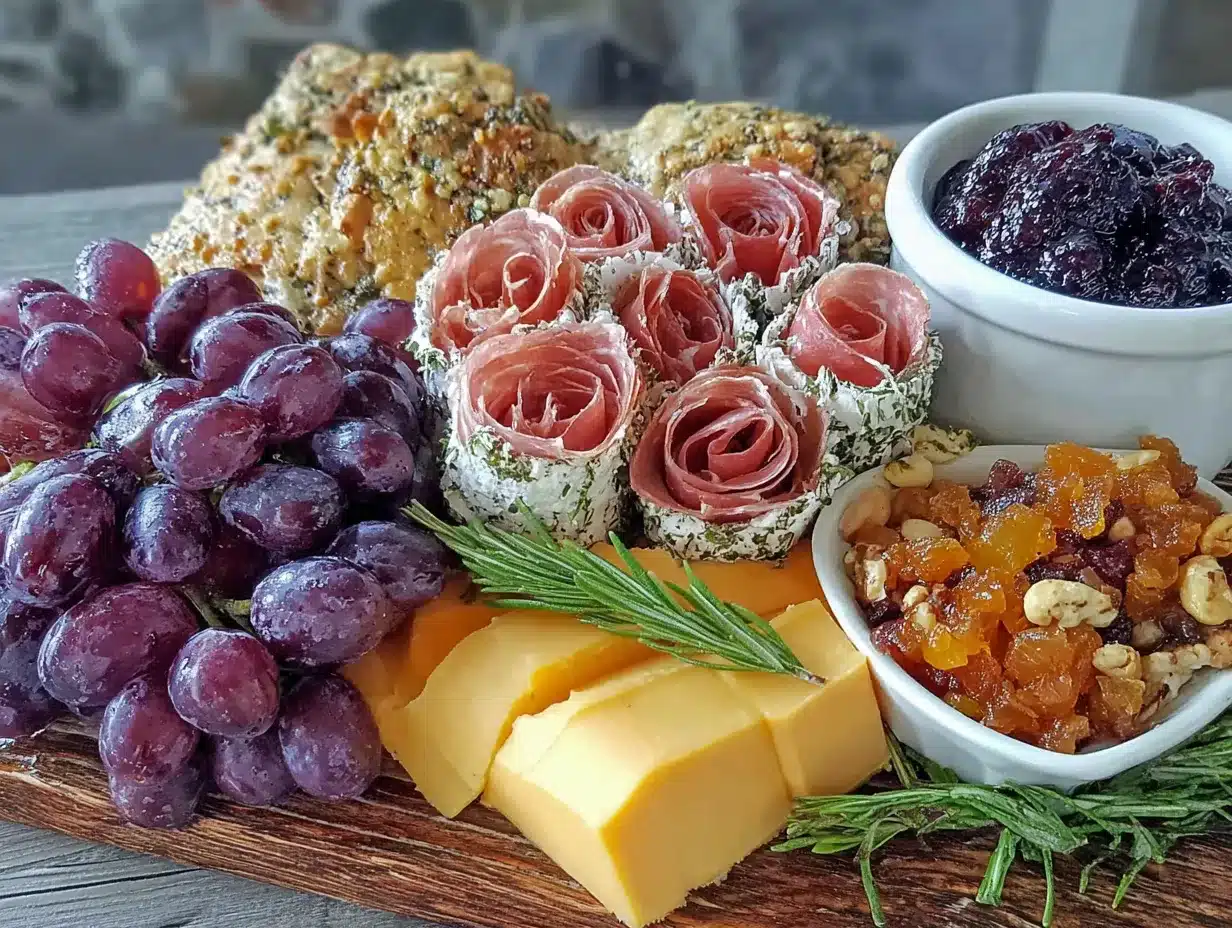
- 8 ounces sharp cheddar, cut into 1/2-inch cubes (I like Cabot’s Seriously Sharp for maximum flavor)
- 6 ounces fresh mozzarella pearls (these are the small balls—no cutting needed)
- 4 ounces gouda, cut into 1/2-inch cubes (smoked gouda adds a wonderful depth)
For the Accompaniments
- 1/2 cup fig jam (Bonne Maman is my go-to for the right sweetness and texture)
- 1/4 cup honey (local honey adds a nice floral note if you can find it)
- 1/2 cup mixed olives, pitted (kalamata and castelvetrano are my favorites)
- 1/4 cup cornichons (these tiny pickles are perfect for popping in your mouth)
- 1/4 cup dried apricots, halved (adds a chewy sweetness that balances the salt)
- 1/4 cup roasted almonds (unsalted, so they don’t compete with the meats)
For the Garnish
- Fresh rosemary sprigs, cut into small pieces (adds a festive look and subtle aroma)
- Flaky sea salt, like Maldon (a pinch on top makes everything pop)
Ingredient Selection Tips
When choosing your meats, ask the deli counter to slice them thin but not paper-thin. You want them pliable enough to roll into rosettes but sturdy enough to hold their shape. For the cheese, go with what you love—I’ve used manchego, aged provolone, and even brie in different batches. Just make sure at least one cheese is firm enough to cube cleanly. The fig jam is non-negotiable in my book—it’s the sweet-salty bridge that ties everything together. But if you can’t find it, a good raspberry preserves works in a pinch.
Equipment Needed
You don’t need anything fancy for these cups, which is part of the beauty. Here’s what I use:
- 12 clear plastic cups (the 9-ounce size works perfectly—I get them at Party City or on Amazon)
- Small cookie scoop (for portioning the jam and honey evenly, but a spoon works fine)
- Sharp knife (for cubing the cheese—a dull knife will just crush it)
- Cutting board (I use separate boards for meat and fruit to avoid cross-contamination)
- Serving tray (a large wooden board or even a baking sheet lined with parchment works great)
- Tongs (for arranging the cups on the tray without smudging the sides)
If you don’t have clear cups, small mason jars or even paper cups work. I’ve used both. The clear cups just show off the pretty layers better. For the rosettes, I’ve found that using my hands works better than any tool—just roll the salami slice between your fingers and let it fan out naturally. Budget tip: wash and reuse the cups from last year’s party supplies. No one will know.
Preparation Method
This comes together faster than you’d think. Here’s the exact process I use for perfect cups every time.
- Prep all your ingredients first. Cube the cheddar and gouda into even 1/2-inch pieces. Halve the dried apricots. Measure out the olives and almonds. This mise en place step takes 10 minutes but makes assembly fly by. You’ll thank yourself later.
- Make the salami rosettes. Take each salami slice and fold it in half, then in half again to create a quarter-circle shape. Roll it loosely between your fingers, letting the edges fan out like a flower. Set them aside on a plate. For prosciutto, just fold each slice into a loose ribbon—it’s too delicate for rosettes. This step takes about 5 minutes for a full batch.
- Start with the wet ingredients at the bottom. Spoon about 1 teaspoon of fig jam into the bottom of each cup. Drizzle about 1/2 teaspoon of honey over the jam. This layer creates a sweet base that soaks into the cheese cubes above it, creating little flavor bombs as you eat down through the cup.
- Add the sturdy accompaniments. Drop in 3-4 olives, 2-3 cornichons, and 2-3 almond pieces. These heavier items sit well on top of the jam and create a stable middle layer. Don’t overfill—you need room for the cheese and meat above.
- Layer in the cheese cubes. Add 3-4 cubes of cheddar, 2-3 mozzarella pearls, and 2-3 cubes of gouda. Distribute them evenly so each cup has a nice variety. The cheese should fill about a third of the cup at this point.
- Add the dried fruit. Tuck in 2-3 apricot halves around the cheese. They add a pop of orange color and a chewy texture that breaks up all the creamy and salty elements.
- Top with the meats. Place one salami rosette on top, slightly off-center. Add a folded ribbon of prosciutto next to it. If you’re using soppressata, tuck a slice between the other two meats. The meat should crown the cup beautifully, like a little hat.
- Finish with garnish. Stick a small rosemary sprig into the side of each cup. Sprinkle a tiny pinch of flaky sea salt over the meat. This final touch makes them look professional and adds a subtle herbal note.
- Arrange on a serving tray. Place the cups in neat rows or a loose cluster on your tray. Leave a little space between them so guests can grab them easily. I like to scatter a few extra almonds and olives around the tray for a fuller look.
Prep time note: The entire process takes about 30 minutes from start to finish. If you’re making these for a party, you can assemble them up to 4 hours ahead. Just hold the rosemary garnish and salt until right before serving to keep everything looking fresh.
Sensory cue: When you lift a completed cup, you should see the layers through the clear plastic—the dark jam at the bottom, the golden cheese in the middle, the rosy meat on top. The rosemary should smell fresh and woodsy. If the cup feels too heavy or too light, adjust your portions next time.
Cooking Tips & Techniques
After making these cups more times than I care to count, I’ve learned a few things the hard way. Here’s what I wish someone had told me.
The biggest mistake people make is overfilling the cups. I did this my first time, and the meat kept falling off the sides. You want each layer to be visible, not crammed in. Think of it like a parfait—you’re creating visual interest through the clear walls. Leave about a half-inch of space at the top.
Timing is everything with the meat. If you’re making these more than 2 hours ahead, keep the prosciutto separate and add it just before serving. It tends to dry out and curl up if it sits too long. The salami rosettes hold up much better, so those can go in early. I learned this the morning of a Friendsgiving when my prosciutto looked like sad little jerky strips by noon.
Here’s a trick for even distribution: Line up all your cups on a tray first. Then go down the line adding the jam to each one. Then go back down the line adding the olives. This assembly-line method ensures every cup gets the same amount and you don’t accidentally skip anyone. It also makes the process feel faster—I can do 12 cups in under 20 minutes this way.
For the most beautiful rosettes, use room-temperature salami. Cold salami cracks when you try to roll it. Let it sit out for 10 minutes before you start. Same goes for the cheese—cold cheese cubes more cleanly, but room-temperature cheese tastes better. Find your balance.
One thing I messed up early on: I used too much jam. It seems like more is better, but it actually makes the bottom of the cup messy and the cheese slides around. A teaspoon is plenty. Trust me on this.
Variations & Adaptations
These cups are endlessly customizable. Here are some variations I’ve tried and loved.
Vegetarian Version
Skip the meat entirely and double up on the cheese and accompaniments. Add roasted red pepper strips, marinated artichoke hearts, and extra nuts. I made this for my vegetarian friend Sarah, and she said it was actually better than the meat version—the roasted peppers add a sweetness that the meat would normally provide.
Gluten-Free Friendly
These cups are naturally gluten-free as written, which makes them perfect for Friendsgiving tables with mixed dietary needs. Just double-check your deli meats—some brands use fillers that contain gluten. I stick with Boar’s Head and Applegate for safe options.
Seasonal Swaps
In the fall, swap the dried apricots for dried figs or apple chips. In summer, use fresh berries instead of dried fruit—just add them right before serving so they don’t get mushy. For a winter holiday version, add a few pomegranate seeds on top for a festive pop of red.
Spicy Twist
Add a thin slice of jalapeño to each cup, or use pepper jack cheese instead of cheddar. A drizzle of hot honey instead of regular honey gives the whole thing a sweet-heat kick that’s incredible. My brother requests this version every time now.
Dairy-Free Option
Use vegan cheese alternatives or skip the cheese entirely and add extra nuts, olives, and roasted vegetables. Marinated mushrooms are a surprisingly good substitute for the creamy texture of cheese. I’ve tested this and it works—it’s just a different experience.
Serving & Storage Suggestions
These cups are best served at room temperature, so take them out of the fridge about 20 minutes before your guests arrive. The flavors really open up when the cheese isn’t ice-cold. Arrange them on a large wooden board or a white platter for maximum visual impact.
For a Friendsgiving spread, these pair beautifully with a crisp white wine like Sauvignon Blanc or a light red like Pinot Noir. If you’re doing cocktails, a gin and tonic or a sparkling water with lemon complements the salty-sweet flavors perfectly. I usually set them out alongside a bowl of grapes and a basket of crusty bread for people who want extra carbs.
Storage: If you have leftovers (unlikely, but possible), store the cups in the refrigerator for up to 2 days. The texture of the meat will change slightly, but the flavor is still great. To refresh them, let them sit at room temperature for 15 minutes before serving again. I don’t recommend freezing—the cheese gets crumbly and the jam separates.
One thing I love about these cups is that the flavors actually meld together a bit after a few hours in the fridge. The jam soaks into the bottom cheese cubes, creating these little sweet-salty bites that are addictive. If you’re making them a day ahead, that’s actually a bonus.
Nutritional Information & Benefits
Each cup (based on 12 servings) contains approximately:
- Calories: 280-320
- Protein: 15-18g
- Fat: 20-24g
- Carbohydrates: 12-15g
- Fiber: 2-3g
- Sugar: 8-10g
These numbers will vary based on your exact ingredient choices and portion sizes. The beauty of individual cups is that portion control is built right in—each person gets exactly one serving without any guesswork.
From a health perspective, charcuterie cups offer a good balance of protein from the meats and cheese, healthy fats from the nuts and olives, and antioxidants from the dried fruit. The rosemary garnish isn’t just for looks—it’s actually a good source of iron and calcium. I like knowing that my guests are getting real, whole-food ingredients rather than processed snacks.
If you’re watching your sodium intake, choose low-sodium meats and unsalted nuts. You can also reduce the cheese portion slightly. The jam and honey add natural sugars, but in small amounts that are easy to fit into a balanced diet. I personally love that these cups feel indulgent without being over-the-top.
Conclusion
These Easy Friendsgiving Charcuterie Cups have become my signature party dish, and I think they deserve a spot in your rotation too. They’re the kind of recipe that makes you look like you put in way more effort than you actually did—and honestly, that’s the best kind of recipe to have in your back pocket.
What I love most about these cups is how personal they can be. Swap in your favorite cheeses, use the meats your crowd loves, adjust the jam-to-honey ratio until it’s perfect for you. The template is simple, but the possibilities are endless. I’ve made these for Friendsgiving, for book club, for lazy Sunday afternoons with close friends—and every time, they disappear.
I’d love to hear how yours turn out. Did you try a variation I haven’t thought of? What cheeses did you use? Drop a comment below and let me know. And if you’re looking for more easy appetizer ideas for your next gathering, check out my crispy garlic chicken for a main dish that pairs perfectly with these cups. Happy Friendsgiving, friends. Go make something delicious.
Frequently Asked Questions
Can I make these charcuterie cups ahead of time?
Yes, you can assemble them up to 4 hours ahead. Just wait to add the rosemary garnish and flaky salt until right before serving. If you’re making them more than 2 hours ahead, keep the prosciutto separate and add it later to prevent it from drying out.
What size cups should I use?
I recommend 9-ounce clear plastic cups. They’re big enough to hold a generous portion without being overwhelming. Small mason jars or even paper cups work too, but clear cups let you show off those beautiful layers.
Can I use different meats?
Absolutely. Pepperoni, capicola, or even thin-sliced ham all work great. Just make sure they’re sliced thin enough to roll or fold easily. The key is having at least one meat that can form a rosette for the top.
How many cups does this recipe make?
This recipe makes 12 individual cups. If you’re serving a larger crowd, simply double the ingredients. The assembly process is the same—just give yourself a few extra minutes.
What’s the best way to transport these to a party?
Place the cups in a sturdy box or on a baking sheet with raised edges. Cover them loosely with plastic wrap. I’ve found that keeping them upright is the most important thing—if they tip over, the layers get mixed up. A muffin tin works great for keeping them stable during transport.
Pin This Recipe!
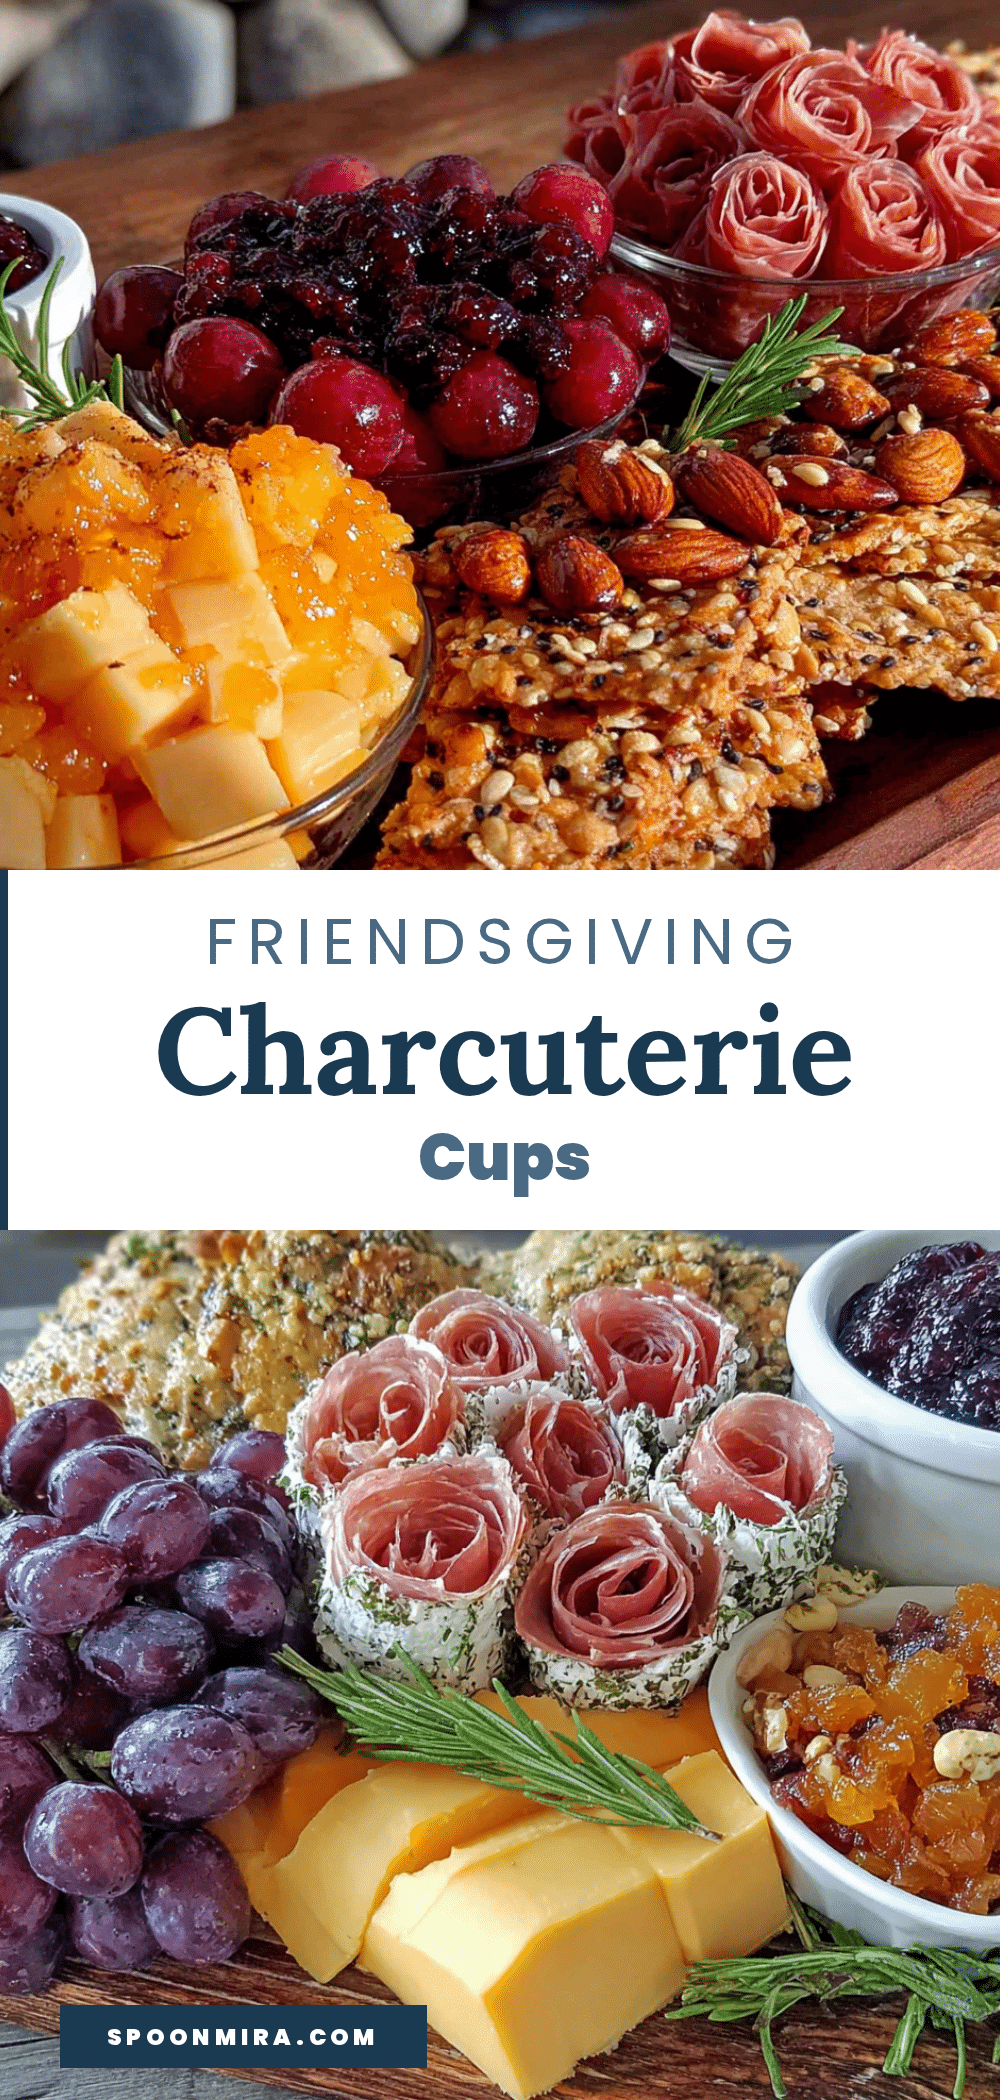
Easy Friendsgiving Charcuterie Cups: Perfect Individual Portions
Individual charcuterie cups layered with salami rosettes, cheese cubes, olives, and fig jam. Perfect for Friendsgiving or any gathering where you want a beautiful, no-fuss appetizer that everyone can grab and enjoy.
- Prep Time: 30 minutes
- Cook Time: 0 minutes
- Total Time: 30 minutes
- Yield: 12 servings 1x
- Category: Appetizer
- Cuisine: American
Ingredients
- 8 ounces salami, thinly sliced (genoa style recommended)
- 4 ounces prosciutto, thinly sliced
- 4 ounces soppressata, thinly sliced (optional)
- 8 ounces sharp cheddar, cut into 1/2-inch cubes
- 6 ounces fresh mozzarella pearls
- 4 ounces gouda, cut into 1/2-inch cubes (smoked gouda recommended)
- 1/2 cup fig jam
- 1/4 cup honey
- 1/2 cup mixed olives, pitted (kalamata and castelvetrano recommended)
- 1/4 cup cornichons
- 1/4 cup dried apricots, halved
- 1/4 cup roasted almonds (unsalted)
- Fresh rosemary sprigs, cut into small pieces
- Flaky sea salt (like Maldon)
Instructions
- Prep all ingredients first: cube cheddar and gouda into 1/2-inch pieces, halve dried apricots, measure olives and almonds.
- Make salami rosettes: fold each salami slice in half, then in half again to create a quarter-circle shape. Roll loosely between fingers, letting edges fan out like a flower. Set aside. For prosciutto, fold each slice into a loose ribbon.
- Spoon about 1 teaspoon of fig jam into the bottom of each cup. Drizzle about 1/2 teaspoon of honey over the jam.
- Add 3-4 olives, 2-3 cornichons, and 2-3 almond pieces to each cup.
- Layer in 3-4 cubes of cheddar, 2-3 mozzarella pearls, and 2-3 cubes of gouda per cup.
- Tuck in 2-3 apricot halves around the cheese.
- Top each cup with one salami rosette (slightly off-center), a folded ribbon of prosciutto, and a slice of soppressata if using.
- Stick a small rosemary sprig into the side of each cup. Sprinkle a tiny pinch of flaky sea salt over the meat.
- Arrange cups on a serving tray, leaving space between them for easy grabbing.
Notes
Assemble up to 4 hours ahead; add rosemary and salt just before serving. Keep prosciutto separate if making more than 2 hours ahead to prevent drying. Use room-temperature salami for easier rolling. Do not overfill cups—leave about 1/2 inch of space at the top. For best flavor, let cups sit at room temperature for 20 minutes before serving.
Nutrition
- Serving Size: 1 cup
- Calories: 300
- Sugar: 9
- Sodium: 800
- Fat: 22
- Saturated Fat: 10
- Carbohydrates: 13
- Fiber: 2
- Protein: 16
Keywords: charcuterie cups, Friendsgiving appetizer, individual charcuterie, easy appetizer, party snack, salami rosettes, cheese cups


