The first October wind rattled the kitchen window, and I had a half-empty bag of egg whites staring at me from the fridge. Not the dramatic start to a Halloween baking session you’d expect, honestly. I wasn’t planning anything spooky. I just wanted to use up those whites before they went sad and forgotten. But then I saw the piping bag, the black gel food coloring, and it clicked. These little guys didn’t need to be complicated to be perfect. They just needed to be light, sweet, and a little bit ridiculous. And that is exactly how these Easy Ghost Meringue Cookies for Halloween came to life—not from a grand plan, but from a quiet afternoon and a fridge that needed clearing.
There’s something almost meditative about making meringue. The way the sugar dissolves into the whites, the glossy peaks that form, the patience it demands. It feels like a small magic trick you get to perform with just a whisk and a bowl. And when you pipe them into little ghost shapes, that magic turns into something downright charming. These aren’t the fussy, bakery-perfect kind of cookies. They are the kind you make while listening to a podcast, the kind that make you smile when you peek through the oven door. I have made a lot of Halloween treats over the years, from spooky graze boards to creepy finger pretzels, but these ghosts have a special place in my heart. They are simple, honest, and utterly delightful.
By the time the last tray was cooling on the counter, the kitchen smelled faintly of toasted sugar and vanilla. The sun had dipped lower, casting long shadows across the floor. I bit into one—crisp, airy, dissolving on my tongue like a whispered secret. And I knew this recipe was a keeper. Not because it was fancy, but because it felt like a small, quiet win. And honestly, isn’t that the best kind of recipe to share?
Why You’ll Love This Recipe
Let me tell you why these ghost meringues are about to become your new Halloween tradition. I have tested this recipe more times than I care to admit, tweaking the sugar ratio, the oven temperature, the piping technique. This version is the one that works every single time, even on a humid day (and if you have ever made meringue, you know that is saying something).
- Only 3 Ingredients: Egg whites, sugar, and vanilla. That is it. No fancy extracts, no hard-to-find stabilizers. You probably have everything in your pantry right now.
- Naturally Gluten-Free & Dairy-Free: These cookies are a lifesaver for guests with dietary restrictions. No one has to miss out on the Halloween fun.
- Incredibly Cute: Let’s face it, the ghost shape is the whole point. They are adorable, a little goofy, and guaranteed to get a reaction from kids and adults alike.
- Make-Ahead Friendly: These cookies keep for weeks in an airtight container. You can bake them a week before Halloween and cross one thing off your to-do list.
- Mess-Free Fun: Unlike frosting or sticky caramel, meringue is surprisingly tidy. The kids can help pipe the ghosts without creating a disaster zone in your kitchen.
I remember the first time I made these for a Halloween party. I was nervous, honestly. Meringue can be finicky. But when I set the platter down, people literally stopped mid-conversation to grab one. The crunch, the melt-in-your-mouth texture, the tiny chocolate chip eyes staring back at you. It was a hit. And it took me less than thirty minutes of active work. That is the kind of win I live for.
What Ingredients You Will Need
This recipe uses the simplest ingredients to create something truly special. Each one plays a crucial role in building that perfect light-as-air texture and sweet vanilla flavor. Here is what you need and why it matters.
- 3 Large Egg Whites: Make sure they are at room temperature. Cold egg whites do not whip up as well, and you want all the volume you can get. I always separate my eggs when they are cold (it is easier), then let the whites sit on the counter for about 20 minutes before I start whisking. If you are in a rush, you can place the bowl of egg whites in a warm water bath for a few minutes, stirring gently.
- ¾ Cup (150g) Granulated Sugar: This is not the time for brown sugar or powdered sugar. Granulated sugar dissolves cleanly and gives meringue its structure. I actually prefer to use superfine sugar if I can find it, because it dissolves faster. But regular granulated sugar works perfectly fine. Just make sure you whisk it in slowly, a tablespoon at a time, so it has time to dissolve.
- 1 Teaspoon Vanilla Extract: Pure vanilla extract gives the best flavor, but imitation vanilla works in a pinch. You could also use vanilla bean paste for those lovely little speckles. Avoid vanilla essence if you can—the artificial taste is a bit too strong for such a delicate cookie.
- ¼ Teaspoon Cream of Tartar (Optional but Recommended): This is my secret weapon. Cream of tartar stabilizes the egg whites, making them less likely to deflate. It also helps create that glossy, stiff-peak texture. If you do not have it, you can substitute with a teaspoon of lemon juice or white vinegar. But honestly, just buy a little jar—it lasts forever and saves you from meringue disasters.
- Mini Chocolate Chips (For the Eyes): You will need about 24-30 mini chocolate chips to give your ghosts their spooky little faces. I like to use dark chocolate chips for a slightly less sweet contrast, but milk chocolate works too. Just make sure they are mini, not regular-sized, or they will look like ghost googly eyes. Which, actually, is also kind of cute.
A quick note on egg whites: if you have leftover yolks, do not throw them away! You can use them to make a batch of classic moist banana bread or add them to a creamy carbonara sauce. Waste not, want not, right?
Equipment Needed
You do not need a professional pastry kit for this recipe. In fact, I have made these ghosts with just a few basic tools and a lot of patience. Here is what you will need:
- Electric Mixer (Stand or Handheld): You can technically whisk meringue by hand, but your arm will be screaming after about ten minutes. A stand mixer with the whisk attachment is ideal, but a handheld electric mixer works just as well. I have used both, and honestly, the handheld mixer gives me more control over the bowl.
- Large Mixing Bowl: Make sure it is spotlessly clean. Any trace of grease or yolk will prevent your egg whites from whipping up properly. I like to wipe my bowl down with a little lemon juice and a paper towel before I start, just to be safe.
- Piping Bag with a Round Tip: A piping bag is the easiest way to shape the ghosts. I use a Wilton 1A round tip, but you can also just snip the corner off a zip-top bag. Do not use a star tip—it will make your ghosts look fuzzy instead of smooth.
- Baking Sheets Lined with Parchment Paper: Parchment paper is non-negotiable here. The meringues will stick to bare baking sheets, and wax paper will melt in the oven. Silicone baking mats also work beautifully.
- Offset Spatula (Optional): This is handy for smoothing out any rough edges on your ghosts, but a butter knife works in a pinch.
Preparation Method
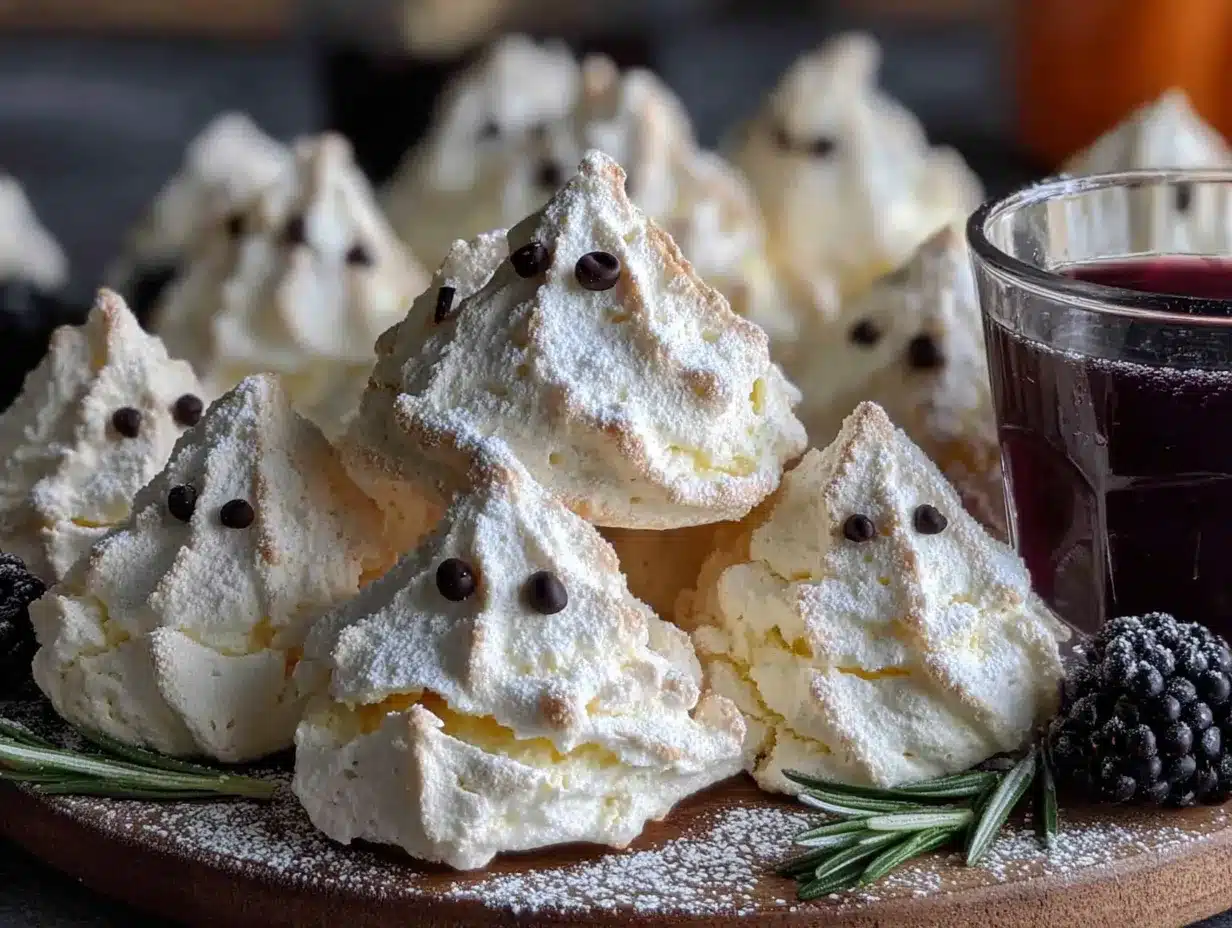
Now for the fun part. Follow these steps carefully, and you will have a tray of adorable ghost meringues in no time. Remember, meringue rewards patience, so do not rush the process.
- Preheat your oven to 200°F (93°C). Yes, that low. Meringue is not baked; it is dried out slowly. If your oven runs hot, consider lowering the temperature to 190°F (88°C). Line two baking sheets with parchment paper and set them aside.
- Prepare your egg whites. Place the room-temperature egg whites and cream of tartar in the bowl of your stand mixer (or a large mixing bowl if using a handheld mixer). Begin whisking on medium speed until the mixture becomes frothy and bubbly, about 1-2 minutes. You want it to look like a bubble bath, not a stiff foam.
- Slowly add the sugar. This is the most important step. With the mixer running on medium-low, add the granulated sugar one tablespoon at a time. I know it is tedious, but rushing this step will result in grainy meringue. Each spoonful should be fully incorporated before you add the next. This takes about 5-7 minutes total.
- Add the vanilla. Once all the sugar is incorporated, add the vanilla extract. Increase the mixer speed to medium-high and continue whisking. You are looking for stiff, glossy peaks. This means when you lift the whisk attachment, the meringue stands up straight without drooping. It should feel smooth between your fingers, not gritty (that is how you know the sugar has dissolved).
- Test the meringue. Rub a tiny bit between your thumb and forefinger. If it feels gritty, keep whisking for another minute. If it feels smooth, you are ready to pipe. Do not overmix at this stage, or the meringue can become dry and clumpy.
- Fill your piping bag. Fit your piping bag with the round tip and fold the top edge down over your hand to create a cuff. Use a spatula to fill the bag with the meringue. Do not overfill—about half full is perfect. Twist the top of the bag closed and squeeze a small amount out to release any air bubbles.
- Pipe the ghosts. Hold the piping bag perpendicular to the baking sheet, about ½ inch above the parchment. Squeeze gently to create a round base, then pull the bag straight up while reducing pressure to form a tall, wobbly teardrop shape. Release pressure completely and pull the bag away with a quick flick. Do not worry if they look uneven—ghosts are supposed to be a little lopsided! Leave about 1 inch of space between each ghost.
- Add the eyes. This part is fiddly but fun. Gently press two mini chocolate chips into each ghost to create eyes. Press them in just until they are flush with the surface—if you push too hard, the meringue will crack. I like to place the eyes slightly unevenly for a more “spooky” look.
- Bake low and slow. Place the baking sheets in the preheated oven and bake for 90 minutes. Do not open the oven door during the first hour! After 90 minutes, turn off the oven but leave the meringues inside to cool completely. This gradual cooling prevents cracking. Leave them in the oven for at least 2 hours, or even overnight if you have the time.
- Check for doneness. A perfectly baked meringue should lift easily off the parchment paper. The bottom should be dry, not sticky. If they stick, return them to the warm oven (with the heat off) for another 30 minutes.
Cooking Tips & Techniques
I have made my fair share of meringue mistakes, and I am here to save you from repeating them. Here are the tips I have learned the hard way.
Humidity is the enemy. Meringue is basically sugar and air, and sugar loves to absorb moisture from the air. If it is a rainy or humid day, your meringue might turn out sticky or chewy instead of crisp. Wait for a dry day, or run a dehumidifier in your kitchen if you have one. I once made these on a muggy August afternoon, and they never crisped up properly. Learn from my pain.
Do not overbake, but do not underbake either. The line between perfectly crisp and slightly chewy is a thin one. If your meringues start to turn golden brown, your oven is too hot. If they feel soft and marshmallowy after cooling, they need more time in the drying stage. When in doubt, leave them in the turned-off oven for an extra hour.
Make sure your bowl is perfectly clean. I cannot stress this enough. Any trace of grease, yolk, or even dish soap residue will prevent your egg whites from whipping up. I like to wipe my bowl and whisk attachment with a little lemon juice or white vinegar on a paper towel before I start. It is an extra step, but it guarantees success.
Practice your piping. If you have never piped meringue before, do a few practice ghosts on a separate piece of parchment. You can scrape them back into the bag and try again. The key is to squeeze steadily and lift smoothly. Think of it like drawing a ghost in the air—slow and steady wins the race.
Use a timer, not your eyes. Meringue does not change color much as it bakes, so you cannot rely on visual cues. Set a timer for 90 minutes and do not open the oven door. Trust the process.
Variations & Adaptations
One of the best things about this recipe is how easy it is to customize. Here are a few ways I have played around with the basic ghost formula.
- Spooky Swirl Ghosts: Before piping, dip a toothpick into black gel food coloring and swirl it through the meringue in the piping bag. When you pipe the ghosts, they will have eerie grey streaks running through them. It looks like they have been touched by a ghostly hand.
- Pumpkin Spice Ghosts: Add ½ teaspoon of pumpkin pie spice to the sugar before you start whisking. The warm, earthy flavor pairs beautifully with the vanilla and gives these ghosts a fall twist. Serve them alongside a cozy pumpkin chai latte for the ultimate autumn treat.
- Chocolate-Dipped Ghosts: Once the meringues are fully cooled, dip the bottoms in melted dark chocolate and let them set on parchment paper. The chocolate adds a rich, fudgy contrast to the airy meringue. It also makes them look like they are standing in a puddle of chocolate mud—perfect for Halloween.
- Peppermint Ghosts: Substitute the vanilla extract with ½ teaspoon of peppermint extract. The cool, minty flavor is surprisingly good with the sweet meringue. Add a tiny crushed candy cane on top before baking for a festive crunch.
- Vegan Meringue Ghosts: You can absolutely make these without eggs! Use aquafaba (the liquid from a can of chickpeas) instead of egg whites. Use 3 tablespoons of aquafaba for each egg white. The process is exactly the same, though it might take a few extra minutes to reach stiff peaks. I have tried this, and honestly, the texture is almost identical.
Serving & Storage Suggestions
These ghost meringues are as versatile as they are adorable. Here is how to serve and store them for maximum enjoyment.
Serving: Serve the meringues at room temperature. They are perfect on their own as a light, sweet snack, but they also make a fantastic topping for a Halloween dessert table. Pile them in a glass jar or arrange them on a platter with some mummy pigs in a blanket for a sweet-and-savory spread. You can also use them to decorate a Halloween cake or cupcake tower—just stick them in the frosting like little ghostly tombstones.
Storage: This is where meringue really shines. Store the cookies in an airtight container at room temperature for up to 2 weeks. Do not refrigerate them—the moisture in the fridge will make them sticky and chewy. If you live in a humid climate, add a food-safe silica gel packet to the container to absorb excess moisture. I have kept a batch in a sealed tin for three weeks, and they were still perfectly crisp.
Freezing: You can freeze baked meringues for up to 3 months. Place them in a single layer in a freezer-safe container, with parchment paper between layers to prevent sticking. Thaw them at room temperature for about 30 minutes before serving. Do not thaw them in the fridge!
Flavor Development: Honestly, these cookies taste best within the first week. The vanilla flavor is brightest, and the texture is at its peak crispness. After that, they are still delicious, but they lose a little bit of that ethereal quality. So eat them while they are fresh!
Nutritional Information & Benefits
Let me be real with you—these are not health food. They are sugar and air, and they are meant to be a treat. But here is the good news: each cookie is surprisingly low in calories because they are mostly air. One ghost meringue contains approximately 15-20 calories, 0g fat, 4g carbohydrates, and 0g protein. That is pretty good for a cookie!
The main ingredient, egg whites, are a great source of high-quality protein and contain no fat or cholesterol. They are also rich in selenium, which is an important antioxidant. Of course, the sugar content means these should be enjoyed in moderation, but they are a much lighter option than a traditional butter cookie or brownie.
Dietary Considerations: These cookies are naturally gluten-free, dairy-free, and nut-free. With the aquafaba substitution, they can also be made vegan. The only potential allergen is eggs, so be sure to check with your guests if you are serving these at a party.
Conclusion
These Easy Ghost Meringue Cookies for Halloween are everything I want in a holiday treat—simple, cute, and genuinely delicious. They take almost no effort to put together, but they look like you spent hours fussing over them. That is the kind of baking magic I can get behind.
I love that this recipe is forgiving enough for beginners but impressive enough for seasoned bakers. Whether you are making them for a Halloween party, a school bake sale, or just a quiet afternoon in the kitchen, these little ghosts will bring a smile to your face. And honestly, is there any better reason to bake?
I would love to see your ghost meringue creations! Tag me in your photos, leave a comment below with your variations, or let me know if you tried the aquafaba version. Your feedback helps me create better recipes for you. Until next time, happy baking, and may your ghosts always be perfectly crisp!
Frequently Asked Questions
Can I make these without a piping bag?
Absolutely. If you do not have a piping bag, you can use a sturdy zip-top bag with a tiny corner snipped off. You can also use a small spoon to drop dollops of meringue onto the parchment paper and gently shape them with the back of the spoon. They will not be as perfectly ghost-shaped, but they will still taste amazing.
Why are my meringues sticky?
Sticky meringues are usually a sign of underbaking or high humidity. Make sure you bake them for the full 90 minutes and let them cool completely in the turned-off oven. If it is a rainy day, your meringues might absorb moisture from the air as they cool. Try adding a silica gel packet to your storage container.
Can I use liquid egg whites from a carton?
You can, but I do not recommend it. Carton egg whites are pasteurized, which affects their ability to whip up into stiff peaks. They also often contain stabilizers that can make the meringue grainy. Fresh egg whites are always the best choice for meringue.
How do I know when the sugar is fully dissolved?
The best test is the “finger test.” Rub a tiny bit of the meringue between your thumb and forefinger. If it feels smooth and silky, the sugar is dissolved. If it feels gritty or grainy, keep whisking. Undissolved sugar will cause the meringue to weep or collapse during baking.
Can I color the meringue?
Yes! Gel food coloring is best because it does not add extra liquid. Add a few drops to the meringue after it reaches stiff peaks and gently fold it in with a spatula. You can make green ghosts, purple ghosts, or even rainbow-swirl ghosts. Just be careful not to overmix, or you will deflate the meringue.
Pin This Recipe!
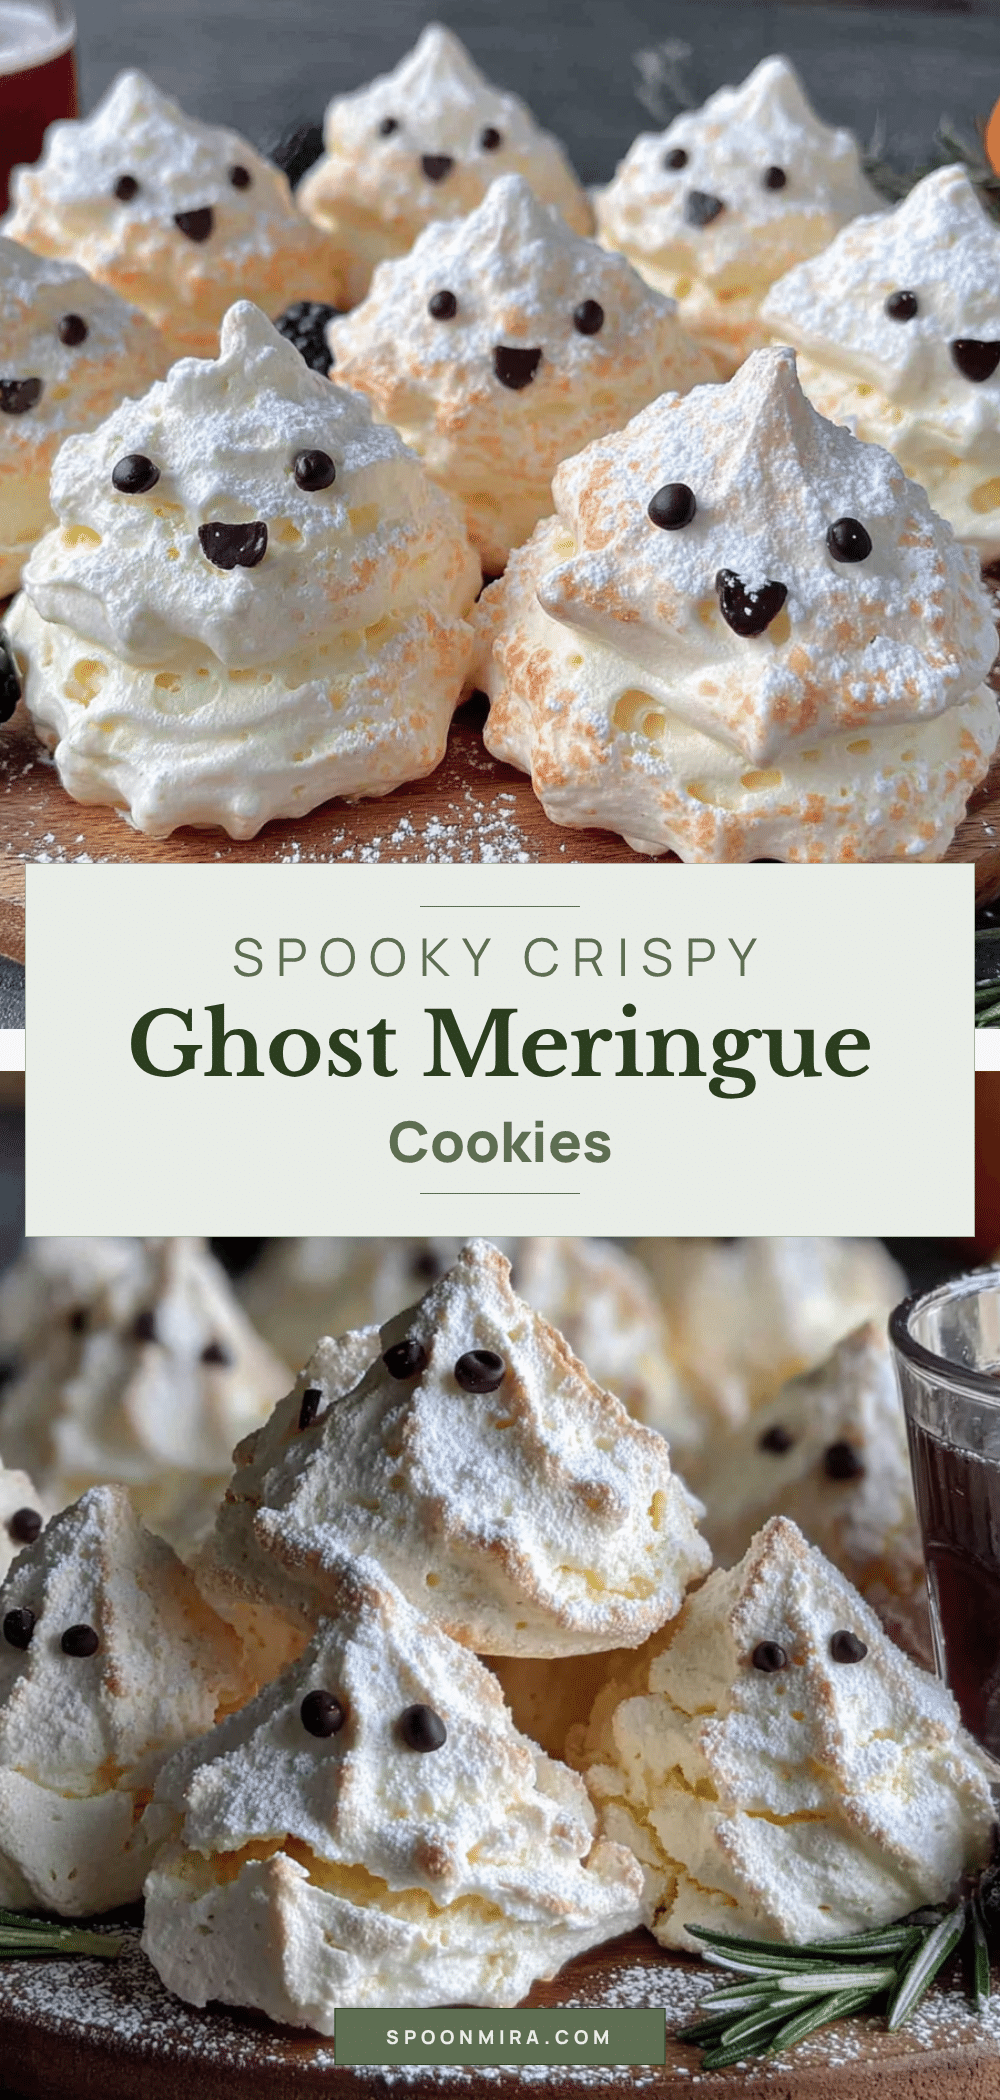
Easy Ghost Meringue Cookies: Best Halloween Treat
These light, sweet, and adorable ghost-shaped meringue cookies are made with just 3 ingredients and are naturally gluten-free and dairy-free. Perfect for Halloween parties or a fun baking project.
- Prep Time: 20 minutes
- Cook Time: 90 minutes
- Total Time: 2 hours 50 minutes (plus cooling time)
- Yield: 24-30 cookies 1x
- Category: Dessert
- Cuisine: American
Ingredients
- 3 large egg whites, at room temperature
- 3/4 cup (150g) granulated sugar
- 1 teaspoon vanilla extract
- 1/4 teaspoon cream of tartar (optional but recommended)
- 24–30 mini chocolate chips (for the eyes)
Instructions
- Preheat your oven to 200°F (93°C). Line two baking sheets with parchment paper.
- Place the room-temperature egg whites and cream of tartar in the bowl of a stand mixer or large mixing bowl. Whisk on medium speed until frothy and bubbly, about 1-2 minutes.
- With the mixer running on medium-low, add the granulated sugar one tablespoon at a time, allowing each to fully incorporate before adding the next (about 5-7 minutes total).
- Add the vanilla extract. Increase mixer speed to medium-high and whisk until stiff, glossy peaks form. The meringue should feel smooth between your fingers, not gritty.
- Test the meringue by rubbing a tiny bit between your thumb and forefinger. If it feels smooth, it’s ready. If gritty, continue whisking for another minute.
- Fit a piping bag with a round tip (e.g., Wilton 1A) and fill it with the meringue. Twist the top closed and squeeze out any air bubbles.
- Pipe ghosts onto the prepared baking sheets: hold the piping bag perpendicular to the sheet, squeeze gently to create a round base, then pull straight up while reducing pressure to form a teardrop shape. Leave about 1 inch of space between each ghost.
- Gently press two mini chocolate chips into each ghost for eyes, pressing just until flush with the surface.
- Bake for 90 minutes. Do not open the oven door during the first hour. After 90 minutes, turn off the oven and leave the meringues inside to cool completely (at least 2 hours or overnight).
- Check for doneness: a perfectly baked meringue should lift easily off the parchment. If they stick, return to the warm oven (heat off) for another 30 minutes.
Notes
Humidity is the enemy of meringue; wait for a dry day or use a dehumidifier. Ensure your bowl and whisk are perfectly clean and grease-free. For vegan version, substitute egg whites with aquafaba (3 tablespoons per egg white).
Nutrition
- Serving Size: 1 cookie
- Calories: 1520
- Sugar: 4
- Sodium: 5
- Carbohydrates: 4
Keywords: ghost meringue cookies, Halloween cookies, meringue cookies, easy Halloween treats, gluten-free Halloween cookies