Pulling a warm, fragrant pumpkin pie out of the oven feels like the quintessential fall moment, right? But here’s the thing—this year, my oven decided to go on strike. The heating element blew right as I was about to blind-bake a crust for a Thanksgiving trial run. I stood there, staring at a bowl of pumpkin puree and a sleeve of ginger cookies, feeling that familiar pinch of kitchen panic. You know that moment when a plan just… implodes?
Honestly, I almost gave up and ordered a pie from the store. But the stubborn side of me kicked in. I grabbed the ginger cookies, crushed them with the bottom of a measuring cup (very therapeutic, by the way), and mixed them with melted butter. No-bake was the only option left on the table. And let me tell you, that moment of improvisation turned into what my family now calls “the pie that’s actually better than the original.”
This easy no-bake pumpkin pie with ginger cookie crust isn’t just a backup plan—it’s become my go-to. The crust has this incredible spicy snap that plays off the silky, cool pumpkin filling. It’s the kind of dessert that makes you slow down and actually taste every single bite. No oven required, no stress, and honestly? No one will ever guess it started as a kitchen disaster.
Sometimes the best recipes are the ones you stumble into when everything goes wrong. And this one? It stuck around for a reason.
Why You’ll Love This Recipe
I’ve tested this recipe about seven times now, tweaking the filling ratios and crust texture until it was just right. It’s not just another pumpkin pie—it’s the one that saves your sanity during the holiday rush. Here’s why it works:
- No Oven Required: Perfect for when your oven is occupied with a turkey, or, you know, when it decides to quit on you like mine did. It’s also great for hot days when turning on the oven feels criminal.
- Simple Ingredients: You probably have most of these on hand already. No weird stabilizers or hard-to-find extracts. Just real, honest ingredients.
- Perfect for Make-Ahead Meals: This pie needs at least 4 hours to set in the fridge, which means you can make it the night before and cross “dessert” off your list. It actually tastes better the next day.
- Crowd-Pleaser: I’ve served this at three different gatherings now, and every single person asked for the recipe. Even the “I don’t like pumpkin pie” folks went back for seconds.
- Unbelievably Creamy: The texture is this perfect balance between a mousse and a traditional custard pie. It’s light but satisfying, and the ginger cookie crust adds a crunch that keeps things interesting.
What makes this recipe different from the dozens of other no-bake pumpkin pies out there? It’s the crust. Most recipes use graham crackers or vanilla wafers, but using ginger cookies brings a warmth and spice that elevates the entire dessert. The filling also uses a specific ratio of cream cheese to pumpkin that prevents that “too jiggly” texture some no-bake pies suffer from. I’ve dialed it in so you get a clean slice every time—no slumping, no sogginess.
This is the kind of pie that makes you close your eyes after the first bite. It’s comfort food reimagined—easier, cooler, and somehow even more satisfying than the original.
What Ingredients You Will Need
This recipe uses simple, wholesome ingredients to deliver bold flavor and satisfying texture without the fuss. Most of these are pantry staples, especially if you do a lot of fall baking.
- Ginger snap cookies: 2 cups (about 200g), finely crushed. I prefer using store-bought ginger snaps for convenience—they have that perfect spice blend. Look for brands like Anna’s or Mi-Del for a crisp, flavorful base. You can also use homemade ginger cookies if you have them.
- Unsalted butter: 6 tablespoons (85g), melted. This binds the crust together. If you only have salted butter, just reduce the added salt in the filling slightly.
- Cream cheese: 8 ounces (226g), softened to room temperature. Full-fat cream cheese is non-negotiable here—it provides the structure and richness that makes the filling set properly. I always use Philadelphia brand for consistency.
- Granulated sugar: ½ cup (100g). Just regular white sugar works perfectly. It dissolves easily into the cream cheese without needing heat.
- Pumpkin puree: 1 can (15 ounces or 425g). Make sure you’re buying pure pumpkin puree, not pumpkin pie filling. Libby’s is my go-to brand because it has a consistent texture and moisture content.
- Heavy whipping cream: 1 cup (240ml). This gets whipped to stiff peaks and folded into the pumpkin mixture, creating that light, mousse-like texture. Don’t substitute with milk or half-and-half—you need the fat content for stability.
- Vanilla extract: 1 teaspoon (5ml). Pure vanilla adds warmth and rounds out the pumpkin spice flavors. Imitation vanilla works in a pinch, but pure is better.
- Pumpkin pie spice: 1½ teaspoons. You can use store-bought or make your own blend (cinnamon, nutmeg, ginger, cloves, allspice). I actually prefer making my own because I like a heavier hand on the ginger to complement the crust.
- Ground cinnamon: ½ teaspoon. This extra boost of cinnamon makes the filling feel extra cozy and autumnal.
- Salt: ¼ teaspoon. Just a pinch to balance the sweetness and enhance all the flavors.
- Optional for topping: ½ cup (120ml) heavy whipping cream, 2 tablespoons powdered sugar, and ½ teaspoon vanilla extract for a homemade whipped cream. Store-bought whipped cream works too if you’re short on time.
For the best texture, make sure your cream cheese is truly at room temperature. Cold cream cheese will leave lumps in your filling, and nobody wants that. Also, if you can find them, ginger cookies with actual crystallized ginger pieces in them make an incredible crust—they add little bursts of spicy sweetness that are absolutely addictive.
Equipment Needed
You don’t need much for this recipe, which is part of its charm. Here’s what you’ll want to have on hand:
- 9-inch pie dish: A standard glass or ceramic pie dish works perfectly. I use a deep-dish Pyrex one because it gives you room for a generous filling.
- Food processor or rolling pin: For crushing the ginger cookies. A food processor makes quick work of it, but if you don’t have one, place the cookies in a zip-top bag and go to town with a rolling pin. It’s oddly satisfying!
- Electric hand mixer or stand mixer: You’ll need this to whip the cream and beat the cream cheese mixture. A whisk and some elbow grease works too, but it’ll take a while.
- Large mixing bowls: At least two—one for the crust ingredients and one for the filling.
- Measuring cups and spoons: For accurate measurements, especially for the spices.
- Spatula: A rubber spatula is essential for folding the whipped cream into the pumpkin mixture without deflating it.
- Plastic wrap: To cover the pie while it sets in the fridge.
One tip I learned the hard way: make sure your mixing bowl for the cream is completely clean and free of any grease residue. Even a tiny bit of oil can prevent the cream from whipping properly. I always wipe my bowl with a little lemon juice and dry it thoroughly before starting—works like a charm.
Preparation Method
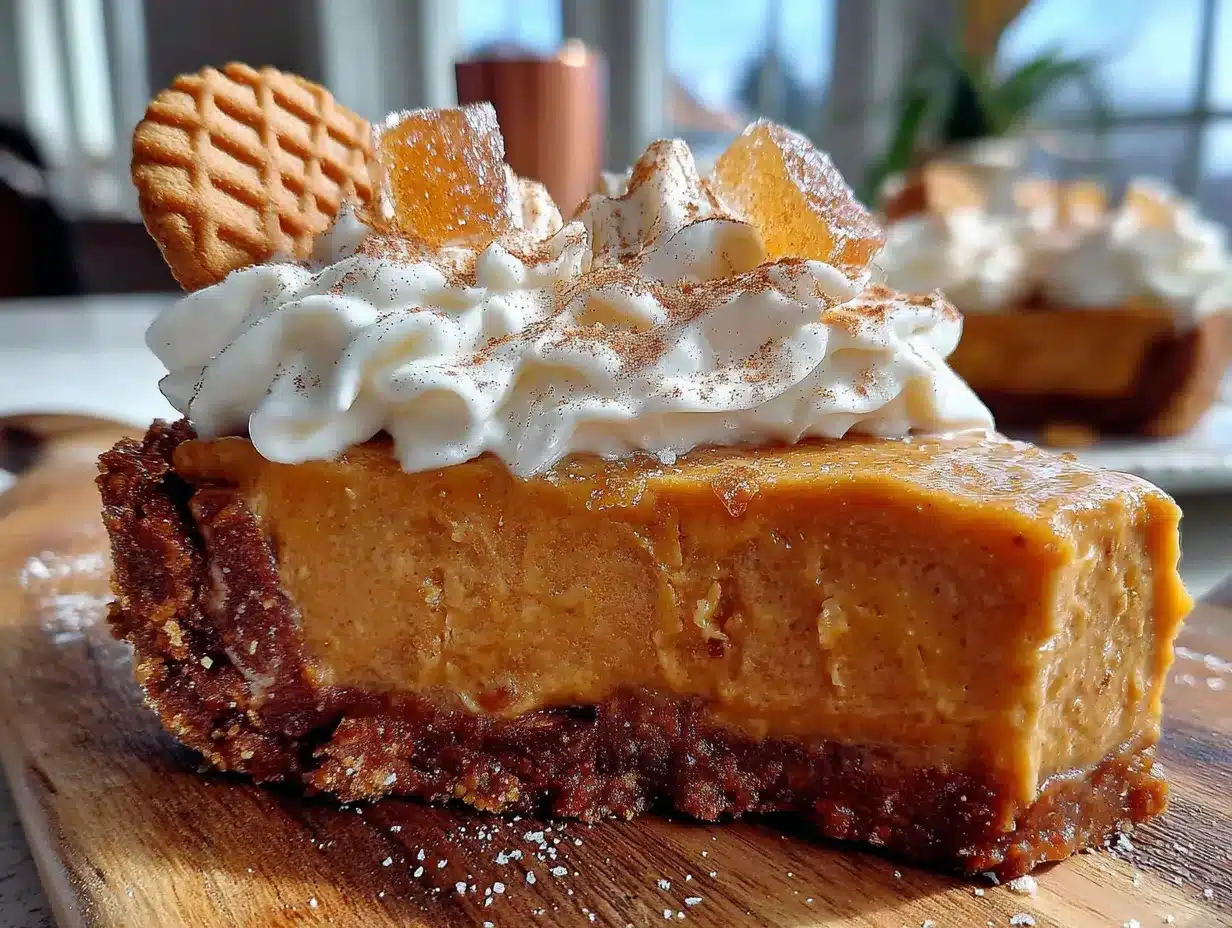
This recipe comes together in about 20 minutes of active time, plus at least 4 hours of chilling. The waiting is the hardest part!
- Make the crust: Place the ginger cookies in a food processor and pulse until they turn into fine crumbs. You should have about 2 cups of crumbs. If you’re using the bag-and-rolling-pin method, crush them until no large pieces remain—you want a uniform texture for the best crust.
- Combine crust ingredients: Pour the cookie crumbs into a medium bowl. Add the melted butter and stir with a fork until all the crumbs are evenly moistened. The mixture should look like wet sand and hold together when you squeeze it in your fist.
- Press the crust: Transfer the crumb mixture to your 9-inch pie dish. Use the bottom of a flat measuring cup or a glass to press the crumbs firmly into the bottom and up the sides of the dish. Don’t skip this step—a well-packed crust is the key to clean slices later. Make sure the crust is even in thickness, about ¼ inch all around.
- Chill the crust: Place the crust in the refrigerator for at least 30 minutes while you prepare the filling. This helps it firm up so it doesn’t crumble when you add the filling.
- Whip the cream: In a large, clean mixing bowl, pour the heavy whipping cream. Using an electric hand mixer or stand mixer fitted with the whisk attachment, beat the cream on medium-high speed until stiff peaks form. This usually takes about 3-4 minutes. You’ll know it’s ready when you lift the beaters and the cream stands up in peaks that don’t droop. Be careful not to over-whip, or you’ll end up with butter!
- Beat the cream cheese: In another large bowl, beat the softened cream cheese with the granulated sugar until smooth and creamy, about 2 minutes. Scrape down the sides of the bowl with a spatula to make sure everything is incorporated.
- Add pumpkin and spices: To the cream cheese mixture, add the pumpkin puree, vanilla extract, pumpkin pie spice, cinnamon, and salt. Beat on medium speed until everything is well combined and silky smooth. The mixture will be thick and smell incredible at this point.
- Fold in the whipped cream: Gently add about one-third of the whipped cream to the pumpkin mixture. Fold it in with a rubber spatula using a gentle, sweeping motion—cut through the center, scrape along the bottom, and fold over the top. Once it’s mostly incorporated, add the remaining whipped cream and fold until no white streaks remain. This step is crucial: folding gently keeps the filling light and airy.
- Fill the crust: Spoon the filling into the chilled crust. Use the spatula to spread it evenly, smoothing the top into a nice, even surface. You can leave it rustic or create gentle swirls on top for a prettier presentation.
- Chill the pie: Cover the pie loosely with plastic wrap and refrigerate for at least 4 hours, but overnight is even better. The longer it chills, the cleaner your slices will be. The filling needs time to set and firm up properly.
- Serve: Before serving, you can top the pie with homemade whipped cream if desired. Slice with a sharp knife, wiping it clean between cuts for the prettiest pieces.
Sensory cue: When you fold the whipped cream into the pumpkin mixture, it should look like a thick, mousse-like batter. The color should be a warm, even orange, and it should smell like autumn in a bowl—spices, vanilla, and that earthy pumpkin sweetness.
Cooking Tips & Techniques
I’ve made this pie enough times to know where things can go wrong. Here are the lessons I learned the hard way so you don’t have to:
Don’t skip the crust chilling step. The first time I made this, I was impatient and poured the filling into a warm, freshly pressed crust. The butter in the crust hadn’t set, so the bottom got a little soggy. Letting the crust chill for a full 30 minutes (or even an hour) makes a world of difference in texture.
Room temperature cream cheese is non-negotiable. I once tried to speed things up by microwaving cold cream cheese. Big mistake. It melted unevenly and left lumps in my filling that no amount of beating could fix. Take it out of the fridge about an hour before you start baking—or, in this case, assembling.
Fold, don’t stir. When you add the whipped cream to the pumpkin mixture, resist the urge to stir vigorously. Folding is a gentle technique that preserves all those air bubbles you worked so hard to create. If you stir too aggressively, the filling will deflate and become dense instead of light and mousse-like.
Use a sharp knife for clean slices. This pie is soft and creamy, so a dull knife will drag through it and ruin the presentation. Run your knife under hot water, dry it off, and slice. Wipe the blade clean between each cut for picture-perfect pieces.
Timing is everything. The active prep time is short, but the chilling time is long. I always make this pie the day before I plan to serve it. That way, it’s fully set, the flavors have had time to meld, and I’m not rushing around on the day of. It’s the ultimate stress-free dessert for holidays and gatherings.
Variations & Adaptations
This recipe is surprisingly flexible. Here are some variations I’ve tried and loved:
Gluten-Free Version: Use gluten-free ginger cookies for the crust. Many store-bought brands offer gluten-free options that work perfectly. Just check the label to make sure they’re certified if needed.
Dairy-Free Adaptation: Substitute the cream cheese with a dairy-free cream cheese alternative (like Kite Hill or Miyoko’s) and use coconut cream instead of heavy whipping cream. Chill the can of coconut cream overnight, then scoop out the solid part and whip it just like regular cream. The texture will be slightly different but still delicious.
Extra Spicy Crust: If you love ginger like I do, add 2 tablespoons of finely chopped crystallized ginger to the crust mixture before pressing it into the dish. It adds little bursts of spicy-sweetness that are incredible against the cool, creamy filling.
Maple Pumpkin Version: Replace the granulated sugar with ⅓ cup of pure maple syrup. The maple flavor pairs beautifully with the pumpkin and ginger. Note that the filling will be slightly softer, so you might need an extra hour of chilling time.
Chocolate Drizzle: For a decadent twist, melt ¼ cup of dark chocolate chips with a teaspoon of coconut oil and drizzle it over the finished pie before serving. The chocolate and ginger combination is surprisingly amazing.
I once made a version with a pecan shortbread crust instead of ginger cookies, and it was fantastic—but honestly, the ginger cookie version is still my favorite. There’s something about that spicy-sweet contrast that just works.
Serving & Storage Suggestions
This pie is best served cold, straight from the refrigerator. The filling is firm but creamy, and the crust stays perfectly crunchy. For the prettiest presentation, I like to add a generous dollop of homemade whipped cream on top, a sprinkle of cinnamon or pumpkin pie spice, and maybe a few candied pecans for crunch.
It pairs beautifully with a warm cup of coffee or a spiced latte. If you’re serving it after a big meal, it’s light enough that it won’t weigh anyone down—a perfect end to a Thanksgiving feast or a cozy fall dinner. For a fun twist, try serving it alongside a slice of pumpkin spice sheet cake for the ultimate pumpkin dessert spread.
Storage: Cover the pie tightly with plastic wrap or aluminum foil and store it in the refrigerator for up to 5 days. The crust will stay crisp for the first 2-3 days, then gradually soften. I honestly think it tastes best on day two—the flavors have had time to meld and deepen.
Freezing: This pie freezes beautifully! Wrap the fully chilled pie (without toppings) in a layer of plastic wrap, then a layer of foil. Freeze for up to 3 months. To serve, thaw it in the refrigerator overnight. Add fresh whipped cream after thawing.
Reheating: This is a no-bake pie, so there’s no reheating needed. In fact, you don’t want to warm it up—the filling will lose its structure. Serve it cold and enjoy the contrast between the creamy filling and the crunchy crust.
One note: if you’re making this for a gathering, I recommend adding the whipped cream topping just before serving. Pre-topped pies can get a little messy after a day in the fridge.
Nutritional Information & Benefits
Here’s the estimated nutritional breakdown for one slice (based on 8 servings per pie, without whipped cream topping):
| Nutrient | Amount per Serving |
|---|---|
| Calories | 345 |
| Total Fat | 22g |
| Saturated Fat | 12g |
| Cholesterol | 65mg |
| Sodium | 210mg |
| Total Carbohydrates | 35g |
| Dietary Fiber | 2g |
| Sugars | 22g |
| Protein | 4g |
| Vitamin A | 180% DV |
| Vitamin C | 4% DV |
| Calcium | 6% DV |
| Iron | 8% DV |
Pumpkin is packed with Vitamin A, which is great for eye health and immune function. It’s also a good source of fiber, which helps keep you full and supports digestion. The ginger in the cookies has anti-inflammatory properties too—so really, this pie is practically health food! (Okay, maybe not, but it’s certainly better for you than most store-bought desserts.)
If you’re watching your sugar intake, you can reduce the granulated sugar to ⅓ cup without sacrificing too much sweetness. The ginger cookies already add some sweetness to the crust.
Conclusion
This easy no-bake pumpkin pie with ginger cookie crust has become a staple in my fall recipe rotation, and I have a feeling it will become one in yours too. It’s proof that you don’t need an oven, a ton of fancy equipment, or hours of free time to create something truly special. Sometimes the best things come from moments of kitchen chaos—and this pie is the delicious result of exactly that.
I’d love to hear how yours turns out! Did you try any variations? Did your family go back for thirds like mine did? Drop a comment below and let me know. And if you’re looking for more easy, stress-free fall recipes, don’t miss this creamy hatch green chile corn chowder or these brown butter snickerdoodle crinkle cookies for more cozy inspiration.
Happy no-baking, friends. May your crust always be crunchy and your slices always be clean.
Frequently Asked Questions
Can I use homemade pumpkin puree instead of canned?
Yes, you can! Just make sure to strain the homemade puree through a cheesecloth or fine-mesh sieve for a few hours to remove excess moisture. Canned pumpkin is more consistent in texture, so homemade might make the filling slightly softer. If using homemade, add an extra hour of chilling time.
How long does this pie need to set?
At least 4 hours in the refrigerator, but overnight is ideal. The longer it chills, the firmer and cleaner your slices will be. I always recommend making it the day before you plan to serve it.
Can I use a different type of cookie for the crust?
Absolutely! Graham crackers, vanilla wafers, or even shortbread cookies would work. Just keep in mind that the flavor profile will change. Ginger cookies add that warm, spicy kick that pairs so well with pumpkin, so it’s my top recommendation.
Why is my filling not setting?
This usually happens if the cream cheese wasn’t fully softened, or if the whipped cream wasn’t whipped to stiff peaks. Make sure your cream cheese is at room temperature and your cream is properly whipped. Also, don’t skimp on the chilling time—4 hours is the minimum, not a suggestion.
Can I make this pie ahead of time for Thanksgiving?
Yes! This pie is perfect for make-ahead holiday prep. Make it up to 2 days in advance, keep it covered in the refrigerator, and add the whipped cream topping just before serving. It actually tastes better on day two!
Pin This Recipe!
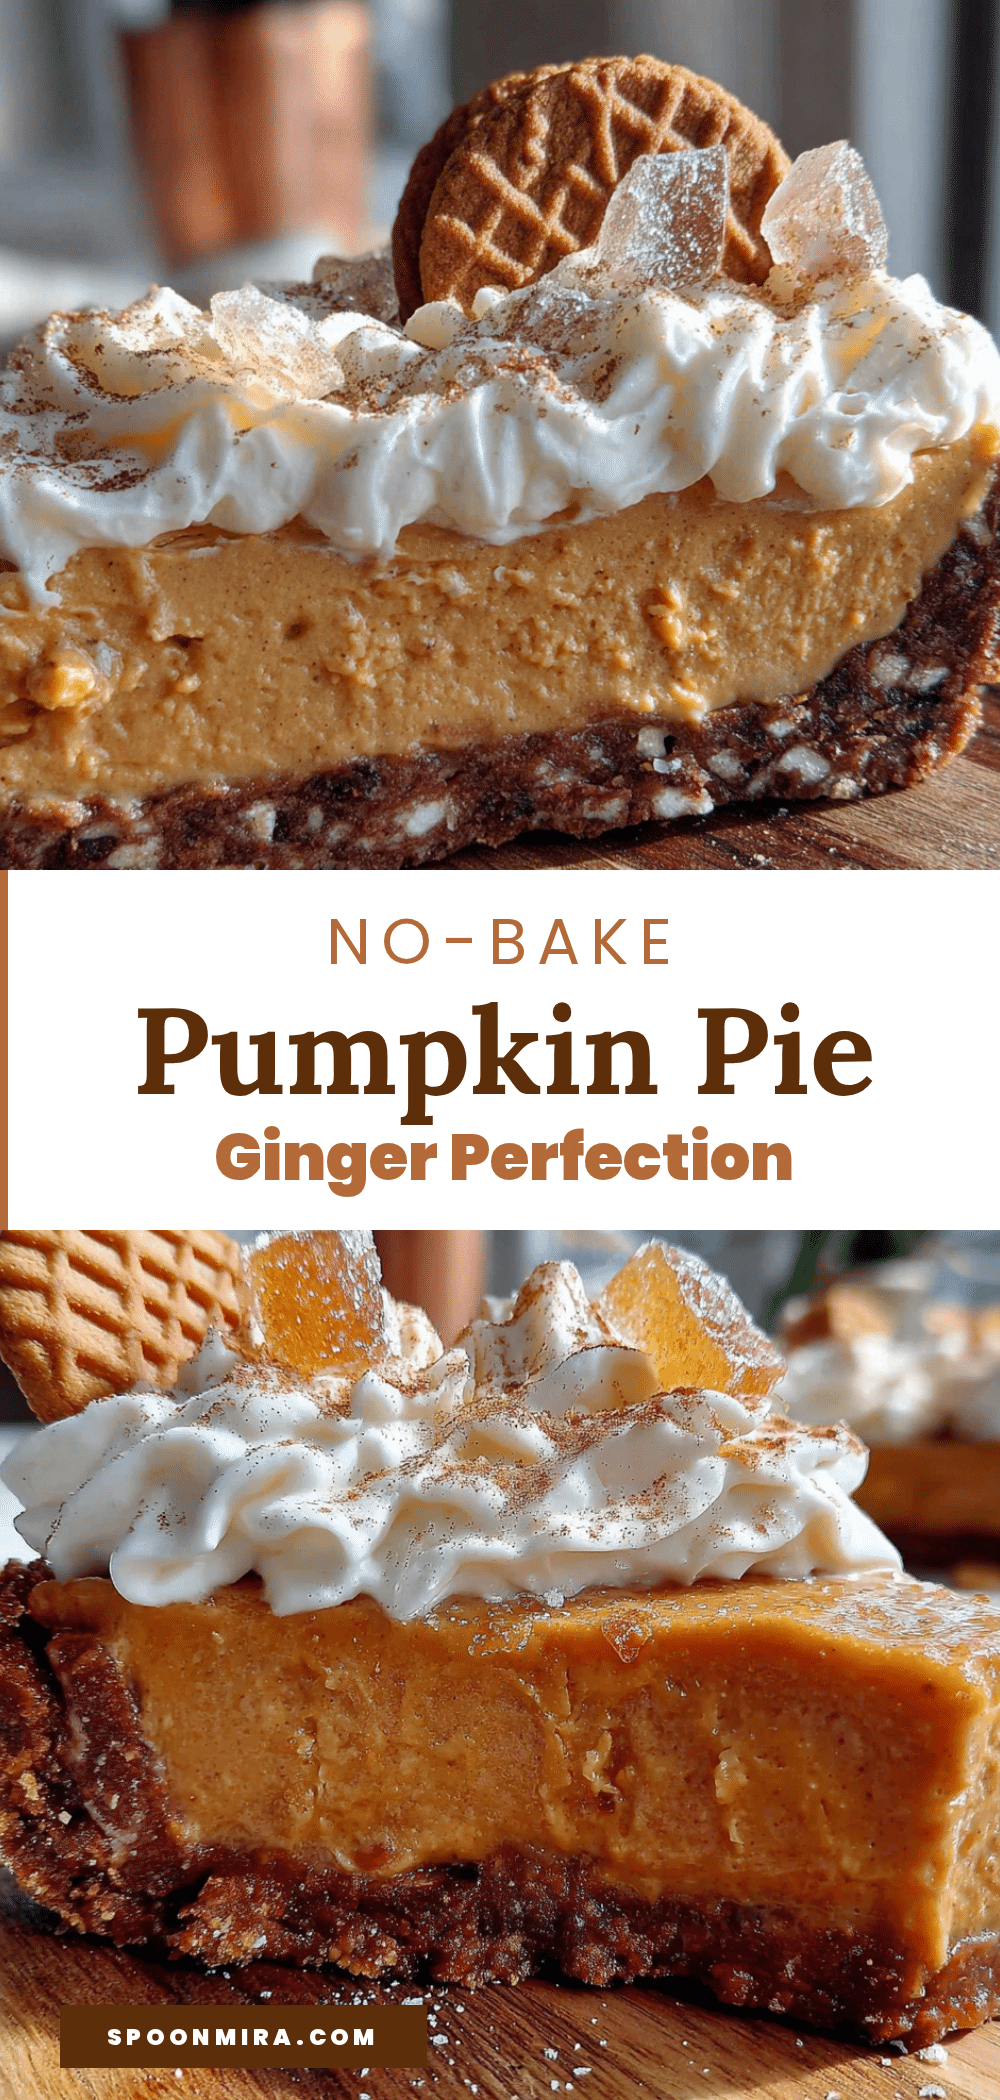
Easy No-Bake Pumpkin Pie with Ginger Cookie Crust

A creamy, no-bake pumpkin pie with a spicy ginger cookie crust that’s perfect for fall gatherings. This stress-free dessert requires no oven and can be made ahead, delivering a silky, mousse-like filling with a crunchy, flavorful crust.
- Prep Time: 20 minutes
- Cook Time: 0 minutes
- Total Time: 4 hours 20 minutes (includes chilling)
- Yield: 8 servings 1x
- Category: Dessert
- Cuisine: American
Ingredients
- 2 cups (about 200g) ginger snap cookies, finely crushed
- 6 tablespoons (85g) unsalted butter, melted
- 8 ounces (226g) cream cheese, softened to room temperature
- ½ cup (100g) granulated sugar
- 1 can (15 ounces or 425g) pumpkin puree (not pumpkin pie filling)
- 1 cup (240ml) heavy whipping cream
- 1 teaspoon (5ml) vanilla extract
- 1½ teaspoons pumpkin pie spice
- ½ teaspoon ground cinnamon
- ¼ teaspoon salt
- Optional for topping: ½ cup (120ml) heavy whipping cream, 2 tablespoons powdered sugar, ½ teaspoon vanilla extract
Instructions
- Make the crust: Place the ginger cookies in a food processor and pulse until they turn into fine crumbs (about 2 cups). Alternatively, crush them in a zip-top bag with a rolling pin.
- Combine crust ingredients: Pour the cookie crumbs into a medium bowl. Add the melted butter and stir with a fork until all the crumbs are evenly moistened (like wet sand).
- Press the crust: Transfer the crumb mixture to a 9-inch pie dish. Use the bottom of a flat measuring cup or a glass to press the crumbs firmly into the bottom and up the sides of the dish, about ¼ inch thick.
- Chill the crust: Place the crust in the refrigerator for at least 30 minutes while you prepare the filling.
- Whip the cream: In a large, clean mixing bowl, pour the heavy whipping cream. Using an electric hand mixer or stand mixer fitted with the whisk attachment, beat the cream on medium-high speed until stiff peaks form (about 3-4 minutes).
- Beat the cream cheese: In another large bowl, beat the softened cream cheese with the granulated sugar until smooth and creamy, about 2 minutes. Scrape down the sides of the bowl.
- Add pumpkin and spices: To the cream cheese mixture, add the pumpkin puree, vanilla extract, pumpkin pie spice, cinnamon, and salt. Beat on medium speed until well combined and silky smooth.
- Fold in the whipped cream: Gently add about one-third of the whipped cream to the pumpkin mixture. Fold it in with a rubber spatula using a gentle, sweeping motion. Once mostly incorporated, add the remaining whipped cream and fold until no white streaks remain.
- Fill the crust: Spoon the filling into the chilled crust. Use the spatula to spread it evenly, smoothing the top.
- Chill the pie: Cover the pie loosely with plastic wrap and refrigerate for at least 4 hours, but overnight is even better.
- Serve: Before serving, top with homemade whipped cream if desired. Slice with a sharp knife, wiping it clean between cuts.
Notes
For best results, use full-fat cream cheese at room temperature. Chill the crust for at least 30 minutes before filling. The pie needs at least 4 hours to set; overnight is ideal. For gluten-free, use gluten-free ginger cookies. For dairy-free, use dairy-free cream cheese and coconut cream. Store covered in the refrigerator for up to 5 days. Freeze for up to 3 months (without topping).
Nutrition
- Serving Size: 1 slice (1/8 of pie)
- Calories: 345
- Sugar: 22
- Sodium: 210
- Fat: 22
- Saturated Fat: 12
- Carbohydrates: 35
- Fiber: 2
- Protein: 4
Keywords: no-bake pumpkin pie, ginger cookie crust, easy pumpkin pie, fall dessert, Thanksgiving pie, no oven dessert


