The school Halloween party was in twelve hours and I’d completely forgotten. Not just the treat I was supposed to bring—the entire party. My kid had reminded me at breakfast, which is the worst possible time to hear news like that. Everyone else would be bringing elaborate cupcakes with fondant ghosts or those creepy-crawly dirt cups with gummy worms and crushed Oreos. I had a bag of pretzel rods, some almond slivers, and a jar of green candy melts I’d bought on a whim three weeks ago. Honestly, I almost just grabbed a bag of chips from the pantry and called it a day.
But then I saw the almond slivers and something clicked. Witch fingers. You know that feeling when a desperate idea turns out to be the best one? I started melting candy melts while the pretzels were still in the wrapper, and by the time the school bus honked, I had forty witch finger pretzel rods cooling on parchment paper. They were lopsided, the “fingernails” were crooked, and I’d gotten green candy melt on my favorite sweater. But they looked undeniably, delightfully creepy.
That night, my kid came home with an empty tray and a note from the room mom asking for the recipe. The elaborate cupcakes? Half of them were still sitting on the dessert table. The witch finger pretzel rods? Gone in twenty minutes. I stood in my kitchen, still picking dried candy melt off my sleeve, and realized I’d accidentally created the perfect Halloween treat. It’s been our go-to ever since—zero stress, maximum payoff, and the kind of recipe that makes you look like a holiday hero without actually trying.
Why You’ll Love This Recipe
Let me be real with you for a second. Halloween treats can be a whole production. Between the fondant molding, the multiple layers of frosting, and the time it takes to make something look “spooky but cute,” it’s exhausting. These witch finger pretzel rods flip that script completely. Here’s why they work so well:
- Ready in under 30 minutes — from start to finish, including setting time. You can make these while your kid is doing homework or while you’re waiting for the pizza delivery.
- Only three main ingredients — pretzel rods, green candy melts, and sliced almonds. That’s it. No special trip to a baking supply store, no obscure ingredients you’ll never use again.
- Zero baking required — the only heat involved is melting candy melts in the microwave. If you can operate a microwave, you can make these.
- Perfect for classroom parties — they’re individually portioned, easy to transport, and don’t get soggy or fall apart. Plus, kids absolutely lose their minds over them.
- Actually delicious — the salty pretzel with sweet, creamy candy coating and a crunchy almond “fingernail” is a surprisingly perfect combination. They taste like a fancy chocolate-covered pretzel, just green and creepy.
What makes these different from every other Halloween treat tutorial out there? It’s the texture. Most witch finger recipes use cookie dough or breadsticks, which take time to bake and can end up dry or crumbly. Pretzel rods give you that satisfying snap and salty-sweet contrast that keeps people reaching for “just one more.” The candy coating sets up hard and glossy, so they look professional without any special skills. And the almond sliver fingernail? It stays put once the coating sets, which means no disasters during transport.
These aren’t just cute—they’re the kind of treat that makes people do a double-take. The green color is just unsettling enough to feel Halloween-appropriate, but the flavor is so good that even picky eaters go back for seconds. I’ve watched adults grab these without shame at office parties. There’s something about the witch finger shape that brings out the kid in everyone.
What Ingredients You Will Need
This recipe uses simple, straightforward ingredients to create maximum Halloween impact with minimum effort. Most of these are pantry staples or easily found at any grocery store. Here’s what you’ll need:
For the Witch Fingers
- Pretzel rods — 1 standard package (about 12 ounces). Look for thick, straight pretzel rods, not the thin sticks. I prefer the Utz brand for their consistent size and sturdy texture, but any brand works. Avoid broken rods—check the package before you buy.
- Green candy melts — 1 cup (about 6 ounces). Wilton brand is my go-to for consistent melting and smooth coverage. You can also use green melting wafers from Ghirardelli or any store brand. The color should be a medium green—not too dark or it looks moldy, not too light or it looks like green beans.
- Sliced almonds — about 30-40 pieces, depending on how many pretzel rods you’re making. You want raw or blanched sliced almonds, not roasted or salted. The natural light color makes the best “fingernail.” Look for slices that are relatively flat and uniform in shape.
For Decoration (Optional but Recommended)
- Red gel food coloring — for adding “blood” drips at the base of the fingernail. A tiny dot makes a huge difference in the creepy factor.
- Black edible marker — for drawing small wrinkles or knuckle lines on the fingers. This is optional but adds nice detail if you have the time.
- Coconut oil — 1 teaspoon, for thinning the candy melts if they get too thick. Not always needed, but good to have on hand.
Ingredient Selection Tips
When choosing candy melts, avoid the “candy coating” discs that come in bulk bins—they often have a weird waxy texture and don’t melt as smoothly. The branded melting wafers are worth the extra dollar or two. For the pretzel rods, give each one a gentle squeeze before buying. If they flex instead of snapping, they’re stale. Fresh pretzel rods should be crisp and brittle.
If you can’t find green candy melts, you can use white candy melts with green gel food coloring added. Just stir the coloring in thoroughly after melting, and add it drop by drop until you reach the right shade. Keep in mind that liquid food coloring will seize the candy melts, so stick with gel or oil-based colors.
For a dairy-free version, check the label on your candy melts—many brands are naturally dairy-free, but some contain milk solids. Enjoy Life brand makes a good dairy-free option. The pretzel rods themselves are typically vegan, but double-check the package.
Equipment Needed
You don’t need any specialized Halloween baking equipment for this recipe. Here’s what you’ll actually use:
- Microwave-safe bowl — medium size, for melting the candy melts. Glass or ceramic works best; plastic can hold onto heat unevenly.
- Parchment paper — for lining your work surface. Wax paper works in a pinch, but parchment is less likely to stick if the candy melts are warm.
- Baking sheet — to hold the parchment paper and give you a stable work surface. A half-sheet pan is perfect.
- Small spatula — or a butter knife, for spreading the candy coating. An offset spatula gives you the most control.
- Tweezers — for placing the almond slivers precisely. This sounds fancy, but I’ve also used my fingers and a toothpick. The tweezers just save you from getting green goo on your hands.
- Toothpicks — for adding small details or fixing mistakes. Also useful for popping air bubbles in the candy coating.
If you don’t have a microwave, you can melt the candy melts in a double boiler or a heatproof bowl set over simmering water. Just be careful not to get any steam or water droplets in the candy—water will seize it instantly and turn it into a grainy mess. I learned this the hard way my second time making these, and I had to start over with a fresh batch of melts.
For storage, you’ll want an airtight container. A rectangular plastic container with a tight-fitting lid works perfectly. Layer the witch fingers between sheets of parchment or wax paper so they don’t stick together.
Preparation Method
This is where the magic happens. Follow these steps, and you’ll have a tray of creepy witch fingers in less time than it takes to watch a Halloween episode of your favorite show.
- Prepare your work station. Line a baking sheet with parchment paper. Make sure it’s completely flat—curled edges on the paper will make the pretzel rods wobble. Set out your pretzel rods, sliced almonds, and a small bowl of the green candy melts. Have a toothpick and tweezers handy.
- Melt the candy melts. Place the green candy melts in a microwave-safe bowl. Microwave in 30-second intervals at 50% power, stirring thoroughly between each interval. This is crucial—full power will burn the candy melts and turn them into a thick, lumpy mess. After two intervals, switch to 15-second intervals. The candy is ready when it’s completely smooth and flows like thick honey when you lift the spatula. If it’s too thick, stir in 1 teaspoon of coconut oil. Do not add water, milk, or butter—they will ruin the texture.
- Coat the pretzel rods. Hold a pretzel rod by one end, leaving about an inch uncoated for the “wrist” area. Dip the other end into the melted candy, rotating slowly to coat evenly. Let the excess drip back into the bowl for a few seconds. You want a thin, even layer—too thick and it will pool at the bottom and look lumpy. Place the coated pretzel rod on the parchment paper. Repeat with the remaining pretzel rods, working in batches of 5-6 so the candy doesn’t set before you add the almond.
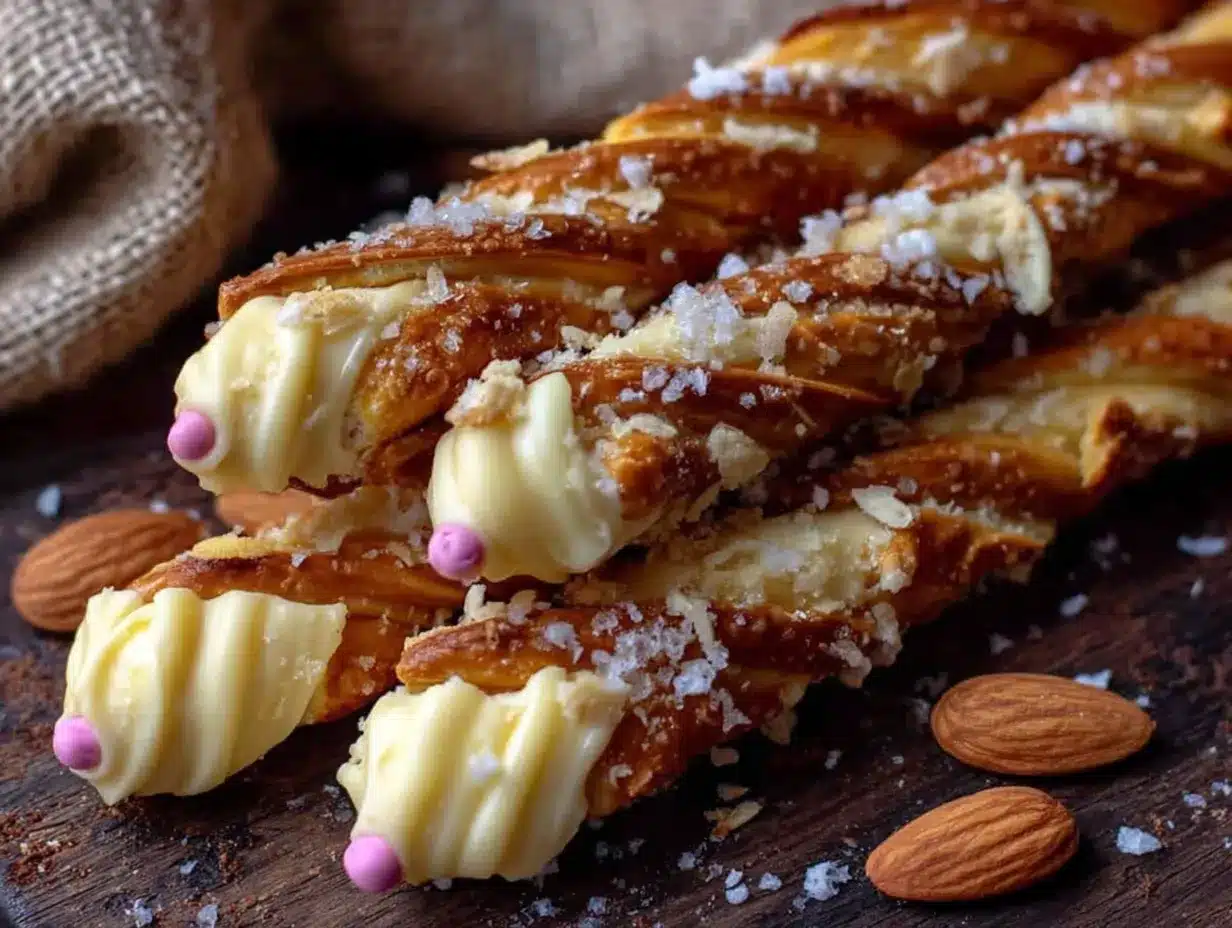
- Add the fingernails. While the candy coating is still wet, press a sliced almond onto the tip of each pretzel rod. The pointed end of the almond should face outward, like a fingernail extending past the fingertip. Press gently but firmly—the almond should be partially embedded in the candy coating. If the coating has started to set, the almond won’t stick, so work quickly. Use tweezers for precision if you need them.
- Create the knuckle wrinkles. Using a toothpick, gently drag two or three lines across the coated area to create the appearance of knuckles. Don’t press too hard—you just want to create shallow indentations in the candy coating. Space them unevenly for a more natural, creepy look. Real fingers aren’t perfectly symmetrical, and neither should these be.
- Add the “blood” drips (optional). Dip a clean toothpick into red gel food coloring and carefully draw a small line at the base of the almond “fingernail.” Let a tiny drop run down slightly to look like blood. Less is more here—one small drop looks creepy, while too much looks like a crime scene. I usually do this step after all the pretzels are coated and the candy has set for about 5 minutes.
- Let them set completely. Allow the witch fingers to sit at room temperature until the candy coating is completely hard and glossy. This takes about 15-20 minutes at normal room temperature. Don’t refrigerate them to speed this up—condensation will form on the candy coating and make it sticky and dull. If you’re in a hurry, set them in front of a fan for faster setting.
- Add final details (optional). Once the coating is fully set, use a black edible marker to draw small wrinkles or age spots on the fingers. This step is completely optional but adds a nice touch if you’re making these for a party or photo-worthy display. I usually skip this for classroom treats and save it for Halloween parties where I have more time.
A few things to watch for during this process. If the candy melts start to thicken while you’re working, pop the bowl back in the microwave for 10 seconds and stir. If you get a drip or an uneven spot on a pretzel rod, you can smooth it with a clean finger—just make sure your hands are completely dry. And if an almond sliver falls off after the coating has set, dab a tiny bit of melted candy on the spot and press the almond back on. No one will notice.
The first time I made these, I tried to coat all the pretzel rods at once and ended up with a big bowl of setting candy and half-finished fingers. Work in small batches—it’s better to reheat the candy melts three times than to rush and end up with a mess. Trust me on this one.
Cooking Tips & Techniques
After making these witch finger pretzel rods for three Halloweens straight, I’ve collected a few tricks that make the process smoother and the results more impressive. Here’s what I’ve learned the hard way so you don’t have to.
The biggest mistake people make is overheating the candy melts. I did this my first time—I hit them with full power for a minute and ended up with a bowl of thick, grainy goo that looked like green cottage cheese. Candy melts are temperamental. Low and slow is the only way. If you do accidentally overheat them, you can try stirring in a teaspoon of coconut oil or shortening to bring them back, but honestly, it’s usually faster to start over with fresh melts.
Temperature matters more than you think. If your kitchen is hot and humid, the candy coating will take longer to set and may develop a streaky appearance. If it’s cold, the coating will set too fast and you won’t have time to add the almonds and knuckle details. Aim for a cool, dry room—around 68-72°F is ideal. I made the mistake of making these on a humid August day when I was testing for a fall preview post, and the coating never fully hardened. They were sticky for days.
Multitasking strategy: While the candy melts are in the microwave, arrange your pretzel rods and almonds on the parchment paper so everything is within reach. Once the candy is melted, you’re on the clock. Every second you spend hunting for an almond sliver is a second the coating is setting. I lay out 10 almond slivers in a row, then work through 10 pretzel rods without stopping. It’s assembly line efficiency, and it makes a huge difference.
Consistency tip: If you want perfectly uniform witch fingers, use a small offset spatula to spread the candy coating instead of dipping. This gives you more control over the thickness and coverage. Dip the spatula into the melted candy, then spread it onto the pretzel rod like you’re buttering bread. It takes a little longer but produces a smoother, more professional finish.
Fix mistakes immediately. If an almond falls off while the coating is still wet, just press it back on. If you get a big drip, wipe it with your finger and smooth the area. If the coating slides down the pretzel rod, hold it upright for a few seconds until it sets slightly. Don’t wait—once the candy hardens, you can’t fix anything without making a visible patch.
Variations & Adaptations
One of the best things about this recipe is how easily it adapts to different tastes, dietary needs, and occasions. Here are some variations I’ve tried and loved:
Monster Fingers
Skip the green candy melts and use purple or orange instead. Add candy eyes (the little white and black discs) instead of almond fingernails. Press two eyes onto each pretzel rod while the coating is wet, then use a toothpick to draw a small mouth. These are less creepy and more cute—perfect for younger kids who might find the witch fingers too spooky.
Zombie Fingers
Use gray or white candy melts for a decaying zombie look. After the coating sets, brush a tiny bit of cocoa powder or crushed Oreo dust onto the surface with a clean makeup brush. This creates a “dirt” effect that looks like the fingers just crawled out of the grave. Add a drop of red gel at the tip for a freshly unearthed look. I made these for a Halloween party last year and they were the most photographed item on the table.
Gluten-Free Version
Swap the pretzel rods for gluten-free pretzel rods or gluten-free breadsticks. Many grocery stores carry gluten-free pretzel options now. The process is exactly the same—just make sure your candy melts are also certified gluten-free if that’s a concern. I’ve tested this with Snyder’s of Hanover gluten-free pretzel rods and they work beautifully.
Dairy-Free Version
Use dairy-free candy melts (Enjoy Life brand makes a good one) and check that your pretzel rods don’t contain any milk-derived ingredients. Most standard pretzel rods are dairy-free, but flavored or seasoned varieties sometimes have butter or milk powder added. The coconut oil trick works well with dairy-free melts to keep the texture smooth.
Chocolate Witch Fingers
If green isn’t your thing, use dark or milk chocolate candy melts instead. The almond fingernail looks great against dark chocolate, and you can add orange drizzle on top for a Halloween color scheme. These are less “witchy” and more “chocolate-covered pretzel with a spooky twist,” which some people prefer.
Serving & Storage Suggestions
These witch finger pretzel rods are best served at room temperature, straight from the counter. The candy coating should be hard and glossy, and the pretzel should snap cleanly when bitten. Don’t serve them straight from the fridge—the coating will develop condensation and become sticky within minutes.
Presentation ideas: Arrange the witch fingers in a cauldron-shaped bowl or a black serving platter with a few fake spiders scattered around. For a classroom party, stand them upright in a small vase or mason jar filled with black beans or coffee grounds—it looks like the fingers are growing out of the dirt. I’ve also seen people arrange them in a circle on a round platter with a small pumpkin in the center, like they’re pointing at it.
What to serve with them: These pair well with other no-bake Halloween treats like chocolate-covered pretzels, popcorn balls, or caramel apples. For a drink, serve with apple cider, hot chocolate, or a Halloween-themed punch. If you’re making these for an adult party, they’re surprisingly good with a dark beer or a spiced rum cocktail—the salty-sweet combination works beautifully.
Storage instructions: Store the witch fingers in an airtight container at room temperature for up to 5 days. Layer them between sheets of parchment or wax paper to prevent sticking. Do not refrigerate—the moisture in the fridge will ruin the candy coating’s texture. If you need to make them ahead of time, they actually taste better on day two, once the flavors have had time to meld.
Freezer instructions: You can freeze these for up to 2 months. Place them in a single layer on a baking sheet and freeze until solid (about 1 hour), then transfer to a freezer-safe container with parchment paper between layers. Thaw at room temperature for 30 minutes before serving. Don’t thaw in the refrigerator—again, condensation is the enemy here.
Transport tips: If you’re bringing these to a party, arrange them in a single layer in a shallow container with a tight lid. Place a piece of parchment paper on top, then add another layer if needed. Stand them upright in a tall container for a dramatic presentation that also prevents breakage. I once stacked them in a ziplock bag and ended up with a bag of green pretzel pieces—learn from my mistake.
Nutritional Information & Benefits
Let’s be honest—these are a treat, not a health food. But here’s the nutritional breakdown for one witch finger pretzel rod (based on standard ingredients):
- Calories: Approximately 120-140 per rod
- Carbohydrates: 18-22g
- Fat: 5-7g (mostly from the candy coating and almonds)
- Protein: 2-3g
- Sugar: 10-12g
- Sodium: 200-250mg
The almonds actually add a small nutritional boost—they provide healthy monounsaturated fats, vitamin E, and a bit of fiber. The pretzel rods are low in fat and provide quick energy, though they’re also high in sodium. If you’re watching your sugar intake, you can use sugar-free candy melts, though the texture may be slightly different.
Dietary considerations: This recipe contains gluten (pretzel rods), dairy (most candy melts), and tree nuts (almonds). For nut-free versions, use a sunflower seed or pumpkin seed in place of the almond sliver—though the look won’t be quite as fingernail-like. For gluten-free versions, use gluten-free pretzel rods as mentioned above. Always check labels if you’re serving people with allergies.
From a wellness perspective, these are a great option for Halloween because they’re portion-controlled. One or two feels satisfying without the sugar overload that comes from a full cupcake or a giant cookie. Plus, the salt from the pretzel helps balance the sweetness, so you don’t get that sickly sugar rush that some Halloween treats leave behind.
Conclusion
These easy witch finger pretzel rods have become my secret weapon for Halloween, and I hope they become yours too. They’re the kind of recipe that looks like you spent hours on it when really, you just melted some candy and stuck almonds on pretzels. That’s the beauty of it—maximum Halloween spirit with minimum effort.
What I love most about this recipe is how forgiving it is. Your almond slivers don’t have to be perfectly aligned. Your knuckle lines don’t have to be evenly spaced. The slightly imperfect ones actually look more realistic, more creepy, more witch-like. There’s no pressure to make them perfect, which is rare for holiday treats.
I’d love to hear how yours turn out. Did you add the red “blood” drips? Did you try the zombie version with cocoa powder? Did your kids help you press the almonds on? Drop a comment below and let me know—I read every single one, and your variations might inspire someone else’s Halloween treat table.
If you’re looking for more easy Halloween treats that don’t require baking skills or fancy equipment, check out my spider web dip and these mummy hot dogs—they follow the same philosophy of maximum fun with minimum stress. Happy Halloween, and may your candy melts always be smooth!
Frequently Asked Questions
Can I make these ahead of time?
Absolutely! These witch finger pretzel rods actually stay fresh for up to 5 days at room temperature in an airtight container. Just make sure they’re completely set before you store them, and layer parchment paper between each layer to prevent sticking. They’re perfect for making a day or two before your Halloween party.
Why did my candy melts get thick and lumpy?
This usually happens for one of two reasons: overheating or moisture. If you microwave the candy melts on full power or for too long, they’ll seize up and turn into a thick, grainy paste. Always use 50% power and stir frequently. Also, make sure your bowl and spatula are completely dry—even a single drop of water can ruin the texture of melted candy.
Can I use white chocolate instead of candy melts?
You can, but white chocolate is more temperamental and requires tempering to set properly. Candy melts are designed to melt and set without tempering, which makes them much easier for this recipe. If you want to use white chocolate, add green gel food coloring and a teaspoon of coconut oil, and be prepared for a slightly softer finish that may not set as hard as candy melts.
How do I get the green color to be consistent?
If you’re using pre-colored green candy melts, the color should be consistent straight out of the bag. If you’re coloring white candy melts yourself, use gel food coloring rather than liquid—liquid can affect the texture. Add the color drop by drop and stir thoroughly before adding more. The color will deepen slightly as the coating sets, so aim for a shade slightly lighter than your target.
My almond slivers keep falling off. What am I doing wrong?
This usually means the candy coating had started to set before you added the almond. Work in smaller batches of 5-6 pretzel rods at a time, and press the almond in firmly while the coating is still wet and shiny. If the coating has already formed a skin, you can dab a tiny bit of melted candy onto the spot before pressing the almond on. Also, make sure your almonds are at room temperature—cold almonds will cause the candy to set instantly on contact.
Pin This Recipe!

Easy Witch Finger Pretzel Rods: Best Halloween Treat

These easy witch finger pretzel rods are a quick, no-bake Halloween treat made with just three main ingredients. Ready in under 30 minutes, they’re perfect for classroom parties and guaranteed to be a hit.
- Prep Time: 10 minutes
- Cook Time: 5 minutes
- Total Time: 25 minutes
- Yield: 30-40 servings 1x
- Category: Dessert
- Cuisine: American
Ingredients
- 1 standard package (about 12 ounces) pretzel rods
- 1 cup (about 6 ounces) green candy melts
- 30–40 sliced almonds
- Red gel food coloring (optional)
- Black edible marker (optional)
- 1 teaspoon coconut oil (optional, for thinning candy melts)
Instructions
- Prepare your work station: Line a baking sheet with parchment paper. Set out pretzel rods, sliced almonds, and a small bowl of green candy melts. Have a toothpick and tweezers handy.
- Melt the candy melts: Place green candy melts in a microwave-safe bowl. Microwave in 30-second intervals at 50% power, stirring thoroughly between each interval. After two intervals, switch to 15-second intervals until completely smooth and flows like thick honey. If too thick, stir in 1 teaspoon coconut oil.
- Coat the pretzel rods: Hold a pretzel rod by one end, leaving about an inch uncoated for the ‘wrist’ area. Dip the other end into melted candy, rotating slowly to coat evenly. Let excess drip back into the bowl. Place on parchment paper. Repeat in batches of 5-6.
- Add the fingernails: While coating is still wet, press a sliced almond onto the tip of each pretzel rod with pointed end facing outward. Press gently but firmly so almond is partially embedded.
- Create knuckle wrinkles: Using a toothpick, gently drag two or three lines across the coated area to create knuckle indentations. Space unevenly for a natural look.
- Add ‘blood’ drips (optional): Dip a clean toothpick into red gel food coloring and draw a small line at the base of the almond ‘fingernail.’ Let a tiny drop run down slightly.
- Let them set completely: Allow to sit at room temperature until candy coating is hard and glossy, about 15-20 minutes. Do not refrigerate.
- Add final details (optional): Once set, use a black edible marker to draw small wrinkles or age spots on the fingers.
Notes
Work in small batches to prevent candy coating from setting before adding almonds. If candy melts thicken, reheat for 10 seconds. Avoid moisture—water will seize the candy melts. For best results, keep kitchen cool and dry (68-72°F). Store in airtight container at room temperature for up to 5 days. Freeze for up to 2 months.
Nutrition
- Serving Size: 1 witch finger pretz
- Calories: 130
- Sugar: 11
- Sodium: 225
- Fat: 6
- Saturated Fat: 3
- Carbohydrates: 20
- Fiber: 1
- Protein: 2.5
Keywords: Halloween treats, witch fingers, pretzel rods, no-bake, easy Halloween recipe, classroom party treats


