That faintly tart, earthy smell of dried elderberries simmering on the stove — the kind that hits you before you even round the corner into the kitchen — still takes me straight to my Aunt Lena’s tiny farmhouse in the Finger Lakes. She wasn’t a fancy cook, not by any stretch. But she had this almost stubborn belief in what she called “kitchen medicine.” Every fall, when the first chill bit the air and the goldenrod started to fade, she’d pull out her big enamel pot and start making her famous syrups. I remember sitting at her worn oak table, watching the steam curl up and fog the windows, while she told me stories about her grandmother foraging for berries along the hedgerows back in the old country. It felt like magic, honestly. Like she was bottling up the last warmth of summer to get us through the long, dark winter.
Years later, living in a cramped city apartment with a radiator that clanked and hissed, I found myself craving that exact smell. I wanted that feeling of protection, of being cared for, not just a sugar-coated vitamin. The problem was, I didn’t have the patience for syrups. Measuring out a spoonful every morning felt like a chore I’d inevitably forget. I needed something I could grab on my way out the door. I needed a gummy. Not the store-bought kind, which are often packed with corn syrup and artificial flavors, but something real. Something made with the same dark, rich berry juice and a generous swirl of local honey. Something that actually tasted good.
So, I set out to create my own homemade elderberry immune-boost gummies with honey. It took a few sticky batches and a couple of molds that ended up in the trash (don’t ask about the gelatin clumps), but I finally cracked it. This recipe isn’t just a copycat of Aunt Lena’s syrup; it’s my own little ritual. It’s the taste of that farmhouse memory, now portable and perfectly chewy. Trust me, once you make these, you’ll never look at a gummy bear the same way again.
Why You’ll Love This Recipe
Let’s be real for a second — most “healthy” gummies taste like regret and artificial sweetener. These are different. These are the kind you actually look forward to eating. Here’s why this recipe works so well:
- Simple, Real Ingredients: No corn syrup, no pectin, no weird preservatives. Just dried elderberries, raw honey, and gelatin. You can pronounce everything in the ingredient list.
- Actually Effective: Elderberries are packed with antioxidants and flavonoids. While I’m not a doctor (and I always say talk to yours), the science on their immune-supporting benefits is pretty solid. This is a tasty way to get those good-for-you compounds into your daily routine.
- Kid-Approved (and Adult-Approved): My nephew, who can sniff out a hidden vegetable from three rooms away, literally asks for these. The honey balances the elderberry’s natural tartness perfectly. It’s a treat that just happens to be good for you.
- Perfect for Busy Mornings: No mixing, no measuring at 6 a.m. just as you’re trying to get out the door. Make a batch on the weekend, pop them in the fridge, and you have a week’s worth of immune support ready to go. It’s easier than remembering to take a pill.
- Endlessly Customizable: You can adjust the sweetness, add a little ginger for warmth, or even use a different berry juice blend. This recipe is a base, and you’re the chef.
What really sets this recipe apart is the texture. So many homemade gummies turn out either too hard and rubbery or too soft and melty. I’ve tested this ratio of liquid to gelatin about a dozen times (seriously, my trash can was a graveyard of failed gummies) to get that perfect, bouncy, slightly firm chew that holds its shape at room temperature for a bit but melts beautifully on your tongue. It’s not just another version — it’s the best version.
What Ingredients You Will Need
This recipe uses simple, wholesome ingredients to deliver a powerful immune boost without the fuss. Most of these are pantry staples if you’re into herbal remedies, and the rest are easy to find at a well-stocked grocery store or online.
- Dried Elderberries (½ cup): These are the star of the show. You can find them at health food stores, online retailers (Mountain Rose Herbs is my go-to for quality), or even some farmers’ markets. Look for dark, plump berries that smell earthy and slightly sweet. Avoid any that look dusty or have a musty smell.
- Filtered Water (2 cups): Don’t use tap water if you can help it. The chlorine and minerals can sometimes affect the flavor of the tea and the clarity of your final gummies. Filtered or spring water is best.
- Raw Honey (¼ cup, plus more to taste): This is your sweetener and your antimicrobial powerhouse. Raw, unfiltered honey is best because it hasn’t been pasteurized, meaning it still contains all those beneficial enzymes and local pollen. The flavor of the honey will shine through, so use one you love. A mild wildflower honey is a safe bet; a stronger buckwheat honey will give a more molasses-like depth. Pro tip: Never add honey to boiling water — it can destroy those delicate beneficial compounds.
- Grass-Fed Beef Gelatin (¼ cup / about 4 tablespoons): This is what gives the gummies their structure. I strongly recommend using a high-quality, grass-fed gelatin like Vital Proteins or Great Lakes. It dissolves more cleanly and has a neutral flavor. Don’t use collagen peptides — they won’t set into a firm gummy. You need gelatin for that gummy texture.
- Optional Add-Ins: This is where you can get creative. A 1-inch knob of fresh ginger (sliced) adds a warming, anti-inflammatory kick. A cinnamon stick or a pinch of ground cloves adds depth and cozy spice. A tablespoon of fresh lemon juice brightens the whole thing up.
Ingredient Selection Tips
When buying dried elderberries, look for organic if your budget allows. They’re a soft-skinned berry and can absorb pesticides easily. For the honey, local is always best — it contains trace amounts of local pollen, which some believe can help with seasonal allergies. If you’re vegan or avoiding animal products, you can try using agar-agar powder, but the texture will be much more like a firm jelly than a chewy gummy, and the setting process is a bit different. I haven’t been as happy with the results from agar, so I stick with gelatin for this homemade elderberry immune-boost gummies with honey recipe.
Equipment Needed
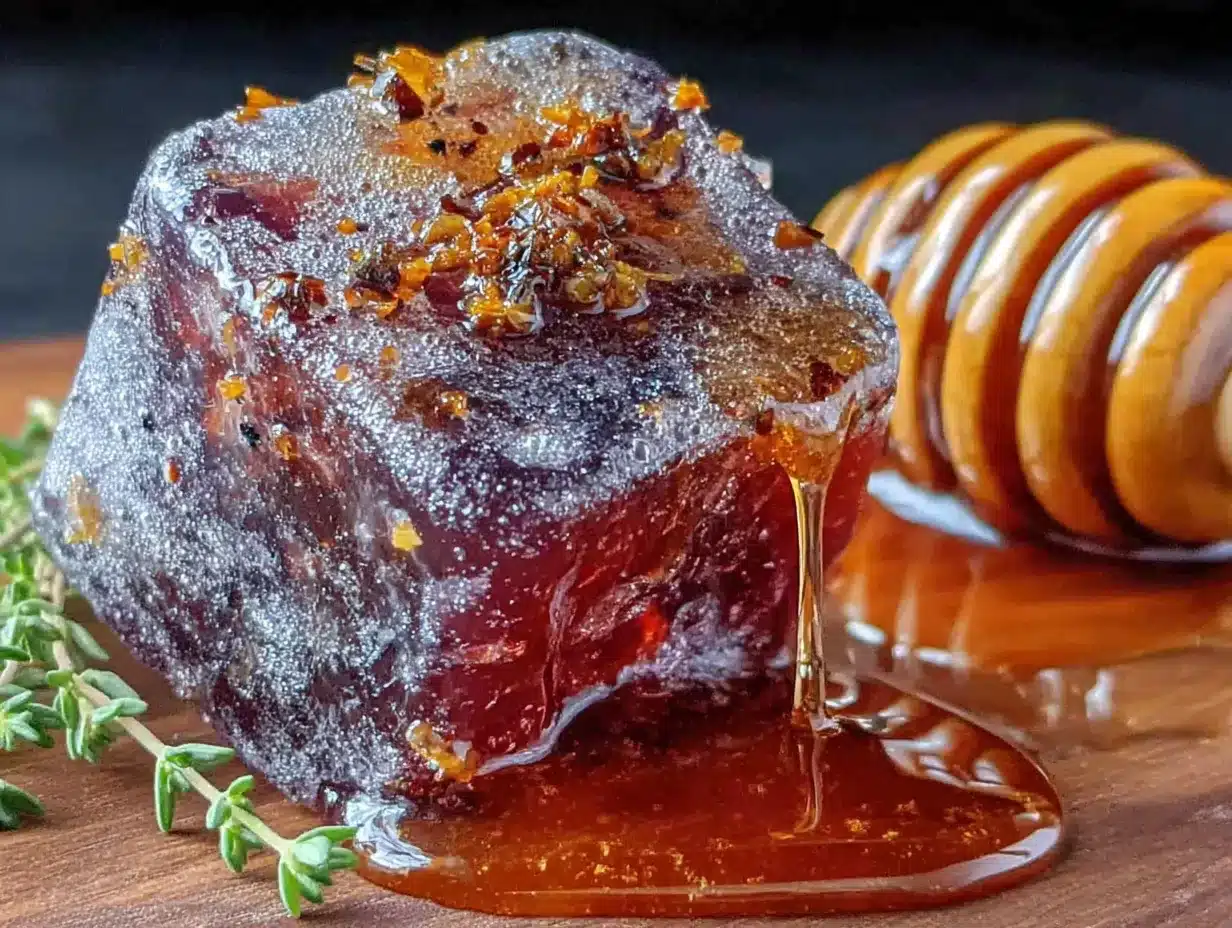
You don’t need a fancy kitchen setup for this. Just a few basic tools you probably already have.
- Small to Medium Saucepan: For simmering the elderberry tea. A non-reactive pot like stainless steel or enameled cast iron is best.
- Fine-Mesh Strainer or Cheesecloth: To strain out the berries and any ginger or spices. A nut milk bag works great too.
- Measuring Cups and Spoons: Precision matters here, especially with the gelatin.
- Silicone Gummy Bear Molds: These are a game-changer. They come in all shapes and sizes — bears, worms, little fruit shapes. Silicone makes it so easy to pop the gummies out once they’re set. I bought a set of four on Amazon for under ten bucks, and they’ve lasted for years.
- Liquid Dropper or Small Spouted Measuring Cup: Filling those tiny gummy molds can be a mess without one. A small glass measuring cup with a spout works okay, but a liquid dropper (like the ones for kids’ medicine) gives you way more control and less waste.
- Whisk: For making sure the gelatin dissolves completely without clumps.
- Baking Sheet (optional): To hold the filled molds flat in the fridge.
If you don’t have silicone molds, don’t worry. You can pour the mixture into a small, shallow glass dish (like an 8×8 Pyrex) and let it set. Once it’s firm, just cut it into little squares with a sharp knife. They won’t be bears, but they’ll taste just as good!
Preparation Method
Alright, let’s get to the fun part. This process is actually really satisfying. You’re making a little potion, a little kitchen magic.
- Make the Elderberry Tea: In your small saucepan, combine the ½ cup of dried elderberries and 2 cups of filtered water. If you’re using fresh ginger or a cinnamon stick, add them now. Bring the mixture to a boil over medium-high heat. Once it’s boiling, reduce the heat to low, cover the pot, and let it simmer gently for about 20-25 minutes. You’ll know it’s ready when the liquid has reduced slightly, the berries have plumped up and burst, and the kitchen smells amazing — like a dark, fruity, slightly woodsy tea. The liquid should be a deep, rich purple.
- Strain the Concentrate: Place your fine-mesh strainer over a medium bowl or a large glass measuring cup. Carefully pour the hot elderberry mixture through the strainer. Use the back of a spoon to gently press on the berries to extract every last drop of that beautiful, concentrated juice. Discard the spent berries (or compost them!). You should have about 1 to 1 ¼ cups of dark purple liquid. Let it cool for about 10 minutes until it’s warm but not steaming hot. You want it around 120-130°F — warm enough to dissolve the honey and gelatin, but not so hot that it kills the honey’s benefits or makes the gelatin clumpy.
- Whisk in the Honey: Add the ¼ cup of raw honey to the warm elderberry concentrate. Whisk until the honey is completely dissolved. Taste it here! Is it sweet enough for you? If you like it a little sweeter, add another tablespoon of honey. Remember, the sweetness will be less intense once the gummies are cold. If you’re adding lemon juice, whisk that in now too.
- Bloom the Gelatin: This is the most important step. Pour the ¼ cup of grass-fed beef gelatin into a small bowl. Add about ½ cup of the warm elderberry-honey mixture to the gelatin. Whisk vigorously until the gelatin is fully dissolved and you have a smooth, thick paste. This is called “blooming” the gelatin. It prevents those dreaded clumps from forming when you add it to the rest of the liquid. Seriously, don’t skip this.
- Combine Everything: Pour the bloomed gelatin mixture back into the saucepan with the remaining elderberry concentrate. Place the saucepan over very low heat. Whisk constantly for 2-3 minutes, until the mixture is completely smooth, glossy, and has thinned out a bit. Do not let it boil! If it gets too hot, the gelatin can lose its setting power. You’re just warming it enough to ensure everything is perfectly combined.
- Fill the Molds: Remove the saucepan from the heat. Let it cool for another 5 minutes. This is the perfect time to set up your molds on a small baking sheet (makes it easier to move them). Using your liquid dropper or small spouted cup, carefully fill each cavity of your silicone molds. Work quickly but steadily, as the gelatin mixture will start to set as it cools. If it gets too thick to pour easily, you can very gently re-warm it over low heat for a few seconds. Don’t overfill the molds — a tiny bit of overflow is fine, but you want them to be neat.
- Set and Chill: Carefully transfer the baking sheet with the filled molds to the refrigerator. Let them chill, undisturbed, for at least 2-3 hours, or until they are completely firm to the touch. I usually leave them overnight. Patience is key here — if you try to pop them out too early, they’ll be a sticky mess.
- Pop and Store: Once they’re fully set, the gummies should pop right out of the silicone molds. If they’re stubborn, gently press on the back of the mold to release them. And that’s it! You’ve just made your own homemade elderberry immune-boost gummies with honey.
Cooking Tips & Techniques
I’ve made this recipe more times than I can count, and I’ve learned a few things the hard way. Let me save you some trouble.
- The Temperature Trap: The biggest mistake people make is getting the liquid too hot. If you add gelatin to boiling water, it can become stringy and lose its ability to set properly. If you add raw honey to boiling water, you destroy its beneficial enzymes. Warm is the word. Think “warm bath” temperature, not “hot cup of coffee.”
- Clump-Free Gelatin: Blooming the gelatin in a small amount of the warm liquid is non-negotiable. It’s the only way to ensure a perfectly smooth, clump-free texture. I learned this after making a batch of gummies that looked like they had little clear jellyfish swimming in them. Not cute.
- Dealing with Foam: Sometimes when you whisk the gelatin, you’ll get a little foam on the surface. If you want perfectly clear gummies (and who doesn’t?), use a small spoon to skim that foam off before pouring the mixture into the molds. It makes a big difference in the final appearance.
- Timing is Everything: Once you start pouring the mixture into the molds, you’re on the clock. The gelatin will begin to set as it cools. Have your molds ready and your dropper in hand before you even take the pot off the stove. Work in batches if you have a lot of molds.
- Don’t Over-Simmer: Simmering the elderberries for too long can break down some of the beneficial compounds and make the final flavor a bit bitter. 20-25 minutes is the sweet spot.
Variations & Adaptations
This recipe is a fantastic base, and it loves to be played with. Here are a few of my favorite twists.
- Spiced Ginger & Clove Gummies: When you simmer the elderberries, add 3-4 slices of fresh ginger and 2 whole cloves. The ginger adds a lovely warmth and is also great for digestion, while the clove brings a festive, cozy note. Strain them out with the berries.
- Berry Boost Gummies: Add ¼ cup of dried hibiscus flowers or a handful of frozen blueberries to the pot while the elderberries are simmering. Hibiscus adds a beautiful tartness and a stunning ruby-red color. Blueberries add extra antioxidants and a milder flavor.
- Citrus Sunshine Gummies: After you’ve strained the tea and it’s cooled slightly, whisk in 2 tablespoons of fresh lemon juice and 1 teaspoon of finely grated orange zest. The citrus cuts through the earthiness of the elderberry and makes them taste incredibly bright and fresh.
- Low-Sugar Option: If you’re watching your sugar intake, you can reduce the honey to 2 tablespoons and add a few drops of stevia or monk fruit extract to taste. The texture will be slightly less tender, but they’ll still be delicious and effective.
- Vitamin C Kick: Once the mixture has cooled to almost room temperature (but is still liquid), you can stir in the contents of a 500mg Vitamin C capsule (ascorbic acid powder). Do not add it when the liquid is warm, as heat can degrade the vitamin C. This gives your gummies an extra immune-supporting punch.
If you love making your own healthy snacks, you might also enjoy our easy after-school protein energy balls for another grab-and-go option. And for a different kind of immune-supporting treat, our healthy homemade elderberry gummies post has a slightly different twist you might want to compare.
Serving & Storage Suggestions
These gummies are best enjoyed cold, right out of the fridge. The texture is at its peak — firm, bouncy, and satisfyingly chewy. I keep a small glass jar in the door of my fridge and grab two or three every morning.
- Serving Temperature: Serve them straight from the refrigerator. They will soften and become a bit sticky if left at room temperature for more than an hour or two, especially in warm weather.
- Storage: Store your homemade elderberry immune-boost gummies with honey in an airtight container in the refrigerator. A glass jar with a tight-fitting lid is perfect. They will stay fresh and firm for up to 2-3 weeks. I’ve never had a batch last longer than that because we eat them all!
- Freezing: You can absolutely freeze these gummies! Place them in a single layer on a parchment-lined baking sheet and freeze until solid (about 1 hour). Then transfer the frozen gummies to a freezer-safe bag or container. They will keep for up to 3 months. Thaw them in the fridge for a few hours before eating, or enjoy them frozen as a little icy treat (my kids love this).
- Layering Flavors: The flavor of these gummies actually deepens and melds together after a day or two in the fridge. The honey’s sweetness becomes more integrated, and the elderberry’s tartness softens. They’re good on day one, but amazing on day three.
For a cozy, comforting meal that pairs perfectly with a daily dose of these gummies, try our creamy hatch green chile corn chowder. It’s the ultimate cold-weather comfort food. And if you’re looking for a sweet, healthy snack for the kids’ lunchboxes, our fresh toddler bento box is always a hit.
Nutritional Information & Benefits
While I’m not a registered dietitian, I can share what makes these little gummies so special from a nutritional standpoint. The exact values will vary based on your specific ingredients, but here’s a general idea.
Per serving (2 gummies): Approximately 40-50 calories, 1g protein, 10g carbohydrates (mostly from honey), 0g fat.
- Elderberries: These dark purple berries are packed with anthocyanins, which are powerful antioxidants that help fight oxidative stress in the body. They are also traditionally used to support the immune system and may help reduce the duration and severity of cold symptoms.
- Raw Honey: A natural source of antioxidants and enzymes. Raw honey has antimicrobial and anti-inflammatory properties and can soothe a sore throat. The local pollen in raw honey is also thought to help with seasonal allergies.
- Gelatin: A great source of protein and collagen, which is fantastic for supporting healthy skin, hair, nails, and joints. It also aids in digestion.
Dietary Considerations
- Gluten-Free: This recipe is naturally gluten-free.
- Dairy-Free: This recipe is naturally dairy-free.
- Nut-Free: This recipe is naturally nut-free.
- Not Vegan: Due to the gelatin, this recipe is not vegan. For a vegan option, you can try agar-agar, but the texture will be very different (more like a firm jelly).
- Potential Allergen: Honey is not recommended for children under 1 year of age due to the risk of botulism.
Conclusion
There’s something deeply satisfying about making your own medicine, isn’t there? It’s a small act of care, a little ritual that says, “I’ve got my back.” These homemade elderberry immune-boost gummies with honey are exactly that — a simple, delicious way to take control of your family’s wellness without relying on a bottle of neon-colored syrup from the pharmacy. They’re a little piece of that farmhouse kitchen magic, made portable and perfectly chewy.
I want to hear about your batches! Did you add ginger? Did you use a different berry? Did your kids love them? Share your creations and your tweaks in the comments below. And if you found this recipe helpful, please share it with a friend who’s looking for a better way to stay healthy this season. Let’s keep each other well, one little gummy at a time.
Frequently Asked Questions
Can I use frozen elderberries instead of dried?
Yes, you can! Use about 1 cup of frozen elderberries in place of the ½ cup of dried. You may need to simmer them for a few minutes longer to extract the flavor, and you’ll likely end up with a bit more liquid. Just simmer until it’s reduced to about 1 to 1 ¼ cups of concentrate.
Why did my gummies turn out too hard or too soft?
This is almost always a ratio issue. If they’re too hard and rubbery, you used too much gelatin. If they’re too soft and don’t hold their shape, you didn’t use enough, or you didn’t let them set for long enough. The ¼ cup gelatin to 1 ¼ cups liquid ratio is the sweet spot. Also, make sure your gelatin is fresh — expired gelatin loses its setting power.
Can I make these gummies without a stove?
Absolutely. You can make the elderberry tea in a slow cooker. Simmer the berries and water on low for 4-6 hours. Then, strain the liquid. You can also combine the warm liquid, honey, and bloomed gelatin in a bowl and whisk until smooth, then pour into molds. No stovetop required!
How many gummies should I eat per day?
For general immune support, 2-3 gummies per day is a good starting point for adults. For children, 1-2 gummies is plenty. If you feel a cold coming on, you can double that amount for a few days. Always listen to your body and consult with a healthcare professional if you have any concerns.
My gummy mixture got too thick before I could pour it. What do I do?
Don’t panic! Simply place the saucepan back over very low heat and whisk gently until it thins out again. Do not let it boil. You can also add a tablespoon of warm water to help loosen it up. This happens to me all the time when I get distracted by the cat — it’s an easy fix!
Pin This Recipe!
Homemade Elderberry Gummies: Easy Immune-Boosting Recipe
These homemade elderberry gummies with honey are a delicious, immune-boosting treat made with simple, real ingredients. Perfect for busy mornings, they offer a portable and chewy way to support your family’s wellness.
- Prep Time: 15 minutes
- Cook Time: 25 minutes
- Total Time: 3 hours 40 minutes (includes chilling time)
- Yield: 4 servings 1x
- Category: Snack
- Cuisine: American
Ingredients
- ½ cup dried elderberries
- 2 cups filtered water
- ¼ cup raw honey (plus more to taste)
- ¼ cup grass-fed beef gelatin (about 4 tablespoons)
- Optional: 1-inch knob fresh ginger (sliced)
- Optional: 1 cinnamon stick or pinch ground cloves
- Optional: 1 tablespoon fresh lemon juice
Instructions
- Make the Elderberry Tea: In a small saucepan, combine dried elderberries and filtered water. Add optional ginger or cinnamon if using. Bring to a boil over medium-high heat, then reduce heat to low, cover, and simmer for 20-25 minutes until liquid reduces slightly and berries plump.
- Strain the Concentrate: Place a fine-mesh strainer over a medium bowl or large glass measuring cup. Pour the hot mixture through the strainer, pressing on berries with a spoon to extract all liquid. Discard berries. Let liquid cool for about 10 minutes until warm (120-130°F).
- Whisk in the Honey: Add raw honey to the warm elderberry concentrate and whisk until fully dissolved. Taste and adjust sweetness if desired. If using lemon juice, whisk it in now.
- Bloom the Gelatin: In a small bowl, pour gelatin and add about ½ cup of the warm elderberry-honey mixture. Whisk vigorously until smooth and thick (a paste).
- Combine Everything: Pour the bloomed gelatin mixture back into the saucepan with the remaining elderberry concentrate. Place over very low heat and whisk constantly for 2-3 minutes until smooth and glossy. Do not let it boil.
- Fill the Molds: Remove from heat and let cool for 5 minutes. Using a liquid dropper or small spouted cup, carefully fill silicone gummy molds placed on a baking sheet. Work quickly but steadily.
- Set and Chill: Transfer the baking sheet with filled molds to the refrigerator. Chill undisturbed for at least 2-3 hours or until completely firm (overnight is best).
- Pop and Store: Once fully set, pop gummies out of molds. Store in an airtight container in the refrigerator.
Notes
Do not add honey to boiling water to preserve its beneficial enzymes. Blooming gelatin in a small amount of warm liquid prevents clumps. For vegan option, use agar-agar but texture will be different. Gummies can be frozen for up to 3 months.
Nutrition
- Serving Size: 2 gummies
- Calories: 45
- Sugar: 9
- Sodium: 5
- Carbohydrates: 10
- Protein: 1
Keywords: elderberry gummies, immune-boosting, homemade gummies, honey, healthy snack, elderberry recipe, immune support, gelatin gummies


