My nephew, Leo, asked why I couldn’t just dip the apple slices in the caramel sauce while it was still warm from the pot. I started to explain why that wouldn’t work—the caramel would slide right off, it would be a sticky mess, you have to let it cool and thicken first. Then I stopped. Honestly, I had no good reason other than “that’s not how you do it.” So I handed him a spoon and said, “Go for it.”
He dunked a crisp Granny Smith wedge into that bubbling, amber caramel and pulled it out. The caramel clung like a second skin, thin and even, not a glob in sight. I stood there, spatula in hand, feeling a little silly. Here I was, the “expert” in the kitchen, and a ten-year-old had just cracked the code for perfect caramel apple slices. That Tuesday afternoon, with caramel dripping onto the counter and Leo grinning like he’d won a prize, I realized I had been overcomplicating things for years.
That moment changed how I make these for every party, potluck, and get-together. These Irresistible Caramel Apple Slices are now my go-to dessert bite when I want to impress without stress. They’re quick, they’re gorgeous, and they let me spend more time with my guests and less time fussing over a stove. Maybe you’ve been there—staring at a recipe, convinced you need to follow every rule to the letter, only to find out the shortcut was the secret all along. That’s the story of this dish, and I keep making it because it reminds me that sometimes the best tricks come from the people we’re trying to teach.
Why You’ll Love This Recipe
Let me tell you why these caramel apple slices have become my secret weapon for hosting. I’ve tested this method more times than I can count, and it never fails to steal the show. Here’s what makes them stand out:
- Quick & Easy: Comes together in under 15 minutes, perfect for last-minute cravings or unexpected guests.
- Simple Ingredients: No fancy grocery trips needed; you likely already have apples, caramel candies, and a few toppings in your kitchen.
- Perfect for Parties: Great for dinner parties, potlucks, Halloween gatherings, or any festive get-together where you want to impress without slaving over a complicated dessert.
- Crowd-Pleaser: Always gets rave reviews from kids and adults alike. I’ve watched people go back for thirds, and that’s not an exaggeration.
- Unbelievably Delicious: The texture and flavor combo is next-level comfort food—crisp apple, buttery caramel, and a crunch from your favorite toppings.
What makes this recipe different from the rest? It’s the warm-dipping technique I learned from Leo. Most recipes tell you to cool the caramel completely, but dipping while it’s warm gives you that perfect, thin coating that doesn’t slide off or get too thick. It’s a game-changer, honestly. This isn’t just another version of caramel apples—it’s my best version, born from a moment of humility in the kitchen.
This recipe isn’t just good—it is the kind that makes you close your eyes after the first bite. It’s comfort food reimagined: faster, easier, but with the same soul-soothing satisfaction. Perfect for impressing guests without stress, or turning a simple dessert into something memorable.
What Ingredients You Will Need
This recipe uses simple, wholesome ingredients to deliver bold flavor and satisfying texture without the fuss. Most of these are pantry staples, and you can easily swap things based on what you have on hand.
For the Caramel Coating
- 1 package (14 ounces) soft caramel candies (I recommend Kraft Caramels for consistent melting—unwrapped, of course)
- 2 tablespoons heavy cream (adds richness; use whole milk if that’s what you’ve got)
- 1 teaspoon vanilla extract (pure, not imitation, for that deep flavor)
- Pinch of sea salt (optional, but it balances the sweetness beautifully)
For the Apples
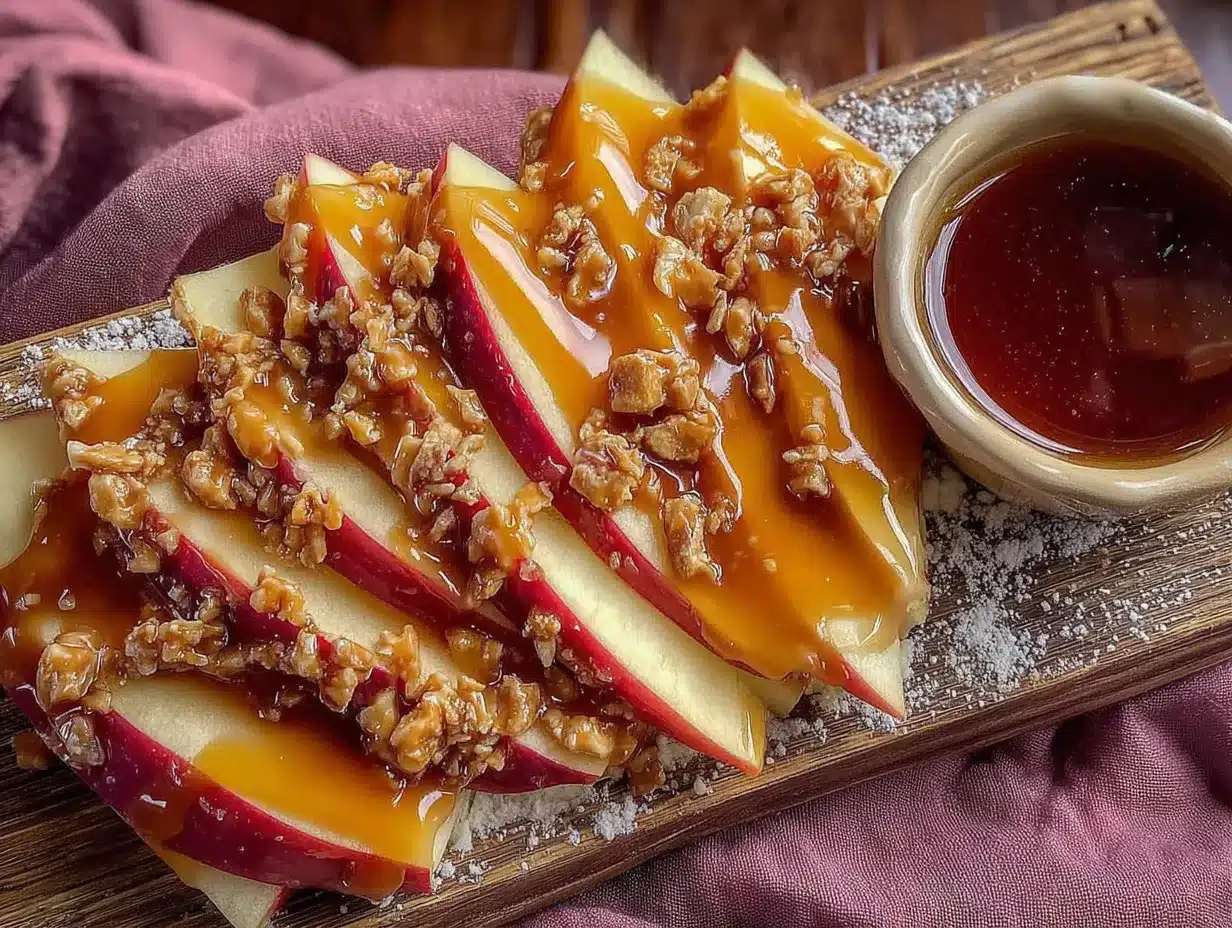
- 4 large apples (Granny Smith are my go-to for tartness, but Honeycrisp or Fuji work great too)
- 1 tablespoon lemon juice (to prevent browning—fresh squeezed is best)
- Cold water (for soaking the slices)
For the Toppings (Mix and Match)
- ½ cup crushed peanuts (or any nuts you like—pecans are amazing here)
- ¼ cup mini chocolate chips (semi-sweet or dark, your call)
- ¼ cup shredded coconut (toasted for extra flavor, if you have time)
- 2 tablespoons sprinkles (festive ones for parties, or rainbow for a fun look)
- Drizzle of white chocolate (melted, for that bakery-style finish)
Ingredient selection tips: Look for firm, crisp apples that are free of bruises. Granny Smith holds up best because the tartness cuts through the sweet caramel, but if you prefer sweeter apples, go with Honeycrisp. For the caramel, avoid using pre-made caramel sauce—it’s too thin and won’t set properly. The soft candies melt into that perfect, thick coating. You can also use dairy-free cream if you need a vegan option, though the texture will be slightly different.
Equipment Needed
You don’t need a fancy kitchen to pull these off. Here’s what I use:
- Medium saucepan (for melting the caramel—non-stick makes cleanup easier)
- Wooden spoon or silicone spatula (for stirring; metal can scratch non-stick pans)
- Sharp knife and cutting board (for slicing apples evenly)
- Large bowl (for lemon water soak)
- Parchment paper-lined baking sheet (for setting the finished slices)
- Small bowls (for holding your toppings—keeps things organized)
- Forks or skewers (for dipping the apple slices—I prefer skewers for better control)
If you don’t have skewers, you can use toothpicks or even just your fingers (washed, of course). I’ve used a butter knife in a pinch, but it gets messy. A silicone mat on the baking sheet works just as well as parchment paper and is reusable. Budget-friendly tip: skip the fancy dipping tools and use what you have—the caramel doesn’t care if you use a fork or a chopstick.
Preparation Method
Let’s get to the good part. Follow these steps, and you’ll have a platter of caramel apple slices that’ll disappear in minutes.
Step 1: Prep the Apples
Wash and dry your apples thoroughly—any moisture on the skin will make the caramel slide off. Core the apples and slice them into ½-inch thick rounds or wedges. I prefer wedges because they’re easier to dip and eat, but rounds look beautiful on a platter. Place the slices in a bowl of cold water mixed with the lemon juice and let them soak for 2-3 minutes. This prevents browning and adds a slight tang. Drain and pat them completely dry with paper towels. Don’t skip this drying step—I learned the hard way that wet apples = sad, sliding caramel.
Step 2: Melt the Caramel
Unwrap the caramel candies and place them in a medium saucepan with the heavy cream. Cook over low heat, stirring constantly with a wooden spoon. This takes about 5-7 minutes, and patience is key here. If you rush and crank up the heat, the caramel will burn and turn grainy. Stir until the caramels are completely melted and the mixture is smooth and glossy. Remove from heat and stir in the vanilla extract and a pinch of sea salt if using. Let it sit for 1-2 minutes—it should be warm but not scalding hot.
Step 3: Set Up Your Dipping Station
While the caramel is melting, arrange your toppings in small bowls. Line a baking sheet with parchment paper. Have your skewers or forks ready. This assembly line approach makes the process smooth and keeps you from scrambling when the caramel is ready. Trust me, nothing’s worse than having perfectly melted caramel while you’re frantically searching for sprinkles.
Step 4: Dip the Apple Slices
Here’s where Leo’s trick comes in. Insert a skewer or fork into each apple slice. Dip it into the warm caramel, tilting the pan if needed to coat both sides evenly. Let the excess drip off for a few seconds—don’t shake it, or you’ll lose too much caramel. Immediately transfer the slice to your chosen toppings and press gently to adhere. Place the finished slice on the parchment-lined baking sheet. Repeat with remaining slices. Work quickly because the caramel will start to thicken as it cools. If it gets too thick, simply reheat it over low heat for a minute, stirring constantly.
Step 5: Let Them Set
Once all slices are dipped and topped, place the baking sheet in the refrigerator for 15-20 minutes. This sets the caramel firmly so it doesn’t slide off when you pick it up. If you’re serving immediately, 10 minutes in the fridge is enough. For make-ahead, let them set for the full 20 minutes, then transfer to an airtight container with parchment between layers.
Sensory Cues to Watch For
The caramel should look glossy and smooth, not grainy or separated. When you dip the apple slice, you should hear a slight sizzle if the caramel is warm enough—that’s a good sign. The apple slices should feel cool and crisp to the touch before dipping. After setting, the caramel should be firm but still give slightly when pressed. If it’s hard like a rock, you overheated the caramel; if it’s still runny, it needs more time in the fridge.
Cooking Tips & Techniques
I’ve made these caramel apple slices more times than I care to count, and I’ve learned a few things the hard way. Here are my best tips for success.
Don’t skip the lemon water soak. I once thought it was unnecessary and ended up with brown, unappetizing apple slices within an hour. The lemon juice stops oxidation in its tracks, keeping your apples looking fresh and appetizing for hours. It’s a small step that makes a huge difference when you’re serving guests.
Temperature is everything. If your caramel is too hot, it will run right off the apple. Too cold, and it’ll be too thick to coat evenly. I aim for a temperature where the caramel is warm to the touch but not uncomfortable—about 110°F to 120°F. If you don’t have a thermometer, test it on a small apple slice first. The caramel should coat the slice in a thin, even layer without pooling at the bottom.
Work in batches. Don’t try to dip all the slices at once. Dip 4-5 slices, top them, and set them on the baking sheet. Then dip the next batch. This keeps the caramel at the right temperature and prevents you from rushing. I learned this after a disastrous holiday party where I tried to dip 20 slices at once and ended up with a sticky mess on my hands—literally.
Use a damp paper towel under your baking sheet. This keeps the parchment paper from sliding around while you’re placing the slices. It’s a tiny trick, but it saves so much frustration. Also, make sure your baking sheet is completely flat—a warped pan will cause the caramel to pool on one side.
Toast your nuts and coconut. This adds a depth of flavor that takes these slices from good to unforgettable. Spread chopped nuts or coconut on a baking sheet and toast at 350°F for 5-7 minutes, shaking halfway through. Let them cool completely before using. The aroma alone will make your kitchen smell like a bakery.
Variations & Adaptations
One of the best things about this recipe is how easy it is to customize. Here are some of my favorite variations.
Dietary Adaptations
Vegan version: Use dairy-free caramel candies (many brands make them now) and substitute the heavy cream with coconut cream. The texture is slightly different—a bit softer—but still delicious. For the toppings, use dairy-free chocolate chips and skip the white chocolate drizzle.
Gluten-free: This recipe is naturally gluten-free as long as you check your caramel candies and toppings. Some sprinkles contain wheat starch, so look for certified gluten-free options. Most nuts, chocolate chips, and coconut are naturally gluten-free.
Nut-free: Skip the nuts and use seeds like pumpkin seeds or sunflower seeds for crunch. You can also use crushed pretzels (check for gluten if needed) or crushed cookies for a different texture.
Seasonal Variations
Fall harvest: Use a mix of apples—Granny Smith, Honeycrisp, and Gala—for variety. Top with crushed pecans, a drizzle of maple syrup, and a sprinkle of cinnamon. This is my go-to for Thanksgiving.
Holiday festive: Use red and green sprinkles, crushed candy canes, and white chocolate drizzle. It looks stunning on a Christmas dessert table and kids absolutely love it.
Summer berry: Dip the apple slices in caramel, then roll them in crushed freeze-dried strawberries or raspberries. The tartness of the berries balances the sweet caramel perfectly.
Flavor Twists
Salted caramel: Sprinkle flaky sea salt over the caramel-coated apples before adding toppings. The salt cuts through the sweetness and adds a sophisticated touch that adults especially appreciate.
Chocolate lover’s: After dipping in caramel, drizzle melted dark chocolate over the top and let it set before serving. Add a sprinkle of sea salt for that sweet-salty combo that’s absolutely addictive.
Spiced apple: Add ½ teaspoon of cinnamon and ¼ teaspoon of nutmeg to the caramel while it melts. It gives the caramel a warm, cozy flavor that pairs beautifully with the apples.
Serving & Storage Suggestions
These caramel apple slices are best served chilled or at room temperature, straight from the fridge. I like to arrange them on a large platter in a fan pattern, with the caramel-coated sides facing up to show off the toppings. Add a few fresh mint leaves or whole apples for decoration—it makes the platter look gorgeous without much effort.
For a dinner party, I serve these as a dessert bite alongside coffee or tea. They also pair beautifully with a cheese board—the sweetness of the caramel contrasts nicely with sharp cheddar or creamy brie. If you’re hosting a potluck, bring them on the baking sheet and transfer to a platter when you arrive. They hold up well for about 2 hours at room temperature, but any longer and the caramel might start to soften.
Storage instructions: Store leftover slices in an airtight container in the refrigerator for up to 3 days. Place parchment paper between layers to prevent sticking. Don’t leave them at room temperature for more than 2 hours, as the caramel can become soft and messy.
Reheating: If you prefer your caramel a bit softer, let the slices sit at room temperature for 10-15 minutes before serving. Don’t microwave them—the caramel will melt and slide off, and the apples will become mushy. If you want to refresh the toppings, add a fresh sprinkle of nuts or chocolate chips right before serving.
One thing I love about this recipe is that the flavors actually get better after a few hours in the fridge. The caramel absorbs some of the apple’s natural juices, creating a deeper, more complex flavor. So don’t be afraid to make them a day ahead—they’ll still be delicious.
Nutritional Information & Benefits
Here’s a rough estimate per serving (1 slice, assuming 16 slices total with basic toppings):
- Calories: 180-220
- Fat: 8-10g
- Carbohydrates: 28-32g
- Fiber: 3-4g
- Protein: 2-3g
- Sugar: 20-24g
These numbers will vary depending on your toppings and the type of apples you use. Granny Smith apples have slightly less sugar than sweeter varieties like Honeycrisp, so keep that in mind.
Health benefits: Apples are packed with fiber and vitamin C, which supports your immune system and digestive health. The fiber in the apple skin also helps slow down sugar absorption, making this a slightly better choice than other desserts. The caramel adds sweetness, but you’re still getting the nutritional benefits of the fruit underneath. Plus, nuts and seeds add healthy fats and protein, making this a more balanced treat.
Dietary considerations: This recipe is naturally gluten-free and can be made vegan with simple substitutions. It contains dairy from the caramel and cream, so it’s not suitable for those with dairy allergies unless you use dairy-free alternatives. The nuts are optional, so you can easily make it nut-free. Always check your caramel candies for any hidden allergens.
I personally love that I can serve these at a party without feeling like I’m feeding my guests pure sugar. The apples provide real nutritional value, and the portion-controlled slices make it easy to enjoy without overindulging.
Conclusion
These Irresistible Caramel Apple Slices have become my signature party dessert for a reason. They’re quick, they’re beautiful, and they always get that “wow” reaction from guests. But more than that, they remind me that sometimes the best recipes come from letting go of control and trusting the process—or in this case, trusting a ten-year-old with a spoon.
I encourage you to make these your own. Experiment with different apple varieties, play with toppings, and don’t be afraid to try something unexpected. That’s how Leo taught me, and that’s how I keep discovering new favorites. Whether you’re hosting a holiday gathering, a summer barbecue, or just a cozy night in, these caramel apple slices will steal the show.
I’d love to hear how yours turn out! Drop a comment below with your favorite topping combinations, or share a photo of your creation. And if you have a story about being proven wrong in the kitchen, I’d love to hear that too. Happy dipping, friends!
Frequently Asked Questions
Can I use pre-made caramel sauce instead of caramel candies?
I wouldn’t recommend it. Pre-made caramel sauce is too thin and won’t set properly on the apple slices. It will just run off and make a mess. The caramel candies melt into a thicker, more stable coating that holds up beautifully. If you’re in a pinch, you can try reducing the caramel sauce on the stove for 5-7 minutes to thicken it, but the results aren’t as reliable.
How far in advance can I make these?
You can make them up to 24 hours in advance. Store them in an airtight container in the refrigerator with parchment paper between layers. The apples will stay crisp, and the caramel will hold its shape. I wouldn’t recommend making them more than a day ahead, as the apples can start to release moisture and make the caramel soggy.
What are the best apples for this recipe?
Granny Smith apples are my top choice because their tartness balances the sweet caramel perfectly. Honeycrisp and Fuji are also excellent—they’re sweet and crisp, and they hold up well to the caramel coating. Avoid soft apples like Red Delicious or McIntosh, as they can become mushy and won’t hold their shape.
Can I use a double boiler to melt the caramel?
Absolutely! A double boiler is actually a great way to melt caramel because it provides gentle, even heat and reduces the risk of burning. If you don’t have a double boiler, you can use a heatproof bowl set over a pot of simmering water. Just make sure the bowl doesn’t touch the water. This method takes a little longer but gives you more control.
How do I prevent the caramel from getting too hard?
The key is not to overcook the caramel. Heat it just until the candies are melted and the mixture is smooth—about 5-7 minutes on low heat. If you cook it too long, the sugar can crystallize and make the caramel hard and grainy. Also, make sure you’re using heavy cream, which adds fat and keeps the caramel soft. If your caramel does get too hard, you can reheat it gently with a splash of cream to soften it.
Pin This Recipe!

Irresistible Caramel Apple Slices – 5-Minute Easy Party Dessert

These quick and easy caramel apple slices are the perfect party dessert, featuring a warm-dipping technique that creates a thin, even caramel coating. Ready in under 15 minutes, they’re a crowd-pleaser that lets you spend more time with guests and less time in the kitchen.
- Prep Time: 10 minutes
- Cook Time: 7 minutes
- Total Time: 17 minutes
- Yield: 16 servings 1x
- Category: Dessert
- Cuisine: American
Ingredients
- 1 package (14 ounces) soft caramel candies (e.g., Kraft Caramels)
- 2 tablespoons heavy cream
- 1 teaspoon vanilla extract
- Pinch of sea salt (optional)
- 4 large apples (Granny Smith, Honeycrisp, or Fuji)
- 1 tablespoon lemon juice (fresh squeezed)
- Cold water (for soaking)
- ½ cup crushed peanuts (or pecans)
- ¼ cup mini chocolate chips (semi-sweet or dark)
- ¼ cup shredded coconut (toasted optional)
- 2 tablespoons sprinkles
- Drizzle of white chocolate (melted)
Instructions
- Wash and dry apples thoroughly. Core and slice into ½-inch thick wedges or rounds. Soak slices in a bowl of cold water mixed with lemon juice for 2-3 minutes. Drain and pat completely dry with paper towels.
- Unwrap caramel candies and place in a medium saucepan with heavy cream. Cook over low heat, stirring constantly, until completely melted and smooth (5-7 minutes). Remove from heat and stir in vanilla extract and sea salt (if using). Let sit for 1-2 minutes until warm but not scalding.
- Arrange toppings in small bowls. Line a baking sheet with parchment paper. Have skewers or forks ready.
- Insert a skewer or fork into each apple slice. Dip into warm caramel, tilting pan to coat both sides evenly. Let excess drip off for a few seconds. Immediately transfer to chosen toppings and press gently to adhere. Place on parchment-lined baking sheet. Repeat with remaining slices. If caramel thickens, reheat over low heat for 1 minute.
- Refrigerate baking sheet for 15-20 minutes to set caramel firmly. For immediate serving, 10 minutes is enough. For make-ahead, let set for 20 minutes, then transfer to an airtight container with parchment between layers.
Notes
Don’t skip drying the apple slices after the lemon water soak—wet apples cause caramel to slide off. Work in batches to keep caramel at the right temperature. For best results, use firm apples like Granny Smith. Toast nuts and coconut for extra flavor. Store leftovers in an airtight container in the refrigerator for up to 3 days.
Nutrition
- Serving Size: 1 slice
- Calories: 200
- Sugar: 22
- Sodium: 120
- Fat: 9
- Saturated Fat: 4
- Carbohydrates: 30
- Fiber: 3.5
- Protein: 2.5
Keywords: caramel apple slices, easy party dessert, quick dessert, caramel apples, apple slices, party appetizer, fall dessert, Halloween dessert


