The neighborhood fall block party was in three hours and I’d completely forgotten. I was staring into my pantry like it held the answers to the universe—which, honestly, it kind of needed to. Everyone else would be bringing elaborate pies from scratch, those fancy caramel apples with the chocolate drizzle that looked like they belonged on a magazine cover. I had a bag of apples that were starting to look a little sad, some leftover caramels from a baking project that went sideways, and a sugar craving that was not going to be ignored.
I almost just grabbed a store-bought bag of chips—let’s face it, that was the easier path. But then I saw the popsicle sticks in the back of the drawer, and something clicked. I didn’t have time for a full caramel apple situation. The dipping, the mess, the sticky counters—no thank you. But what if I made them smaller? Bite-sized. Easy to grab. Something you could eat in two bites without getting caramel all over your chin.
So I chopped the apples, melted the caramels in a pan I really should have washed first (there was a brief, panicky moment with some burnt bits), and started assembling these little guys on a sheet pan. I was still scraping caramel off the counter when my neighbor Karen knocked on the door. She’d brought a three-layer pumpkin cake. I showed up with my little apple bites on a paper plate, honestly feeling a little embarrassed.
You know that feeling when you bring the “simple” thing and everyone loses their minds? That was this recipe. The caramel apple bites disappeared in minutes. People kept coming back for “just one more.” Karen asked for the recipe before I’d even finished my first cup of cider. And honestly? I’ve been making them ever since. They’re the recipe I bring when I want to look like I tried—without actually trying that hard.
Why You’ll Love This Recipe
These Light & Easy Caramel Apple Candy Bites are the kind of recipe that makes you look like a fall baking hero with almost zero effort. I’ve tested this more times than I care to admit (including one memorable attempt where the caramel slid right off because I forgot to dry the apples first—we don’t talk about that). Here’s why this version wins every time:
- Quick & Easy: From start to finish, you’re looking at about 20 minutes. That’s faster than a trip to the store for a dessert, and way more impressive.
- Simple Ingredients: Apples, caramels, a few toppings. You probably have most of this in your kitchen right now—no special trip to a fancy grocery store required.
- Perfect for Fall Gatherings: These little bites are the ultimate party food. They’re great for Halloween parties, Thanksgiving dessert tables, or just a cozy night in with a movie.
- Crowd-Pleaser: Kids love them because they’re basically candy. Adults love them because they feel just a tiny bit virtuous eating fruit. Everyone wins.
- Unbelievably Delicious: The contrast between the crisp apple, the soft caramel, and whatever crunchy topping you choose is honestly next-level. It’s comfort food in one perfect bite.
What makes these different from every other caramel apple recipe out there? It’s the size, honestly. Full-sized caramel apples are a commitment. They’re messy, they’re hard to eat, and let’s be real—by the time you’re halfway through, you’re kind of over it. These bites solve all of that. You get the same amazing flavor combination in a two-bite package that’s easy to serve, easy to eat, and easy to customize. It’s the best version of a fall classic, simplified.
What Ingredients You Will Need
This recipe uses simple, wholesome ingredients that come together to create something truly special. Most of these are pantry staples, especially during apple season. Here’s what you’ll need:
For the Apple Bites
- 2 large apples (I recommend Honeycrisp or Granny Smith for the best balance of sweet and tart; about 400g total)
- 1 tablespoon lemon juice (fresh squeezed is best, but bottled works in a pinch; this prevents browning)
- 1 cup caramel candies (about 200g, unwrapped; I prefer Kraft Caramels for consistent melting)
- 2 tablespoons heavy cream (or whole milk; this helps the caramel stay smooth and dippable)
- 1 tablespoon unsalted butter (adds richness and helps the caramel set with a nice shine)
For the Toppings (Choose Your Favorites)
- ½ cup crushed peanuts (or any nut you like; toasting them first adds extra flavor)
- ¼ cup mini chocolate chips (semi-sweet or milk chocolate both work great)
- ¼ cup crushed graham crackers (for a s’mores-inspired twist)
- 2 tablespoons shredded coconut (unsweetened or sweetened, depending on your preference)
- Flaky sea salt (optional, but highly recommended—it cuts the sweetness beautifully)
Ingredient Tips & Swaps
For the apples, you want something that holds its shape. Granny Smith is my go-to because the tartness balances the sweet caramel perfectly. Honeycrisp is sweeter but still firm enough to work. Avoid Red Delicious—they get mealy and soft.
If you’re dairy-free, you can use coconut cream instead of heavy cream and a plant-based butter. The caramel won’t be quite as rich, but it still works beautifully. For a vegan version, there are also dairy-free caramel candies available now—just check the label.
I recommend unwrapping the caramels before you start cooking. It sounds obvious, but I’ve definitely been caught mid-recipe with sticky fingers and a pile of wrappers. Do yourself a favor and get it done first.
Equipment Needed
You don’t need much for this recipe, which is part of the beauty. Here’s what you’ll need:
- Small saucepan (for melting the caramel; a heavy-bottomed one works best to prevent burning)
- Cutting board and sharp knife (a good chef’s knife makes quick work of the apples)
- Melon baller or small cookie scoop (this is optional but makes perfectly uniform apple bites; a teaspoon works fine too)
- Baking sheet lined with parchment paper (for setting the finished bites)
- Popsicle sticks or toothpicks (small toothpicks for bite-sized pieces; larger sticks for bigger chunks)
- Small bowls (for holding your toppings)
- Fork or dipping tool (for coating the apple pieces in caramel)
If you don’t have a melon baller, don’t sweat it. Just cut the apples into 1-inch chunks. They won’t be perfectly round, but they’ll taste exactly the same. I’ve done it both ways, and honestly, the rustic chunks have a charm all their own. Plus, they’re faster to prep.
Preparation Method
Let’s get to the fun part. Follow these steps, and you’ll have a tray of beautiful caramel apple bites in no time. I’ve included all the little details I wish someone had told me the first time I made these.
- Prep the apples (5 minutes): Wash and dry your apples thoroughly. This is crucial—any moisture on the surface will make the caramel slide right off. Core the apples using an apple corer or a small knife. Cut them into 1-inch chunks, or use a melon baller to create small, round bites. Place the apple pieces in a bowl and toss them with the lemon juice to prevent browning. Pat them dry again with a paper towel if they seem wet.
- Insert the sticks (2 minutes): Gently push a toothpick or small popsicle stick into each apple piece. You want it secure enough to hold for dipping, but not so deep that it pokes out the other side. Place the prepared apple bites on a parchment-lined baking sheet and pop them in the fridge while you make the caramel.
- Melt the caramel (5 minutes): In a small saucepan over low heat, combine the unwrapped caramels, heavy cream, and butter. Stir constantly with a silicone spatula or wooden spoon. This is not the time to walk away—caramel burns fast. It should take about 5 minutes for everything to melt into a smooth, glossy sauce. If it looks a little thick, add another splash of cream. If it seems too thin, let it cook for another minute while stirring.
- Set up your dipping station (2 minutes): Pour the melted caramel into a small, deep bowl (a ramekin or small glass bowl works perfectly). Arrange your toppings in separate small bowls. Take the chilled apple bites out of the fridge. Having everything ready before you start dipping makes the process so much smoother.
- Dip the apples (5-7 minutes): Working with one apple bite at a time, hold it by the stick and dip it into the warm caramel. Tilt the bowl slightly to get good coverage. Let any excess caramel drip back into the bowl for a few seconds. Immediately roll or sprinkle the coated apple with your chosen toppings. Place it back on the parchment-lined baking sheet. Repeat with the remaining apple pieces. If the caramel starts to thicken as it cools, gently reheat it over low heat for a minute.
- Set and serve (10 minutes): Once all the bites are dipped and topped, place the baking sheet in the refrigerator for at least 10 minutes to let the caramel set. This step is important—don’t skip it. The caramel needs that chill time to firm up so the bites hold their shape when you serve them.
Here’s a tip I learned the hard way: if your caramel starts sliding off the apple pieces, it means the apples are too wet or the caramel is too thin. Pat the apples dry more thoroughly next time, or let the caramel cook for an extra minute to thicken up. You want it to be the consistency of warm honey—coating but not runny.
Cooking Tips & Techniques
I’ve made this recipe about a dozen times now, and I’ve picked up a few tricks along the way. Some came from success, some from spectacular failure. Here’s what I wish I’d known from the start:
Temperature is everything. Caramel that’s too hot will slide right off the cold apple. Caramel that’s too cool will be too thick to coat evenly. The sweet spot is when the caramel is warm enough to be fluid but not hot. Test it on a spare apple piece first—if it coats and stays, you’re golden.
Chill the apples before dipping. This is non-negotiable if you want the caramel to set quickly and stay put. Cold apples help the caramel firm up almost instantly, which means less mess and a cleaner finish. I usually pop them in the fridge for at least 15 minutes while I’m prepping the caramel.
Work in small batches. Don’t dip all the apple pieces at once if you’re slow (like me). The caramel will start to set in the bowl, and you’ll end up with lumpy bites. Dip 4-5 pieces, then reheat the caramel for 30 seconds if needed before continuing.
Use a fork for stubborn toppings. Some toppings (like crushed graham crackers) don’t stick as easily as others. If you’re having trouble, hold the dipped apple over the topping bowl and use a small spoon or your fingers to press the topping gently into the caramel. It works every time.
Don’t skip the lemon juice. I know it seems like an extra step, but it’s what keeps your apple bites from turning brown and sad-looking. You want them to look as good as they taste, especially if you’re serving them at a party.
Variations & Adaptations
One of the best things about this recipe is how easy it is to customize. Here are some of my favorite variations:
Dietary Adaptations
Vegan Version: Use dairy-free caramel candies (they exist and they’re surprisingly good), coconut cream instead of heavy cream, and a plant-based butter. The texture is slightly different—a bit softer—but the flavor is still amazing.
Gluten-Free: Most caramel candies are naturally gluten-free, but always check the label. Use gluten-free graham crackers or crushed nuts for the topping, and you’re good to go.
Nut-Free: Skip the peanuts and use seeds (like crushed pumpkin seeds) or more chocolate and graham crackers for crunch.
Flavor Twists
Salted Caramel: Sprinkle a tiny pinch of flaky sea salt on top of each bite right after dipping. The salt cuts the sweetness and makes the caramel taste even more caramel-y.
Chocolate Lover’s: After the caramel sets, drizzle melted dark chocolate over the top. Let it set in the fridge for another 10 minutes. It’s decadent and gorgeous.
Fall Spice: Mix a pinch of cinnamon and nutmeg into your crushed graham crackers or nuts. It adds that warm, cozy fall flavor that makes these taste like autumn in a bite.
Seasonal Swaps
In the summer, try this with fresh pineapple or mango chunks instead of apples. The caramel-pineapple combo is weirdly delicious. In the winter, pears work beautifully—just make sure they’re firm, not too ripe.
Serving & Storage Suggestions
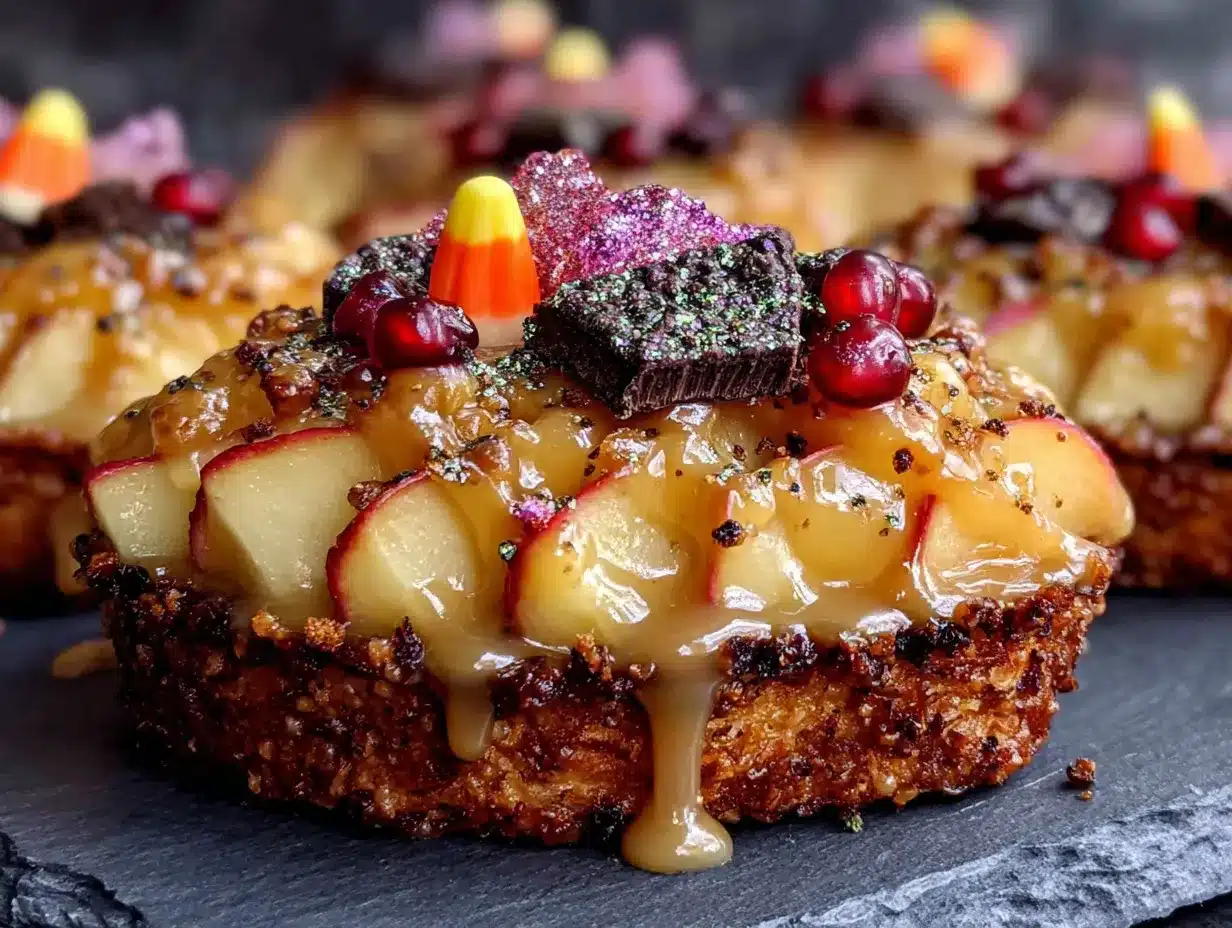
These bites are best served cold or at room temperature, straight from the fridge. The caramel is firm but chewy, and the apple stays crisp and refreshing. Arrange them on a platter or cake stand for a beautiful presentation—they look like little jewels.
For a fall party, I love serving these alongside a warm apple cider or a spiced latte. They also pair beautifully with a cheese board—the sweetness of the caramel and apple contrasts nicely with sharp cheddar or aged gouda. Trust me on that one.
Storage: Keep any leftovers in an airtight container in the refrigerator. They’ll stay good for up to 3 days, though the apples will start to soften after the first day. I honestly think they’re best the day you make them, but they’re still pretty great the next morning with coffee (not that I’ve done that… regularly).
Freezing: You can freeze these for up to a month. Place them on a baking sheet in a single layer and freeze until solid, then transfer to a freezer bag. Thaw in the refrigerator for about an hour before serving. The texture of the apple will be slightly softer after freezing, but the flavor is still fantastic.
Nutritional Information & Benefits
Here’s the honest truth: these are still a treat. They have sugar and caramel and all the good stuff. But compared to a full-sized caramel apple (which can easily pack 400+ calories), these bite-sized versions are a much smarter choice. You get all the flavor and satisfaction in a portion that feels indulgent without going overboard.
Apples are a great source of fiber and vitamin C, and they’re naturally low in calories. The caramel provides a quick energy boost, and the nuts add healthy fats and protein. So while I’m not calling these a health food, they’re definitely a more balanced dessert option. Plus, you’re more likely to stop after two or three bites than you are with a whole apple.
One serving (about 3-4 bites) contains approximately:
- Calories: 180-220
- Fat: 8-10g
- Carbohydrates: 28-32g
- Fiber: 3-4g
- Protein: 3-4g
Values will vary based on your choice of toppings. If you’re watching your sugar intake, you can use sugar-free caramel candies (they work, but the texture is slightly different).
Conclusion
These Light & Easy Caramel Apple Candy Bites are the recipe I keep coming back to, season after season. They’re simple enough for a lazy Sunday afternoon but impressive enough for a holiday party. They’re the kind of treat that makes people smile, that disappears before you’ve had a chance to grab one for yourself, that earns you recipe requests from friends you haven’t seen in years.
I love that they’re customizable—you can make them your own with whatever toppings you have on hand. I love that they’re quick. But mostly, I love that they remind me of that fall block party where my “panic recipe” turned into the star of the show. Sometimes the best things come from the most chaotic moments.
I’d love to hear how yours turn out! What toppings did you use? Did you try a variation I haven’t thought of? Drop a comment below and let me know. And if you make these for a party, take a picture—I want to see your beautiful creations. Happy fall baking, friends!
Frequently Asked Questions
Can I make these ahead of time for a party?
Absolutely! You can make them up to 24 hours in advance. Store them in an airtight container in the refrigerator, and add any delicate toppings (like flaky salt) just before serving for the best presentation.
Why did my caramel slide off the apples?
This usually happens for one of two reasons: the apples were too wet, or the caramel was too thin. Make sure to dry your apple pieces thoroughly after washing them, and cook the caramel until it’s thick enough to coat the back of a spoon. Chilling the apples before dipping also helps.
Can I use apple slices instead of chunks?
You can, but slices are more likely to break when you insert the stick. If you want a slice shape, cut the apple into thick wedges (about ½ inch thick) and use a larger popsicle stick. They’ll be a bit messier to eat, but just as delicious.
What’s the best apple variety for this recipe?
Granny Smith is my top pick because the tartness balances the sweet caramel perfectly. Honeycrisp is a close second—it’s sweeter but still holds its shape. Avoid soft varieties like Red Delicious or McIntosh, as they can turn mushy.
Can I use store-bought caramel sauce instead of melting candies?
Store-bought caramel sauce is usually too thin to coat the apples properly. It will run off and make a mess. If that’s all you have, you can try thickening it by simmering it on the stove for a few minutes, but melted caramel candies really do work best for this recipe.
Pin This Recipe!

Light & Easy Caramel Apple Candy Bites: Best Bite-Sized Fall Treat

These bite-sized caramel apple bites are the perfect fall treat—quick, easy, and customizable with your favorite toppings. They’re a crowd-pleaser for parties and a healthier alternative to full-sized caramel apples.
- Prep Time: 15 minutes
- Cook Time: 5 minutes
- Total Time: 20 minutes
- Yield: 4 servings 1x
- Category: Dessert
- Cuisine: American
Ingredients
- 2 large apples (Honeycrisp or Granny Smith, about 400g total)
- 1 tablespoon lemon juice
- 1 cup caramel candies (about 200g, unwrapped)
- 2 tablespoons heavy cream
- 1 tablespoon unsalted butter
- ½ cup crushed peanuts
- ¼ cup mini chocolate chips
- ¼ cup crushed graham crackers
- 2 tablespoons shredded coconut
- Flaky sea salt (optional)
Instructions
- Wash and dry apples thoroughly. Core and cut into 1-inch chunks or use a melon baller. Toss with lemon juice to prevent browning. Pat dry again.
- Insert a toothpick or small popsicle stick into each apple piece. Place on a parchment-lined baking sheet and refrigerate while making caramel.
- In a small saucepan over low heat, combine caramels, heavy cream, and butter. Stir constantly until smooth and glossy, about 5 minutes.
- Pour melted caramel into a small deep bowl. Arrange toppings in separate small bowls. Remove chilled apple bites from fridge.
- Dip each apple bite into warm caramel, letting excess drip off. Immediately roll or sprinkle with desired toppings. Place back on parchment-lined sheet.
- Refrigerate for at least 10 minutes to set the caramel. Serve cold or at room temperature.
Notes
Chill apples before dipping for best results. If caramel slides off, apples may be too wet or caramel too thin. Work in small batches to prevent caramel from setting in the bowl. For vegan version, use dairy-free caramel, coconut cream, and plant-based butter.
Nutrition
- Serving Size: 3-4 bites
- Calories: 200
- Sugar: 22
- Sodium: 120
- Fat: 9
- Saturated Fat: 4
- Carbohydrates: 30
- Fiber: 3.5
- Protein: 3.5
Keywords: caramel apple bites, fall dessert, easy caramel apples, bite-sized treats, party appetizer


