It was 11:47 PM on a random Wednesday in October, and I had a very specific, almost aggressive craving for a chocolate chip cookie. Not just any cookie, mind you—I wanted that perfect, slightly chewy, golden-brown one from the bakery down the street. The problem? The bakery was closed, and my kitchen had exactly zero sticks of butter. I did, however, have a half-empty jar of unsweetened applesauce, a bag of dark chocolate chips, and a wild idea that felt more like a desperate gamble than a recipe. I thought, “What if I just… swapped the butter for applesauce? And while I’m at it, what if I made them look like creepy little spider webs?” Honestly, it was the kind of kitchen experiment that usually ends in a trash can full of regrets, but something about the late hour and the quiet house made me feel like a mad scientist who had nothing to lose. I pulled out a mixing bowl, cracked an egg, and started whisking, fully expecting to be disappointed. But then, the batter came together—soft, sweet, and surprisingly sturdy. I drizzled a little extra chocolate over the top, dragged a toothpick through it to make those webs, and popped them in the oven. When I pulled them out, they were perfect. Maybe you’ve been there, standing in your kitchen at midnight, convinced you’re about to ruin a perfectly good snack. These cookies, though—they were a little victory. They’re lighter, they’re fun, and they’ve become my go-to for Halloween parties, bake sales, or just a quiet Tuesday night when the craving hits. Let me tell you, they’re worth staying up for.
Why You’ll Love This Recipe
These Lighter Spider Web Chocolate Chip Cookies aren’t just another Halloween treat. They’re a smart, delicious twist on a classic that proves you don’t need a ton of butter to get a perfect cookie. I’ve tested this recipe at least a dozen times, tweaking the applesauce ratio and the baking time until I got that ideal chewy texture. Trust me, it works.
- Quick & Easy: From start to finish, these cookies come together in about 25 minutes. Perfect for a last-minute Halloween party or a weeknight baking session with the kids.
- Simple Ingredients: You probably have everything you need right now. No fancy extracts, no hard-to-find flours. Just pantry staples and a little creativity.
- Perfect for Halloween: The spider web design is a showstopper for parties, school events, or just a fun family activity. It’s festive without being overly complicated.
- Crowd-Pleaser: I’ve brought these to potlucks and gatherings, and they disappear faster than the full-fat versions. Kids love the design, and adults appreciate the lighter twist.
- Unbelievably Delicious: You honestly won’t miss the butter. The applesauce keeps them incredibly moist and tender, while the dark chocolate chips add that rich, satisfying flavor. It’s comfort food you can feel good about.
What makes these different from every other chocolate chip cookie recipe out there? It’s the perfect balance of a healthier swap and a fun, decorative element. The applesauce isn’t just a substitute—it’s an upgrade that creates a uniquely soft texture. And the spider web design? It’s so simple to do, but it looks like you spent hours on it. This is the kind of cookie that makes you close your eyes after the first bite, not because it’s overly indulgent, but because it’s just that good. It’s comfort food reimagined—healthier, faster, but with the same soul-soothing satisfaction.
What Ingredients You Will Need
This recipe uses simple, wholesome ingredients to deliver bold flavor and satisfying texture without the fuss. Most of these are pantry staples, which makes this a perfect go-to when you need a quick treat.
- Unsweetened Applesauce (1/2 cup / 120 ml): This is our secret weapon for replacing the butter. It adds moisture and natural sweetness without the fat. I prefer using a smooth, store-bought brand like Mott’s or a homemade version if I have it on hand. Make sure it’s unsweetened so you can control the sugar level.
- Granulated Sugar (1/4 cup / 50 g): Adds the necessary sweetness and helps with browning. You can use coconut sugar for a slightly deeper flavor, but the texture will be a bit grainier.
- Light Brown Sugar (1/2 cup / 100 g), packed: This is crucial for moisture and that classic chewy texture. The molasses in brown sugar adds a lovely depth of flavor that pairs perfectly with the chocolate.
- Large Egg (1): Acts as a binder and adds richness. Make sure it’s at room temperature for the best emulsion. If you’re in a hurry, you can place the egg in a bowl of warm water for 5 minutes.
- Vanilla Extract (1 teaspoon / 5 ml): Enhances all the other flavors. I recommend using pure vanilla extract, not imitation, for the best taste. It makes a real difference.
- All-Purpose Flour (1 1/2 cups / 180 g): The base of our cookie. For a gluten-free option, you can use a 1:1 gluten-free baking flour blend. I’ve had good luck with the Bob’s Red Mill brand.
- Baking Soda (1/2 teaspoon): Helps the cookies spread and become slightly chewy. Don’t skip this—it’s essential for the right texture.
- Salt (1/4 teaspoon): Balances the sweetness and enhances the chocolate flavor. I use fine sea salt for baking.
- Dark Chocolate Chips (1 cup / 175 g): The star of the show! I prefer dark chocolate (60-70% cacao) for a richer, less sugary taste. Feel free to use semi-sweet or milk chocolate if that’s your preference. For the spider web design, you’ll need an extra 1/4 cup (45 g) of chocolate chips for drizzling.
Equipment Needed
You don’t need a fancy kitchen to make these cookies. Here’s what you’ll need:
- Mixing Bowls: One large bowl for the wet ingredients and one medium bowl for the dry ingredients.
- Whisk: For combining the wet ingredients smoothly.
- Rubber Spatula or Wooden Spoon: For folding the dry ingredients into the wet. I prefer a rubber spatula because it gets every bit of batter.
- Baking Sheet: A standard 13×18-inch sheet pan works perfectly. Line it with parchment paper for easy cleanup.
- Cookie Scoop (optional): A 1.5-tablespoon scoop ensures uniform cookies that bake evenly. If you don’t have one, just use a spoon.
- Piping Bag or Small Ziploc Bag: For drizzling the melted chocolate. A ziploc bag with a tiny corner snipped off works like a charm.
- Toothpick: The secret tool for creating the spider web effect.
- Cooling Rack: Essential for letting the cookies cool completely without getting soggy on the bottom.
Preparation Method
Let’s get baking! This recipe is straightforward, but I’ve included some personal tips to make sure your cookies turn out perfectly every time.
- Preheat and Prep: Preheat your oven to 350°F (175°C). Line a baking sheet with parchment paper. This is non-negotiable for easy cleanup and preventing sticking. While the oven heats, measure out all your ingredients. I can’t stress this enough—having everything ready makes the process so much smoother.
- Mix the Wet Ingredients: In a large bowl, combine the 1/2 cup of unsweetened applesauce, 1/4 cup of granulated sugar, and 1/2 cup of packed light brown sugar. Whisk them together until the mixture is smooth and the sugars are mostly dissolved. It will look a bit like a thick paste. Add the 1 large egg and 1 teaspoon of vanilla extract, and whisk again until everything is well combined and slightly frothy. This should take about a minute.
- Combine the Dry Ingredients: In a separate medium bowl, whisk together 1 1/2 cups of all-purpose flour, 1/2 teaspoon of baking soda, and 1/4 teaspoon of salt. Whisking ensures the baking soda and salt are evenly distributed, which prevents any bitter pockets in your cookies.
- Bring It Together: Pour the dry ingredients into the bowl with the wet ingredients. Use your rubber spatula to fold everything together. Stir gently until just combined—you don’t want to overmix, or the cookies will be tough. A few streaks of flour are okay at this point. Then, fold in 1 cup of dark chocolate chips. The batter will be thick and slightly sticky, which is exactly what we want.
- Scoop and Shape: Using a cookie scoop or a tablespoon, drop rounded tablespoons of dough onto the prepared baking sheet, spacing them about 2 inches apart. I usually fit 12 cookies on a standard sheet. For a more uniform look, you can roll each scoop into a ball between your palms. Don’t flatten them—they’ll spread on their own in the oven.
- Bake to Perfection: Bake for 10-12 minutes, or until the edges are set and lightly golden. The centers will look slightly underdone and puffy—that’s perfect. They’ll continue to set as they cool. For a softer, chewier cookie, pull them out at the 10-minute mark. For a slightly crispier edge, go for 12 minutes. I personally prefer 11 minutes for the best of both worlds.
- Cool and Create the Webs: Let the cookies cool on the baking sheet for 5 minutes. This is crucial—they’re very delicate when hot. After 5 minutes, transfer them to a cooling rack to cool completely. While they cool, melt the extra 1/4 cup of dark chocolate chips. You can do this in a microwave-safe bowl in 20-second bursts, stirring in between, or using a double boiler on the stove. Be careful not to burn the chocolate.
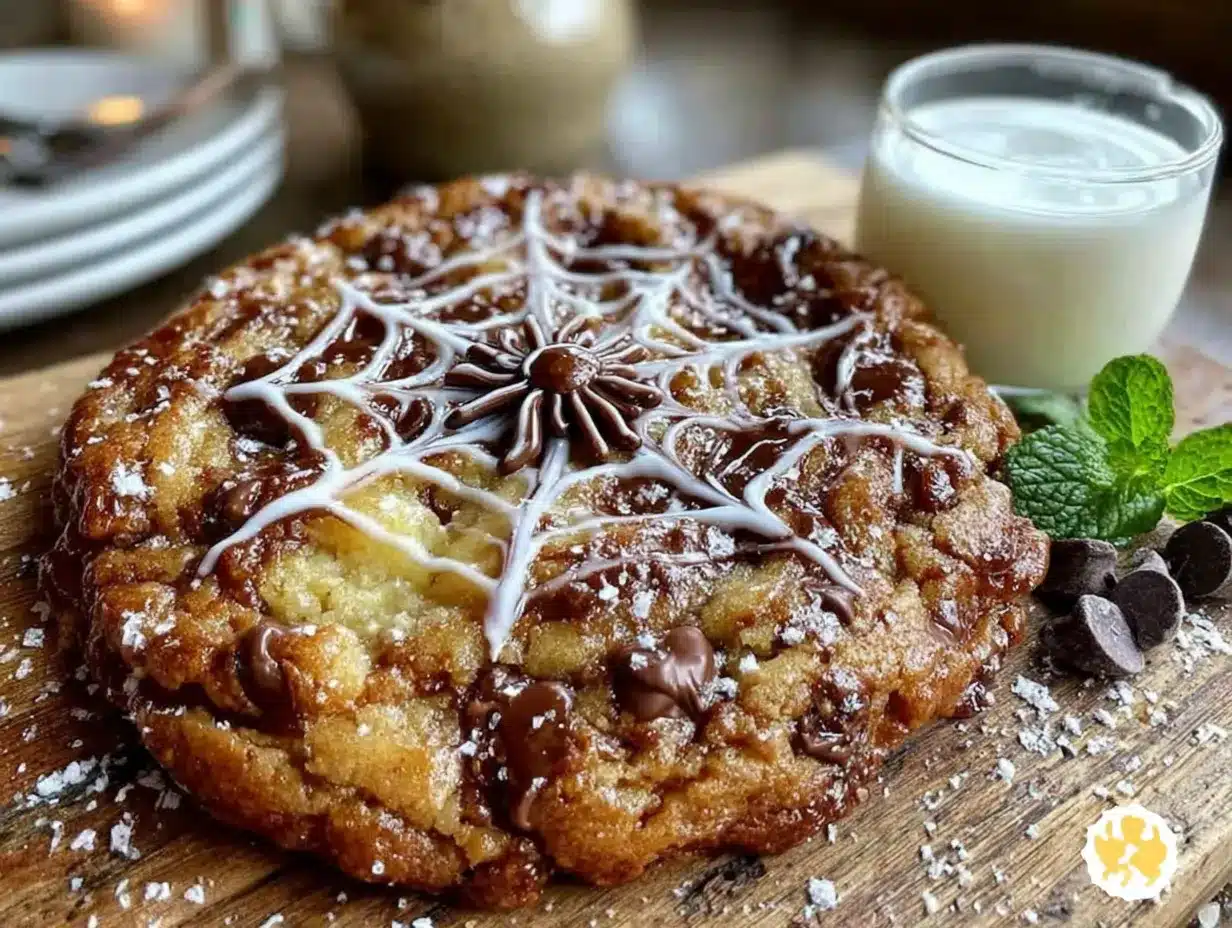
- The Spider Web Design: Once the cookies are completely cool, it’s time for the fun part. Spoon the melted chocolate into a small piping bag or a ziploc bag with a tiny corner snipped off. Starting from the center of each cookie, pipe a small circle. Then, pipe a few concentric circles around it, like a bullseye. Working quickly before the chocolate sets, use a toothpick to drag lines from the center outward through all the circles. This creates the classic spider web pattern. Wipe the toothpick clean between each cookie for the best results. Let the chocolate set completely before serving, about 15-20 minutes at room temperature.
Cooking Tips & Techniques
I’ve made my fair share of cookie mistakes, so let me save you some trouble. Here are the things I’ve learned the hard way.
Don’t Overmix the Dough: This is the number one mistake. Overmixing develops the gluten in the flour, which leads to tough, dense cookies. Mix just until the flour disappears. A few lumps are totally fine.
The Applesauce Swap: I was skeptical the first time I tried this. I thought the cookies would be cakey or gummy. But the trick is to not add too much. Stick to the 1/2 cup measurement. Any more, and you’ll end up with cookie-shaped muffins. Also, make sure your applesauce is unsweetened. Sweetened applesauce will throw off the sugar balance and make the cookies spread too much.
Chilling the Dough (Optional): If you have time, chilling the dough for 30 minutes before baking can help prevent excessive spreading. It also deepens the flavor as the ingredients meld together. I do this when I want extra-thick cookies, but it’s not necessary for this recipe.
Perfecting the Spider Web: The first time I tried this, my chocolate was too thick, and the lines were a mess. The key is to have the chocolate melted to a smooth, drizzling consistency. If it’s too thick, add a tiny splash of coconut oil or vegetable oil to thin it out. Also, work on one cookie at a time. If the chocolate starts to set on the piping bag, pop it in the microwave for 10 seconds to loosen it up again.
Timing is Everything: These cookies bake quickly. Don’t walk away from the oven. I once got distracted by a phone call, and my perfect cookies turned into crispy little frisbees. Set a timer, and check them at the 9-minute mark.
Variations & Adaptations
One of the best things about this recipe is how flexible it is. Here are a few ways I’ve adapted it for different moods and diets.
Gluten-Free Version: I’ve made these with a 1:1 gluten-free flour blend (the one with xanthan gum), and they turned out beautifully. The texture is slightly more tender, but the flavor is spot on. Just make sure your blend is designed for baking.
Vegan Adaptation: To make these vegan, replace the egg with a flax egg (1 tablespoon ground flaxseed mixed with 3 tablespoons water, left to sit for 5 minutes until gel-like). Use dairy-free chocolate chips. The texture will be a bit softer, but the spider web design still works perfectly.
Spooky Color Twist: For a more festive look, I’ve added a few drops of orange food coloring to the wet ingredients. It doesn’t affect the taste, but it makes the cookies look extra Halloween-y. You can also use white chocolate for the spider web design for a more dramatic contrast.
Different Mix-Ins: Not a fan of dark chocolate? Swap in semi-sweet, milk chocolate, or even white chocolate chips. I’ve also added 1/2 cup of chopped pecans or walnuts for a little crunch. For a fun Halloween twist, try using candy corn or mini M&Ms instead of the second batch of chocolate for the drizzle.
Serving & Storage Suggestions
These cookies are best served at room temperature, right after the spider web chocolate has set. The contrast between the soft, chewy cookie and the slightly firm chocolate drizzle is just perfect.
Serving Ideas: They’re a natural fit for a Halloween party spread, alongside some pumpkin spice latte cupcakes or a bowl of creamy mulled apple cider. For a fun dessert board, arrange them on a platter with some caramel apples and popcorn balls. Kids love them with a glass of cold milk, and adults enjoy them with a cup of coffee or a warm chai latte.
Storage: Store the cookies in an airtight container at room temperature. They’ll stay fresh and chewy for up to 4 days. If you stack them, place a sheet of parchment paper between the layers to protect the spider web design. Do not refrigerate them, as the fridge will dry them out.
Freezing Instructions: You can freeze the baked cookies (without the spider web design) for up to 3 months. Place them in a single layer on a baking sheet and freeze until solid, then transfer to a freezer-safe bag. When you’re ready to serve, thaw them at room temperature, then add the spider web design. You can also freeze the raw cookie dough balls. Scoop them onto a baking sheet, freeze until solid, then store in a freezer bag. Bake from frozen, adding 2-3 minutes to the baking time.
Nutritional Information & Benefits
These cookies are a lighter take on a classic, and I love that I can enjoy a couple without feeling weighed down. Here’s the estimated breakdown per cookie (based on 24 cookies):
| Nutrient | Amount per Cookie |
|---|---|
| Calories | ~115 kcal |
| Fat | ~4.5 g |
| Saturated Fat | ~2.5 g |
| Carbohydrates | ~18 g |
| Sugar | ~11 g |
| Fiber | ~1 g |
| Protein | ~2 g |
The biggest health benefit here is the swap from butter to applesauce. This cuts a significant amount of saturated fat and adds a little fiber and vitamin C from the apples. Using dark chocolate also provides antioxidants, making this a treat that’s a bit more balanced than your average cookie. They are not gluten-free or dairy-free by default, but can easily be adapted. As always, check your ingredients for potential allergens like dairy in the chocolate chips or gluten in the flour.
Conclusion
These Lighter Spider Web Chocolate Chip Cookies are proof that you don’t have to sacrifice flavor or fun to make a smarter choice. They’re everything I want in a Halloween treat—easy, festive, and genuinely delicious. I love that they came from a late-night experiment, and now they’re a staple in my fall baking rotation. I really hope you give them a try, whether you’re making them for a party or just because you have a craving. Don’t be afraid to make them your own—swap the chocolate, add some nuts, or double the batch because they disappear fast. If you make them, I’d love to hear about it. Drop a comment below and tell me how your spider webs turned out, or tag me in your photos on social media. Happy baking, and enjoy every single bite!
Frequently Asked Questions
Can I use melted butter instead of applesauce?
Yes, you can substitute 1/2 cup of melted butter for the applesauce. However, this will significantly increase the fat and calorie content, and the cookies will be denser and less moist. The applesauce version is specifically designed to be lighter.
Why did my cookies spread too much?
This usually happens if the dough is too warm or if you used sweetened applesauce. Make sure your applesauce is unsweetened, and try chilling the dough for 20-30 minutes before baking. Also, ensure your baking soda is fresh—old baking soda loses its leavening power.
Can I make the spider web design with white chocolate?
Absolutely! White chocolate creates a beautiful, ghostly contrast against the dark cookie. Just melt it the same way you would the dark chocolate. You can even add a tiny drop of black food coloring to the white chocolate for a truly spooky look.
How do I prevent the chocolate drizzle from smudging?
Patience is key. Let the cookies cool completely before you add the spider web design. Once the chocolate is drizzled, let it set completely at room temperature before stacking or storing them. If you’re in a hurry, you can pop them in the fridge for 10 minutes to speed up the setting process.
Can I use this recipe for regular chocolate chip cookies without the spider web?
Of course! Just skip the extra chocolate drizzle and the toothpick step. You’ll have a fantastic batch of lighter, chewy chocolate chip cookies that are perfect for any day of the year. The recipe works beautifully on its own.
Pin This Recipe!
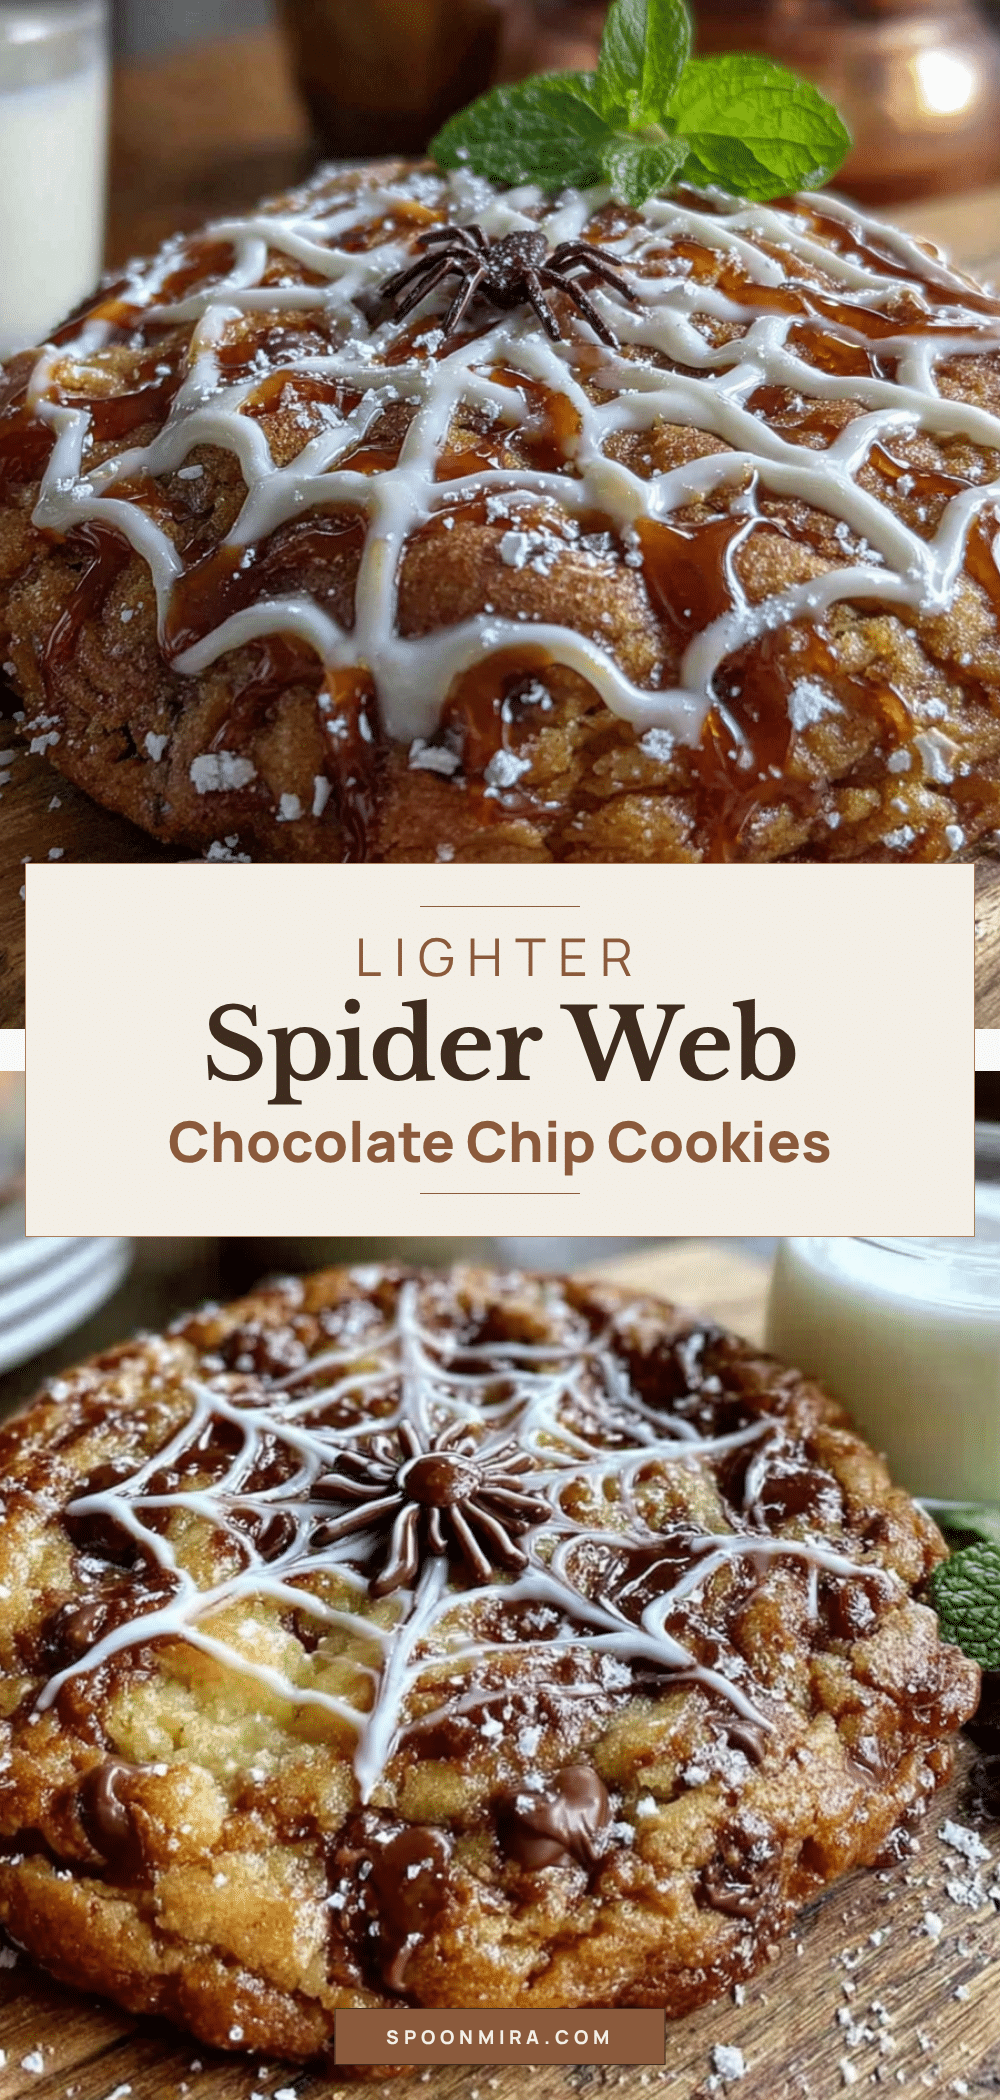
Lighter Spider Web Chocolate Chip Cookies (Easy & Fun)

These lighter chocolate chip cookies use applesauce instead of butter for a moist, chewy texture, and are topped with a fun spider web design made from melted chocolate. Perfect for Halloween parties or a quick weeknight treat.
- Prep Time: 15 minutes
- Cook Time: 10-12 minutes
- Total Time: 25 minutes
- Yield: 24 cookies 1x
- Category: Dessert
- Cuisine: American
Ingredients
- 1/2 cup (120 ml) unsweetened applesauce
- 1/4 cup (50 g) granulated sugar
- 1/2 cup (100 g) light brown sugar, packed
- 1 large egg, at room temperature
- 1 teaspoon (5 ml) vanilla extract
- 1 1/2 cups (180 g) all-purpose flour
- 1/2 teaspoon baking soda
- 1/4 teaspoon salt
- 1 cup (175 g) dark chocolate chips (60-70% cacao)
- 1/4 cup (45 g) dark chocolate chips (for spider web design)
Instructions
- Preheat oven to 350°F (175°C). Line a baking sheet with parchment paper.
- In a large bowl, whisk together applesauce, granulated sugar, and brown sugar until smooth and sugars are mostly dissolved.
- Add egg and vanilla extract; whisk until well combined and slightly frothy, about 1 minute.
- In a separate medium bowl, whisk together flour, baking soda, and salt.
- Pour dry ingredients into wet ingredients; fold with a rubber spatula until just combined. Do not overmix.
- Fold in 1 cup of dark chocolate chips until evenly distributed. Batter will be thick and slightly sticky.
- Using a cookie scoop or tablespoon, drop rounded tablespoons of dough onto prepared baking sheet, spacing 2 inches apart. Do not flatten.
- Bake for 10-12 minutes, until edges are set and lightly golden. Centers will look slightly underdone. For chewier cookies, bake 10 minutes; for crispier edges, bake 12 minutes.
- Let cookies cool on baking sheet for 5 minutes, then transfer to a cooling rack to cool completely.
- Melt the extra 1/4 cup of dark chocolate chips in a microwave-safe bowl in 20-second bursts, stirring between each, until smooth.
- Spoon melted chocolate into a small piping bag or ziploc bag with a tiny corner snipped off.
- On each cooled cookie, pipe a small circle in the center, then pipe concentric circles around it like a bullseye.
- Working quickly, use a toothpick to drag lines from the center outward through all the circles to create a spider web pattern. Wipe toothpick clean between cookies.
- Let chocolate set completely at room temperature, about 15-20 minutes, before serving.
Notes
For best results, use unsweetened applesauce. Chilling the dough for 30 minutes before baking can prevent excessive spreading. For vegan version, replace egg with a flax egg (1 tablespoon ground flaxseed + 3 tablespoons water) and use dairy-free chocolate chips. Store in an airtight container at room temperature for up to 4 days. Freeze baked cookies (without spider web design) for up to 3 months.
Nutrition
- Serving Size: 1 cookie
- Calories: 115
- Sugar: 11
- Fat: 4.5
- Saturated Fat: 2.5
- Carbohydrates: 18
- Fiber: 1
- Protein: 2
Keywords: spider web cookies, chocolate chip cookies, Halloween cookies, lighter cookies, applesauce cookies, easy cookies


