October 29th, 9:47 PM. The house is finally quiet, the last of the candy bags are tucked away in the pantry, and I’m standing in the kitchen with a smear of purple food coloring on my forearm. The only thing I want right now is to make this Perfect Purple Ombre Halloween Cookie Cake. Not a spooky cupcake, not a batch of fifty sugar cookies—something that feels like the centerpiece of the night but doesn’t require a pastry degree. I found myself pulling out my mixer without really thinking about it, the way you do when a craving has already made the decision for you.
The ombre effect on this cookie cake is surprisingly forgiving. You start with a deep, rich violet at the base, and each layer gets a little lighter, a little softer, until the top is a pale, almost lavender ghost of a color. It looks intentional. It looks like you planned it for weeks. Honestly? It took me about half an hour of active work to get the batter into the pan. The hardest part was waiting for it to cool.
I’ve made a lot of Halloween desserts over the years. I’ve done the pumpkin spice sheet cakes for fall parties and the brown butter snickerdoodles for cozy nights, but this cookie cake is different. It’s a statement. It sits on the table and demands attention without being overly fussy. And the best part? It tastes like a giant, soft-baked sugar cookie with a slightly crisp edge and a tender, almost melt-in-your-mouth center. It’s the kind of thing you make once, and then suddenly you’re making it for every Halloween gathering you’re invited to.
This recipe is for the person who wants the wow factor without the stress. Trust me on this one.
Why You’ll Love This Purple Ombre Halloween Cookie Cake
I’ve tested this recipe four times to get the color gradient just right and the texture exactly where I wanted it. Here’s why it deserves a spot in your Halloween rotation:
- Stunning Visual Effect – The purple ombre gradient looks professional and magical. It’s the kind of dessert that makes people say “Whoa, you made that?”
- Simple Ingredients – You don’t need any specialty flours or hard-to-find extracts. Everything is a standard baking staple, plus purple gel food coloring.
- Perfect for Halloween Parties – This cookie cake serves a crowd. Slice it up, and it’s immediately the star of the dessert table.
- No Complicated Decorating – No piping bags, no fondant, no stress. You just spoon the batter in layers and let the oven do the magic.
- Soft and Buttery Texture – It has that perfect cookie balance: a slightly crisp golden edge with a soft, chewy center that stays tender for days.
What makes this recipe different from the rest is the technique. Most ombre bakes rely on complicated frosting gradients. This one does the gradient inside the batter itself. It’s baked right in, which means the color is part of the cookie, not just a topping. It feels more intentional, more integrated. And honestly, it tastes better because you’re not covering up a mediocre cookie with a thick layer of frosting.
This isn’t just another Halloween dessert. It’s the one that makes you close your eyes after the first bite. It’s comfort food with a spooky, beautiful twist—faster than a layer cake, but with the same soul-soothing satisfaction. Perfect for impressing guests without breaking a sweat.
What Ingredients You Will Need
This recipe uses simple, wholesome baking ingredients to deliver a bold visual impact and a soft, buttery texture. Most of these are pantry staples, so you probably already have everything except the purple gel coloring.
- Unsalted butter, softened – 1 cup (2 sticks, 226g). Softening to room temperature is crucial for proper creaming. I always use unsalted so I can control the salt level.
- Granulated sugar – 1 cup (200g). Adds sweetness and helps create that slightly crisp edge.
- Light brown sugar, packed – ½ cup (100g). Adds moisture and a subtle caramel undertone that balances the vanilla.
- Large egg – 1, room temperature. Room temperature eggs incorporate more evenly into the creamed butter.
- Egg yolk – 1, room temperature. The extra yolk adds richness and tenderness.
- Pure vanilla extract – 2 teaspoons. Use the real stuff here; it makes a difference in flavor depth.
- All-purpose flour – 2 ¼ cups (280g). Spoon and level your flour for accuracy. Too much flour makes a dry cookie cake.
- Baking soda – ½ teaspoon. For a little lift.
- Salt – ½ teaspoon. Balances the sweetness and enhances the vanilla.
- Purple gel food coloring – I recommend the Wilton brand or Americolor. Gel is concentrated and won’t thin your batter like liquid drops. You’ll need a deep violet and a lighter shade for the gradient.
- Powdered sugar (optional, for dusting) – 1 tablespoon. A light dusting before serving adds a spooky, ethereal look.
Ingredient Selection Tips: For the most vibrant color, use a high-quality gel food coloring. Cheap liquid colors will give you a muddy, grayish purple. I’ve tried both, and the gel is non-negotiable for a true ombre effect. If you want a deeper, almost black-purple at the base, add a tiny drop of black gel coloring to the dark purple layer—just a toothpick’s worth.
Substitution Guidance: If you’re dairy-free, you can use a high-quality vegan butter stick (like Miyoko’s). The texture will be slightly different—a little less crisp on the edges—but still delicious. For a gluten-free version, use a 1:1 gluten-free baking flour blend with xanthan gum. I tested this with King Arthur’s Measure for Measure, and it worked beautifully.
Equipment Needed
You don’t need a lot of fancy tools for this recipe, which is part of its charm.
- 9-inch round cake pan – This is your canvas. A springform pan works well too, but a standard cake pan lined with parchment is perfectly fine.
- Stand mixer or hand mixer – For creaming the butter and sugar. You can do it by hand with a wooden spoon, but your arm will get tired.
- Mixing bowls – At least 3 small bowls for dividing the batter.
- Rubber spatula – For folding and layering the batter without overmixing.
- Measuring cups and spoons – Accurate measurements matter in baking.
- Parchment paper – Line the pan for easy removal. I’ve tried greasing the pan alone, and the cookie cake always sticks. Parchment is your friend.
- Toothpicks or skewers – For swirling the colors together at the seams.
Budget-friendly tip: You don’t need a fancy stand mixer. A $20 hand mixer from the grocery store will do the job perfectly. The only non-negotiable is the gel food coloring—don’t try to substitute with liquid drops.
Preparation Method
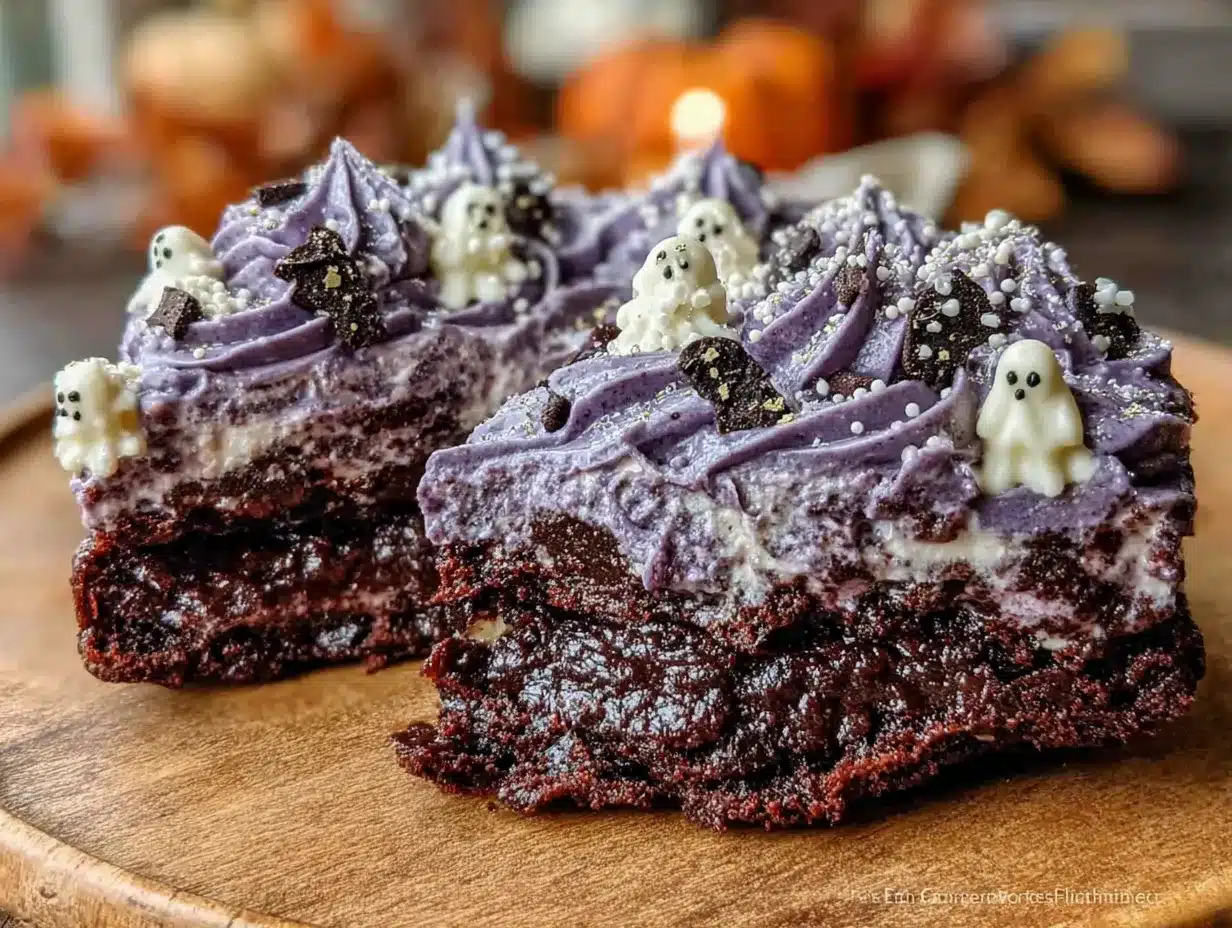
Let’s walk through this step by step. I’ve included the sensory cues I use to know when each stage is right.
- Preheat and Prepare – Preheat your oven to 350°F (175°C). Grease a 9-inch round cake pan and line the bottom with a circle of parchment paper. Set aside.
- Cream the Butter and Sugars – In a large mixing bowl, beat the softened unsalted butter, granulated sugar, and light brown sugar together on medium speed for 3-4 minutes. You’re looking for a light, fluffy, pale yellow mixture. It should look like soft, pillowy sand. Scrape down the sides of the bowl once halfway through.
- Add the Egg, Yolk, and Vanilla – Add the room-temperature egg and egg yolk, then the vanilla extract. Beat on medium speed until fully combined, about 1 minute. The mixture will look glossy and smooth. Don’t overbeat here—you don’t want to incorporate too much air.
- Combine the Dry Ingredients – In a separate bowl, whisk together the all-purpose flour, baking soda, and salt. This ensures the leavening is evenly distributed.
- Mix the Dry into the Wet – Gradually add the dry ingredients to the wet mixture, mixing on low speed. Stop as soon as the flour disappears. You want a thick, cohesive dough that pulls away from the sides of the bowl. Overmixing will make the cookie cake tough.
- Divide the Dough – Divide the dough into three separate bowls. You want roughly one-third in the first bowl (the darkest layer), one-third in the second (the medium layer), and one-third in the third (the lightest layer).
- Color the Layers – Start with the darkest layer. Add about 8-10 drops of purple gel food coloring to the first bowl. Mix with a spatula until the color is uniform. It should be a deep, rich violet—think of a twilight sky. For the second bowl, add 4-5 drops of purple gel. Mix until you get a medium lavender shade. For the third bowl, add just 1-2 drops. You want a very pale, soft lilac. If any layer looks too dark, add a tiny bit of uncolored dough from another bowl to lighten it.
- Layer the Dough in the Pan – Using a spatula or a spoon, drop the darkest purple dough into the prepared pan. Spread it into an even layer. It will be thick—use your fingers lightly dusted with flour if needed. Next, drop the medium lavender dough on top. Gently spread it to the edges, being careful not to mix it completely into the dark layer. Finally, drop the lightest lilac dough on top and spread gently.
- Create the Ombre Swirl (Optional but Recommended) – Take a toothpick or a thin skewer and gently swirl it through the layers in a zigzag pattern. Don’t overdo it—you just want a few soft swirls to blur the lines between colors. This creates a more organic ombre effect.
- Bake – Place the pan on the center rack of your preheated oven. Bake for 28-32 minutes, or until the edges are golden brown and a toothpick inserted into the center comes out with a few moist crumbs (not wet batter). The top should be set and slightly springy to the touch. My oven runs hot, so I check at 28 minutes.
- Cool – Let the cookie cake cool in the pan on a wire rack for 15 minutes. Then run a knife around the edge, invert onto the rack, and remove the parchment. Let it cool completely before slicing. If you slice it while it’s warm, it will crumble.
Cooking Tips & Techniques
I’ve made a few mistakes with this recipe so you don’t have to. Here’s what I learned.
Don’t overmix the dough after adding the flour. I did this once, and the cookie cake came out tough and dense instead of tender. Mix just until the flour disappears. A few streaks are fine—they’ll disappear during baking.
Gel food coloring is non-negotiable. I tried liquid drops once because I was out of gel. The batter turned a sad, grayish purple, and the ombre effect was barely visible. Gel is concentrated, so it gives you bright, true colors without thinning the batter.
Let the layers be imperfect. You don’t need perfectly flat, even layers. The beauty of the ombre effect is the slight blending at the seams. If some dark purple peeks into the medium layer, that’s a good thing. It looks more natural.
Check for doneness at 28 minutes. Every oven is different. Start checking early. You want the edges to be golden and the center to be set but still soft. Overbaking dries out the cookie cake.
Cool completely before slicing. I know it’s tempting to cut into it warm. Don’t. The structure needs time to set. If you slice too soon, you’ll get a crumbly mess instead of clean, beautiful slices.
Variations & Adaptations
This recipe is surprisingly flexible. Here are some ways to make it your own.
Spooky Black and Purple Ombre – Add a tiny drop of black gel food coloring to the darkest layer to create a deep, almost black-purple base. The gradient will look even more dramatic and eerie.
Green and Orange Halloween Ombre – Swap the purple gel for orange and green. Use the same layering technique: dark orange at the bottom, medium green in the middle, and pale orange on top. It’s perfect for a non-purple Halloween theme.
Gluten-Free Version – Use a 1:1 gluten-free baking flour blend with xanthan gum. I tested this with King Arthur’s Measure for Measure, and the texture was soft and slightly more delicate but still delicious.
Extra Candy Crunch – Sprinkle ¼ cup of crushed Halloween candy (like candy corn or chocolate chips) between the layers before baking. It adds texture and a little surprise in every bite.
Dairy-Free Adaptation – Use a high-quality vegan butter stick. The edges won’t be quite as crisp, but the flavor and color will still be fantastic.
Serving & Storage Suggestions
This cookie cake is best served at room temperature. The texture is soft and chewy, and the flavors are most balanced when it’s not straight from the fridge.
Presentation Idea: Dust the top lightly with powdered sugar right before serving. It adds a ghostly, ethereal look that’s perfect for Halloween. You can also add a few candy eyes or a drizzle of white chocolate for extra spookiness.
Complementary Pairings: Serve with a cold glass of milk, a scoop of vanilla ice cream, or a warm cup of spiced apple cider. The creamy, cool elements balance the buttery sweetness of the cookie cake beautifully.
Storage: Store leftover cookie cake in an airtight container at room temperature for up to 4 days. Do not refrigerate—the fridge will dry it out. If you need to keep it longer, wrap individual slices tightly in plastic wrap and freeze for up to 3 months.
Reheating: To bring back that fresh-from-the-oven softness, microwave a slice for 10-15 seconds. You can also warm it in a 300°F (150°C) oven for 5 minutes.
Nutritional Information & Benefits
This is a treat, not a health food, but here’s what you can expect per slice (based on 12 slices):
- Calories: Approximately 310
- Fat: 16g
- Carbohydrates: 40g
- Protein: 3g
- Sugar: 24g
The butter provides a small amount of vitamin A, and the egg adds a bit of protein. The real benefit here is the joy factor—sometimes you need a dessert that makes you smile. This cookie cake is also a great option for potlucks and parties because it’s easy to transport and serve.
Dietary Considerations: This recipe contains gluten, dairy, and eggs. For gluten-free and dairy-free adaptations, see the Variations section above.
Conclusion
This Perfect Purple Ombre Halloween Cookie Cake is the kind of recipe that feels like a secret weapon. It looks like you spent hours on it, but it comes together with the same effort as a batch of regular cookies. The ombre gradient is forgiving, the texture is spot-on, and it’s the kind of dessert that makes people stop and take a photo before they take a bite.
I love this recipe because it captures the magic of Halloween without the stress. It’s spooky, it’s beautiful, and it tastes like pure comfort. Whether you’re making it for a party, a family gathering, or just because the Halloween spirit hit you, I promise you’ll be proud of the result.
If you make this cookie cake, I’d love to hear about it. Leave a comment below and let me know how your ombre turned out. Did you try a different color combination? Did your kids help with the layering? Share your photos and tag me—I can’t wait to see your spooky creations.
Happy Halloween, and happy baking!
Frequently Asked Questions
Can I use liquid food coloring instead of gel?
I don’t recommend it. Liquid food coloring will thin out your batter and give you a muddy, grayish purple instead of a vibrant violet. Gel is concentrated and won’t affect the texture. It’s worth the extra dollar or two.
How do I get clean slices without the colors smearing?
Let the cookie cake cool completely before slicing. Use a sharp chef’s knife and wipe the blade clean between each cut. If you’re serving it at a party, slice it just before guests arrive so the edges stay clean.
Can I make this cookie cake ahead of time?
Absolutely. You can bake it a day ahead, let it cool completely, and store it in an airtight container at room temperature. Dust with powdered sugar just before serving. The flavor actually improves slightly overnight as the vanilla settles.
Why did my cookie cake turn out dry?
Overbaking is the most common culprit. Check your oven temperature with an oven thermometer—many ovens run hot. Also, make sure you’re measuring your flour correctly. Spoon the flour into your measuring cup and level it off with a knife. Scooping directly from the bag packs in too much flour.
Can I freeze this cookie cake?
Yes. Wrap the completely cooled cookie cake (or individual slices) tightly in plastic wrap, then in aluminum foil. Freeze for up to 3 months. Thaw at room temperature for about an hour before serving. You can warm slices in the microwave for 10-15 seconds to restore the soft texture.
Pin This Recipe!
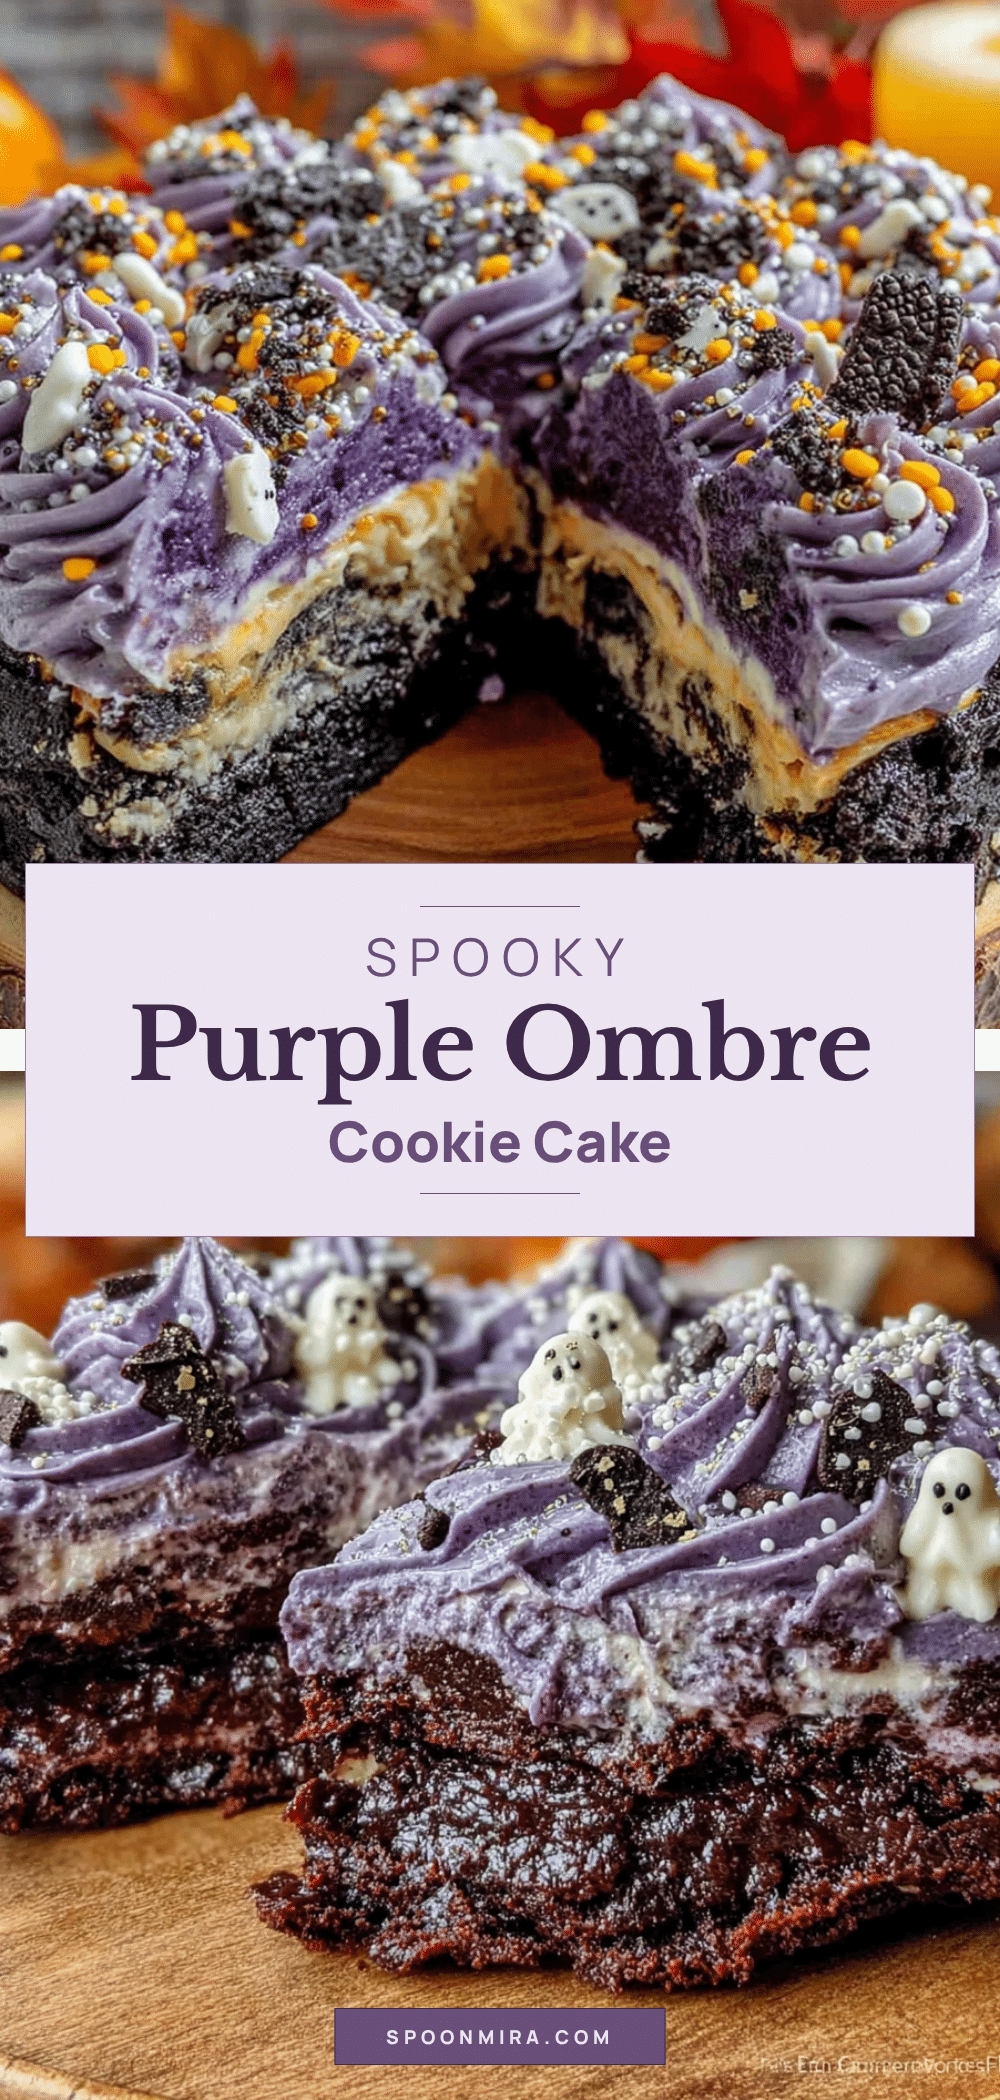
Perfect Purple Ombre Halloween Cookie Cake
A stunning purple ombre cookie cake that looks like a professional centerpiece but comes together with the same effort as a batch of regular cookies. Soft, buttery, and perfect for Halloween parties.
- Prep Time: 30 minutes
- Cook Time: 30 minutes
- Total Time: 1 hour
- Yield: 12 servings 1x
- Category: Dessert
- Cuisine: American
Ingredients
- 1 cup (2 sticks, 226g) unsalted butter, softened
- 1 cup (200g) granulated sugar
- ½ cup (100g) light brown sugar, packed
- 1 large egg, room temperature
- 1 egg yolk, room temperature
- 2 teaspoons pure vanilla extract
- 2 ¼ cups (280g) all-purpose flour
- ½ teaspoon baking soda
- ½ teaspoon salt
- Purple gel food coloring (Wilton or Americolor recommended)
- 1 tablespoon powdered sugar (optional, for dusting)
Instructions
- Preheat oven to 350°F (175°C). Grease a 9-inch round cake pan and line the bottom with parchment paper.
- In a large bowl, beat softened butter, granulated sugar, and brown sugar on medium speed for 3-4 minutes until light and fluffy.
- Add egg, egg yolk, and vanilla extract. Beat on medium speed until fully combined, about 1 minute.
- In a separate bowl, whisk together flour, baking soda, and salt.
- Gradually add dry ingredients to wet mixture, mixing on low speed just until flour disappears. Do not overmix.
- Divide dough into three equal portions in separate bowls.
- Color the layers: Add 8-10 drops purple gel to first bowl for dark violet; 4-5 drops to second bowl for medium lavender; 1-2 drops to third bowl for pale lilac. Mix each until uniform.
- Layer dough in pan: Spread dark purple dough evenly on bottom. Add medium lavender dough on top, spreading gently. Top with pale lilac dough.
- Optional: Use a toothpick to gently swirl layers in a zigzag pattern for a softer ombre effect.
- Bake for 28-32 minutes until edges are golden and a toothpick inserted in center comes out with moist crumbs.
- Cool in pan on wire rack for 15 minutes. Run knife around edge, invert onto rack, remove parchment. Cool completely before slicing.
Notes
Gel food coloring is non-negotiable for vibrant color. Do not overmix dough after adding flour. Cool completely before slicing to avoid crumbling. Store in airtight container at room temperature for up to 4 days. Freeze for up to 3 months.
Nutrition
- Serving Size: 1 slice
- Calories: 310
- Sugar: 24
- Sodium: 180
- Fat: 16
- Saturated Fat: 10
- Carbohydrates: 40
- Fiber: 1
- Protein: 3
Keywords: Halloween cookie cake, purple ombre, sugar cookie cake, Halloween dessert, ombre cake, cookie cake recipe


