My friend Cara had claimed for years that she hated sugar cookies. “They’re just sweet disks,” she’d say, waving a dismissive hand at the bakery counter. “All that work for something that tastes like nothing.” For three Halloweens straight, she’d show up to my annual party empty-handed, insisting she was “just there for the cider.” Then last October, I made a batch of these spooky cute pumpkin spice sugar cookies for the party, setting them on a tiered stand by the front door. I swear, I didn’t mention them to her. But twenty minutes into the party, I found her standing by the stand, mid-bite, with powdered sugar on her chin. “Okay,” she said, not even looking embarrassed, “these are different.” And honestly? That was the best compliment I could have gotten.
These aren’t your average sugar cookies. They’ve got that warm, cozy pumpkin spice flavor that makes you want to curl up in a sweater, but they’re sturdy enough to hold a ghost shape or a pumpkin face without crumbling. The texture is soft in the middle with just the slightest crisp on the edges—exactly what you want when you’re hosting a crowd and need something that looks impressive but doesn’t require a pastry degree. I started making them for Halloween parties about five years ago, and now I get texts in September asking if the “spooky cookies” are happening this year. They’ve become my signature, the thing people expect.
And here’s the thing—they’re actually easy. Like, embarrassingly easy. You don’t need a stand mixer or a piping bag or any of that fuss. Just a bowl, a whisk, and a little patience for chilling the dough. If you’ve ever felt intimidated by decorated cookies, trust me, these are the ones to start with. The dough is forgiving, the flavor is spot-on, and the decorating is more about fun than perfection. I mean, a slightly crooked ghost face just adds character, right?
Maybe you’ve hosted a Halloween party and stressed over the dessert situation. You want something that looks festive but doesn’t taste like cardboard. Something that kids will grab and adults will sneak back for. These cookies check every box. They’re the kind of treat that makes you look like you planned everything perfectly, when really, you just found a good recipe and let the pumpkin spice do the heavy lifting. Let me show you how to make them.
Why You’ll Love This Recipe
I’ve tested this recipe about seven times to get it right. The first batch spread too much, the second was too dense, and the third—well, let’s just say I learned that chilling the dough is non-negotiable. But this version? It’s the Goldilocks of Halloween cookies. Here’s why it works for hosting:
- Simple Ingredients – You probably already have flour, butter, sugar, and pumpkin pie spice in your pantry. No weird specialty items that cost ten dollars and sit in your cabinet forever.
- Make-Ahead Magic – The dough chills for at least two hours, but you can make it up to three days ahead. That means less stress when guests are about to walk through the door.
- Perfect for a Crowd – This recipe makes about 30 cookies depending on your cutter size. Double it for a big party and nobody goes home empty-handed.
- Crowd-Pleaser – I’ve served these at parties with kids running wild and adults sipping wine, and both groups grab them equally. The pumpkin spice is familiar but the cookie texture wins people over.
- Unbelievably Delicious – The combination of brown sugar and pumpkin spice creates this deep, almost caramel-like flavor that makes regular sugar cookies taste flat in comparison.
What makes this recipe different from all the other pumpkin cookies out there? It’s the texture. Most pumpkin cookies turn out cakey and soft, which is fine, but they don’t hold shapes well. These are rolled and cut, so you get clean edges and a satisfying bite. The secret is using just a touch of pumpkin puree—enough for flavor and moisture, but not so much that the dough gets sticky and unmanageable. Plus, I add a little cream cheese to the icing, which gives it a tangy balance against the sweet pumpkin spice. It’s a small touch that makes people pause and say, “Wait, what’s in this?”
These cookies are the kind that make you close your eyes after the first bite. I’m not exaggerating. The first time I nailed the recipe, I stood in my kitchen eating one while the party prep piled up around me, and I just—stopped. It was that moment where everything clicks. The spice is warm, the cookie is tender, and the icing is just sweet enough. It’s comfort food reimagined for Halloween, and honestly, it’s the only cookie I make for fall now.
What Ingredients You Will Need
This recipe uses simple, wholesome ingredients to deliver that cozy pumpkin spice flavor without any fuss. Most of these are pantry staples, especially if you do any fall baking at all. I’ve tested substitutions for some of these, and I’ll note where you can swap things out without losing the magic.
- 2 ½ cups all-purpose flour – Spoon and level it. Don’t scoop directly from the bag or you’ll end up with dense cookies. I prefer King Arthur Flour for consistent results, but any brand works.
- 1 teaspoon baking powder – Helps the cookies puff just slightly. Make sure it’s fresh—test it by dropping a pinch in hot water; if it fizzes, you’re good.
- ½ teaspoon baking soda – Works with the brown sugar to give the cookies a little spread and a chewy texture.
- ½ teaspoon salt – Don’t skip this. Salt balances the sweetness and makes the pumpkin spice pop.
- 2 teaspoons pumpkin pie spice – Use store-bought or make your own with cinnamon, nutmeg, ginger, and cloves. I’ve done both, and honestly, the store-bought blends from Penzeys or McCormick are totally fine for this.
- ½ teaspoon ground cinnamon – Extra cinnamon because I’m obsessed. You can skip it if you want, but why would you?
- ¾ cup unsalted butter – Softened to room temperature. If you forget to take it out, microwave it in 5-second bursts, but be careful—you want it soft, not melted.
- ½ cup granulated sugar – For sweetness and that slight crisp on the edges.
- ½ cup packed light brown sugar – This is where the depth comes from. Dark brown sugar works too, but the flavor will be more molasses-forward.
- 1 large egg – Room temperature. If you’re in a rush, place the egg in a bowl of warm water for 5 minutes.
- 1 teaspoon vanilla extract – Pure vanilla, not imitation. Trust me on this one.
- ¼ cup pumpkin puree – Not pumpkin pie filling. Make sure you grab the 100% pure pumpkin. I use Libby’s because it’s consistent and not too watery.
For the Cream Cheese Icing:
- 4 oz cream cheese – Softened. Full-fat works best for a creamy texture, but low-fat will work in a pinch (the icing will be slightly thinner).
- ¼ cup unsalted butter – Softened.
- 1 ½ cups powdered sugar – Sifted if you want a super smooth icing. I’m usually too lazy to sift, and it turns out fine.
- ½ teaspoon vanilla extract – Again, pure vanilla.
- 1-2 tablespoons milk – To thin the icing to your desired consistency. Start with one tablespoon and add more as needed.
- Orange and black gel food coloring – For decorating. Gel is better than liquid because it doesn’t change the icing consistency.
- Sprinkles or candy eyes – Optional, but honestly, this is where the “spooky cute” comes in. I love the little candy eyes from Wilton.
Substitution Notes: For a dairy-free version, use vegan butter and dairy-free cream cheese. I’ve tried it with Miyoko’s brand, and it works well, though the cookies are slightly less tender. For a gluten-free option, use a 1:1 gluten-free flour blend like Bob’s Red Mill. The dough will be a bit more fragile, so handle it gently. And if you don’t have pumpkin pie spice, mix 1 teaspoon cinnamon, ½ teaspoon ginger, ¼ teaspoon nutmeg, and ¼ teaspoon cloves.
Equipment Needed
You don’t need a fancy kitchen to pull these off. Here’s what I use, along with some alternatives if you’re working with limited tools.
- Mixing bowls – One large, one medium. I use glass because it’s easy to see when the butter and sugar are creamed properly.
- Electric hand mixer or stand mixer – A hand mixer works perfectly. I actually prefer it because there’s less cleanup. If you’re mixing by hand, soften the butter really well and be prepared to work your arm muscles.
- Whisk and rubber spatula – The whisk for dry ingredients, the spatula for folding in the flour.
- Plastic wrap – For chilling the dough. I’ve also used beeswax wraps in a pinch.
- Rolling pin – A standard rolling pin works. If you don’t have one, a wine bottle works surprisingly well—just dust it with flour first.
- Cookie cutters – Pumpkin, ghost, bat, and cat shapes are my go-to for Halloween. A 2.5-inch size is ideal for party portions. Amazon has cheap sets that work fine.
- Baking sheets – Two sheets, preferably light-colored metal. Dark sheets can cause the bottoms to brown too quickly.
- Parchment paper or silicone baking mats – Parchment is cheaper, but silicone mats are reusable and give consistent results. I use both depending on what’s clean.
- Wire cooling rack – Essential for even cooling. If you don’t have one, let the cookies cool on the baking sheet for a few extra minutes before transferring to a plate.
- Piping bags or zip-top bags – For the icing. I use disposable piping bags with a small round tip, but a zip-top bag with a tiny corner snipped off works perfectly for the ghost faces.
- Small offset spatula – Nice for spreading icing, but a butter knife works too.
I bought my first set of Halloween cookie cutters at a dollar store five years ago, and they’re still going strong. Don’t feel pressured to buy expensive equipment. The cookies don’t care if your pumpkin cutter cost two dollars or twenty.
Preparation Method
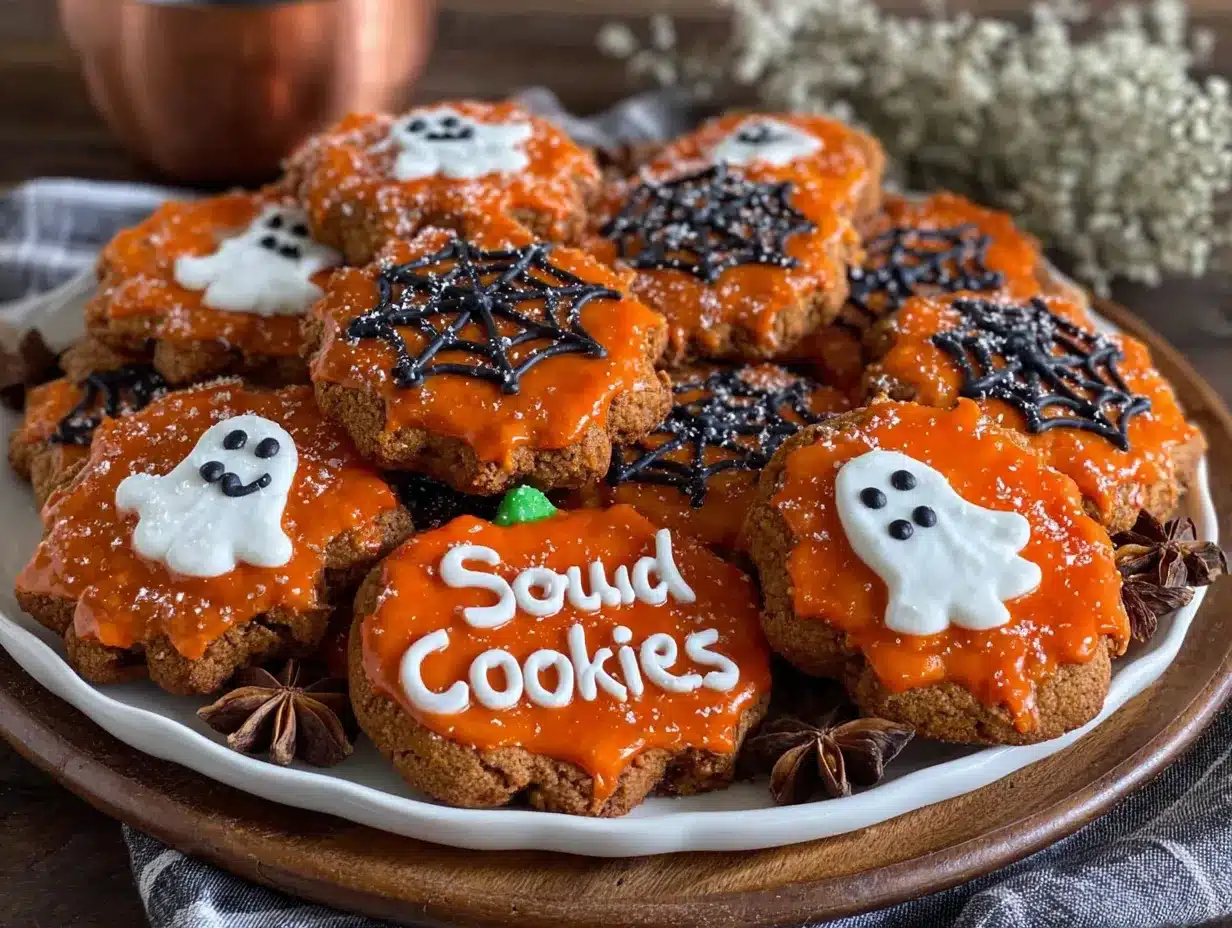
Alright, let’s get into it. I’ll walk you through every step, including the little things I’ve learned from making these cookies about fifteen times. Set aside about 30 minutes for mixing, then at least 2 hours for chilling, then another 30 minutes for baking and decorating. It’s a process, but it’s a relaxing one—perfect for a rainy October afternoon.
Step 1: Mix the Dry Ingredients
In a medium bowl, whisk together 2 ½ cups all-purpose flour, 1 teaspoon baking powder, ½ teaspoon baking soda, ½ teaspoon salt, 2 teaspoons pumpkin pie spice, and ½ teaspoon ground cinnamon. Whisk until everything is evenly distributed. This takes about 30 seconds. Set it aside.
Personal tip: I always whisk the dry ingredients first because it forces me to slow down. If I start with the wet ingredients, I’m tempted to rush through the dry mixing later, and that’s when you end up with pockets of baking powder that make one cookie taste weird.
Step 2: Cream the Butter and Sugars
In a large bowl, beat ¾ cup softened unsalted butter with ½ cup granulated sugar and ½ cup packed light brown sugar. Use your hand mixer on medium speed for about 2-3 minutes, until the mixture is light and fluffy. You’ll see it change from a dense yellow to a paler, almost whipped texture. Scrape down the sides of the bowl with your spatula halfway through.
Warning: Don’t over-cream. If you go too long, the cookies will spread too much in the oven. Stop when it looks fluffy and uniform. Trust your eyes on this one.
Step 3: Add the Wet Ingredients
Add 1 large egg, 1 teaspoon vanilla extract, and ¼ cup pumpkin puree to the butter mixture. Beat on low speed until just combined. It might look a little curdled at first—that’s the pumpkin puree separating from the butter. Don’t panic. Keep mixing for another 30 seconds, and it will come together into a smooth, creamy batter. Scrape the bowl again.
Sensory cue: At this point, the mixture should smell like fall. The pumpkin spice and vanilla will hit your nose, and you’ll know you’re on the right track.
Step 4: Combine Wet and Dry
Add the flour mixture to the wet ingredients in two additions. Mix on low speed after each addition, just until the flour disappears. Use your rubber spatula to fold the last bits of flour in by hand. This prevents over-mixing, which would make the cookies tough. The dough will be soft and slightly sticky, but it should hold together when pressed.
If the dough feels too sticky to handle, add one more tablespoon of flour. If it feels dry and crumbly, add one teaspoon of milk. Dough consistency varies based on humidity and pumpkin brand, so trust your hands.
Step 5: Chill the Dough
Divide the dough in half. Flatten each half into a disc about 1 inch thick. Wrap each disc tightly in plastic wrap. Refrigerate for at least 2 hours, or up to 3 days. I’ve also frozen the discs for up to 3 months—just thaw them in the fridge overnight before rolling.
This is the step you can’t skip. I learned this the hard way. The first time I made these, I was impatient and chilled the dough for only 30 minutes. The cookies spread into blobs. Cute blobs, but blobs nonetheless. The chilling solidifies the butter, which means the cookies hold their shape in the oven. Be patient.
Step 6: Preheat and Prep
When you’re ready to bake, preheat your oven to 350°F (175°C). Line two baking sheets with parchment paper or silicone mats. Take one disc of dough out of the fridge and let it sit at room temperature for about 5 minutes—just enough to be rollable without being rock hard.
Step 7: Roll and Cut
Lightly flour your work surface and rolling pin. Place the dough disc on the floured surface and roll it out to about ¼-inch thickness. Roll from the center outward, turning the dough occasionally to prevent sticking. Add more flour to the surface as needed, but don’t go overboard—too much flour will make the cookies dry.
Cut out your shapes using your Halloween cookie cutters. Press straight down and lift straight up—no twisting, which can seal the edges and prevent even baking. Transfer the cut cookies to the prepared baking sheets, leaving about 1.5 inches between them. Gather the scraps, press them together, re-roll, and cut more cookies. Repeat until you’ve used all the dough.
Personal anecdote: I once tried to rush this step and used a dull cutter. The ghost came out looking like a blob with a head. My friend’s kid called it “the sad ghost,” and honestly, it became a running joke. Now I always make sure my cutters are sharp.
Step 8: Bake
Bake for 8-10 minutes, or until the edges are just barely golden. The centers will look slightly underdone—that’s perfect. They’ll continue to set on the baking sheet. If you over-bake them, they’ll be crisp instead of tender, and you lose that soft texture that makes these cookies special.
Sensory cue: Your kitchen will smell like a pumpkin spice candle, but better. When you see the edges turn a pale gold, they’re done.
Step 9: Cool
Let the cookies cool on the baking sheet for 5 minutes. This is important—they’re fragile when hot. After 5 minutes, transfer them to a wire cooling rack to cool completely. Don’t even think about icing them while they’re warm. The icing will melt into a puddle, and you’ll have a sticky mess.
Step 10: Make the Icing
While the cookies cool, make the cream cheese icing. In a medium bowl, beat 4 oz softened cream cheese and ¼ cup softened unsalted butter together until smooth and creamy. Add 1 ½ cups powdered sugar and ½ teaspoon vanilla extract. Beat on low speed until combined, then increase to medium and beat for 2 minutes until fluffy. Add 1 tablespoon of milk and beat again. If the icing is too thick for piping, add another tablespoon of milk. If it’s too thin, add a little more powdered sugar.
Divide the icing into bowls if you want different colors. I usually keep about ⅔ of it white for ghosts and pumpkins, then color the rest orange and black. Gel food coloring is best—just dip a toothpick in and add a tiny bit at a time until you reach the desired shade.
Step 11: Decorate
Transfer the icing to piping bags or zip-top bags with a small corner snipped off. For ghosts, pipe a white blob shape and add two black dots for eyes. For pumpkins, pipe an orange outline and fill it in, then add a green stem. For bats, use black icing to outline the shape. Add candy eyes or sprinkles while the icing is still wet.
Tip: Don’t stress about perfection. I’ve had cookies where the ghost eyes are uneven, and honestly, it makes them cuter. The “spooky cute” vibe is supposed to be slightly imperfect.
Cooking Tips & Techniques
I’ve made enough batches of these cookies to fill a small bakery, and I’ve picked up a few tricks along the way. Here’s what I wish someone had told me before my first attempt.
Chill the cut-out shapes. This is a game-changer. After you cut the cookies and place them on the baking sheet, pop the whole sheet in the fridge for 15 minutes before baking. This extra chill time ensures the cookies hold their shapes perfectly. I started doing this after my first batch of bat cookies came out looking like weird circles with wings. Now they’re crisp and defined.
Rotate your baking sheets halfway through. Every oven has hot spots. Halfway through the bake time, swap the top sheet to the bottom and vice versa, and rotate each sheet 180 degrees. This ensures even browning. I forgot to do this once, and the cookies on the back left corner came out darker than the rest. Not the end of the world, but annoying when you’re trying to present a uniform platter.
Use a light touch with the flour. When rolling out the dough, it’s tempting to dust the surface generously to prevent sticking. But too much flour makes the cookies dry and less tender. Use a light dusting, and if the dough starts sticking, scrape it up gently with a bench scraper and add a tiny bit more flour. The dough should feel soft but not tacky.
Don’t over-mix the icing. Cream cheese icing can go from smooth to runny if you beat it too long. Mix just until it’s combined and fluffy. If it gets too thin, pop it in the fridge for 10 minutes to firm up before piping.
Make the cookies a day ahead. These cookies actually taste better the next day. The flavors meld together, and the texture softens slightly. I bake them the day before my party, let them cool completely, store them in an airtight container, and ice them the morning of. This spreads out the work and reduces party-day stress.
One mistake I made: I once tried to double the recipe and mix it all in one bowl. The dough was too much for my hand mixer, and I ended up with unevenly mixed ingredients. Now I make two separate batches if I need a double quantity. It takes a little longer, but the results are consistent.
Variations & Adaptations
These cookies are versatile, and I’ve tried several variations over the years. Here are some of my favorites, along with notes on what worked and what didn’t.
Vegan Version: I made these for a friend who’s vegan, and they turned out surprisingly well. Substitute the butter with vegan butter (I used Earth Balance), the egg with a flax egg (1 tablespoon ground flaxseed mixed with 3 tablespoons water, let sit for 5 minutes), and the cream cheese with vegan cream cheese (Miyoko’s is my go-to). The cookies were slightly less tender, but the flavor was spot-on. The icing was a little thinner, so I added an extra ¼ cup of powdered sugar to thicken it.
Gluten-Free Adaptation: Use a 1:1 gluten-free flour blend. I’ve tested this with Bob’s Red Mill, and it works well. The dough is a bit more fragile, so handle it gently when rolling and cutting. Bake for an extra 1-2 minutes since gluten-free flours often need a little more time. The texture is slightly crumblier but still delicious.
Chocolate Pumpkin Spice: For a richer flavor, replace ¼ cup of the all-purpose flour with unsweetened cocoa powder. The chocolate and pumpkin spice combination is surprisingly good—it’s like a Mexican hot chocolate in cookie form. I made these for a Halloween party last year, and they disappeared faster than the regular ones.
Extra Spicy: If you like a stronger spice kick, add ¼ teaspoon of ground ginger and a pinch of cayenne pepper to the dry ingredients. The cayenne adds a subtle warmth that complements the pumpkin spice without making the cookies spicy. My brother-in-law, who claims to hate pumpkin-flavored things, ate four of these before I told him what was in them.
No-Icing Version: If you’re short on time or want a simpler cookie, skip the icing entirely. Before baking, press a few chocolate chips or candy corn into the tops of the cookies for a festive look. Or roll the dough balls in cinnamon sugar before flattening and cutting. These are great for kids’ parties where icing might get messy.
Personal variation I love: I sometimes add ½ cup of finely chopped pecans to the dough. It adds a nice crunch and makes the cookies feel more grown-up. I did this for a Halloween dinner party where the guests were all adults, and everyone commented on the texture. Just make sure the pecans are chopped very fine so they don’t interfere with the cookie shapes.
Serving & Storage Suggestions
These cookies are designed for a party, so let’s talk about how to serve them in a way that impresses your guests without making you crazy.
Serving Temperature: Serve these at room temperature. If you’ve iced them, let the icing set for at least 30 minutes before stacking or arranging on a platter. I usually ice them in the morning and leave them on the counter (covered loosely with a clean kitchen towel) until the party starts. The icing firms up nicely, and the cookies stay perfectly tender.
Presentation Ideas: Arrange the cookies on a large wooden board or a white platter for contrast. Group them by shape—ghosts together, pumpkins together, bats together—for a visually appealing display. Add a few mini pumpkins or fall leaves around the edges for a festive touch. I once arranged them on a tiered stand with the ghosts on top and the pumpkins on the bottom, and it looked like a Halloween dessert tower. My guests took photos before they even grabbed a cookie.
What to Serve Alongside: These cookies pair beautifully with warm apple cider, hot chocolate, or a spiced chai latte. For an adult gathering, set out a pitcher of mulled wine or a pumpkin spice cocktail. The cookies are sweet but not cloying, so they work well with both hot and cold drinks. I also like to serve them alongside a cheese board with sharp cheddar and apple slices—the savory-sweet combination is unexpected and delicious.
Storage Instructions: Store the cookies in an airtight container at room temperature for up to 5 days. If you’ve iced them, place a piece of parchment paper between layers to prevent sticking. Don’t refrigerate them—the fridge dries out the cookies and makes the icing weep. If you need to store them longer, freeze the un-iced cookies for up to 3 months. Thaw at room temperature, then ice and serve.
Reheating: These cookies are best at room temperature, but if you want a warm cookie, pop one in the microwave for 10 seconds. The icing will get slightly melty, which is actually kind of nice. I wouldn’t recommend reheating a whole batch—just do individual cookies as you eat them.
Flavor Development: I’ve noticed that these cookies taste even better on day two. The pumpkin spice flavor deepens and the texture becomes more tender. So don’t stress about making them fresh the day of the party. Bake them a day or two ahead, and your guests will still rave.
Nutritional Information & Benefits
Let’s be real—these are cookies. They’re a treat, not a health food. But I think it’s still helpful to know what’s in them, especially if you’re serving guests with dietary concerns.
Estimated Nutritional Values (per cookie, based on 30 cookies):
- Calories: 145
- Fat: 7g
- Saturated Fat: 4g
- Carbohydrates: 19g
- Sugar: 11g
- Protein: 2g
- Fiber: 0.5g
- Sodium: 85mg
Health Benefits of Key Ingredients: Pumpkin puree is packed with vitamin A and fiber, which is a nice bonus. The pumpkin pie spice contains cinnamon, which has anti-inflammatory properties. And the cream cheese in the icing adds a small amount of calcium. Of course, these benefits are minimal in the context of a cookie, but it’s nice to know there’s something slightly redeeming in there.
Dietary Considerations: This recipe contains gluten, dairy, and eggs. For gluten-free and vegan variations, see the section above. The cookies are nut-free as written, but if you add the pecan variation, be sure to label them for guests with allergies. I always put a small card next to the platter listing the main allergens—it’s a small gesture that guests really appreciate.
My Perspective: I believe in balance. These cookies are meant to be enjoyed, not analyzed. I make them for Halloween because they bring people together and make the party feel special. One cookie isn’t going to derail anyone’s health goals. So go ahead, have two. Or three. It’s Halloween.
Conclusion
These spooky cute pumpkin spice sugar cookies have become my go-to Halloween treat for a reason. They’re easy enough for a beginner baker but impressive enough to make you look like a pro. The flavor is warm and cozy, the texture is soft and tender, and the decorating is fun without being stressful. Plus, they’re designed for hosting—make-ahead friendly, crowd-pleasing, and beautiful on a platter.
I love that these cookies have become a tradition. Every October, I pull out my Halloween cookie cutters, crank up the spooky playlist, and spend an afternoon making dough. It’s become my favorite pre-party ritual, a quiet moment before the chaos of hosting. And when I see guests grabbing a second cookie, or when Cara texts me asking when the cookies are ready, I know it’s worth it.
I’d love to see your versions. Tag me in your photos or leave a comment below telling me which shapes you made. Did you try the chocolate variation? Did your kids help decorate? I want to hear about the ghosts with uneven eyes and the pumpkins that look more like blobs. Those are the ones that make me smile.
So go ahead—preheat that oven, dust off your rolling pin, and make some memories. These cookies are more than a recipe. They’re a little piece of fall happiness, and I’m so glad I get to share them with you.
Frequently Asked Questions
Can I use pumpkin pie filling instead of pumpkin puree?
No, please don’t. Pumpkin pie filling is pre-sweetened and spiced, which will throw off the sugar and spice balance in this recipe. Stick with 100% pure pumpkin puree. Libby’s is my go-to brand because it’s consistent and not too watery.
Why did my cookies spread too much?
This usually happens for one of three reasons: the dough wasn’t chilled long enough, the butter was too soft, or the baking sheet was too warm. Make sure you chill the dough for at least 2 hours, and let the baking sheets cool completely between batches. Also, try chilling the cut-out cookies on the baking sheet for 15 minutes before baking—this makes a huge difference.
Can I freeze the dough?
Absolutely. Wrap the dough discs tightly in plastic wrap, then place them in a freezer bag. They’ll keep for up to 3 months. When you’re ready to bake, thaw the dough in the fridge overnight, then roll and cut as directed. I’ve done this multiple times, and the cookies turn out just as good as fresh.
How do I get clean, sharp cookie shapes?
Make sure your cookie cutters are sharp and you’re pressing straight down without twisting. Also, keep the dough cold. If the dough gets too warm and sticky while you’re rolling and cutting, pop it back in the fridge for 10-15 minutes. A well-floured surface helps too, but don’t overdo it—too much flour can make the cookies dry.
Can I make these cookies without a hand mixer?
Yes, you can mix everything by hand. Soften the butter really well (almost to the point of being very soft but not melted), and use a wooden spoon to cream it with the sugars. It’ll take a bit more elbow grease, but it works. Just make sure you cream until the mixture is light and fluffy, which might take 4-5 minutes of vigorous stirring.
Pin This Recipe!
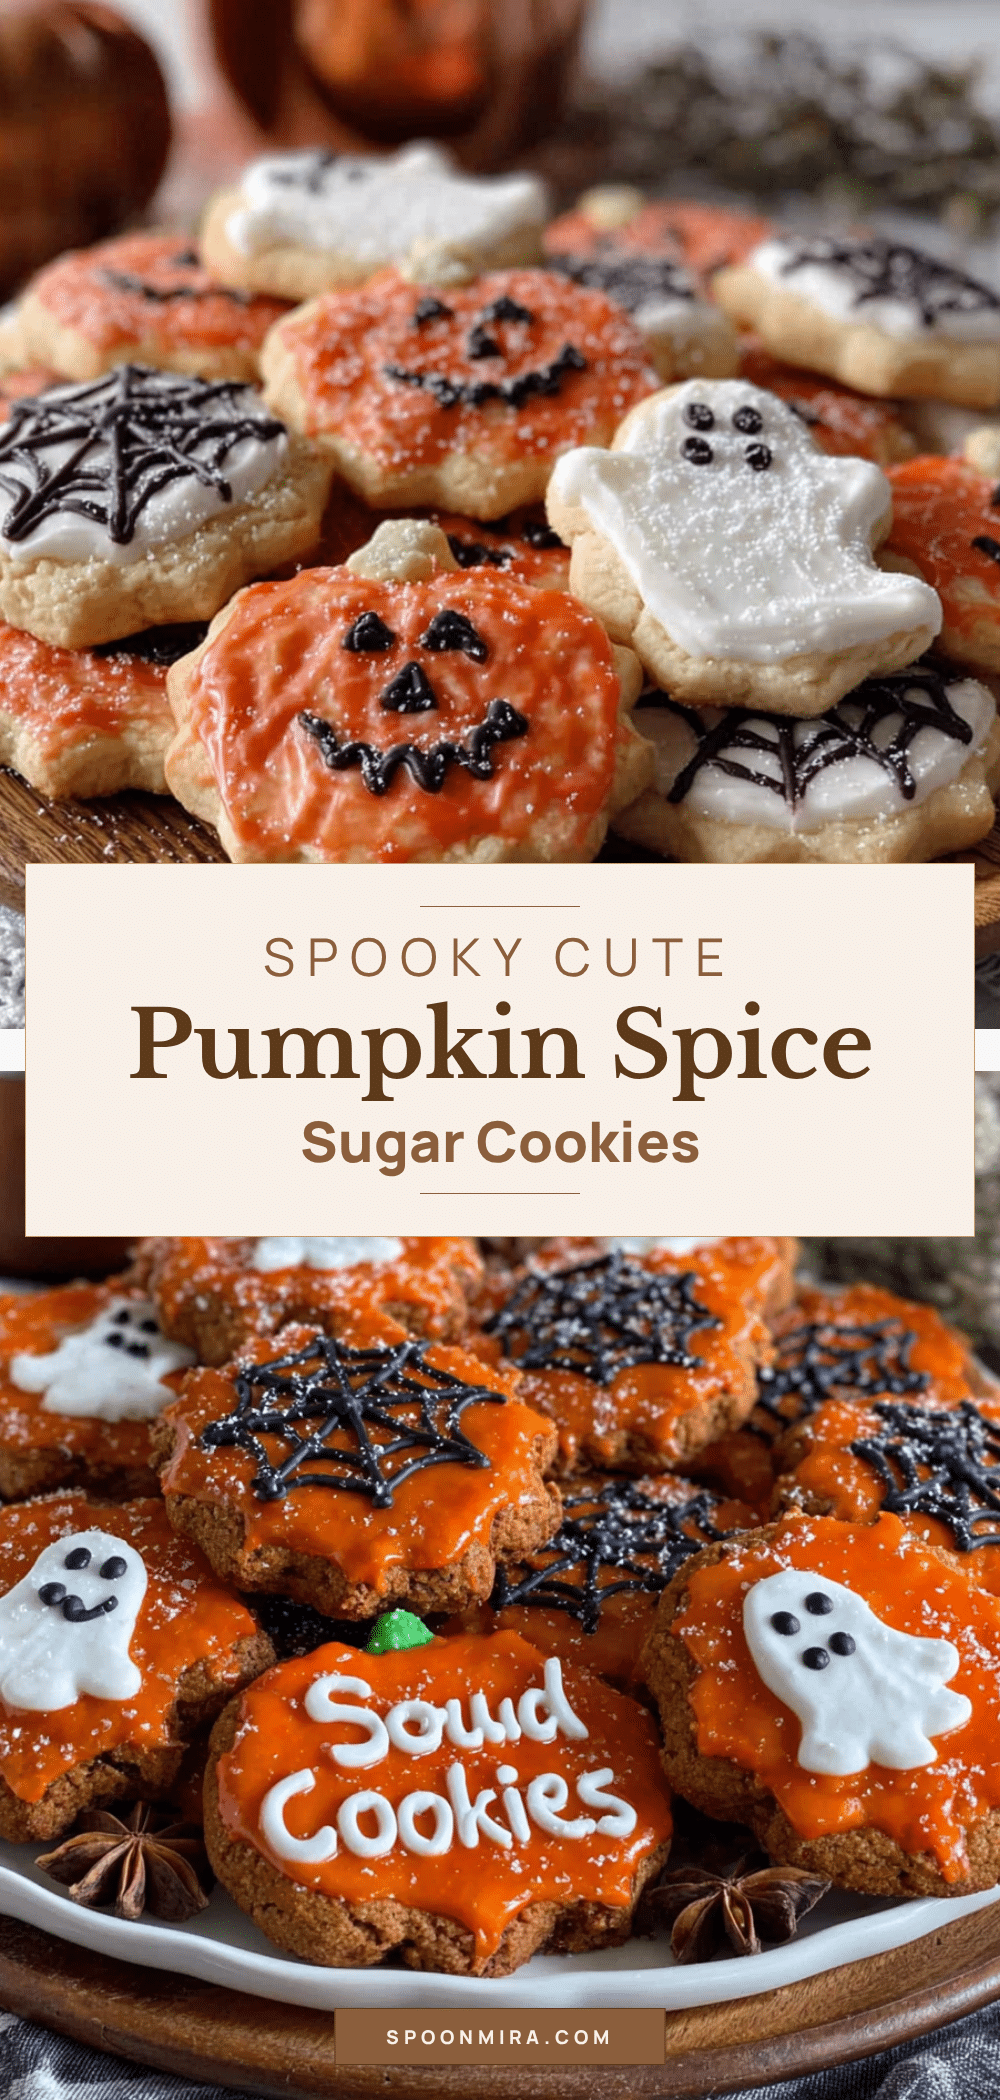
Spooky Cute Pumpkin Spice Sugar Cookies: Best Easy Halloween Treat

These spooky cute pumpkin spice sugar cookies are soft, tender, and full of warm fall flavor. Easy to make and perfect for Halloween parties, they hold their shape beautifully and are a crowd-pleaser for kids and adults alike.
- Prep Time: 30 minutes
- Cook Time: 10 minutes
- Total Time: 2 hours 40 minutes (includes chilling)
- Yield: 30 cookies 1x
- Category: Dessert
- Cuisine: American
Ingredients
- 2 ½ cups all-purpose flour
- 1 teaspoon baking powder
- ½ teaspoon baking soda
- ½ teaspoon salt
- 2 teaspoons pumpkin pie spice
- ½ teaspoon ground cinnamon
- ¾ cup unsalted butter, softened
- ½ cup granulated sugar
- ½ cup packed light brown sugar
- 1 large egg, room temperature
- 1 teaspoon vanilla extract
- ¼ cup pumpkin puree (not pumpkin pie filling)
- 4 oz cream cheese, softened
- ¼ cup unsalted butter, softened
- 1 ½ cups powdered sugar
- ½ teaspoon vanilla extract
- 1–2 tablespoons milk
- Orange and black gel food coloring
- Sprinkles or candy eyes (optional)
Instructions
- In a medium bowl, whisk together flour, baking powder, baking soda, salt, pumpkin pie spice, and cinnamon. Set aside.
- In a large bowl, beat softened butter, granulated sugar, and brown sugar with a hand mixer on medium speed until light and fluffy, about 2-3 minutes.
- Add egg, vanilla extract, and pumpkin puree to the butter mixture. Beat on low speed until just combined. The mixture may look curdled at first but will come together.
- Add the flour mixture to the wet ingredients in two additions, mixing on low speed after each until just combined. Fold in any remaining flour with a rubber spatula. The dough should be soft and slightly sticky.
- Divide the dough in half, flatten each half into a 1-inch thick disc, wrap tightly in plastic wrap, and refrigerate for at least 2 hours or up to 3 days.
- Preheat oven to 350°F (175°C). Line baking sheets with parchment paper or silicone mats.
- Lightly flour a work surface and rolling pin. Roll one disc of dough to ¼-inch thickness. Cut into shapes with Halloween cookie cutters. Transfer to prepared baking sheets, spacing 1.5 inches apart.
- Bake for 8-10 minutes, until edges are just barely golden. Centers will look slightly underdone. Cool on baking sheet for 5 minutes, then transfer to a wire rack to cool completely.
- For the icing: Beat softened cream cheese and butter until smooth. Add powdered sugar and vanilla, beat until fluffy. Add milk 1 tablespoon at a time to reach desired consistency. Divide and color with gel food coloring as desired.
- Decorate cooled cookies with icing using piping bags or zip-top bags. Add sprinkles or candy eyes while icing is wet. Let icing set for at least 30 minutes before serving.
Notes
Chill the cut-out shapes on the baking sheet for 15 minutes before baking for cleaner edges. Rotate baking sheets halfway through baking for even browning. Cookies taste even better the next day. Store in an airtight container at room temperature for up to 5 days. Freeze un-iced cookies for up to 3 months.
Nutrition
- Serving Size: 1 cookie
- Calories: 145
- Sugar: 11
- Sodium: 85
- Fat: 7
- Saturated Fat: 4
- Carbohydrates: 19
- Fiber: 0.5
- Protein: 2
Keywords: pumpkin spice, sugar cookies, Halloween cookies, spooky cookies, fall baking, easy cookie recipe, cream cheese icing


