I wasn’t expecting cooking advice from my accountant, but there I was, knee-deep in spreadsheets during an April tax appointment, watching him sketch a pepper on a sticky note. “You need to make these for your blog,” he said, pushing the drawing across his cluttered desk. “My wife calls them mummy bites. They’re the only thing my kids actually fight over at Halloween.” I blinked at him—this was the same man who once corrected my mileage deduction by 14 cents. But the way he described the cream cheese filling oozing around a jalapeño, wrapped in a crescent roll bandage… let me tell you, I forgot all about Schedule C.
Honestly, the whole thing felt like a fever dream. I mean, here was this buttoned-up numbers guy getting genuinely animated about a Halloween appetizer. He even drew little eyes on his pepper sketch with a red pen. “You gotta use the toothpicks for the eyes,” he insisted. “Makes ’em look spooky, not sad.” I walked out of there with tax forms and a recipe scribbled on an envelope. That night, I made my first batch of Spooky Mummy Jalapeño Popper Bites, and honestly? It was the best thing to come out of tax season, ever.
The magic of these bites is how they nail that perfect Halloween vibe without any fussy decorating. You get the classic jalapeño popper heat, the creamy coolness from the filling, and that flaky, golden crust that looks exactly like mummy bandages. My accountant buddy was right—the toothpick eyes are genius. So if you’re looking for the perfect Spooky Mummy Jalapeño Popper Bites for Halloween, you’ve come to the right place. Maybe you’ve been there, scrambling for a last-minute party snack that actually looks like you tried? These are it.
Why You’ll Love This Recipe
Let’s be real for a second. Halloween appetizers can be a total pain. You either spend hours carving something into a pumpkin shape, or you buy a bag of chips and call it a day. These Spooky Mummy Jalapeño Popper Bites are the glorious middle ground—they look like you fussed for an hour, but they come together in about 30 minutes. I’ve tested this recipe about seven times (my neighbors have become very willing taste-testers), and here’s why it’s a total winner:
- Quick & Easy: From start to table in under 30 minutes. Perfect for that pre-trick-or-treating chaos when you need something fast.
- Simple Ingredients: You probably already have cream cheese, jalapeños, and crescent rolls in your fridge. No weird specialty items required.
- Perfect for Halloween Parties: These little mummies are the star of any spooky spread. Kids love them, adults fight over them—it’s a crowd-pleaser through and through.
- Unbelievably Delicious: The combo of spicy jalapeño, cool cream cheese, and flaky, buttery crust is next-level comfort food. That first bite with the crispy edges and the melty center? Pure magic.
- No Special Equipment: You don’t need a deep fryer or a piping bag. Just a baking sheet and your hands. That’s it.
What makes these different from every other jalapeño popper recipe out there is the wrapping technique. I spent a solid afternoon figuring out the perfect way to cut the crescent roll strips so they look like authentic mummy bandages—not sad, droopy snakes. The trick is to stretch the dough just a tiny bit as you wrap, which creates those lovely, uneven gaps that let the filling peek through. It’s a small detail, but it makes these bites look genuinely spooky instead of just messy. And honestly, that’s the whole point of Halloween food, right?
What Ingredients You Will Need
This recipe uses simple, wholesome ingredients to deliver bold flavor and satisfying texture without the fuss. Most of these are pantry staples you probably already have kicking around, especially if you’re a fan of game-day snacks. Here’s what you’ll need to round up for your Spooky Mummy Jalapeño Popper Bites for Halloween:
For the Filling
- 8 oz cream cheese, softened (I recommend Philadelphia for the smoothest texture—the cheap stuff can get grainy when baked)
- 1/2 cup shredded cheddar cheese (sharp cheddar gives the best flavor, but mild works fine too)
- 1/4 cup grated Parmesan cheese (adds a salty, nutty depth that balances the heat)
- 1/2 teaspoon garlic powder (don’t skip this—it’s the secret to making the filling taste restaurant-quality)
- 1/4 teaspoon smoked paprika (optional, but it adds a lovely smoky undertone)
- Salt and black pepper to taste (go easy on the salt—the cheeses are already salty)
For the Poppers

- 12 large jalapeño peppers (look for ones that are fat and evenly shaped—they’re easier to fill and wrap)
- 1 can (8 oz) refrigerated crescent roll dough (Pillsbury is my go-to, but any brand works)
- 24 candy eyeballs (or use black sesame seeds and a dab of cream cheese for a natural version)
- 1 tablespoon olive oil or melted butter (for brushing the tops—gives that golden, glossy finish)
Ingredient Tips from My Kitchen
Let me save you some trouble here. The first time I made these, I used low-fat cream cheese, and the filling turned out watery and sad. Trust me on this—use the full-fat stuff. It holds up better in the oven and gives you that luscious, creamy texture that makes poppers so addictive. Also, wear gloves when you’re handling the jalapeños. I learned this the hard way when I rubbed my eye an hour after prepping these and spent the next 20 minutes in absolute misery. Not my finest moment.
For the crescent rolls, you want the original version, not the flaky layers or the buttermilk kind. The original dough is stretchy enough to wrap around the peppers without tearing, and it bakes up with that perfect golden-brown color. If you’re feeling ambitious, you can make your own pizza dough from scratch, but honestly, the canned stuff works beautifully here and keeps this recipe in the “easy” category.
Equipment Needed
- Baking sheet (a rimmed half-sheet pan works best—prevents any filling drips from hitting the oven floor)
- Parchment paper or silicone baking mat (non-negotiable—these will stick to a bare pan)
- Sharp knife or kitchen shears (for cutting the crescent roll dough into strips)
- Small mixing bowl (for combining the filling ingredients)
- Rubber spatula (for mixing the filling until smooth)
- Cutting board (dedicated one for the jalapeños—the capsaicin lingers)
- Disposable gloves (trust me on this one—buy a box at the grocery store)
- Small spoon or piping bag (a piping bag makes filling the peppers way faster, but a small spoon works fine)
- Pastry brush (for brushing the tops with oil or butter)
You don’t need anything fancy here. I’ve made these in a tiny apartment kitchen with a dollar-store baking sheet, and they turned out great. If you don’t have a piping bag, just snip the corner off a zip-top bag—works like a charm. And if you’re using a baking sheet that’s seen better days, just line it with parchment paper and you’re golden.
Preparation Method
Alright, let’s get down to business. Here’s how to make these Spooky Mummy Jalapeño Popper Bites for Halloween step by step. I’ve included all the little tricks I learned from my many, many test batches (and my accountant’s wife’s original instructions).
- Preheat your oven to 375°F (190°C). Line a baking sheet with parchment paper or a silicone mat. This is important—if you skip the lining, the crescent dough will stick and you’ll be peeling mummies off the pan instead of serving them.
- Put on those gloves. Seriously. I know I said it already, but I’m saying it again. Slice each jalapeño in half lengthwise, from stem to tip. Use a small spoon to scrape out the seeds and white membranes. The membranes are where most of the heat lives, so if you want milder poppers, scrape them clean. If you like it spicy, leave a little bit in. Set the hollowed-out jalapeño halves aside on a plate.
- Make the filling. In a small bowl, combine the softened cream cheese, shredded cheddar, Parmesan, garlic powder, smoked paprika (if using), and a pinch of salt and pepper. Mix until everything is smooth and well combined. Taste a tiny bit—it should be creamy, cheesy, and just a little tangy. Adjust the seasoning if needed.
- Fill the peppers. Spoon or pipe the cream cheese mixture into each jalapeño half, mounding it slightly in the center. Don’t overfill—you want about a tablespoon per half, maybe a little more for the big ones. The filling will puff up a bit as it bakes, so leave a little room. Place the filled peppers on the prepared baking sheet, cut-side up.
- Prepare the mummy bandages. Unroll the crescent roll dough and separate it along the perforations into 8 rectangles. Pinch the diagonal seams together so you have 8 solid rectangles. Using a sharp knife or kitchen shears, cut each rectangle lengthwise into 3 or 4 thin strips. You want them about 1/2-inch wide—thin enough to look like bandages, but thick enough that they won’t tear when you wrap them.
- Wrap the mummies. Take a dough strip and wrap it around a filled jalapeño half, crossing it over the top like you’re bandaging a tiny finger. Leave a small gap near the center of the pepper so the filling is visible—that’s where the eyes will go. Don’t wrap too tightly, or the dough will squeeze the filling out as it bakes. Just let it drape naturally. Repeat with the remaining peppers. You’ll have some dough strips left over—that’s normal.
- Add the eyes. Press two candy eyeballs into the exposed cream cheese filling on each mummy. If you’re using black sesame seeds, dab a tiny bit of cream cheese on the back to make them stick. Position them close together for a cute look, or slightly apart for a derpy, confused mummy face—both are adorable.
- Brush with oil or butter. Lightly brush the exposed dough strips with olive oil or melted butter. This step is key for getting that beautiful golden-brown color. Skip it, and your mummies will look pale and sad.
- Bake for 12-15 minutes, or until the dough is golden brown and the filling is hot and bubbly. Keep an eye on them after the 12-minute mark—ovens vary, and you don’t want the dough to burn. The filling should be visibly bubbling around the edges.
- Let them rest for 5 minutes on the baking sheet before serving. This is the hardest part, I know. But the filling is molten-hot straight out of the oven, and letting them cool slightly prevents burned tongues and sad faces. Plus, the dough gets a little crispier as it sits.
Cooking Tips & Techniques
I’ve made these Spooky Mummy Jalapeño Popper Bites for Halloween at least a dozen times now, and I’ve definitely learned a few things the hard way. Let me save you some kitchen drama.
The great dough disaster of 2023. The first time I made these, I wrapped the dough strips too tightly, and every single mummy burst open in the oven. Filling went everywhere. It looked like a crime scene in my kitchen. The fix? Wrap the dough loosely—think of it like a cozy blanket, not a straitjacket. The dough will shrink slightly as it bakes, so leaving a little slack gives it room to expand without tearing.
Watch your oven temperature. My oven runs hot, so I actually bake these at 365°F instead of 375°F. If your oven tends to burn things on the bottom, slide the baking sheet onto the middle rack and check it at the 10-minute mark. You want golden brown, not burnt-to-a-crisp brown.
Make-ahead tip: You can prep the jalapeños and the filling a day in advance. Just store the hollowed peppers and the filling separately in the fridge. When you’re ready to bake, fill and wrap them straight from the fridge—no need to let them come to room temperature. Just add 2-3 minutes to the baking time.
Don’t skip the parchment. I know it’s tempting to just spray the pan with cooking spray, but the crescent dough has a tendency to stick to bare metal. Parchment paper or a silicone mat makes cleanup a breeze and ensures your mummies come off the pan in one piece.
Multitasking strategy: While the mummies are baking, set up a dipping station. These are delicious on their own, but a side of ranch dressing or sour cream takes them over the top. I like to mix a little hot sauce into sour cream for an extra kick.
Variations & Adaptations
One of the best things about these Spooky Mummy Jalapeño Popper Bites for Halloween is how easy they are to customize. Here are some variations I’ve tried and loved:
- Vegetarian Version: This recipe is already vegetarian, but if you want to add some extra texture, toss in 1/4 cup of corn kernels or finely chopped mushrooms into the filling. It adds a nice pop of sweetness that balances the heat.
- Gluten-Free Adaptation: Swap the crescent roll dough for gluten-free pizza dough or gluten-free puff pastry. The texture will be slightly different, but the flavor is still fantastic. Just roll the dough out thin and cut it into strips the same way.
- Milder Version: If you’re serving kids or spice-wimps, use mini sweet bell peppers instead of jalapeños. They’re naturally sweet and have zero heat. The mummies will be a little smaller, but just as cute.
- Extra Spicy Version: For the heat-seekers out there, mix 1/4 teaspoon of cayenne pepper into the cream cheese filling, or use pepper jack cheese instead of cheddar. You could also leave a few seeds in the jalapeños for an extra kick.
- Bacon-Wrapped Mummies: Because everything is better with bacon, right? Cook 6 strips of bacon until crispy, then crumble them into the cream cheese filling. Or, wrap a half-strip of raw bacon around each mummy before adding the dough bandages. Just note that the bacon will need a few extra minutes in the oven to get crispy.
My personal favorite variation? I made a batch with smoked gouda instead of cheddar last Halloween, and they were gone in five minutes. The smoky flavor paired beautifully with the jalapeño heat. I’m honestly thinking about making that my default version from now on.
Serving & Storage Suggestions
These Spooky Mummy Jalapeño Popper Bites for Halloween are best served warm, straight from the oven. The dough is at its flakiest, the filling is melty, and the candy eyeballs are still firmly in place. Arrange them on a platter with a few extra candy eyeballs scattered around for a fun, spooky presentation.
What to serve with them: These mummies are fantastic on their own, but they pair beautifully with a few dips. Ranch dressing is the classic choice—the cool, herby flavor cuts through the heat. Sour cream works great too, especially if you stir in a little lime juice and cilantro. For a more sophisticated spread, serve them alongside a bowl of queso or a spicy chipotle mayo.
If you’re building a Halloween party menu, these mummies go wonderfully with a batch of slow-cooker chili, a platter of deviled eggs dyed with beet juice (they turn a lovely shade of pinkish-red), and a pitcher of sparkling apple cider with a few dry ice cubes for a smoky effect. The contrast of the hot, spicy poppers with something cold and sweet is just perfect.
Storage: Leftover mummies (if you somehow have any) can be stored in an airtight container in the refrigerator for up to 3 days. The dough will lose its crispiness, but they’ll still taste great. To reheat, pop them in a 350°F oven for 5-7 minutes, or until heated through. The microwave works in a pinch, but the dough will be soft and chewy rather than flaky.
Freezer instructions: You can freeze these before baking. Assemble the mummies completely, but don’t brush them with oil or butter. Place them on a baking sheet and freeze until solid, then transfer to a freezer bag. When you’re ready to bake, brush them with oil and bake straight from frozen, adding 5-7 minutes to the baking time. The candy eyeballs might shift a little during freezing, but they’ll still look adorable.
Nutritional Information & Benefits
Let’s be honest—these Spooky Mummy Jalapeño Popper Bites for Halloween are a treat, not a health food. But they’re not as bad as you might think. Here’s the rough breakdown for one mummy (based on 24 servings):
- Calories: 110-130
- Fat: 8-9g
- Carbohydrates: 7-8g
- Protein: 3-4g
- Fiber: 0.5g
- Sugar: 2-3g
Now, let’s talk about the good stuff. Jalapeños are packed with vitamin C—in fact, one pepper has more vitamin C than an orange. They also contain capsaicin, which is the compound that gives them their heat. Capsaicin has been shown to boost metabolism and reduce inflammation. The cream cheese and cheddar provide calcium and protein, which help keep you full. And the crescent dough? Well, it’s delicious, and that counts for something too.
Dietary considerations: This recipe contains dairy and gluten. For a dairy-free version, use vegan cream cheese and shredded vegan cheddar. For a gluten-free version, use gluten-free pizza dough as mentioned above. The recipe is naturally nut-free and egg-free.
My personal take? Halloween comes once a year. Enjoy the mummies. Pair them with a big salad or some veggie sticks if you’re feeling virtuous, but don’t stress about the calories. Life’s too short to skip the good stuff.
Conclusion
So there you have it—the story of how my accountant changed my Halloween game forever with a sticky-note sketch and a lot of enthusiasm. These Spooky Mummy Jalapeño Popper Bites for Halloween are everything I want in a party snack: they’re fun to make, adorable to look at, and absolutely delicious to eat. The combination of spicy, creamy, and flaky is unbeatable, and the mummy faces never fail to make people smile.
I love this recipe because it proves that you don’t need to be a professional chef or a crafty Pinterest pro to make something impressive. All you need is a few simple ingredients, a little patience, and a willingness to get cream cheese under your fingernails. And honestly? The mess is part of the fun.
Now I want to hear from you. Are you going to make these for your Halloween party? Did you try a fun variation? Maybe you added something wild like blue cheese or roasted garlic? Drop a comment below and tell me all about it. And if you snap a photo of your mummies, tag me—I love seeing your creations. Happy Halloween, and happy snacking!
Frequently Asked Questions
Can I make these Spooky Mummy Jalapeño Popper Bites in an air fryer?
Absolutely! Preheat your air fryer to 350°F (175°C). Place the mummies in a single layer in the basket (you may need to work in batches). Cook for 8-10 minutes, or until the dough is golden brown and the filling is bubbly. No need to flip them halfway through. The air fryer actually makes the dough extra crispy—it’s my preferred method now.
How do I keep the candy eyeballs from falling off during baking?
This is a common issue, and I’ve found two solutions. First, press the eyeballs firmly into the cream cheese filling before baking—they should be partially submerged. Second, if you’re worried about them shifting, you can add the eyeballs after baking. Just press them into the warm filling right when the mummies come out of the oven. They’ll stick perfectly.
Can I use pickled jalapeños instead of fresh?
I wouldn’t recommend it. Pickled jalapeños are already cooked and have a softer texture, so they tend to get mushy in the oven. They also have a very different flavor—more vinegar-forward than fresh peppers. Stick with fresh jalapeños for the best texture and heat level. If you can’t find fresh jalapeños, use mini sweet bell peppers instead.
How spicy are these mummies?
That depends entirely on how thoroughly you remove the seeds and membranes. If you scrape the jalapeños clean, they’ll have a mild warmth that most people can handle. If you leave some seeds in, they’ll be medium-spicy. For a truly mild version, use sweet bell peppers. For a fiery version, add cayenne to the filling and leave all the seeds in. I’d say they’re about a 3 out of 10 on the spice scale with the seeds removed.
Can I use a different type of dough for the bandages?
Yes! Crescent roll dough is the easiest option, but you can use puff pastry (cut into strips), refrigerated pizza dough (rolled thin), or even wonton wrappers (cut into strips). Each will give a slightly different texture. Puff pastry is the flakiest, pizza dough is the chewiest, and wonton wrappers get super crispy. Experiment and see which one you like best!
Pin This Recipe!
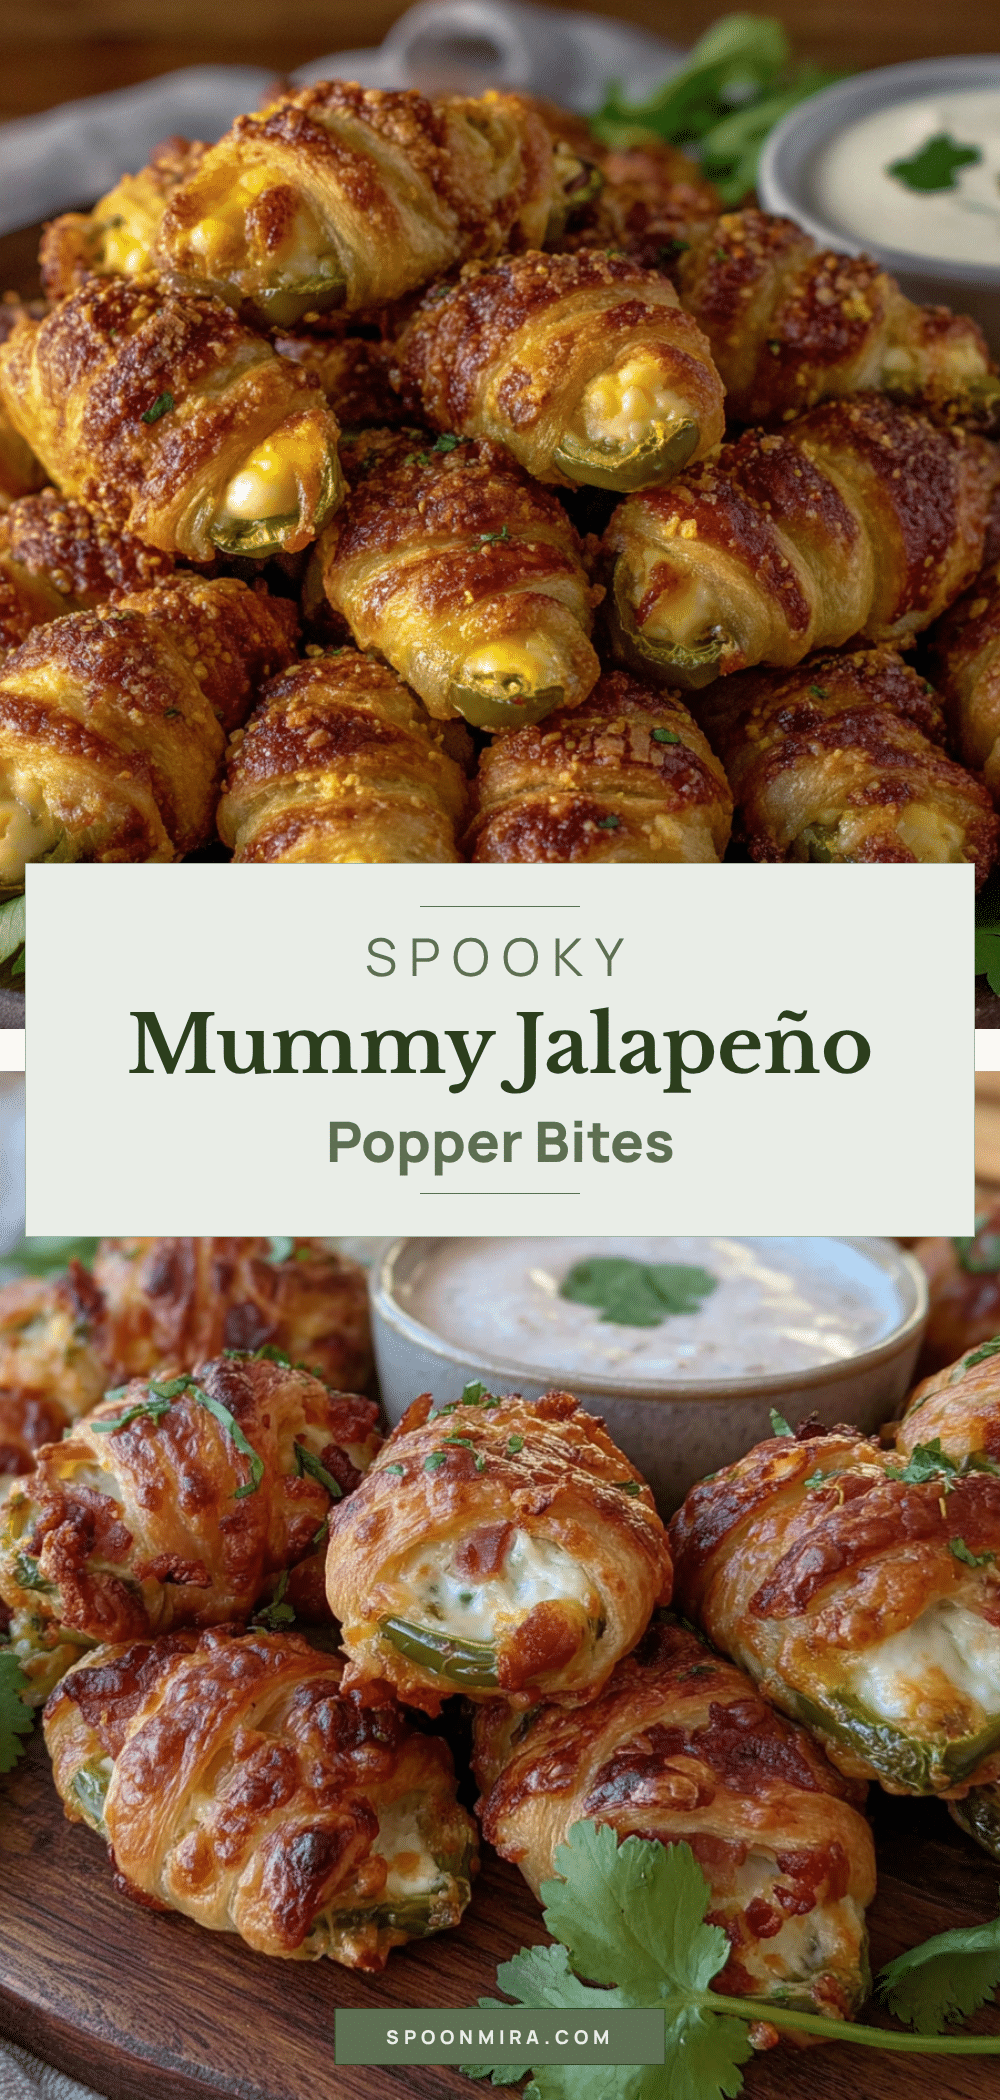
Spooky Mummy Jalapeño Popper Bites: Easy Halloween Appetizer

These Spooky Mummy Jalapeño Popper Bites are a fun and easy Halloween appetizer featuring spicy jalapeños filled with a creamy cheese mixture, wrapped in crescent roll bandages, and topped with candy eyeballs. Ready in under 30 minutes, they’re perfect for parties and guaranteed to be a crowd-pleaser.
- Prep Time: 15 minutes
- Cook Time: 15 minutes
- Total Time: 30 minutes
- Yield: 24 servings 1x
- Category: Appetizer
- Cuisine: American
Ingredients
- 8 oz cream cheese, softened
- 1/2 cup shredded cheddar cheese
- 1/4 cup grated Parmesan cheese
- 1/2 teaspoon garlic powder
- 1/4 teaspoon smoked paprika (optional)
- Salt and black pepper to taste
- 12 large jalapeño peppers
- 1 can (8 oz) refrigerated crescent roll dough
- 24 candy eyeballs
- 1 tablespoon olive oil or melted butter
Instructions
- Preheat your oven to 375°F (190°C). Line a baking sheet with parchment paper or a silicone mat.
- Put on disposable gloves. Slice each jalapeño in half lengthwise, from stem to tip. Use a small spoon to scrape out the seeds and white membranes. Set the hollowed-out jalapeño halves aside on a plate.
- In a small bowl, combine the softened cream cheese, shredded cheddar, Parmesan, garlic powder, smoked paprika (if using), and a pinch of salt and pepper. Mix until smooth and well combined.
- Spoon or pipe the cream cheese mixture into each jalapeño half, mounding it slightly in the center. Place the filled peppers on the prepared baking sheet, cut-side up.
- Unroll the crescent roll dough and separate it along the perforations into 8 rectangles. Pinch the diagonal seams together so you have 8 solid rectangles. Using a sharp knife or kitchen shears, cut each rectangle lengthwise into 3 or 4 thin strips, about 1/2-inch wide.
- Take a dough strip and wrap it around a filled jalapeño half, crossing it over the top like a bandage. Leave a small gap near the center of the pepper so the filling is visible. Repeat with the remaining peppers.
- Press two candy eyeballs into the exposed cream cheese filling on each mummy.
- Lightly brush the exposed dough strips with olive oil or melted butter.
- Bake for 12-15 minutes, or until the dough is golden brown and the filling is hot and bubbly.
- Let them rest for 5 minutes on the baking sheet before serving.
Notes
Wear gloves when handling jalapeños to avoid burning your skin. For milder poppers, scrape out all seeds and membranes. For extra crispiness, use an air fryer at 350°F for 8-10 minutes. Leftovers can be stored in an airtight container in the refrigerator for up to 3 days; reheat in a 350°F oven for 5-7 minutes.
Nutrition
- Serving Size: 1 mummy
- Calories: 120
- Sugar: 2.5
- Sodium: 200
- Fat: 8.5
- Saturated Fat: 4.5
- Carbohydrates: 7.5
- Fiber: 0.5
- Protein: 3.5
Keywords: Halloween appetizer, jalapeño popper, mummy bites, easy Halloween recipe, spooky snack, cream cheese jalapeño, crescent roll recipe


