I burned chicken tenders more times than I care to admit before I finally figured out the trick. Not just a little singed around the edges—I’m talking blackened, smoke-alarm-going-off, why-did-I-even-bother burned. And honestly? I was so frustrated I almost gave up on homemade tenders altogether. But then I stumbled onto this combination by accident one Tuesday night when I was out of breadcrumbs and too tired to go to the store. I had a packet of ranch seasoning in the back of the cabinet and some Parmesan that needed using up. So I just mixed them together, coated the chicken, and crossed my fingers. The result was so good I actually stood there in the kitchen eating one straight off the baking sheet. No dipping sauce. No plate. Just me and a perfectly crispy, golden tender that actually stayed crunchy. That was three years ago, and I haven’t made chicken tenders any other way since.
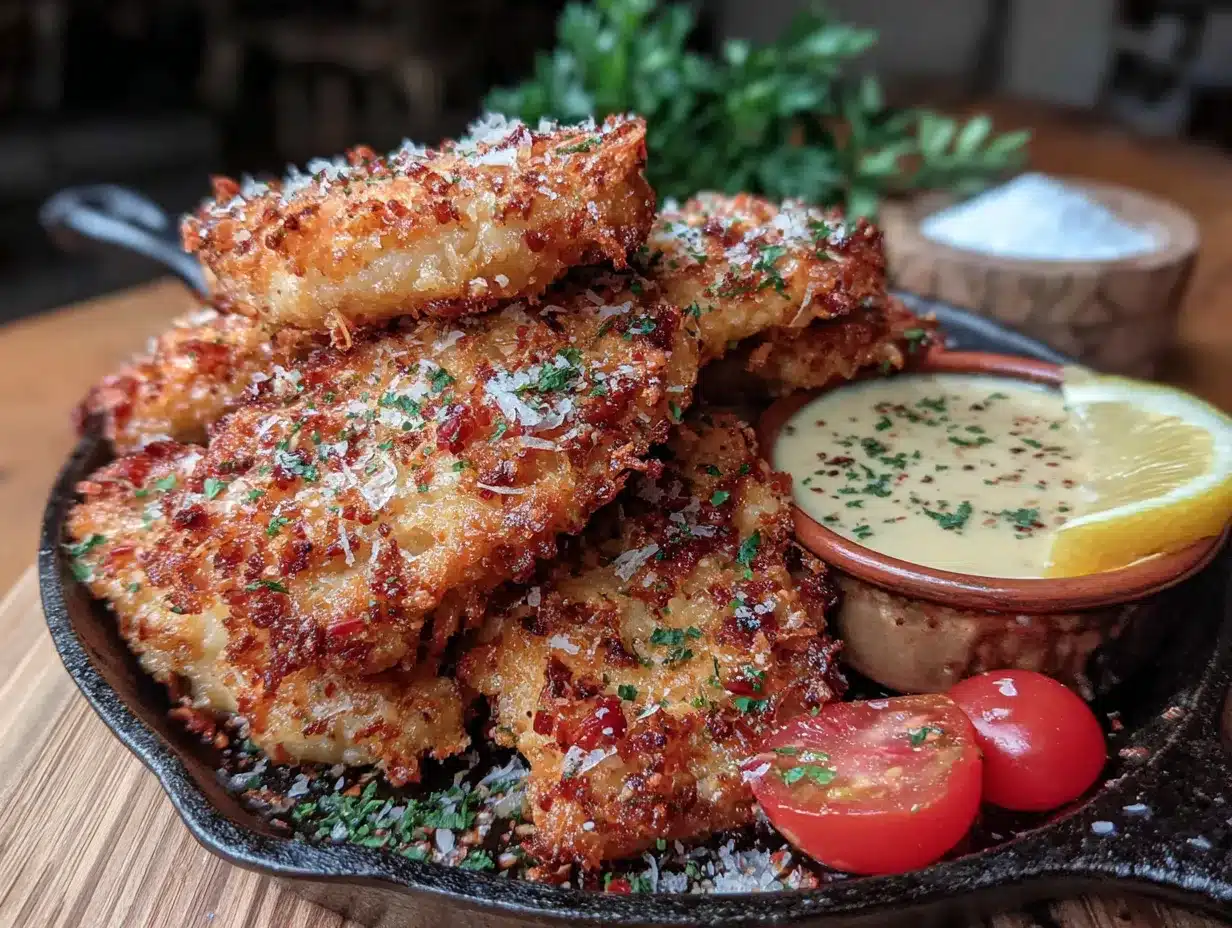
These crispy Parmesan ranch chicken tenders have become my go-to for busy weeknights when I need something fast but still want it to feel like a real meal. They come together in about 30 minutes flat, and the ingredients are things I almost always have on hand. The Parmesan creates this incredible crust that gets shatteringly crisp in the oven, while the ranch seasoning adds that savory, herby punch that makes you want to keep eating even after you’re full. It’s one of those recipes that started as a desperate kitchen experiment and turned into a family staple. And honestly? That’s usually how the best recipes happen.
Why You’ll Love This Recipe
I’ve tested this recipe more times than I can count—through different oven temperatures, coating ratios, and even a few air fryer experiments. What I’m sharing today is the version that worked every single time, no matter what. Here’s why these tenders are worth adding to your dinner rotation:
- Quick & Easy: From start to table in about 30 minutes. No marinating, no complicated steps, no stress.
- Simple Ingredients: You probably have most of this in your kitchen right now. The ranch seasoning is the only thing you might need to grab, and it’s a pantry staple worth keeping around.
- Perfect for Busy Weeknights: When you’re tired and hungry and the last thing you want to do is spend an hour cooking, these tenders save the day. They’re also great for meal prep—make a double batch and reheat throughout the week.
- Crowd-Pleaser: Kids love them. Adults love them. Picky eaters? They’ll ask for seconds. I’ve served these at game day gatherings and watched them disappear before the wings.
- Unbelievably Crispy Without Frying: This is the part that still surprises me. The Parmesan creates this golden, crunchy crust that stays crispy even after it cools. No deep frying needed, which means less mess and fewer calories.
What makes this recipe different from the dozens of other chicken tender recipes out there? It’s the combination of finely grated Parmesan and ranch seasoning that creates a coating that actually sticks to the chicken. I’ve tried versions where the breading falls off in the oven, leaving you with sad, bare chicken. Not here. The Parmesan acts as a binder while also creating that crispy texture, and the ranch seasoning infuses every bite with flavor. This isn’t just another chicken tender recipe—it’s the one you’ll come back to again and again.
There’s something about the first bite of these tenders that just makes you stop for a second. The crunch gives way to tender, juicy chicken, and that ranch-Parmesan flavor hits you right away. It’s comfort food that comes together fast enough for a Tuesday night but tastes like something you’d order at a restaurant. And honestly, that’s the kind of recipe every home cook needs in their back pocket.
What Ingredients You Will Need
This recipe uses simple, everyday ingredients that work together to create something genuinely special. The magic is in how they combine, not in fancy or hard-to-find items. Here’s what you’ll need:
For the Chicken Tenders
- 1½ pounds chicken tenders (or boneless skinless chicken breasts cut into strips) — Look for tenders that are roughly the same size so they cook evenly. If using chicken breasts, cut them into strips about 1 inch wide.
- 1 cup panko breadcrumbs — Panko gives the best crunch. Regular breadcrumbs work in a pinch, but the texture won’t be as crispy. I prefer the Japanese-style panko from the Asian section of the grocery store—it’s flakier and stays crunchier.
- ½ cup finely grated Parmesan cheese — This is important. Buy the finely grated stuff in the shaker container, not the shredded cheese from the deli section. The fine texture helps it stick to the chicken and creates that crispy crust. I recommend Kraft or Whole Foods 365 brand for consistent results.
- 1 packet (1 ounce) ranch seasoning mix — Hidden Valley is my go-to, but any brand works. You can also use homemade ranch seasoning if you have it on hand.
- ½ teaspoon garlic powder — Adds depth without overpowering the ranch flavor.
- ½ teaspoon onion powder — Rounds out the savory notes.
- ¼ teaspoon black pepper — Freshly ground is best, but pre-ground works fine.
- ¼ teaspoon salt — Go easy here since the Parmesan and ranch seasoning both contain salt.
For the Coating Base
- 2 large eggs — Acts as the glue that helps the coating stick. Room temperature eggs work best, but cold ones will do in a pinch.
- 2 tablespoons milk — Any kind works. Whole milk adds richness, but I’ve used almond milk and oat milk with good results.
- 1 tablespoon Dijon mustard — This is my secret ingredient. Don’t skip it. The mustard adds a subtle tang that brightens the whole dish and helps the coating adhere better. You won’t taste it in the final product, I promise.
For Serving (Optional but Recommended)
- Ranch dressing — For dipping, obviously.
- Honey — A little drizzle over the hot tenders is amazing.
- Fresh parsley — Chopped for garnish, if you’re feeling fancy.
- Lemon wedges — A squeeze of lemon right before eating brightens everything up.
Substitution Guidance: Need a gluten-free option? Use gluten-free panko breadcrumbs and check that your ranch seasoning is certified gluten-free. For a dairy-free version, swap the Parmesan with nutritional yeast (use about ¼ cup) and use dairy-free milk in the egg wash. The texture will be slightly different, but still delicious. If you don’t have ranch seasoning, you can make your own by mixing dried dill, parsley, chives, garlic powder, onion powder, and a pinch of salt. I’ve done this when I’ve run out, and it works beautifully.
Equipment Needed
You don’t need any fancy equipment for these tenders, which is part of why I love this recipe so much. Here’s what you’ll need:
- Baking sheet — A standard half-sheet pan works perfectly. Line it with parchment paper or aluminum foil for easy cleanup. I’ve used both, and parchment gives slightly crispier results because it doesn’t conduct heat as intensely as foil.
- Wire rack — This is optional but highly recommended. Placing a wire rack on the baking sheet allows air to circulate underneath the tenders, making them crispy all over instead of soggy on the bottom. I bought a basic cooling rack from the dollar store, and it’s made a huge difference.
- Three shallow bowls — For the coating station. I use wide soup bowls or pie plates. The wider the bowl, the easier it is to coat the chicken without making a mess.
- Tongs — For transferring the chicken from bowl to bowl without getting your hands too messy. You can use your hands, but tongs keep things cleaner.
- Measuring spoons — For the seasonings.
- Chef’s knife and cutting board — If you’re cutting whole chicken breasts into strips.
- Oven thermometer — Not strictly necessary, but ovens can be unreliable. I’ve had ovens that run 25 degrees hot, which can burn the coating before the chicken is cooked through. An oven thermometer is a cheap investment that saves a lot of frustration.
If you don’t have a wire rack, don’t worry. Just place the tenders directly on the parchment-lined baking sheet and flip them halfway through cooking. They won’t be quite as crispy on the bottom, but they’ll still be delicious. I’ve done it both ways, and honestly, my family didn’t notice the difference until I pointed it out.
Preparation Method
Let me walk you through this step by step. I’ve made these tenders dozens of times, and these are the exact steps that give the best results every single time.
- Preheat your oven to 400°F (200°C). Place a wire rack on a baking sheet and spray it lightly with cooking spray. If you don’t have a wire rack, just line the baking sheet with parchment paper. Getting the oven hot before you start is crucial—a hot oven creates that initial sizzle that helps the coating crisp up.
- Set up your coating station. In the first shallow bowl, whisk together the eggs, milk, and Dijon mustard until well combined. The mixture should be pale yellow and slightly frothy. In the second bowl, combine the panko breadcrumbs, finely grated Parmesan, ranch seasoning, garlic powder, onion powder, pepper, and salt. Use a fork to mix everything together until the seasonings are evenly distributed throughout the breadcrumbs.
- Prep the chicken. If you’re using whole chicken breasts, pat them dry with paper towels and cut them into strips about 1 inch wide. If you’re using pre-cut tenders, just pat them dry. Drying the chicken is important—excess moisture will make the coating slide off during baking. I learned this the hard way after making a batch of sad, naked chicken.
- Coat the chicken. Working with one piece at a time, dip a chicken strip into the egg mixture, letting any excess drip off. Then press it into the breadcrumb mixture, making sure it’s fully coated on all sides. I like to use one hand for the wet ingredients and one hand for the dry ingredients to keep from ending up with breadcrumb fingers. Place the coated tender on the prepared wire rack or baking sheet. Repeat with the remaining chicken strips, spacing them about an inch apart so they crisp up evenly.
- Bake for 15-18 minutes. Place the baking sheet in the preheated oven and bake for 15-18 minutes, or until the chicken is golden brown and cooked through. The internal temperature should reach 165°F (74°C) when checked with an instant-read thermometer. If you’re using a wire rack, you don’t need to flip them. If you’re baking directly on the sheet, flip them gently with tongs at the 8-minute mark to ensure even browning on both sides.
- Let them rest. This is the step everyone skips, but it makes a difference. Let the tenders rest on the baking sheet for 2-3 minutes after they come out of the oven. This allows the coating to set and helps it stay crispy instead of falling off when you pick them up. I know it’s hard to wait, but trust me on this one.
- Serve immediately. Transfer the tenders to a serving platter and sprinkle with fresh parsley if you’re using it. Serve with ranch dressing, honey, or your favorite dipping sauce. These are best eaten fresh out of the oven while the coating is still perfectly crispy.
Pro tip from my many batches: If you notice the coating isn’t sticking well to the chicken, your egg wash might be too thin. Add another egg or a splash more milk to thicken it up. Also, make sure you’re pressing the breadcrumb mixture firmly onto the chicken—don’t just dust it on. Really press it in so it adheres properly.
Cooking Tips & Techniques
After making these tenders more times than I can count, I’ve picked up a few tricks that make a real difference. Here’s what I’ve learned through trial and error:
The Parmesan matters more than you think. I’ve tried this recipe with freshly grated Parmesan from a block, and honestly, it doesn’t work as well. The pre-finely-grated stuff in the shaker container is actually better here because it’s so fine that it blends seamlessly with the breadcrumbs and creates a more even coating. Save the fancy block Parmesan for pasta dishes.
Don’t overcrowd the baking sheet. I made this mistake once when I was cooking for a crowd and tried to fit all the tenders on one sheet. They came out steamed instead of crispy because there wasn’t enough space for the hot air to circulate. Give each tender a little breathing room. If you’re making a double batch, use two baking sheets or bake in batches.
The mustard is non-negotiable. I know it sounds weird to put Dijon mustard in the egg wash for chicken tenders, but it’s the secret to getting the coating to stick. The mustard acts as a binder and adds a subtle tang that you won’t even notice in the finished dish. I skipped it once when I was out of mustard, and the coating slid right off the chicken. Never again.
Check your oven temperature. My old oven ran hot, and I burned more batches than I’d like to admit before I figured it out. If your tenders are browning too quickly on the outside but the chicken isn’t cooked through, your oven might be running hot. An oven thermometer is a cheap fix that saves a lot of frustration.
Patience with the resting time. I know you want to eat them immediately, and honestly, I’ve definitely stolen a few off the baking sheet while they were still too hot. But letting them rest for those 2-3 minutes really does make a difference in how crispy they stay. The coating needs that little bit of time to set up properly.
Variations & Adaptations
One of the best things about this recipe is how easily it adapts to different tastes and dietary needs. Here are some variations I’ve tried and loved:
Spicy Ranch Tenders: Add ½ teaspoon of cayenne pepper and ¼ teaspoon of smoked paprika to the breadcrumb mixture. The heat builds slowly and pairs beautifully with the cool ranch flavor. I make these when I want a little kick, and they’re amazing with blue cheese dressing for dipping.
Gluten-Free Version: Swap the panko breadcrumbs with gluten-free panko or crushed pork rinds for a low-carb option. I’ve used both, and the pork rind version is surprisingly good—extra crispy and almost addictive. Just make sure your ranch seasoning is certified gluten-free.
Air Fryer Method: Preheat your air fryer to 375°F (190°C). Place the coated tenders in a single layer in the air fryer basket, making sure they don’t touch. Cook for 8-10 minutes, flipping halfway through, until golden brown and cooked through. The air fryer version is even crispier than the oven version, and it cooks faster too. This is my preferred method when I’m only making a small batch.
Parmesan-Herb Variation: Add 1 tablespoon of dried Italian herbs (oregano, basil, thyme) to the breadcrumb mixture along with an extra ¼ cup of Parmesan. This version is wonderful served over pasta or with a simple marinara sauce for dipping. It feels more like a dinner than a snack.
Lemon-Pepper Twist: Replace the ranch seasoning with 1 tablespoon of lemon pepper seasoning and add the zest of one lemon to the breadcrumb mixture. The bright, citrusy flavor is perfect for summer meals and pairs beautifully with a side of roasted vegetables.
Dairy-Free Adaptation: Use nutritional yeast instead of Parmesan (about ¼ cup) and dairy-free milk in the egg wash. The nutritional yeast gives a cheesy, umami flavor that’s surprisingly close to the real thing. I’ve served this to dairy-free friends who didn’t even notice the difference.
Serving & Storage Suggestions
These tenders are versatile enough to work for almost any occasion, from a quick weeknight dinner to game day appetizers. Here’s how I like to serve and store them:
Serving: Serve the tenders hot out of the oven for the best texture. I like to arrange them on a large platter with a bowl of ranch dressing in the center for dipping. For a complete meal, pair them with a simple side salad, roasted vegetables, or crispy fries. They’re also amazing sliced up on top of a Caesar salad for a heartier lunch. If you’re serving them as an appetizer, set out a few different dipping sauces—ranch, honey mustard, barbecue, and sriracha mayo are all excellent choices.
Storage: Leftover tenders can be stored in an airtight container in the refrigerator for up to 4 days. The coating will soften slightly as they sit, but they’ll still taste great. I don’t recommend freezing these tenders, as the coating tends to get soggy when thawed. If you absolutely must freeze them, do it before baking—freeze the coated raw tenders on a baking sheet, then transfer to a freezer bag. Bake from frozen, adding 5-7 minutes to the cooking time.
Reheating: The best way to reheat these tenders is in the oven or air fryer. For the oven, place them on a wire rack over a baking sheet and reheat at 375°F (190°C) for 5-7 minutes. For the air fryer, reheat at 350°F (175°C) for 3-4 minutes. Avoid the microwave if you can—it will make the coating soft and chewy. If you’re in a hurry and must use the microwave, just know the texture won’t be the same.
Make-Ahead Tip: You can prep the coating mixture and egg wash ahead of time and store them separately in the refrigerator. When you’re ready to cook, just coat the chicken and bake. This saves a few minutes on busy nights and makes the process feel even easier.
Nutritional Information & Benefits
While these tenders are definitely a comfort food, they’re not as indulgent as you might think. Here’s the estimated nutritional breakdown per serving (about 4-5 tenders):
| Nutrient | Amount Per Serving |
|---|---|
| Calories | 385 |
| Protein | 42g |
| Carbohydrates | 18g |
| Fat | 16g |
| Saturated Fat | 6g |
| Cholesterol | 145mg |
| Sodium | 890mg |
| Fiber | 1g |
| Sugar | 2g |
These tenders are a good source of lean protein, which helps keep you full and satisfied. Chicken breast is naturally low in fat and high in protein, making it a great choice for balanced meals. The Parmesan adds calcium and a small amount of protein, while the panko breadcrumbs provide quick energy. If you’re watching your sodium intake, you can use a low-sodium ranch seasoning or make your own seasoning blend to control the salt level.
This recipe can easily fit into a balanced diet, especially when paired with vegetables or a side salad. For a lower-carb option, swap the panko for crushed pork rinds or almond flour. For a lighter version, use egg whites instead of whole eggs in the coating. I’ve made all these adjustments at different times, and the recipe is forgiving enough to handle them.
Conclusion
These crispy Parmesan ranch chicken tenders have become one of those recipes I always come back to, and I think they’ll become one of yours too. They’re quick enough for a busy weeknight but good enough to serve to guests who’ll think you spent way more time than you actually did. The combination of crunchy Parmesan coating and savory ranch flavor is just unbeatable, and the fact that they’re baked instead of fried makes them feel a little bit virtuous.
I hope you give these a try and make them your own. Maybe you’ll add a little extra spice, or serve them with a sauce I haven’t thought of. That’s the beauty of a good basic recipe—it leaves room for your own creativity. If you do make them, I’d love to hear how they turned out. Drop a comment below and let me know what you thought, or tag me in your photos if you share them online. And if you’re looking for more easy weeknight dinner ideas, check out my one-pan garlic butter chicken and rice or this crispy lemon herb baked chicken breast for more oven-baked goodness.
Happy cooking, and remember—the best recipes are the ones you actually make. These tenders are so easy that there’s no excuse not to try them tonight!
Frequently Asked Questions
Can I use chicken thighs instead of chicken breasts?
Absolutely! Chicken thighs will work just as well, though they’ll need a few extra minutes in the oven since they’re a bit thicker. The coating might not get quite as crispy because thighs release more fat during cooking, but they’ll be incredibly juicy and flavorful. Just make sure they reach an internal temperature of 165°F (74°C).
Why did my coating fall off in the oven?
This usually happens for one of three reasons: the chicken wasn’t dried properly before coating, the egg wash was too thin, or the oven wasn’t hot enough. Make sure you pat the chicken dry with paper towels, whisk the egg wash until it’s well combined, and let your oven preheat fully before baking. Also, pressing the breadcrumb mixture firmly onto the chicken helps it adhere better.
Can I make these ahead of time for a party?
You can prep the coating mixture and egg wash ahead of time, but I recommend baking the tenders fresh for the best texture. If you need to make them in advance, bake them as directed, let them cool completely, and reheat in the oven or air fryer just before serving. They’ll lose some crispiness, but they’ll still be delicious.
What dipping sauces go well with these tenders?
Ranch dressing is the obvious choice, but these tenders are also amazing with honey mustard, barbecue sauce, sriracha mayo, blue cheese dressing, or even a simple squeeze of lemon. For something different, try a creamy chipotle sauce or a sweet chili sauce for a spicy-sweet combo.
Can I double this recipe?
Yes, this recipe doubles beautifully. Just make sure you don’t overcrowd the baking sheet—use two sheets if needed, and rotate them halfway through baking. You might need to add a few extra minutes to the cooking time if you’re baking two sheets at once. I’ve made a triple batch for game day parties, and it worked perfectly.
Pin This Recipe!

Crispy Parmesan Ranch Chicken Tenders: Easy Dinner Recipe

These crispy Parmesan ranch chicken tenders are a quick and easy weeknight dinner that comes together in about 30 minutes. The Parmesan creates an incredible crust that gets shatteringly crisp in the oven, while the ranch seasoning adds a savory, herby punch.
- Prep Time: 10 minutes
- Cook Time: 18 minutes
- Total Time: 28 minutes
- Yield: 4 servings 1x
- Category: Main Course
- Cuisine: American
Ingredients
- 1½ pounds chicken tenders (or boneless skinless chicken breasts cut into strips)
- 1 cup panko breadcrumbs
- ½ cup finely grated Parmesan cheese
- 1 packet (1 ounce) ranch seasoning mix
- ½ teaspoon garlic powder
- ½ teaspoon onion powder
- ¼ teaspoon black pepper
- ¼ teaspoon salt
- 2 large eggs
- 2 tablespoons milk
- 1 tablespoon Dijon mustard
- Ranch dressing (for serving, optional)
- Honey (for serving, optional)
- Fresh parsley (for garnish, optional)
- Lemon wedges (for serving, optional)
Instructions
- Preheat your oven to 400°F (200°C). Place a wire rack on a baking sheet and spray it lightly with cooking spray. If you don’t have a wire rack, just line the baking sheet with parchment paper.
- Set up your coating station. In the first shallow bowl, whisk together the eggs, milk, and Dijon mustard until well combined. In the second bowl, combine the panko breadcrumbs, finely grated Parmesan, ranch seasoning, garlic powder, onion powder, pepper, and salt. Use a fork to mix everything together until the seasonings are evenly distributed.
- Prep the chicken. If you’re using whole chicken breasts, pat them dry with paper towels and cut them into strips about 1 inch wide. If you’re using pre-cut tenders, just pat them dry.
- Coat the chicken. Working with one piece at a time, dip a chicken strip into the egg mixture, letting any excess drip off. Then press it into the breadcrumb mixture, making sure it’s fully coated on all sides. Place the coated tender on the prepared wire rack or baking sheet. Repeat with the remaining chicken strips, spacing them about an inch apart.
- Bake for 15-18 minutes, or until the chicken is golden brown and cooked through. The internal temperature should reach 165°F (74°C). If baking directly on the sheet, flip them gently with tongs at the 8-minute mark.
- Let the tenders rest on the baking sheet for 2-3 minutes after they come out of the oven.
- Serve immediately. Transfer the tenders to a serving platter and sprinkle with fresh parsley if using. Serve with ranch dressing, honey, or your favorite dipping sauce.
Notes
For best results, use finely grated Parmesan from a shaker container, not shredded cheese. The Dijon mustard in the egg wash helps the coating stick. Let the tenders rest after baking to keep the coating crispy. If the coating isn’t sticking, the egg wash may be too thin; add another egg or a splash more milk.
Nutrition
- Serving Size: 4-5 tenders
- Calories: 385
- Sugar: 2
- Sodium: 890
- Fat: 16
- Saturated Fat: 6
- Carbohydrates: 18
- Fiber: 1
- Protein: 42
Keywords: chicken tenders, Parmesan ranch, crispy chicken, easy dinner, baked chicken tenders, weeknight dinner


