Grabbing a handful of oats from the pantry while the toddler was melting down over a broken crayon, I realized I had about seven minutes before my coffee break was officially over. That’s when these Easy No-Bake Chocolate Peanut Butter Protein Balls happened. I needed something I could make with one hand while the other held a juice box hostage, something that didn’t require turning on the oven or washing more than one bowl. And honestly? I was tired of spending money on those expensive store-bought protein bars that taste like cardboard dipped in sadness.
So I just started throwing things into the food processor. Peanut butter, chocolate chips, oats, a little honey, some protein powder I’d bought on a whim and never used. I kept adding and tasting until the mixture held together when I squeezed it between my fingers. The first batch was a little dry, the second a little sticky, but the third? That was the one. My kid ate three before I could even roll them all, and I knew I’d stumbled onto something good. These protein balls have become my emergency snack, my afternoon pick-me-up, and my secret weapon for getting through the witching hour without eating an entire sleeve of cookies.
What I love most about this recipe is that it truly is no-fuss. You don’t need fancy ingredients or special equipment, just a bowl and a spoon and about ten minutes. They taste like dessert but keep you full for hours, which is exactly what I need when I’m running between school pickup and soccer practice. These little bites have saved my sanity more times than I can count.
Why You’ll Love This Recipe
Let me tell you why these Easy No-Bake Chocolate Peanut Butter Protein Balls have become a staple in my kitchen, and why they’ll probably become one in yours too.
- No Baking Required: The oven stays off, which means you can make these even on the hottest summer days without breaking a sweat. Just mix, roll, and refrigerate.
- Ready in Under 15 Minutes: From start to finish, you’re looking at about ten minutes of active work. That’s faster than ordering takeout.
- Pantry-Friendly Ingredients: You probably already have most of these items in your kitchen right now. No special trips to the health food store required.
- Perfect for Meal Prep: Make a double batch on Sunday and you’ve got snacks for the whole week. They store beautifully in the fridge or freezer.
- Kid-Approved and Adult-Loved: My kids think they’re getting a treat, but I know they’re getting protein and fiber. It’s a win-win situation.
- Customizable to Your Taste: Don’t like peanut butter? Use almond butter. Want extra crunch? Add some chopped nuts. This recipe is forgiving and flexible.
What makes these protein balls different from all the other recipes out there? It’s the texture. I’ve tested dozens of versions, and most are either too dry and crumbly or too sticky and sweet. These have that perfect fudgy, chewy consistency that makes you want to keep eating them. The chocolate and peanut butter combo is timeless, obviously, but the ratio here is spot on. Every bite has just enough chocolate to feel indulgent without overwhelming the peanut butter flavor.
These protein balls are the kind of snack that makes you feel good about what you’re eating. They’re not trying to be something they’re not, no weird protein powders or obscure superfoods. Just simple, wholesome ingredients that come together to create something genuinely delicious. I’ve brought them to playdates, packed them in lunchboxes, and eaten them standing in front of the open fridge at 10 PM. They never disappoint.
What Ingredients You Will Need
This recipe uses simple, wholesome ingredients that work together to create a perfectly balanced snack. Here’s everything you’ll need and why each ingredient matters.
- Rolled Oats (1 cup / 90g): These are the backbone of our protein balls. Rolled oats provide structure, fiber, and that satisfying chewy texture. I use old-fashioned rolled oats rather than quick oats because they hold up better and don’t get mushy. If you’re gluten-sensitive, make sure to buy certified gluten-free oats.
- Creamy Peanut Butter (1/2 cup / 130g): This is both the binder and the flavor star. I recommend using a natural peanut butter with just peanuts and salt in the ingredient list. The oil separation is normal, just stir it well before measuring. Avoid the sugary, hydrogenated stuff, it won’t mix as well and the texture will be off. For the best results, use a brand like Skippy Natural or Justin’s.
- Honey (1/4 cup / 85g): Honey adds natural sweetness and helps hold everything together. It also brings a subtle floral note that complements the chocolate beautifully. Maple syrup works as a substitute if you’re vegan, but the texture will be slightly stickier. Local honey is always a nice touch if you can find it.
- Chocolate Protein Powder (1/4 cup / 30g): This is where the protein boost comes from. I use a chocolate whey protein powder, but plant-based options work great too. If you don’t have protein powder, you can substitute with an extra 1/4 cup of oats and 2 tablespoons of cocoa powder. My go-to brand is Orgain, it mixes well and doesn’t have that chalky aftertaste.
- Mini Chocolate Chips (1/3 cup / 60g): Because everything is better with chocolate chips. The mini ones distribute more evenly throughout the dough, so you get chocolate in every bite. Dark chocolate chips add a nice bitterness that balances the sweetness, but milk chocolate works too. I prefer Enjoy Life brand for their allergy-friendly options.
- Unsweetened Cocoa Powder (2 tablespoons / 10g): This deepens the chocolate flavor without adding extra sweetness. It gives the protein balls that rich, fudgy taste that makes them feel decadent. Dutch-process cocoa is smoother, but regular cocoa powder works just fine.
- Chia Seeds (1 tablespoon / 12g): These little seeds are optional but highly recommended. They add fiber, omega-3s, and a tiny bit of crunch. They also help absorb moisture and keep the protein balls from getting too sticky. If you don’t have chia seeds, flax meal is a good substitute.
- Vanilla Extract (1 teaspoon): A splash of vanilla rounds out all the flavors and makes everything taste more cohesive. It’s a small ingredient that makes a big difference. Use pure vanilla extract if you have it, but imitation works in a pinch.
- Pinch of Sea Salt: Salt is essential here. It enhances the chocolate and peanut butter flavors and balances the sweetness. Don’t skip it, even if your peanut butter is already salted. A flaky sea salt like Maldon is lovely, but any salt will do.
That’s it. Eight ingredients, most of which you probably already have in your pantry. The beauty of this recipe is how forgiving it is. If you’re out of chia seeds, just add an extra tablespoon of oats. If you only have almond butter, use that instead. The base formula is flexible, so feel free to experiment.
Equipment Needed
One of the best things about these Easy No-Bake Chocolate Peanut Butter Protein Balls is that they don’t require any fancy equipment. Here’s what you’ll need.
- Large Mixing Bowl: Any medium to large bowl will work. I use a stainless steel mixing bowl because it’s easy to clean and doesn’t retain odors.
- Measuring Cups and Spoons: Accurate measurements matter for the texture to come out right. I recommend using dry measuring cups for the oats and wet measuring cups for the peanut butter and honey.
- Rubber Spatula or Wooden Spoon: You need something sturdy enough to mix the thick dough. A rubber spatula is my favorite because it scrapes the sides clean, but a wooden spoon works just as well.
- Small Cookie Scoop or Melon Baller: This isn’t strictly necessary, but it makes portioning the dough so much easier. A 1-tablespoon scoop gives you perfectly uniform balls every time. If you don’t have one, just use your hands.
- Parchment Paper or Silicone Baking Mat: You’ll need something to place the rolled balls on while they chill. Parchment paper is non-stick and easy to handle. A silicone mat also works great.
- Baking Sheet or Large Plate: Something flat to hold the protein balls while they set in the fridge. A baking sheet is ideal because it fits in the fridge easily.
- Airtight Container: For storing the finished protein balls. Glass containers work best because they don’t absorb odors. I use a set of Weck jars that I’ve had for years.
If you’re on a budget, don’t worry about buying special equipment. Your hands are the best tool for rolling these balls. I’ve made this recipe many times with just a bowl, a spoon, and a plate, and it always turns out great. The cookie scoop is a nice convenience, but it’s not a dealbreaker.
Preparation Method
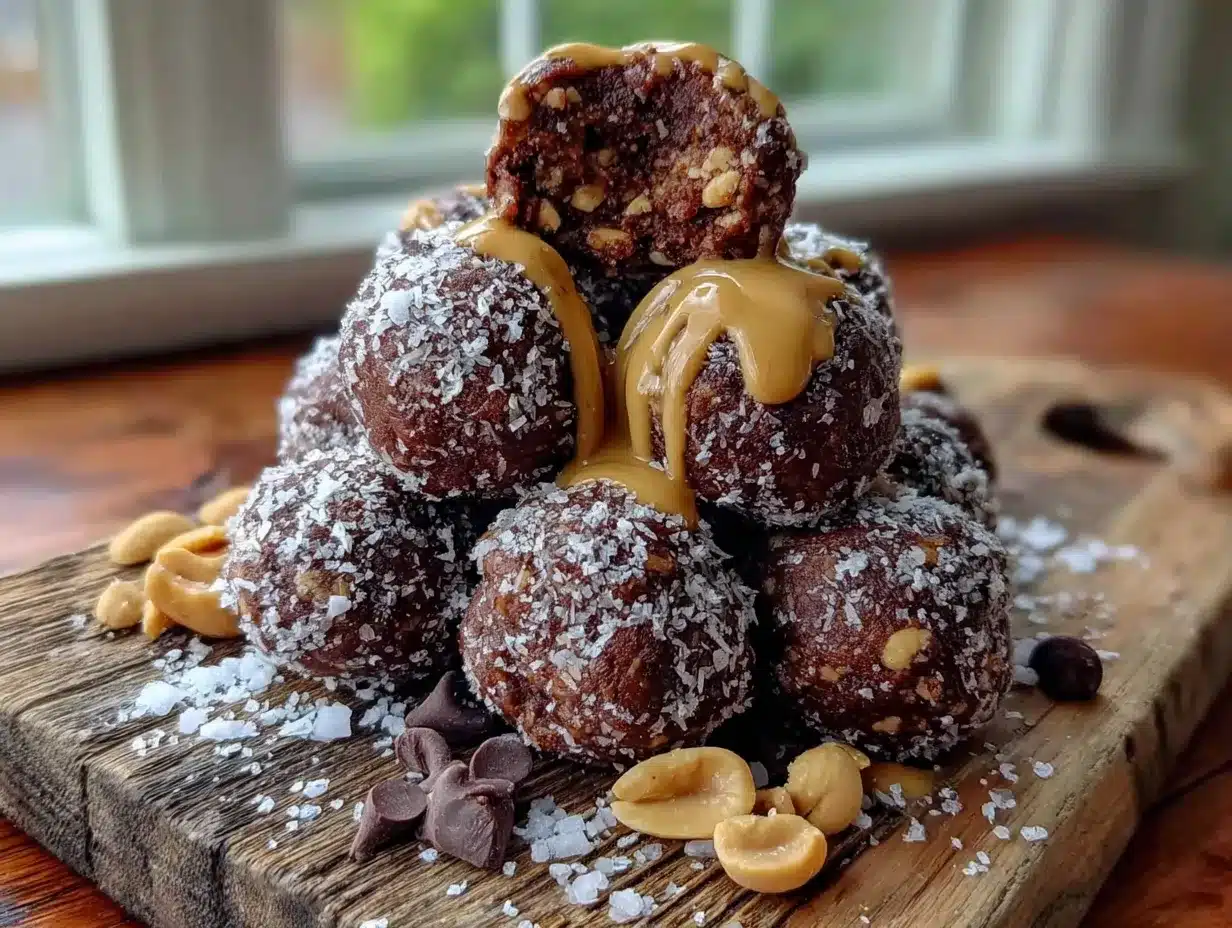
Making these Easy No-Bake Chocolate Peanut Butter Protein Balls is honestly simpler than you’d expect. Here’s the step-by-step process that I’ve perfected through many batches.
- Prepare Your Workspace (2 minutes): Before you start, line a baking sheet or large plate with parchment paper. This gives you a place to put the rolled balls right away. Make sure you have all your ingredients measured and ready to go. Trust me, once you start mixing, you don’t want to be hunting for the chia seeds.
- Combine the Dry Ingredients (1 minute): In your large mixing bowl, add the rolled oats, chocolate protein powder, cocoa powder, chia seeds, and a pinch of sea salt. Use your spatula to stir them together until everything is evenly distributed. This step ensures you won’t get pockets of pure protein powder in your finished balls.
- Add the Wet Ingredients (2 minutes): Pour in the creamy peanut butter, honey, and vanilla extract. At this point, the mixture will look dry and clumpy. Don’t panic, that’s normal. Start stirring with your spatula, pressing the mixture against the sides of the bowl to incorporate everything. It takes a little elbow grease, but it will come together.
- Mix in the Chocolate Chips (1 minute): Once the dough is mostly combined, fold in the mini chocolate chips. Make sure they’re evenly distributed throughout the dough. If the dough feels too dry and isn’t holding together, add a teaspoon of honey or a splash of water. If it’s too sticky, add a tablespoon more oats.
- Test the Consistency (30 seconds): Take a small amount of the dough and squeeze it in your hand. It should hold together firmly without crumbling. If it falls apart, it needs more moisture. If it sticks to your hands excessively, it needs more dry ingredients. Adjust as needed.
- Chill the Dough (10-15 minutes): This step is optional but highly recommended. Pop the bowl in the fridge for about 10-15 minutes. Chilled dough is much easier to handle and rolls into perfect balls without sticking to your hands. If you’re in a hurry, you can skip this, but your hands will get messy.
- Roll the Balls (5 minutes): Using a small cookie scoop or your hands, portion out about 1 tablespoon of dough per ball. Roll it between your palms to form a smooth ball. Place each ball on the prepared baking sheet. You should get about 18-20 balls depending on the size. If the dough starts getting sticky again, wash your hands and continue.
- Chill to Set (30 minutes): Place the baking sheet with the rolled balls in the refrigerator for at least 30 minutes. This allows them to firm up and hold their shape. They’ll be soft but not crumbly when you bite into them. If you can wait an hour, even better.
- Transfer to Storage (2 minutes): Once the protein balls are firm, transfer them to an airtight container. Layer them between sheets of parchment paper if you’re stacking them to prevent sticking. They’re now ready to eat or store.
A few sensory cues to watch for: The dough should feel like a firm, slightly sticky playdough. When you squeeze it, it should hold its shape without feeling wet or greasy. The color should be a rich brown from the cocoa and chocolate. The smell is heavenly, like a Reese’s peanut butter cup but somehow more wholesome.
If you find the dough is too dry, it’s usually because your peanut butter was too thick or your oats were extra absorbent. Add honey a teaspoon at a time until it comes together. If it’s too wet, your peanut butter might have been too oily. Add oats a tablespoon at a time to fix it.
Cooking Tips & Techniques
After making these Easy No-Bake Chocolate Peanut Butter Protein Balls more times than I can count, I’ve picked up a few tricks that make the process smoother and the results better.
Use Room Temperature Ingredients: Cold peanut butter is a nightmare to mix. Let it sit out for 15 minutes before you start. Same goes for honey, cold honey is thick and stubborn. Room temperature ingredients blend together much more easily and create a smoother dough.
Wet Your Hands: If the dough is sticking to your hands while rolling, lightly wet your palms with a little water. The moisture creates a barrier that prevents sticking. Don’t use too much water though, just a quick rinse and shake off the excess. This trick works like magic.
Don’t Overmix: Once everything is combined, stop mixing. Overworking the dough can make the protein balls dense and tough. You want them to be tender and fudgy, not like little hockey pucks. Mix just until no dry spots remain.
Chill Between Batches: If you’re making a double batch, keep the unused dough in the fridge while you roll the first batch. Warm dough gets stickier and harder to handle. A quick chill between batches keeps everything manageable.
Toast the Oats for Extra Flavor: This is optional, but toasting the oats in a dry pan for 2-3 minutes before using them adds a nutty, toasty flavor that takes these protein balls to another level. Just let them cool completely before mixing. I learned this trick after accidentally toasting oats for a granola recipe and never looked back.
One Mistake I Made: The first time I made these, I used crunchy peanut butter because that’s what I had. The texture was weird, and the balls didn’t hold together well. The peanut pieces created weak spots in the dough. Stick with creamy peanut butter for the best results. Save the crunchy stuff for spreading on toast.
Timing Strategy: I like to make the dough, roll the balls, and then let them chill while I clean up the kitchen. By the time the dishes are done, the protein balls are ready to eat. It’s efficient and satisfying to have a clean kitchen and a batch of snacks ready at the same time.
Variations & Adaptations
One of the best things about this recipe is how adaptable it is. Here are some variations I’ve tried and loved.
- Nut-Free Version: Swap the peanut butter for sunflower seed butter or tahini. Sunflower seed butter has a similar consistency and works beautifully. Just note that the color will be a bit darker, and the flavor will be different but still delicious. This is perfect for school lunches where nuts aren’t allowed.
- Vegan Option: Replace the honey with maple syrup or agave nectar. Use a plant-based protein powder instead of whey. Everything else stays the same. The texture might be slightly softer, so you may need to add an extra tablespoon of oats to compensate.
- Extra Crunchy: Add 1/4 cup of chopped almonds, walnuts, or pecans to the dough. You can also add 2 tablespoons of unsweetened coconut flakes for texture. I love this version when I want something more substantial, like after a long hike.
- Fruity Twist: Fold in 1/4 cup of dried cranberries, chopped dried cherries, or golden raisins. The tartness of the fruit cuts through the richness of the chocolate and peanut butter beautifully. This is my go-to variation during the holidays.
- Spiced Version: Add 1/2 teaspoon of cinnamon, a pinch of cayenne pepper, and a dash of nutmeg to the dry ingredients. The warmth of the spices makes these taste almost like Mexican hot chocolate. It’s unexpected but so good.
- Low-Sugar Option: Use a sugar-free protein powder and reduce the honey to 2 tablespoons. You can also use sugar-free chocolate chips or just omit them entirely. The protein balls will be less sweet but still satisfying.
- Cookie Dough Style: Omit the protein powder and add an extra 1/4 cup of oats and 2 tablespoons of coconut flour. The texture becomes even more like edible cookie dough. This version is dangerous because it’s so easy to eat the entire batch.
My personal favorite variation is adding a tablespoon of instant espresso powder to the dry ingredients. The coffee flavor intensifies the chocolate without making the balls taste like coffee. It’s a little trick I picked up from making chocolate desserts, and it works perfectly here.
Serving & Storage Suggestions
These Easy No-Bake Chocolate Peanut Butter Protein Balls are versatile enough to fit into any part of your day. Here’s how I like to serve and store them.
Serving Temperature: I prefer them straight from the fridge. They’re firm but still soft and chewy, with a satisfying coldness that makes them feel like a treat. If you leave them at room temperature for more than 15 minutes, they’ll soften up significantly. Some people love them that way, so it’s really a matter of preference.
Perfect Pairings: These protein balls are fantastic on their own, but they also pair beautifully with a glass of cold milk, a hot cup of coffee, or a smoothie. I often pack two in a lunchbox alongside some apple slices or carrot sticks for a balanced snack. They’re also great crumbled over yogurt or oatmeal for extra texture and protein.
When to Eat Them: They’re perfect as a pre-workout snack, a post-workout refuel, an afternoon pick-me-up, or a healthier dessert option. I keep a stash in my fridge for those moments when I need something quick and satisfying. They’ve saved me from many a vending machine impulse buy.
Storage Instructions: Store the protein balls in an airtight container in the refrigerator for up to 2 weeks. I like to layer them between sheets of parchment paper to prevent them from sticking together. If you’re stacking them, make sure they’re fully chilled first.
Freezing Tips: These freeze beautifully. Place the rolled balls on a baking sheet and freeze until solid, about 1 hour. Then transfer them to a freezer-safe bag or container. They’ll keep for up to 3 months. To thaw, just move them to the fridge overnight or let them sit at room temperature for 15 minutes. I always keep a bag in the freezer for emergency snacks.
Flavor Development: The flavors actually get better after a day or two in the fridge. The oats soften slightly, the chocolate chips firm up, and everything melds together. I actually prefer them on day two or three. Just something to keep in mind if you’re making them ahead of time.
Nutritional Information & Benefits
These Easy No-Bake Chocolate Peanut Butter Protein Balls are more than just a tasty snack, they’re actually quite good for you. Here’s the breakdown.
Estimated Nutritional Values (per ball, based on 20 balls):
| Nutrient | Amount |
|---|---|
| Calories | 120-140 |
| Protein | 6-8g |
| Carbohydrates | 14-16g |
| Fiber | 3-4g |
| Sugar | 8-10g |
| Fat | 6-8g |
Health Benefits: The oats provide complex carbohydrates for sustained energy and soluble fiber for digestive health. Peanut butter offers healthy monounsaturated fats and plant-based protein that keeps you full. Chia seeds are packed with omega-3 fatty acids and additional fiber. The cocoa powder contains antioxidants called flavonoids that support heart health. This is a snack that actually fuels your body rather than just filling it up.
Dietary Considerations: These protein balls are naturally vegetarian and can easily be made vegan and gluten-free with simple substitutions. They contain peanuts, which is a common allergen, but the nut-free version using sunflower seed butter works great. They’re also relatively low in added sugar compared to most packaged snacks.
My Perspective: I’m not a nutritionist, but I am a mom who cares about what my family eats. These protein balls make me feel good about giving my kids a treat because I know exactly what’s in them. No preservatives, no artificial flavors, no weird ingredients I can’t pronounce. They’re real food that happens to taste like dessert, and that’s a win in my book.
Conclusion
These Easy No-Bake Chocolate Peanut Butter Protein Balls have genuinely changed how I approach snacking in my house. They’re quick enough to make on a busy afternoon, simple enough that my kids can help roll them, and delicious enough that nobody feels like they’re eating something healthy. That’s the sweet spot right there.
I love that this recipe is a starting point, not a rigid set of rules. You can swap ingredients, adjust sweetness, add mix-ins, or change up the flavors to suit whatever you’re craving. The base formula is forgiving and flexible, which is exactly what a busy cook needs. Don’t be afraid to experiment and make them your own.
If you make these protein balls, I’d love to hear how they turn out. Drop a comment below and let me know what variations you tried, or tag me in your photos on social media. Your feedback helps other readers know what works, and it honestly makes my day to see these little bites bringing joy to other kitchens. Happy snacking, friends. You’ve got this.
Frequently Asked Questions
Can I make these protein balls without a food processor?
Absolutely. You don’t need a food processor at all. Just mix everything in a bowl with a sturdy spoon or spatula. The oats will stay whole, which gives the protein balls a nice texture. If you prefer a smoother consistency, you can pulse the oats in a food processor first, but it’s completely optional.
How long do these protein balls last at room temperature?
They’re best stored in the refrigerator, but they’ll keep at room temperature for about 24 hours. After that, they start to soften and can become sticky. If you’re taking them on a road trip or packing them in a lunchbox, use an ice pack to keep them cool. I wouldn’t recommend leaving them out for more than a day.
Can I use quick oats instead of rolled oats?
Yes, you can. Quick oats are just rolled oats that have been chopped into smaller pieces. They’ll work fine, but the texture will be slightly different, softer and less chewy. If you only have quick oats on hand, go ahead and use them. The protein balls will still taste great.
Why are my protein balls too dry?
This usually happens when the peanut butter is too thick or the oats are very absorbent. Try adding a teaspoon of honey or a splash of water, then mix and test again. You can also add a little more peanut butter if you have extra. The dough should feel moist and hold together when squeezed.
Can I double this recipe?
Definitely. This recipe doubles beautifully. Just multiply all the ingredients by two and mix in a larger bowl. The chilling and rolling steps stay the same. I often make a double batch on Sunday so we have snacks for the whole week. They freeze well too, so don’t worry about having too many.
Pin This Recipe!
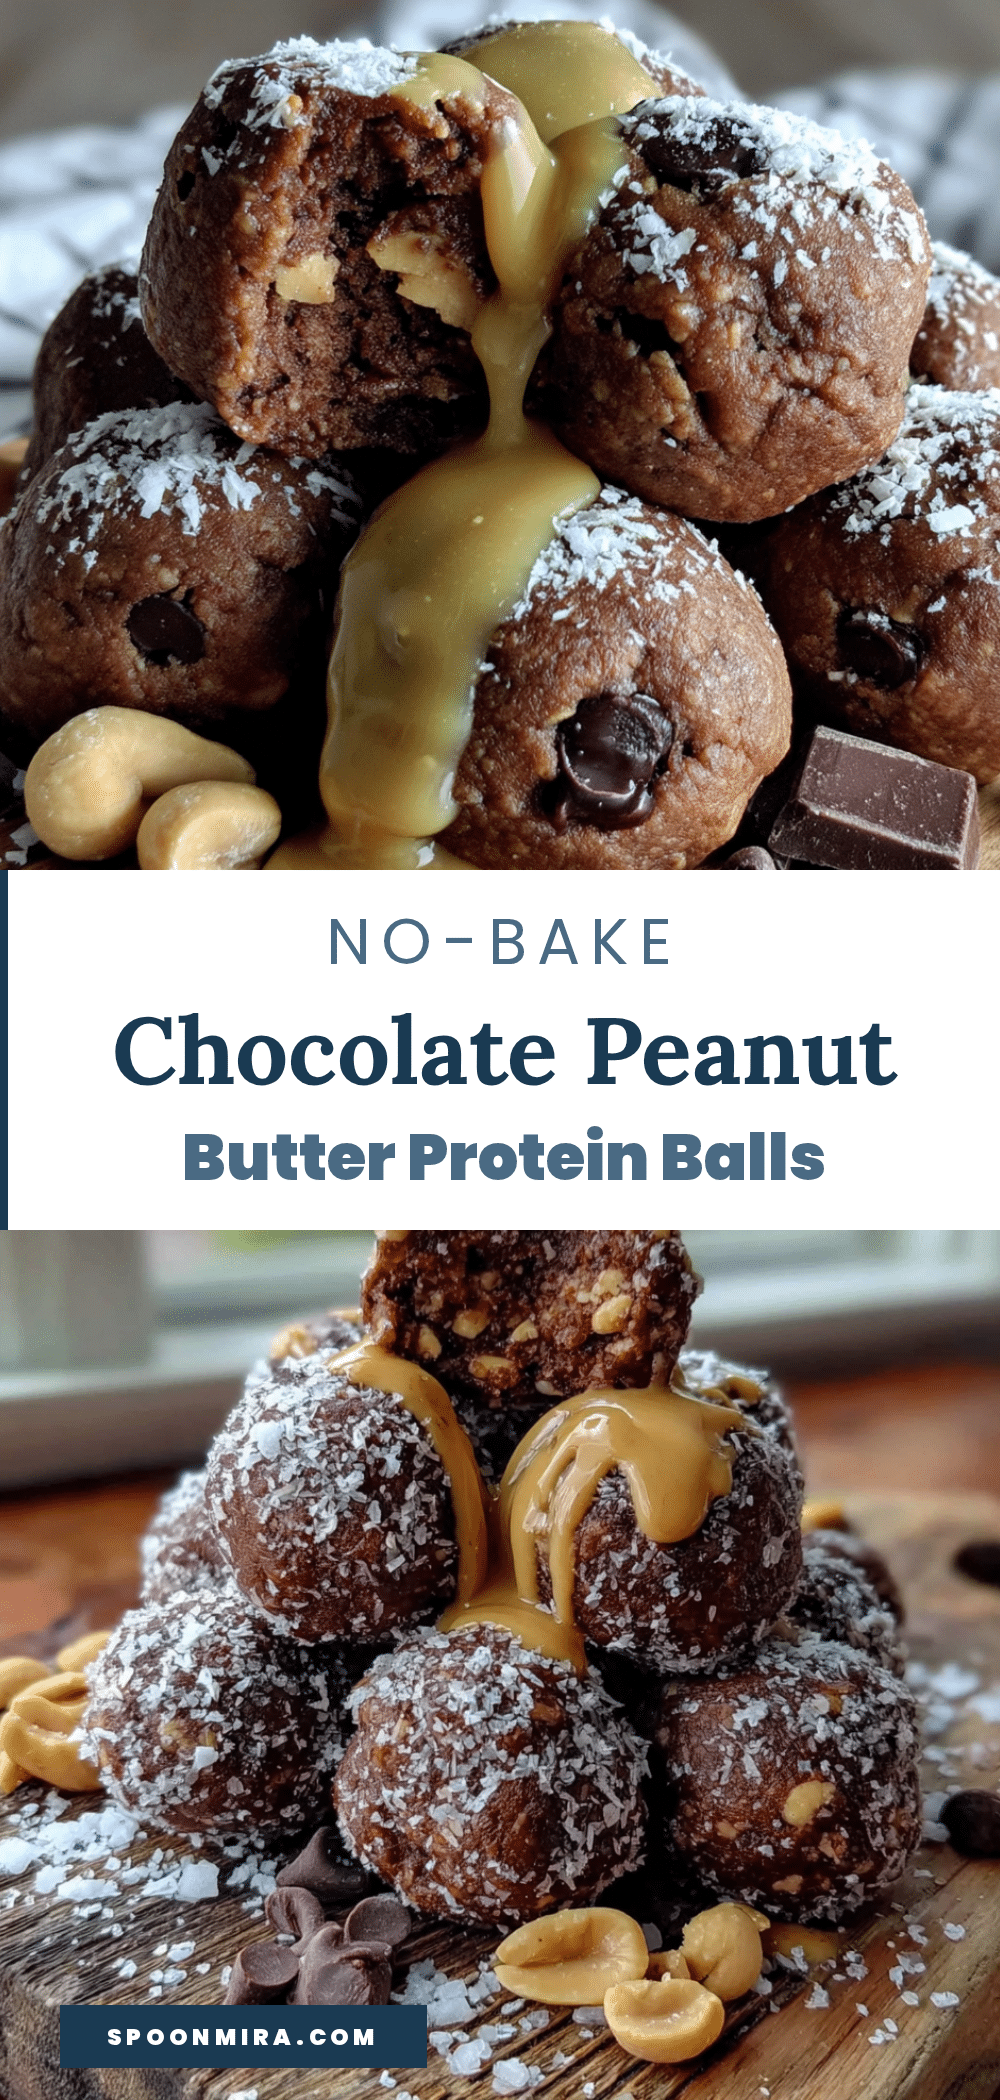
Easy No-Bake Chocolate Peanut Butter Protein Balls

Quick and easy no-bake protein balls made with peanut butter, chocolate, and oats. Perfect for a healthy snack or post-workout treat.
- Prep Time: 10 minutes
- Cook Time: 0 minutes
- Total Time: 40 minutes
- Yield: 18-20 balls 1x
- Category: Snack
- Cuisine: American
Ingredients
- 1 cup (90g) rolled oats
- 1/2 cup (130g) creamy peanut butter
- 1/4 cup (85g) honey
- 1/4 cup (30g) chocolate protein powder
- 1/3 cup (60g) mini chocolate chips
- 2 tablespoons (10g) unsweetened cocoa powder
- 1 tablespoon (12g) chia seeds
- 1 teaspoon vanilla extract
- Pinch of sea salt
Instructions
- Line a baking sheet or large plate with parchment paper.
- In a large mixing bowl, combine rolled oats, chocolate protein powder, cocoa powder, chia seeds, and a pinch of sea salt. Stir until evenly distributed.
- Add creamy peanut butter, honey, and vanilla extract. Stir until the mixture comes together, pressing against the sides of the bowl.
- Fold in mini chocolate chips until evenly distributed. If the dough is too dry, add a teaspoon of honey or a splash of water. If too sticky, add a tablespoon more oats.
- Test the consistency by squeezing a small amount of dough in your hand. It should hold together firmly without crumbling.
- Optional: Chill the dough in the refrigerator for 10-15 minutes for easier handling.
- Using a small cookie scoop or your hands, portion out about 1 tablespoon of dough per ball and roll into smooth balls. Place on the prepared baking sheet. You should get about 18-20 balls.
- Refrigerate the rolled balls for at least 30 minutes to firm up.
- Transfer to an airtight container, layering with parchment paper if stacking. Store in the refrigerator.
Notes
For best texture, use creamy peanut butter (natural, with just peanuts and salt). If dough is too dry, add honey or water a teaspoon at a time. If too sticky, add more oats. Chill dough for easier rolling. Store in refrigerator for up to 2 weeks or freeze for up to 3 months.
Nutrition
- Serving Size: 1 ball
- Calories: 130
- Sugar: 9
- Sodium: 60
- Fat: 7
- Saturated Fat: 2
- Carbohydrates: 15
- Fiber: 3.5
- Protein: 7
Keywords: protein balls, no-bake, chocolate, peanut butter, healthy snack, gluten-free option, vegan option


