Third time in six days and I finally stopped burning the garlic. That was the thing, honestly—the first two attempts at these Quick Teriyaki Chicken and Rice Bowls for Meal Prep were edible, sure, but the garlic had that bitter, acrid edge that tells you you rushed the pan. The third time, I pulled the chicken out a minute earlier, let the sauce reduce on its own, and something clicked. The whole kitchen smelled like a teriyaki takeout shop, but better—cleaner, brighter, with that hit of fresh ginger I’d grated right over the pan.
I wasn’t even trying to meal prep, to be honest. I was just tired of spending twelve dollars on a bowl that left me hungry an hour later. So I grabbed a pack of thighs, a bottle of tamari I’d been hoarding, and decided to figure it out myself. The rice cooker did its thing while I whisked soy sauce, honey, and rice vinegar in a bowl that had seen better days. By the time the chicken was resting, I had four containers waiting on the counter and a strange sense of pride—like I’d finally cracked a code that had been staring me in the face.
These bowls aren’t fancy. They’re not going to win a plating competition. But they’re the kind of thing you look forward to eating at your desk on a Wednesday, when the week has already chewed you up and you just want something that tastes like you actually care about yourself. That’s the real win here—not the recipe itself, but the way it makes the rest of the week feel a little more manageable.
Why You’ll Love This Recipe
I’ve tested this recipe more times than I care to admit, and here’s what I’ve learned: it works because it doesn’t try to be fancy. These Quick Teriyaki Chicken and Rice Bowls for Meal Prep are built on real, honest cooking—no shortcuts that compromise flavor, no complicated steps that’ll have you reaching for takeout menus.
- Ready in 30 minutes flat: From cutting board to container, you’re done before your favorite podcast finishes. Perfect for Sunday afternoon prep sessions or even a Tuesday night if you’re feeling ambitious.
- Pantry-friendly ingredients: Soy sauce, honey, rice vinegar, garlic, ginger—chances are you already have most of these in your kitchen. No specialty grocery runs required.
- Actually stays good all week: Unlike some meal prep recipes that turn sad by Wednesday, these bowls hold up beautifully. The chicken stays tender, the rice stays fluffy, and the sauce keeps everything moist without getting soggy.
- Customizable for any diet: Swap in tamari or coconut aminos for gluten-free, use cauliflower rice for low-carb, or add extra veggies to bulk it up. The base recipe is forgiving and flexible.
- Better than takeout, cheaper too: One batch costs about what you’d pay for a single delivery order, and you get four servings out of it. Your wallet will thank you.
What makes this recipe different from all the other teriyaki chicken bowls out there? It’s the double-glaze technique. I brush a thin layer of sauce onto the chicken while it’s cooking, then toss the cooked pieces in the reduced sauce at the end. That extra step means every single bite is coated in that glossy, sticky goodness—not just the outside pieces. It’s a small thing, but it’s the difference between good meal prep and meal prep you actually look forward to eating.
What Ingredients You Will Need
This recipe relies on a handful of simple, wholesome ingredients that work together to create that signature sweet-savory teriyaki flavor. Nothing fancy, nothing hard to find—just good ingredients doing their thing.
For the Teriyaki Sauce
- Soy sauce, ½ cup (120ml): Use low-sodium if you prefer to control the salt level. I like Kikkoman for its balanced flavor, but any brand works. For gluten-free, swap in tamari or coconut aminos.
- Honey, ¼ cup (85g): Adds sweetness and helps create that glossy finish. Maple syrup works in a pinch, but honey gives the best texture.
- Rice vinegar, 2 tablespoons (30ml): Provides the tangy brightness that balances the sweetness. Unseasoned is best. If you don’t have it, use apple cider vinegar with a pinch of sugar.
- Fresh garlic, 3 cloves, minced: Don’t use the pre-minced stuff from a jar—it burns faster and lacks that sharp, pungent kick. Grate it on a microplane for the best distribution.
- Fresh ginger, 1 tablespoon, grated: This is non-negotiable for authentic flavor. Ground ginger won’t give you the same zing. Peel it with a spoon before grating.
- Sesame oil, 1 tablespoon (15ml): Adds a nutty, toasty note that makes the sauce taste like it came from a restaurant kitchen. Toasted sesame oil, not the light stuff.
- Cornstarch, 1 tablespoon (8g) mixed with 2 tablespoons water: This slurry thickens the sauce to that perfect syrupy consistency. Arrowroot powder works as a substitute.
For the Chicken and Bowls
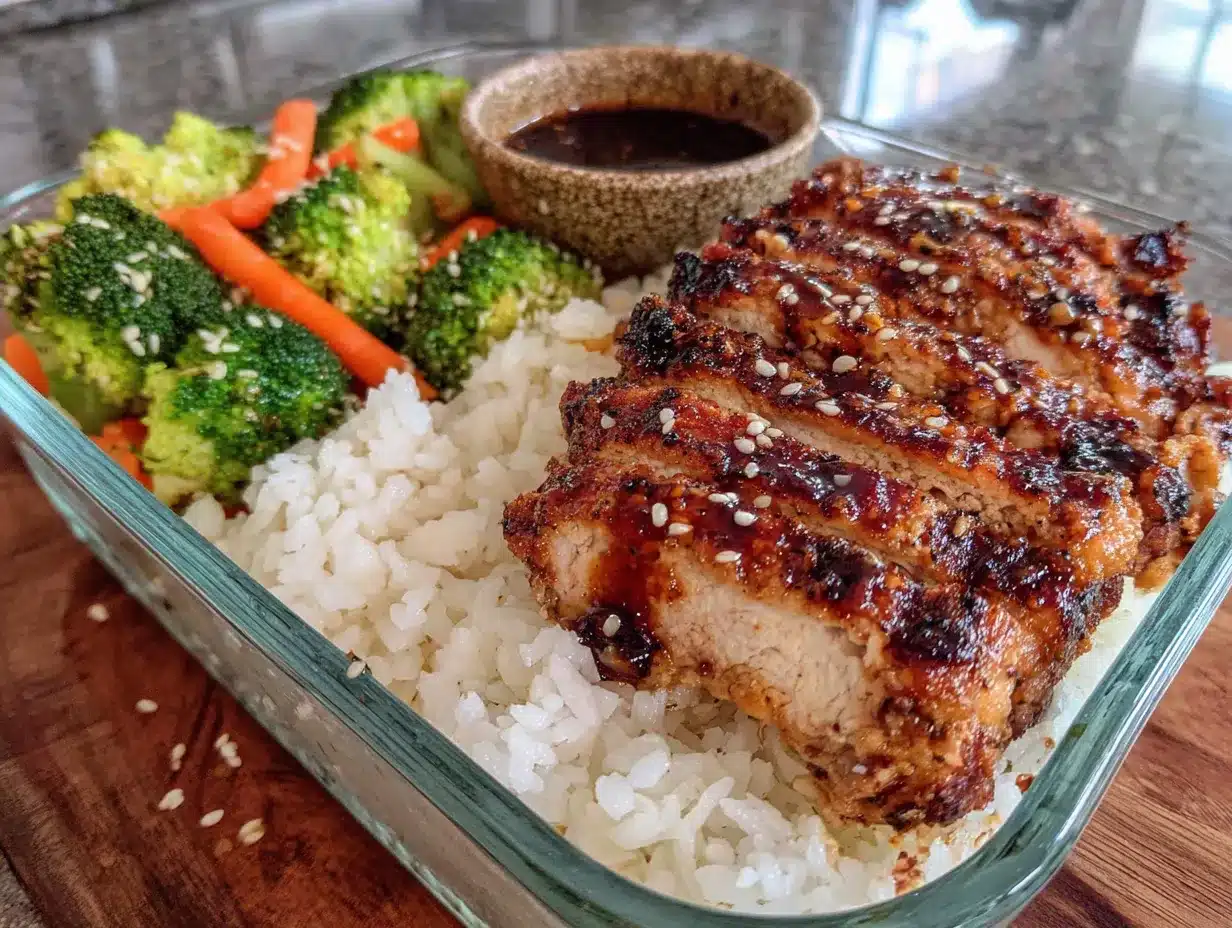
- Boneless, skinless chicken thighs, 1.5 pounds (680g): Thighs stay juicier than breasts during reheating, which is crucial for meal prep. If you must use breasts, pound them to even thickness first.
- Cooked white rice, 4 cups (about 600g cooked): Short-grain or jasmine rice works best—they hold up better to refrigeration and reheating. I use my rice cooker set to the sushi rice setting.
- Broccoli florets, 2 cups (about 200g): Steam them until bright green, then shock in cold water to stop the cooking. This keeps them crisp-tender even after a few days in the fridge.
- Shredded carrots, 1 cup (about 110g): Buy the pre-shredded kind to save time, or use a julienne peeler for thicker strips.
- Edamame, shelled, 1 cup (about 150g): Adds protein and a pop of color. Frozen edamame works perfectly—just thaw and drain.
- Green onions, 4-5, sliced: For garnish and a fresh, sharp finish. Slice them on a bias for a nicer presentation.
- Sesame seeds, 1 tablespoon: Toasted white or black seeds add a nutty crunch. Toast them in a dry pan for 30 seconds to bring out the flavor.
Ingredient Substitution Tips
If you’re avoiding soy, coconut aminos are a solid swap—they’re slightly sweeter, so reduce the honey by a tablespoon. For a lower-carb version, serve over cauliflower rice and add an extra cup of broccoli. And if you don’t have fresh ginger, honestly, just skip it rather than using dried—the texture and flavor won’t be the same.
Equipment Needed
- Large skillet or wok: A 12-inch nonstick skillet works best for even browning. Cast iron works too, but watch the heat—it runs hot.
- Small saucepan: For making the teriyaki sauce. Any small pot works; just make sure it’s not too wide or the sauce will reduce too quickly.
- Rice cooker or medium pot with lid: Rice cookers are hands-off and consistent. If using a pot, bring to a boil, then simmer covered on low for 18 minutes.
- Steamer basket or microwave-safe bowl: For the broccoli. A steamer basket gives better texture, but a microwave with a splash of water works in a pinch.
- Sharp knife and cutting board: A good chef’s knife makes dicing chicken and slicing veggies effortless. Keep your knife sharp—it’s safer and faster.
- Microplane or fine grater: For grating ginger and garlic. This is my favorite tool for the job—it releases all the juices without the fibrous bits.
- Measuring cups and spoons: Precision matters with the sauce. Use liquid measuring cups for the soy sauce and vinegar.
- Whisk: For combining the sauce ingredients smoothly. A fork works if you’re in a bind, but a whisk incorporates the cornstarch better.
- Meal prep containers (4): Glass containers with snap lids are best—they don’t stain, don’t absorb odors, and microwave safely. Look for ones with divided sections to keep components separate.
If you don’t have a rice cooker, don’t worry—I used a pot for years before I finally caved and bought one. The key is just to not lift the lid while it’s cooking. And if you’re missing a steamer basket, you can blanch the broccoli in boiling salted water for 90 seconds, then drain and rinse with cold water.
Preparation Method
Let’s walk through this step by step. I’ve timed everything so you can work efficiently without feeling rushed.
Step 1: Make the Teriyaki Sauce (5 minutes)
In your small saucepan, combine the soy sauce, honey, rice vinegar, minced garlic, grated ginger, and sesame oil. Whisk everything together until the honey dissolves—this takes about 30 seconds. Place the pan over medium heat and bring it to a gentle simmer. You’ll see small bubbles forming around the edges. Let it simmer for 2 minutes, whisking occasionally. In a small bowl, mix the cornstarch with 2 tablespoons of water until smooth. Slowly pour this slurry into the simmering sauce while whisking constantly. The sauce will thicken almost immediately—it should coat the back of a spoon. Remove from heat and set aside. You’ll use half for cooking and half for the final glaze.
Step 2: Prepare the Rice (20 minutes, mostly unattended)
If using a rice cooker, rinse 1½ cups (300g) of short-grain rice under cold water until the water runs clear—this removes excess starch and prevents gummy rice. Add the rinsed rice and 2 cups (480ml) of water to the cooker and start it. If using a pot, combine the rinsed rice and water in a medium pot with a tight-fitting lid. Bring to a boil over high heat, then immediately reduce to low, cover, and simmer for 18 minutes. Do not lift the lid during cooking. After 18 minutes, remove from heat and let it sit, covered, for another 5 minutes. Fluff with a fork.
Step 3: Cook the Broccoli and Prep Veggies (10 minutes)
While the rice cooks, bring a small pot of salted water to a boil. Add the broccoli florets and cook for exactly 90 seconds—they should be bright green and still firm. Drain immediately and plunge into a bowl of ice water to stop the cooking. This step, called shocking, keeps the broccoli crisp even after refrigeration. Drain again and pat dry. Set aside. Shred the carrots if you’re doing it fresh, or just open the bag of pre-shredded ones. Thaw the edamame by running it under warm water for a minute, then drain.
Step 4: Cook the Chicken (12 minutes)
Pat the chicken thighs dry with paper towels—this is crucial for good browning. Season both sides lightly with salt and pepper. Heat a large skillet over medium-high heat and add a tablespoon of neutral oil (like avocado or vegetable oil). When the oil shimmers, add the chicken thighs in a single layer. Don’t overcrowd the pan; work in batches if needed. Cook for 4-5 minutes on the first side without moving them—you want a deep golden-brown crust. Flip and cook for another 3-4 minutes. During the last minute of cooking, brush the tops with about 2 tablespoons of the teriyaki sauce. Remove the chicken to a cutting board and let it rest for 3 minutes. Then dice it into bite-sized pieces, about ½-inch cubes.
Step 5: Glaze and Assemble (5 minutes)
Return the diced chicken to the skillet over low heat. Pour the remaining teriyaki sauce over the chicken and toss gently to coat every piece. Cook for 1-2 minutes, stirring, until the sauce is sticky and clinging to the chicken. You’ll know it’s ready when the sauce looks glossy and doesn’t pool in the bottom of the pan. Remove from heat.
Step 6: Build Your Bowls (5 minutes)
Divide the cooked rice evenly among your four meal prep containers. Top each with a quarter of the glazed chicken, followed by a quarter of the broccoli, shredded carrots, and edamame. Sprinkle with sliced green onions and sesame seeds. Let the bowls cool completely—about 20-30 minutes at room temperature—before sealing the lids. Putting hot food in the fridge creates condensation that makes everything soggy.
Cooking Tips & Techniques
After making these Quick Teriyaki Chicken and Rice Bowls for Meal Prep more times than I can count, I’ve collected a few tricks that make a real difference. Here’s what I’ve learned the hard way so you don’t have to.
Don’t skip drying the chicken. I know it seems like a small step, but moisture is the enemy of browning. If the chicken is wet, it’ll steam instead of sear, and you’ll end up with pale, rubbery meat instead of that beautiful golden crust. Use paper towels and really press them in.
Watch your heat with the garlic. Garlic burns in seconds, especially when it’s minced fine. If you add it to the pan too early, or if your heat is too high, you’ll get that bitter, acrid taste I mentioned earlier. I add the garlic and ginger to the sauce rather than the pan—that way they cook gently and evenly without any risk of burning.
Let the sauce reduce properly. The cornstarch slurry thickens the sauce, but it needs a minute or two to fully activate. If you pull it off the heat too soon, the sauce will be thin and watery. Wait until it coats the back of a spoon and leaves a clear trail when you run your finger through it.
Cool completely before refrigerating. This is the number one mistake people make with meal prep. If you seal hot food in a container, steam builds up and turns everything into a soggy mess. I spread the bowls out on the counter and set a timer for 25 minutes. It’s worth the wait.
Reheat strategically. For the best texture, remove the green onions and sesame seeds before reheating (add them fresh after). Microwave the bowl for 2 minutes, stirring halfway through, or reheat in a skillet with a splash of water to revive the sauce. If you’re using a microwave, place a damp paper towel over the bowl to keep the rice from drying out.
Variations & Adaptations
One of the best things about this recipe is how easily it adapts to different tastes and dietary needs. Here are some variations I’ve tried and loved.
Spicy Teriyaki Bowls: Add 1-2 teaspoons of sriracha or a tablespoon of gochujang to the sauce while it simmers. The heat balances beautifully with the sweetness. I’ve also tried adding a pinch of red pepper flakes at the end for a more subtle warmth.
Vegetarian Version: Swap the chicken for extra-firm tofu or tempeh. Press the tofu for 30 minutes to remove excess moisture, then cube and pan-fry until golden before tossing in the sauce. Add an extra cup of edamame for protein. This version is just as satisfying and reheats beautifully.
Low-Carb / Keto Adaptation: Replace the rice with cauliflower rice (about 4 cups) and double the broccoli and edamame. The teriyaki sauce is naturally low in carbs if you use a sugar-free sweetener like monk fruit instead of honey. I’ve tested this with my friend who’s keto, and she said it hit the spot.
Add More Veggies: Bell peppers, snap peas, and mushrooms all work great. Slice them thin and sauté them in the same pan after the chicken comes out, just for 2-3 minutes. They’ll pick up the residual flavor from the pan. I often add a handful of snow peas when they’re in season.
Different Protein Options: This recipe works with shrimp (cook for 2-3 minutes per side), salmon (cook skin-side down first), or even thinly sliced pork loin. Adjust cooking times based on the protein—shrimp cooks much faster than chicken, so watch it closely.
Serving & Storage Suggestions
These bowls are designed for meal prep, but they’re also fantastic served fresh. Here’s how to get the most out of them.
Serving Temperature: Serve warm or at room temperature. If eating fresh, let the chicken rest for 5 minutes before slicing to keep it juicy. The contrast between the warm chicken and cool veggies is really nice.
Presentation Tips: Arrange the components in neat sections rather than mixing everything together. It looks more appealing and keeps textures distinct. Drizzle a little extra sauce over the top right before serving, and add fresh green onions and sesame seeds for that final touch.
Storage Instructions: Store sealed containers in the refrigerator for up to 4 days. Do not freeze—the rice and vegetables will become mushy upon thawing. If you want to freeze, freeze the chicken and sauce separately from the rice and veggies.
Reheating Methods: Microwave for 2-3 minutes, stirring halfway through. For best results, remove the green onions before reheating and add fresh ones after. If the rice seems dry, sprinkle a teaspoon of water over it before microwaving. You can also reheat in a skillet over medium heat with a splash of water or extra soy sauce.
Flavor Development: Here’s a secret—these bowls actually taste better on day two. The flavors meld together overnight, and the sauce soaks into the rice just enough to make every bite perfectly seasoned. By day three, the ginger and garlic have fully permeated the chicken, and it’s honestly my favorite time to eat them.
Nutritional Information & Benefits
Each serving of these Quick Teriyaki Chicken and Rice Bowls for Meal Prep provides a balanced mix of protein, carbohydrates, and healthy fats. Here’s the estimated breakdown per bowl (based on the recipe as written):
- Calories: Approximately 480-520
- Protein: 35-40g
- Carbohydrates: 55-60g
- Fat: 12-15g
- Fiber: 5-7g
- Sugar: 12-15g (from honey and natural sources)
Health Benefits: Chicken thighs provide high-quality protein and essential B vitamins for energy metabolism. Ginger is known for its anti-inflammatory properties and can aid digestion. Broccoli is packed with vitamin C, vitamin K, and fiber, while edamame offers plant-based protein and heart-healthy fats. The rice provides sustained energy to keep you going through a busy day.
Dietary Considerations: This recipe can be made gluten-free by using tamari or coconut aminos instead of soy sauce. For a lower-sodium version, use low-sodium soy sauce and reduce the added salt. To make it dairy-free, simply follow the recipe as written—there’s no dairy in it. If you’re watching your sugar intake, swap the honey for a sugar-free alternative like monk fruit sweetener or allulose.
Potential Allergens: This recipe contains soy (soy sauce) and sesame (sesame oil and seeds). For a soy-free version, use coconut aminos. For a sesame-free version, omit the sesame oil and use avocado oil instead, and skip the sesame seeds.
Conclusion
These Quick Teriyaki Chicken and Rice Bowls for Meal Prep have genuinely changed how I approach my week. They’re not just a recipe—they’re a system. A way to make sure that no matter how chaotic things get, there’s always something good waiting in the fridge. Something that tastes like effort, even though it barely took any.
I love that this recipe doesn’t demand perfection. If your chicken pieces aren’t uniform, it’s fine. If you forget to toast the sesame seeds, it’s still delicious. The whole point is to make your life easier, not to add another thing to stress about. So take these bowls and make them your own—swap in whatever vegetables you have, adjust the sweetness to your taste, pile on extra edamame if that’s your thing.
I’d love to hear how yours turn out. Drop a comment below and let me know what variations you tried, or tag me in your photos if you share them. And if you’re looking for more easy meal prep inspiration, you might enjoy our wholesome high school lunch bowl with quinoa, avocado, and chickpeas or these easy 3-ingredient peanut butter energy balls for a quick snack. Happy cooking, friends—you’ve got this.
Frequently Asked Questions
Can I use chicken breasts instead of thighs?
Yes, but be aware that chicken breasts are leaner and can dry out during reheating. If you use breasts, pound them to an even thickness (about ½ inch) before cooking, and reduce the cooking time by 1-2 minutes per side. Also, consider adding an extra tablespoon of sauce to keep them moist.
How long do these bowls last in the fridge?
Properly stored in airtight containers, these bowls will stay fresh for up to 4 days. I find they taste best on days 2 and 3, when the flavors have had time to meld. After day 4, the broccoli may start to soften and lose its vibrant color, but it’s still safe to eat.
Can I freeze these meal prep bowls?
I don’t recommend freezing the assembled bowls because the rice and vegetables become mushy when thawed. However, you can freeze the glazed chicken and sauce separately for up to 3 months. When you’re ready to eat, thaw overnight in the fridge, cook fresh rice and veggies, and assemble.
What’s the best way to reheat these bowls without drying them out?
Microwave with a damp paper towel over the bowl for 2-3 minutes, stirring halfway through. For stovetop reheating, add a splash of water or extra soy sauce to a skillet and warm over medium heat, stirring frequently. Avoid high heat, which can dry out the chicken and make the rice hard.
Can I make the teriyaki sauce ahead of time?
Absolutely! The sauce can be made up to a week in advance and stored in an airtight container in the refrigerator. It will thicken as it cools, so just give it a good stir or reheat it gently before using. You can also double or triple the sauce recipe and keep it on hand for quick stir-fries and glazes throughout the week.
Pin This Recipe!
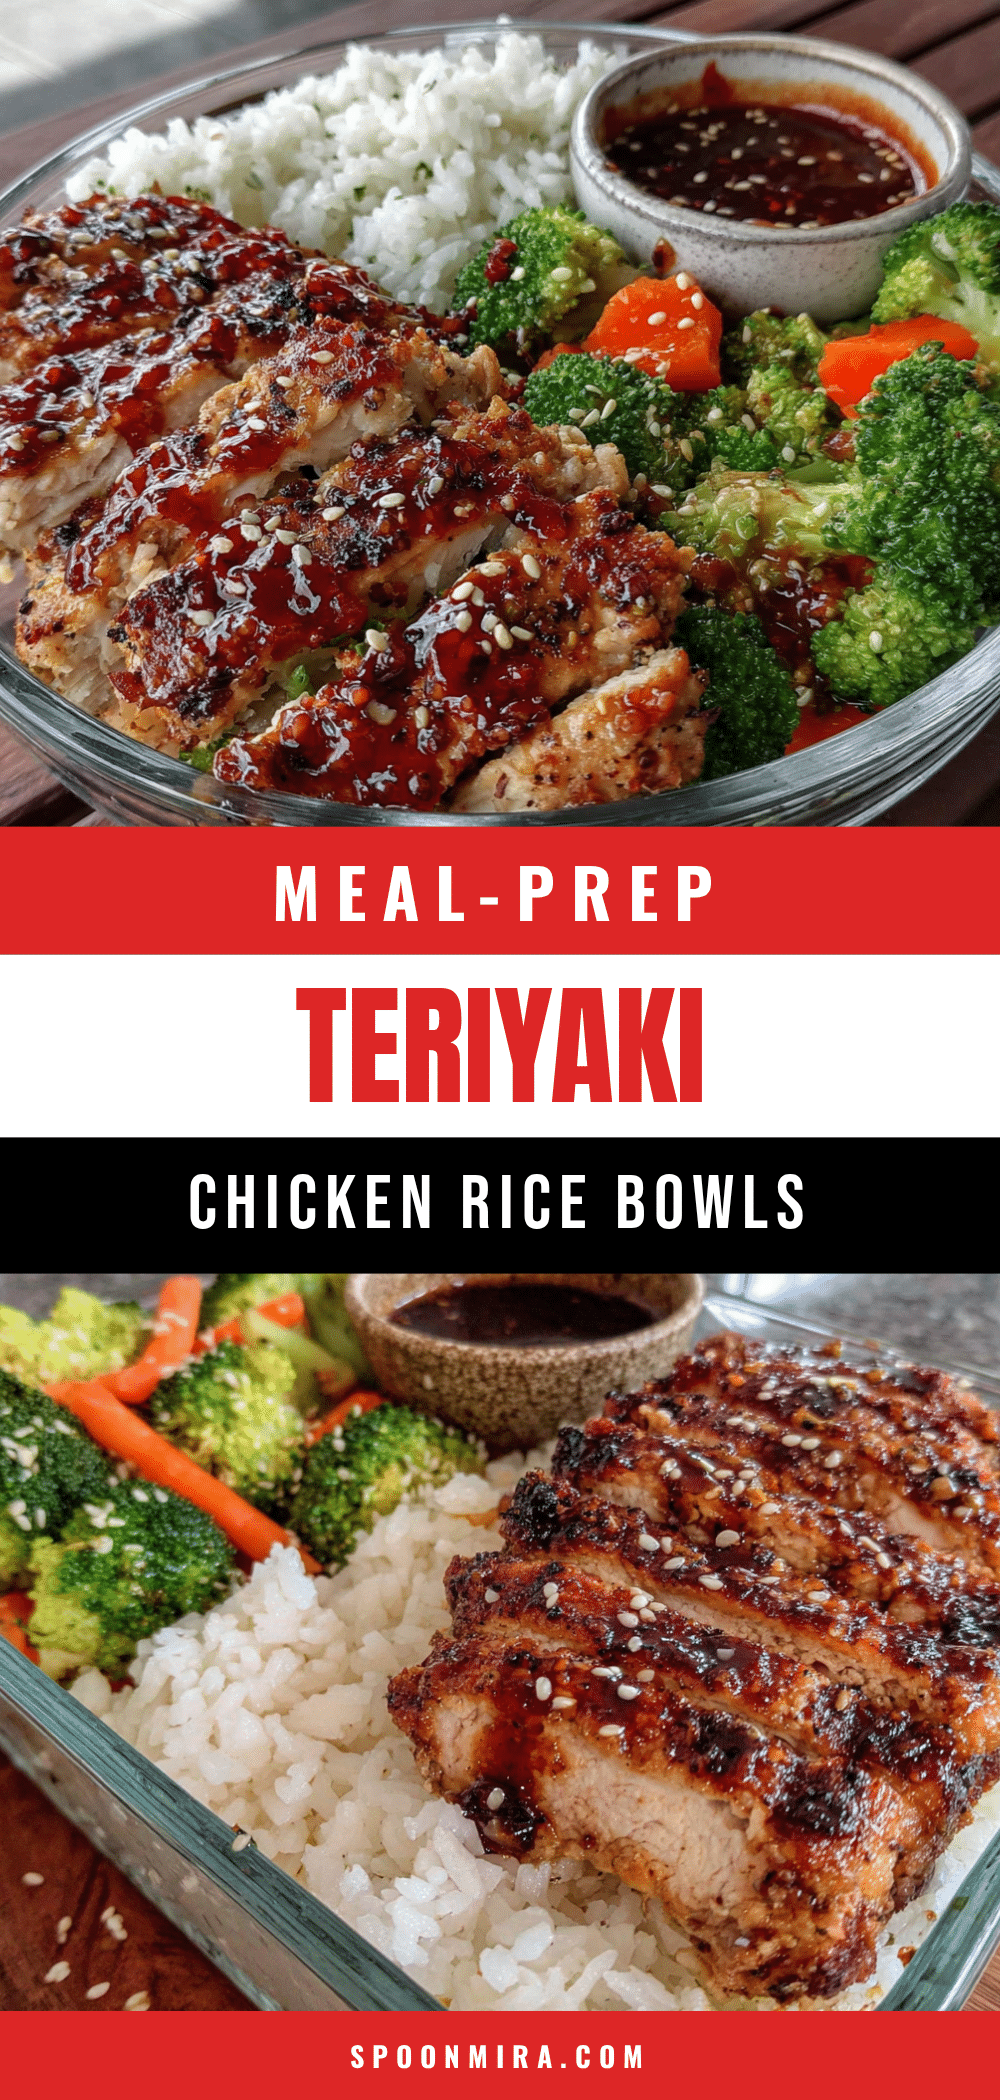
Quick Teriyaki Chicken Bowls: Best Meal Prep Recipe
These Quick Teriyaki Chicken and Rice Bowls are the ultimate meal prep solution—ready in 30 minutes with a double-glaze technique that ensures every bite is coated in sticky, sweet-savory goodness. Perfect for busy weeks, they stay fresh for days and taste even better on day two.
- Prep Time: 10 minutes
- Cook Time: 20 minutes
- Total Time: 30 minutes
- Yield: 4 servings 1x
- Category: Main Course
- Cuisine: Japanese
Ingredients
- ½ cup (120ml) low-sodium soy sauce
- ¼ cup (85g) honey
- 2 tablespoons (30ml) unseasoned rice vinegar
- 3 cloves fresh garlic, minced
- 1 tablespoon fresh ginger, grated
- 1 tablespoon (15ml) toasted sesame oil
- 1 tablespoon (8g) cornstarch mixed with 2 tablespoons water
- 1.5 pounds (680g) boneless, skinless chicken thighs
- 4 cups (about 600g cooked) cooked white rice (short-grain or jasmine)
- 2 cups (about 200g) broccoli florets
- 1 cup (about 110g) shredded carrots
- 1 cup (about 150g) shelled edamame
- 4–5 green onions, sliced
- 1 tablespoon sesame seeds (toasted white or black)
- Salt and pepper to taste
- 1 tablespoon neutral oil (avocado or vegetable)
Instructions
- Make the teriyaki sauce: In a small saucepan, combine soy sauce, honey, rice vinegar, minced garlic, grated ginger, and sesame oil. Whisk until honey dissolves. Bring to a gentle simmer over medium heat for 2 minutes. Slowly pour in cornstarch slurry while whisking constantly until sauce thickens (coats back of spoon). Remove from heat. Set aside half for cooking, half for final glaze.
- Prepare the rice: Rinse 1½ cups (300g) short-grain rice under cold water until water runs clear. Cook in a rice cooker with 2 cups (480ml) water, or in a pot: bring to boil, reduce to low, cover, and simmer 18 minutes. Let sit covered 5 minutes, then fluff with fork.
- Cook the broccoli and prep veggies: Bring a small pot of salted water to a boil. Add broccoli florets and cook 90 seconds until bright green. Drain and plunge into ice water to stop cooking. Drain and pat dry. Shred carrots if fresh, thaw edamame under warm water.
- Cook the chicken: Pat chicken thighs dry with paper towels. Season lightly with salt and pepper. Heat a large skillet over medium-high heat with 1 tablespoon neutral oil. Add chicken in a single layer (work in batches if needed). Cook 4-5 minutes per side until golden brown and cooked through. During last minute, brush tops with 2 tablespoons teriyaki sauce. Remove to cutting board, rest 3 minutes, then dice into ½-inch cubes.
- Glaze the chicken: Return diced chicken to skillet over low heat. Pour remaining teriyaki sauce over chicken and toss gently to coat. Cook 1-2 minutes until sauce is sticky and glossy, clinging to chicken.
- Assemble the bowls: Divide cooked rice evenly among 4 meal prep containers. Top each with glazed chicken, broccoli, shredded carrots, and edamame. Sprinkle with sliced green onions and sesame seeds. Cool completely (20-30 minutes) before sealing lids.
Notes
Don’t skip drying the chicken for best browning. Add garlic and ginger to the sauce rather than the pan to prevent burning. Let sauce reduce until it coats the back of a spoon. Cool bowls completely before refrigerating to avoid sogginess. For best reheating, remove green onions and sesame seeds first, then microwave with a damp paper towel for 2-3 minutes. These bowls taste even better on day two as flavors meld.
Nutrition
- Serving Size: 1 bowl
- Calories: 500
- Sugar: 14
- Sodium: 800
- Fat: 14
- Saturated Fat: 3
- Carbohydrates: 58
- Fiber: 6
- Protein: 38
Keywords: teriyaki chicken bowls, meal prep, quick dinner, healthy meal prep, chicken and rice bowls, easy teriyaki recipe


