I want a slice of bread that tastes like fall but doesn’t sit in my stomach like a brick. That’s the thought that started this whole thing. Not a pie, not a muffin, not a frosted pastry—just bread. Bread that has that sourdough tang but also tastes like pumpkin spice season. And I want pepitas on top because they look pretty and add a little crunch. But here’s the thing I kept running into: pumpkin sourdough is usually dense. Like, dense dense. The kind that makes you reach for a glass of water after one bite. So I started tweaking. I played with hydration levels, fermentation times, and the ratio of pumpkin to flour. I wanted a crumb that was soft enough to tear with your hands but structured enough to hold a thick swipe of butter. And after a few loaves that were… let’s just say “rustic-looking” (read: flat), I finally cracked it. This fluffy pumpkin sourdough bread with pepitas is the one. It’s the loaf I kept coming back to, the one that made me stop tweaking and start baking on repeat.
Why You’ll Love This Recipe
I have tested this recipe more times than I care to admit. I have baked it in a hot kitchen in September and a cold one in November. I have used different brands of pumpkin puree and different hydration levels in my starter. What I landed on is a loaf that delivers every single time. This isn’t just another pumpkin bread recipe—it’s a fluffy, tangy, perfectly textured sourdough that feels like a real accomplishment when it comes out of the oven.
- Perfectly Fluffy Texture: Unlike other pumpkin sourdough loaves that turn out gummy or dense, this one has an open, airy crumb that still feels soft and tender. It’s the texture you dream about.
- Real Sourdough Tang: The pumpkin doesn’t overpower the fermentation flavor. You get that classic sourdough bite balanced beautifully with warm pumpkin and spice.
- Simple Ingredients: You don’t need a trip to a specialty store. Pumpkin puree, flour, water, salt, your sourdough starter, and a handful of pepitas. That’s it.
- Perfect for Fall Mornings: This bread is made for toasting. Slather it with butter, a drizzle of honey, or even some of that homemade maple butter for the ultimate autumn breakfast.
- Impressive but Approachable: It looks like you spent hours in a professional bakery, but the process is straightforward. Even beginner sourdough bakers can nail this one.
- Crowd-Pleaser: I brought this to a Friendsgiving gathering and watched it disappear faster than the pies. People who “don’t like sourdough” asked for the recipe.
What Ingredients You Will Need
This recipe relies on a handful of simple, wholesome ingredients. Each one plays a specific role in creating that fluffy texture and deep fall flavor. Don’t overthink it—just grab good-quality staples and you’re set.
- Active Sourdough Starter (100g): This is your leavening agent. Make sure it’s bubbly and doubled in size before you start. A hungry starter won’t give you the rise you need. I feed mine a 1:1:1 ratio of starter, flour, and water about 6-8 hours before mixing.
- Bread Flour (400g / about 3 cups): Bread flour gives the structure and chew you want in a sourdough loaf. All-purpose will work in a pinch, but the crumb won’t be as open and fluffy. I prefer King Arthur or Bob’s Red Mill for consistent results.
- Whole Wheat Flour (100g / about ¾ cup): Adds a little nuttiness and depth that pairs beautifully with the pumpkin. It also helps with hydration absorption. You can substitute with more bread flour if you want a milder flavor.
- Pumpkin Puree (200g / about ¾ cup): Not pumpkin pie filling—make sure you’re getting 100% pure pumpkin puree. I use Libby’s because it’s consistently thick and not watery. If your puree seems wet, blot it with a paper towel before adding.
- Water (250g / about 1 cup plus 1 tablespoon): Warm water (around 80°F) helps the fermentation process. The pumpkin already adds moisture, so you don’t need as much water as a standard sourdough loaf.
- Fine Sea Salt (9g / about 1½ teaspoons): Don’t skip this. Salt controls fermentation and enhances flavor. I use fine sea salt because it dissolves more evenly than coarse kosher.
- Pumpkin Pie Spice (2 teaspoons): You can use store-bought or make your own with cinnamon, nutmeg, ginger, and cloves. I like the blend from Simply Organic—it’s warm without being overpowering.
- Pepitas (¼ cup, plus more for topping): Raw, shelled pumpkin seeds. They add a lovely crunch and a pop of green color against the orange crumb. Toast them lightly before adding for extra flavor.
- Olive Oil (1 tablespoon, for folding): A little fat helps tenderize the crumb and keeps the bread moist. You can substitute with melted butter if you prefer.
Equipment Needed
You don’t need a fancy kitchen to make this bread, but a few key tools make the process much smoother. Here’s what I use and recommend.
- Dutch Oven (5.5 to 6 quart): This is non-negotiable for the best crust. The steam trapped inside creates that crackly, golden exterior. If you don’t have one, use a heavy baking sheet with a metal bowl inverted over the loaf.
- Kitchen Scale: Please use a scale for this recipe. Measuring flour by volume is inconsistent, and sourdough is finicky enough without guessing. A $15 digital scale is worth every penny.
- Banneton Basket or Large Mixing Bowl: For proofing the shaped loaf. Line it with a floured tea towel if you’re using a bowl. I use a round banneton for that classic artisan shape.
- Bench Scraper: Helps with folding and shaping the dough. A plastic one is gentler on your work surface.
- Lame or Sharp Knife: For scoring the loaf before baking. A sharp blade gives you a clean cut that opens up beautifully in the oven.
- Parchment Paper: Makes transferring the dough into the hot Dutch oven a breeze. No sticking, no mess.
- Instant-Read Thermometer: The bread is done when the internal temperature hits 200-205°F. This takes the guesswork out of baking.
Preparation Method
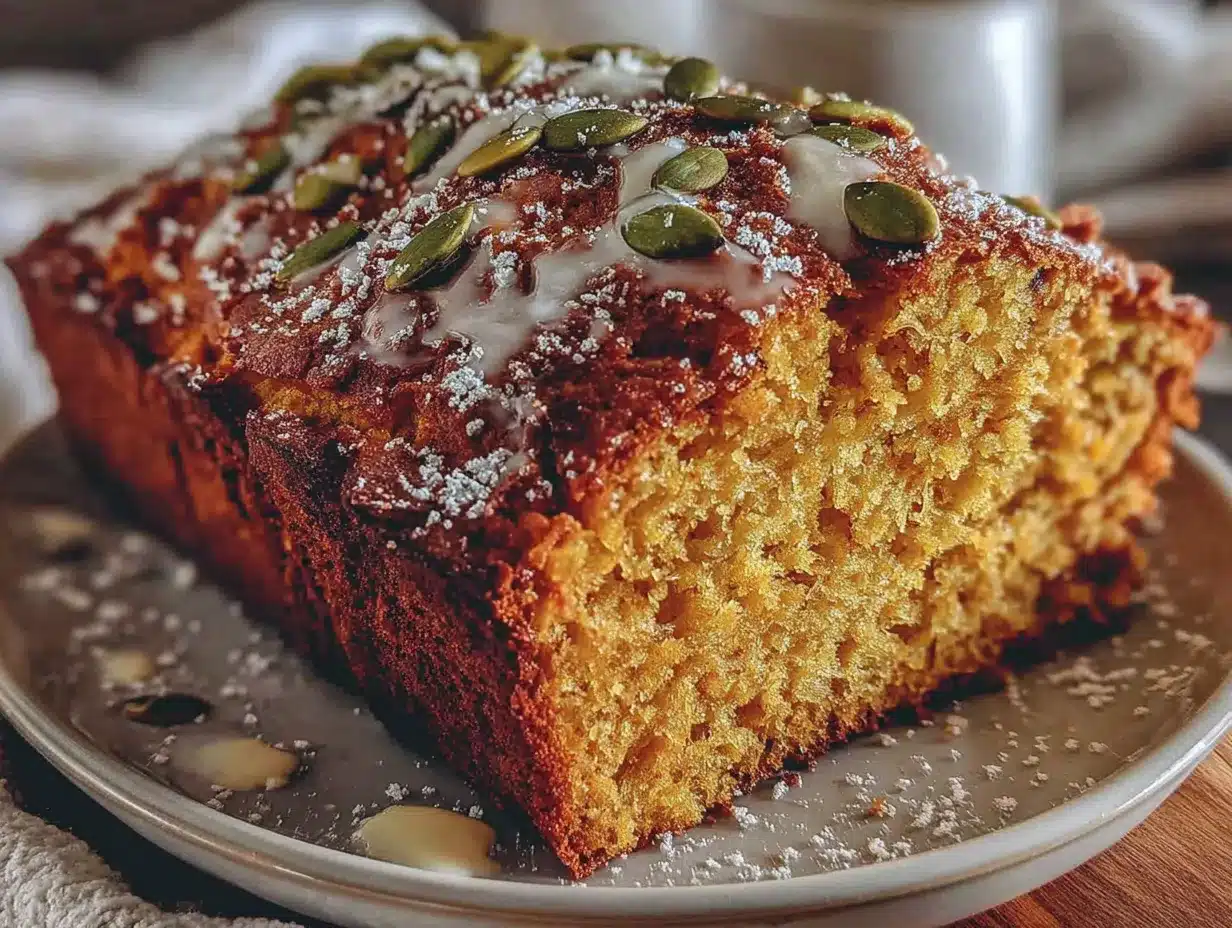
This recipe follows a standard sourdough timeline but with a few adjustments for the pumpkin. Plan to start in the morning for an evening bake, or begin the night before for a next-day loaf. Let’s walk through it step by step.
- Feed Your Starter (Morning, Day 1): Feed your sourdough starter 6-8 hours before you plan to mix the dough. You need 100g of active, bubbly starter. It should pass the float test—drop a spoonful in water and see if it floats. If it sinks, give it more time.
- Mix the Dough (Midday, Day 1): In a large bowl, combine 100g active starter, 250g warm water, and 200g pumpkin puree. Whisk until the starter is fully dissolved and the mixture looks like a thick orange slurry. Add 400g bread flour and 100g whole wheat flour, then sprinkle 9g salt and 2 teaspoons pumpkin pie spice on top. Mix with your hands or a dough whisk until no dry flour remains. The dough will be shaggy and sticky—that’s normal. Cover with a damp towel and let it rest for 30 minutes (this is called autolyse).
- Perform Stretch and Folds (After Autolyse): Wet your hands to prevent sticking. Grab one side of the dough, stretch it up, and fold it over the top. Rotate the bowl a quarter turn and repeat. Do this 4 times total (one full rotation). Then add 1 tablespoon olive oil and ¼ cup pepitas, and gently fold them in. Cover and rest 30 minutes. Repeat the stretch and fold process 3 more times at 30-minute intervals. After the fourth set, the dough should feel smoother and more elastic.
- Bulk Fermentation (3-4 Hours): Cover the bowl and let the dough rise at room temperature (70-75°F is ideal). The dough needs to increase by about 50-60% in volume. Pumpkin puree slows fermentation slightly, so don’t rush this step. You’ll see small bubbles on the surface and the dough should feel pillowy and jiggly. If your kitchen is cold, place the bowl in your oven with the light on.
- Shape the Dough (Evening, Day 1): Lightly flour your work surface. Turn the dough out gently—don’t deflate it too much. Using your bench scraper, fold the edges of the dough into the center to create a round. Flip it over and drag it toward you on the counter to create surface tension. The dough should form a tight, smooth ball. Place it seam-side up in a floured banneton or lined bowl.
- Cold Proof (Overnight, 8-12 Hours): Cover the banneton with a plastic bag or damp towel and place it in the refrigerator. This cold fermentation develops flavor and makes the dough easier to score. You can leave it for up to 48 hours if you want a stronger tang.
- Preheat and Prepare (Morning, Day 2): Place your Dutch oven in the cold oven and preheat to 500°F (260°C). Let it heat for at least 30 minutes after reaching temperature. Remove the dough from the fridge, place a piece of parchment paper on top, and invert the banneton. The dough should release easily. Brush off excess flour and sprinkle extra pepitas on top, pressing them in gently.
- Score and Bake: Using a lame or sharp knife, score the dough with a deep slash (about ½ inch deep) across the top. This allows the bread to expand. Carefully transfer the dough (using the parchment as a sling) into the hot Dutch oven. Cover with the lid and bake at 500°F for 20 minutes. Reduce the temperature to 450°F (230°C), remove the lid, and bake for another 20-25 minutes, until the crust is deep golden brown and the internal temperature reaches 200-205°F.
- Cool Completely: This is the hardest part. Transfer the bread to a wire rack and let it cool for at least 2 hours before slicing. The crumb is still setting inside, and cutting too early will make it gummy. I know it smells incredible, but patience pays off here.
Cooking Tips & Techniques
I have made every mistake in the book with pumpkin sourdough so you don’t have to. Here are the lessons I learned the hard way.
Watch Your Hydration: Pumpkin puree is mostly water, but it also contains fiber and solids that affect dough behavior. If your dough feels excessively sticky after the first stretch and fold, resist the urge to add more flour. Instead, wet your hands more frequently. The dough will absorb the moisture as it ferments. One time I added extra flour out of panic and ended up with a dry, dense loaf that barely rose. Learn from my impatience.
Temperature Matters: Sourdough is a living thing, and it responds to temperature. If your kitchen is cold (below 68°F), bulk fermentation could take 6 hours instead of 3-4. Use the oven with the light on as a makeshift proofing box. If it’s hot (above 80°F), check the dough earlier to avoid over-proofing, which leads to a flat loaf.
Don’t Skip the Cold Proof: I know it’s tempting to bake the same day, but the overnight cold proof does three things: it deepens the sour flavor, makes the dough easier to handle, and creates a better crust. I once tried to rush it and baked after only 4 hours in the fridge. The bread was okay, but it lacked that signature tang and the crumb was tighter. Let it rest.
Scoring with Confidence: If your blade sticks to the dough, it’s either too wet on the surface or your blade is dull. Lightly dust the top of the dough with rice flour before scoring—it creates a dry surface that the blade glides through. And don’t be shy with your cut. A shallow score won’t open properly, and you’ll lose that beautiful “ear” on the side of the loaf.
Variations & Adaptations
One of the best things about this recipe is how adaptable it is. Here are a few ways I’ve changed it up depending on my mood or what’s in my pantry.
- Spiced Maple Swirl: Before shaping, flatten the dough into a rectangle and spread a mixture of 2 tablespoons maple syrup and 1 teaspoon cinnamon over the surface. Roll it up tightly, then shape into a round. The maple caramelizes slightly during baking and creates a sweet ribbon throughout the bread. It’s incredible toasted with butter.
- Gluten-Free Adaptation: Substitute the bread flour and whole wheat flour with a high-quality gluten-free bread flour blend (I like Cup4Cup). Add 1 teaspoon xanthan gum if your blend doesn’t include it. The texture will be more cake-like and less chewy, but it still works beautifully. Reduce the water by 50g since gluten-free flours absorb differently.
- Savory Pumpkin Sourdough: Omit the pumpkin pie spice and add 1 tablespoon fresh rosemary (finely chopped), ½ teaspoon black pepper, and ½ cup grated Parmesan cheese to the dough during the stretch and folds. The pepitas still work perfectly here, and this version is incredible served alongside a bowl of apple cider braised pork shoulder or a hearty soup.
- Seed and Nut Crunch: Swap half the pepitas for a mix of sunflower seeds, sesame seeds, and chopped pecans. Toast them all together before adding to the dough for maximum flavor. This version is my go-to for holiday brunch tables.
- Vegan and Dairy-Free: This recipe is already dairy-free if you use olive oil instead of butter. The olive oil adds a subtle fruitiness that complements the pumpkin beautifully. No other changes needed.
Serving & Storage Suggestions
This bread is a star in so many settings. Here’s how I like to serve and store it.
Serving: Slice the bread thick—about ¾ inch—and toast it until the edges are golden. Spread with salted butter, a drizzle of honey, or a generous smear of cream cheese. For a real treat, serve it alongside a warm homemade iced pumpkin spice latte for the ultimate fall pairing. It’s also fantastic as a base for an open-faced sandwich with roasted turkey, brie, and arugula. The tangy bread balances the rich toppings perfectly.
Storage: Store the bread cut-side down on a wooden cutting board at room temperature for up to 3 days. Do not wrap it in plastic—the crust will turn soggy. Instead, place a clean kitchen towel over the cut end. For longer storage, slice the entire loaf and freeze the slices in a single layer on a baking sheet, then transfer to a freezer-safe bag. Toast directly from frozen for fresh-tasting bread anytime. The bread also develops more flavor on day two, so don’t be afraid to let it sit.
Reheating: To revive day-old bread, run the cut side under a thin stream of water (just enough to dampen the crumb) and place it in a 350°F oven for 5-7 minutes. The steam re-crisps the crust and softens the interior. This trick works like magic.
Nutritional Information & Benefits
This bread is made with real, whole ingredients, and it shows in both flavor and nutrition. Here’s an approximate breakdown per slice (based on 12 slices per loaf).
| Nutrient | Amount Per Slice |
|---|---|
| Calories | 195 |
| Total Fat | 4g |
| Saturated Fat | 0.5g |
| Carbohydrates | 35g |
| Fiber | 3g |
| Sugar | 2g |
| Protein | 6g |
| Sodium | 290mg |
Health Benefits: Pumpkin is packed with vitamin A (beta-carotene), which supports eye health and immune function. The pepitas add magnesium, zinc, and healthy fats that help with energy and muscle recovery. The fermentation process in sourdough breaks down phytic acid, making the minerals in the flour more bioavailable. Plus, the natural probiotic activity from the starter can support gut health. This bread is not just delicious—it’s nourishing in a way that processed breads simply aren’t.
Dietary Notes: This recipe is vegetarian and dairy-free (if using olive oil). It contains gluten and is not suitable for celiacs unless adapted with the gluten-free variation. The pepitas are a common allergen for some, so omit them if needed.
Conclusion
This fluffy pumpkin sourdough bread with pepitas is the loaf I keep coming back to every fall. It has that perfect balance of tangy and sweet, soft and crusty, simple and special. It’s the kind of bread that makes you slow down and actually enjoy the process of baking—the feel of the dough, the smell of pumpkin and spice, the sound of the crust crackling as it cools. I hope you give it a try and make it your own. Maybe you’ll add more spice, or swap in different seeds, or find a new way to serve it that I haven’t thought of. That’s the beauty of a good recipe—it’s a starting point, not a rulebook. When you bake this loaf, tag me or leave a comment below. I genuinely love hearing how it turned out in your kitchen. Happy baking, friends.
Frequently Asked Questions
Can I use canned pumpkin pie filling instead of pure pumpkin puree?
No, please don’t. Pumpkin pie filling has added sugar, spices, and thickeners that will throw off the hydration and fermentation of your dough. Stick with 100% pure pumpkin puree for the best results. If you only have pie filling, save it for making no-bake pumpkin pie instead.
Why is my dough so sticky even after adding all the flour?
Pumpkin puree naturally contains a lot of moisture, and different brands have different water contents. If your dough feels overly sticky, don’t add more flour—instead, wet your hands and work surface more frequently during the stretch and folds. The dough will absorb the moisture as it ferments. If it’s still unmanageable after 2 hours of bulk fermentation, add 1-2 tablespoons of flour during the final fold.
Can I bake this bread without a Dutch oven?
Yes, but you’ll need to create steam another way. Place a baking sheet on the bottom rack of your oven and preheat it with the oven. When you put the bread in, carefully pour 1 cup of hot water into the baking sheet and quickly close the door. The steam will help create a crispy crust. You can also use a heavy baking stone with a metal bowl inverted over the loaf for the first 20 minutes.
How do I know when my sourdough starter is active enough for this recipe?
Your starter should be bubbly, doubled in size, and pass the float test. To test, drop a small spoonful of starter into a glass of room-temperature water. If it floats, it’s ready. If it sinks, feed it again and wait 4-6 more hours. A young or sluggish starter won’t give you the rise you need, especially with the added weight of the pumpkin puree.
Can I add chocolate chips or dried fruit to this bread?
Absolutely. Add ½ cup of dark chocolate chips or dried cranberries during the final stretch and fold. The chocolate pairs beautifully with the pumpkin spice, and the cranberries add a tart pop that cuts through the richness. Just be sure to fold them in gently to avoid deflating the dough too much.
Pin This Recipe!
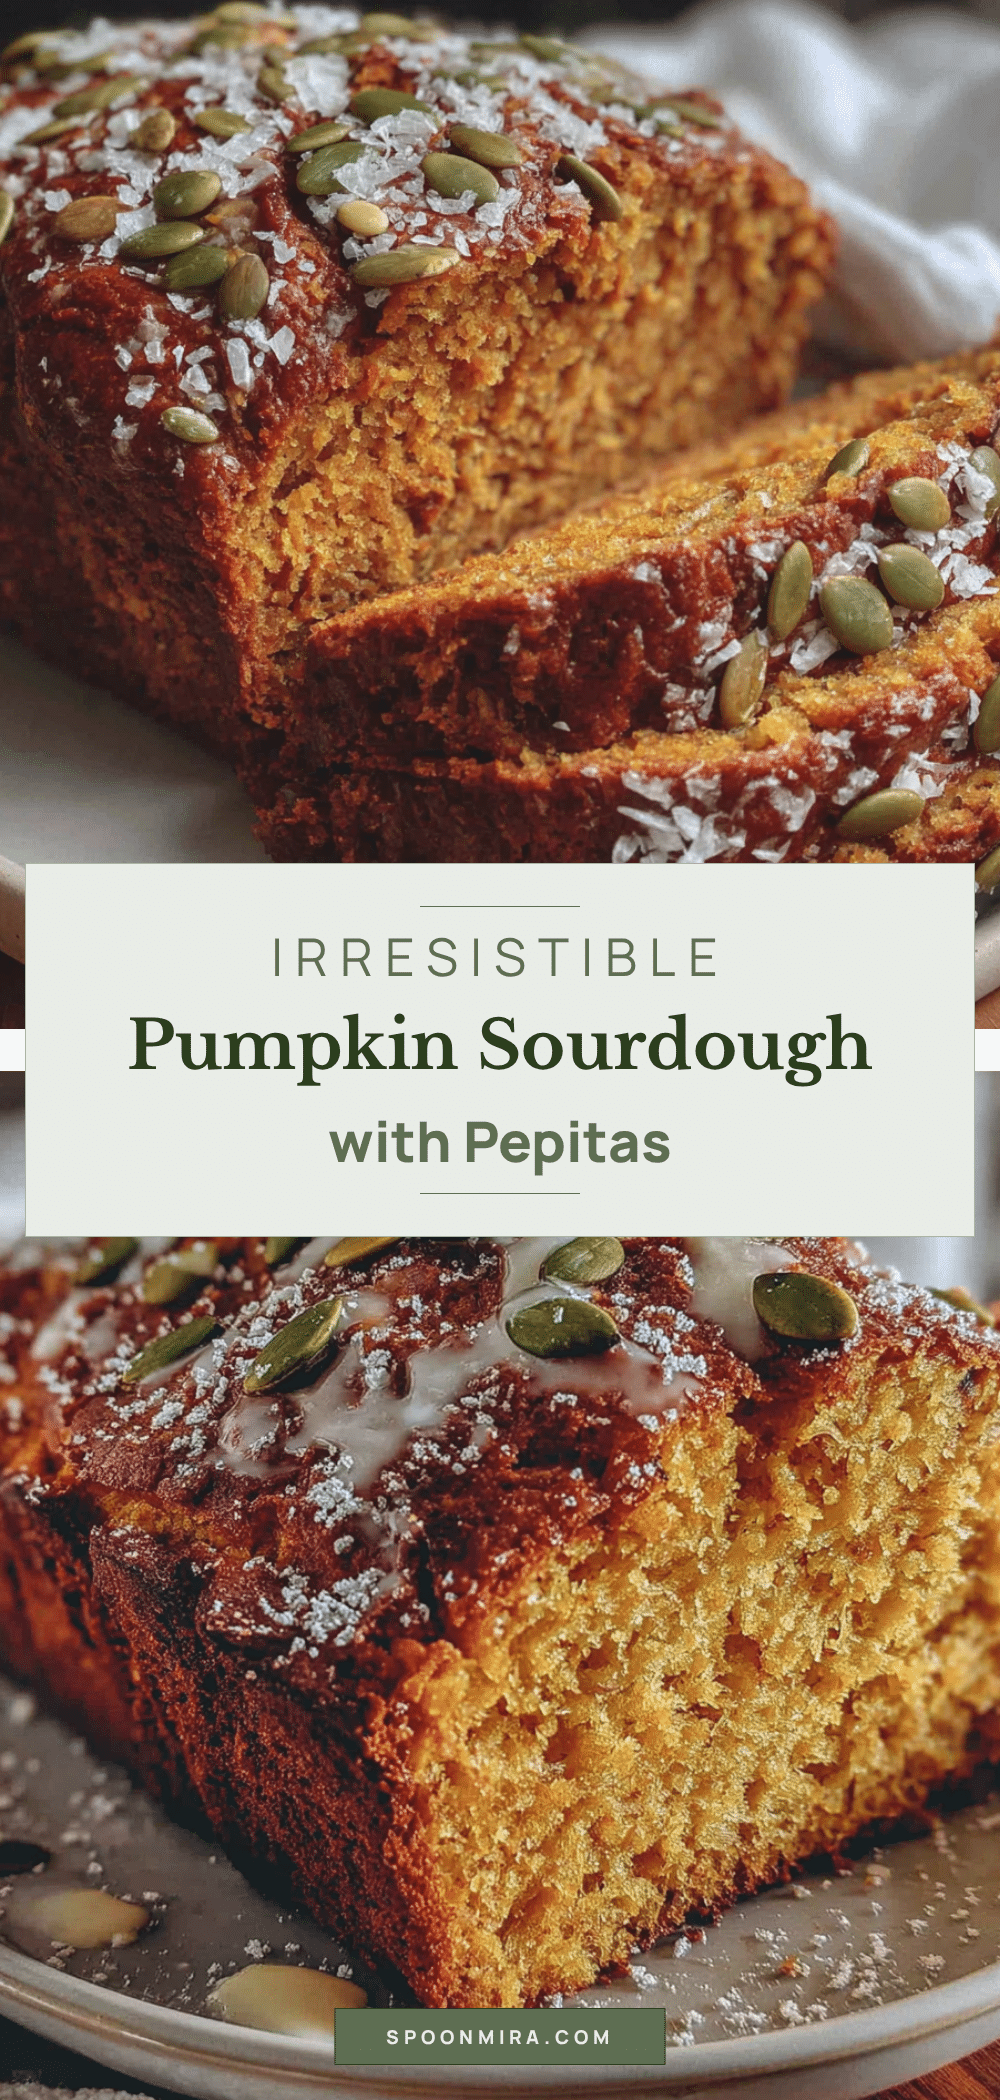
Best Easy Fluffy Pumpkin Sourdough Bread with Pepitas
This fluffy pumpkin sourdough bread with pepitas is the perfect fall loaf—soft, tangy, and packed with pumpkin spice flavor. It’s made with simple ingredients and delivers a beautiful open crumb that’s ideal for toasting.
- Prep Time: 30 minutes
- Cook Time: 45 minutes
- Total Time: 14 hours (including fermentation and proofing)
- Yield: 12 servings 1x
- Category: Bread
- Cuisine: American
Ingredients
- 100g active sourdough starter
- 400g bread flour (about 3 cups)
- 100g whole wheat flour (about ¾ cup)
- 200g pumpkin puree (about ¾ cup)
- 250g warm water (about 1 cup plus 1 tablespoon)
- 9g fine sea salt (about 1½ teaspoons)
- 2 teaspoons pumpkin pie spice
- ¼ cup pepitas (raw, shelled pumpkin seeds), plus more for topping
- 1 tablespoon olive oil
Instructions
- Feed your sourdough starter 6-8 hours before mixing; you need 100g of active, bubbly starter that passes the float test.
- In a large bowl, combine 100g active starter, 250g warm water, and 200g pumpkin puree. Whisk until dissolved. Add 400g bread flour, 100g whole wheat flour, 9g salt, and 2 teaspoons pumpkin pie spice. Mix until no dry flour remains. Cover and rest for 30 minutes (autolyse).
- Wet your hands. Perform 4 stretch and folds (one full rotation). Add 1 tablespoon olive oil and ¼ cup pepitas, folding them in. Cover and rest 30 minutes. Repeat stretch and folds 3 more times at 30-minute intervals.
- Cover and let the dough bulk ferment at room temperature (70-75°F) for 3-4 hours, until increased by 50-60% in volume and feels pillowy.
- Lightly flour your work surface. Turn out the dough and shape into a tight round by folding edges into the center and dragging toward you. Place seam-side up in a floured banneton or lined bowl.
- Cover and cold proof in the refrigerator for 8-12 hours (up to 48 hours for stronger tang).
- Place a Dutch oven in the oven and preheat to 500°F (260°C) for at least 30 minutes. Remove dough from fridge, invert onto parchment paper, brush off excess flour, and sprinkle extra pepitas on top, pressing gently.
- Score the dough with a deep slash (about ½ inch deep). Transfer to the hot Dutch oven using parchment as a sling. Cover and bake at 500°F for 20 minutes. Reduce to 450°F (230°C), remove lid, and bake 20-25 minutes more until deep golden brown and internal temperature reaches 200-205°F.
- Transfer to a wire rack and cool completely for at least 2 hours before slicing.
Notes
Pumpkin puree slows fermentation slightly; don’t rush bulk fermentation. If dough is sticky, wet hands instead of adding flour. Cold proof overnight for best flavor and texture. Cool completely before slicing to avoid gummy crumb.
Nutrition
- Serving Size: 1 slice
- Calories: 195
- Sugar: 2
- Sodium: 290
- Fat: 4
- Saturated Fat: 0.5
- Carbohydrates: 35
- Fiber: 3
- Protein: 6
Keywords: pumpkin sourdough, sourdough bread, pumpkin bread, fall bread, sourdough with pepitas, fluffy sourdough, artisan bread


