“Mom, you HAVE to make that peppermint bark fudge again. The one that tastes like a candy cane got melted into a cloud.”
That text from my teenage daughter landed in the middle of my workday, and honestly, I had to stop and laugh. She wasn’t wrong. That first batch I threw together two Christmases ago—born out of pure desperation when I realized I’d forgotten to buy gifts for three neighbors and the holiday open house was in four hours—had somehow become legendary in our house. I remember standing in my kitchen, staring at the half-empty bag of chocolate chips, the bag of candy canes I’d bought on a whim, and the can of sweetened condensed milk that was somehow always in my pantry. I thought, “There’s no way this works.”
But it did. It really, really did.
The thing about this Easy 3-Ingredient Peppermint Bark Fudge is that it doesn’t taste like a shortcut. It tastes like you spent an afternoon tempering chocolate and crushing candy canes by hand with intention. Nobody needs to know it took you ten minutes of active work. That’s the secret you get to keep. It’s the recipe that makes you look like a holiday hero when you’re actually just a person who needs one less thing to stress about. And honestly, isn’t that what we all want this time of year?
Why You’ll Love This Recipe
This isn’t just another holiday dessert. This is the one that gets requested every single year, and I’ve tested enough versions to know why. Let me break down exactly what makes this Easy 3-Ingredient Peppermint Bark Fudge the recipe you’ll come back to again and again.
- Only Three Ingredients: Chocolate chips, sweetened condensed milk, and candy canes. That’s it. No butter, no cream, no complicated steps. You probably have two of these in your kitchen right now.
- No Candy Thermometer Needed: Traditional fudge recipes make you babysit a pot of sugar until it hits that perfect soft-ball stage. Not this one. We’re melting, stirring, and pouring. That’s the whole process.
- Ready in Under 30 Minutes: From start to finish, including chilling time, you can have a pan of fudge ready to go. The active time is maybe ten minutes. That’s less time than it takes to watch a single holiday movie trailer.
- Perfect for Gift Giving: This fudge travels beautifully. It stacks well in tins, doesn’t melt at room temperature, and looks gorgeous wrapped in a little cellophane bag with a ribbon. I’ve shipped it to friends across the country with zero issues.
- Naturally Gluten-Free: As long as you check your chocolate chip label, this recipe is completely gluten-free. That makes it a safe bet for holiday parties where dietary restrictions are always a concern.
- Foolproof Texture: The sweetened condensed milk creates a fudge that’s creamy and dense but not grainy. It has that perfect melt-in-your-mouth quality that expensive chocolate shops charge a fortune for.
I’ve made this recipe for cookie swaps, teacher gifts, office parties, and last-minute hostess presents. It has never let me down. The first time I made it, I was genuinely shocked at how good it turned out. I kept thinking I must have missed a step. But no—it’s just that simple. And that delicious.
What Ingredients You Will Need
This recipe uses three simple ingredients to create something that tastes far more complex than it has any right to. Here’s what you need and why each one matters.
- 2 cups (12 oz) semi-sweet chocolate chips: I prefer Ghirardelli or Guittard for this recipe. Their chocolate melts smoothly and has a rich flavor that stands up to the sweetness of the condensed milk. You can use milk chocolate chips if you prefer a sweeter fudge, but semi-sweet gives you that perfect balance. Dark chocolate chips work beautifully too, especially if you like a more intense, less sweet result. Just make sure you’re using real chocolate chips, not compound coating or melting wafers—the texture won’t be the same.
- 1 can (14 oz) sweetened condensed milk: This is non-negotiable for the texture. Sweetened condensed milk is what gives this fudge its creamy, dense, almost silky consistency. Don’t confuse it with evaporated milk—they are not the same thing. I use Eagle Brand or Borden, but any brand works. The sweetness from the condensed milk means we don’t need to add any extra sugar, and it helps the chocolate set up perfectly without getting hard or crumbly.
- 1 cup crushed candy canes (about 8-10 regular-sized candy canes): You want the classic peppermint flavor here. I’ve tried this with starlight mints and even those generic peppermint candies from the bulk bin, and nothing works quite as well as actual candy canes. They crush into that perfect mix of fine powder and tiny chunks that gives the fudge both flavor and texture. Pro tip: crush them while they’re still in the wrapper to contain the mess. Then unwrap and crush a little more if you need smaller pieces.
That’s genuinely it. Three ingredients. No fancy extracts, no additional fats, no complicated additions. The magic happens when these three things come together, and I promise you, the result is greater than the sum of its parts.
Equipment Needed
You don’t need a professional kitchen to make this fudge. Here’s what you’ll want to have on hand.
- 8×8-inch baking pan: This is the perfect size for this recipe. It gives you fudge that’s about an inch thick—substantial enough to feel like a real treat but not so thick that it’s overwhelming. If you only have a 9×9 pan, your fudge will be slightly thinner, and you’ll need to reduce the chilling time a bit.
- Parchment paper: Line your pan with parchment paper, leaving some overhang on two opposite sides. This creates handles that let you lift the entire block of fudge out of the pan cleanly. Trust me on this—trying to scoop fudge out of a pan is a messy disaster.
- Medium saucepan: You’ll melt everything together on the stovetop. A heavy-bottomed saucepan works best because it distributes heat evenly and prevents scorching. I’ve used my trusty old Calphalon for years, and it’s never let me down.
- Rubber spatula: For stirring and scraping. A silicone spatula is ideal because it won’t scratch your pan and it gets every last bit of fudge out of the saucepan.
- Ziploc bag or food processor: For crushing the candy canes. A Ziploc bag and a rolling pin work perfectly. If you’re making a big batch, a food processor does the job in seconds.
- Sharp knife: For cutting the fudge once it’s set. A chef’s knife or a large serrated knife works well. Run it under hot water and wipe it dry between cuts for the cleanest edges.
That’s it. No double boiler, no candy thermometer, no special equipment. If you have a pan and a pot, you can make this fudge.
Preparation Method
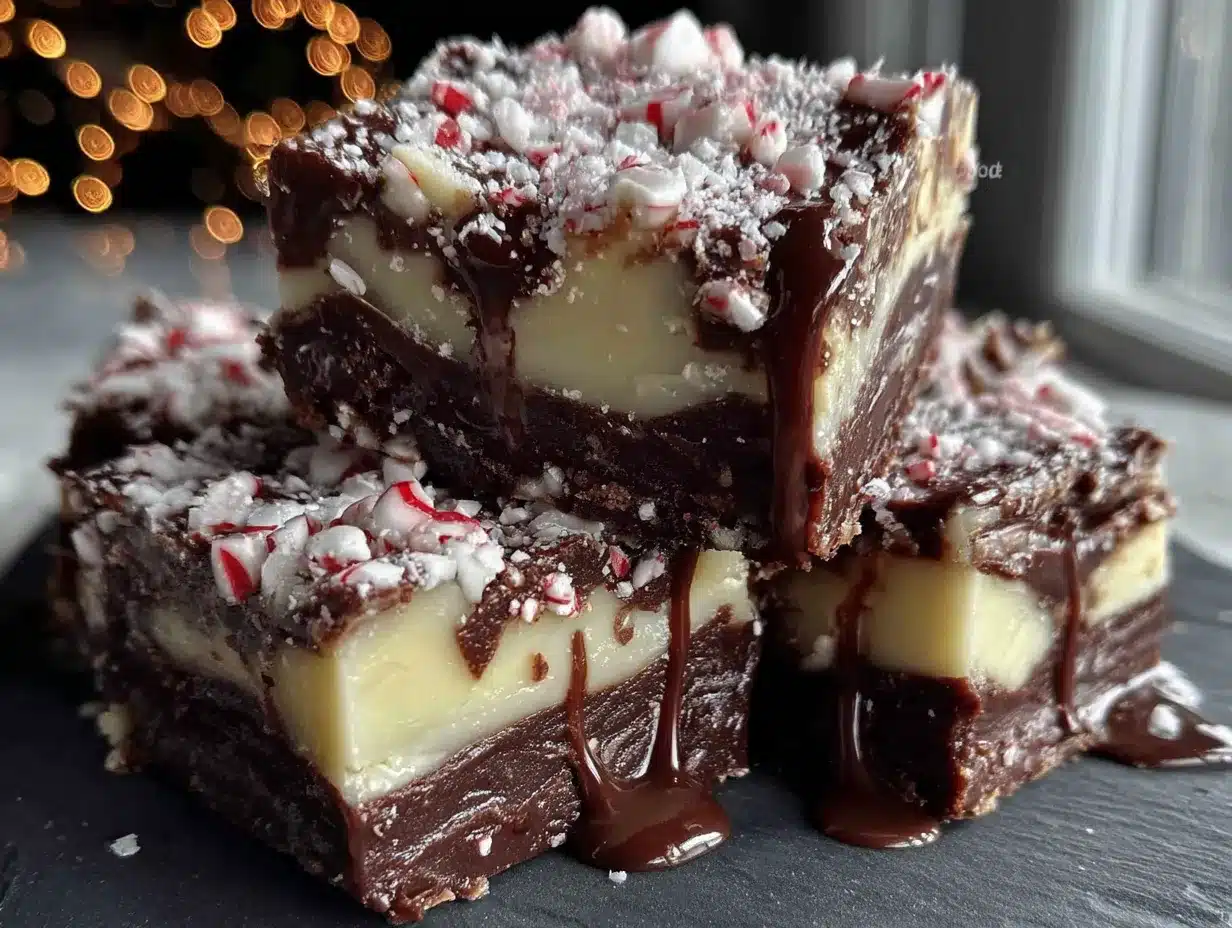
Let me walk you through this step by step. I’ve made this recipe more times than I can count, and these are the exact steps that work every single time.
- Prep your pan. Line your 8×8-inch baking pan with parchment paper, leaving about 2 inches of overhang on two opposite sides. This will be your lifting handles later. Lightly spray the parchment with non-stick cooking spray if you’re feeling extra cautious, though I’ve found it’s usually not necessary.
- Crush your candy canes. Place the unwrapped candy canes in a sturdy Ziploc bag. Seal it, then use a rolling pin or the bottom of a heavy pan to crush them. You want a mix of fine powder and small chunks—not completely pulverized, but not in huge pieces either. Aim for pieces about the size of small peas. Set aside about 2 tablespoons of the crushed candy canes for the top of the fudge.
- Combine the chocolate and condensed milk. Pour the chocolate chips and the entire can of sweetened condensed milk into your medium saucepan. Place it over low heat. This is important—low heat. High heat will scorch the chocolate and give you a gritty, separated mess. I learned this the hard way my second time making this.
- Stir constantly. Keep stirring with your rubber spatula as the chocolate melts. The mixture will look thick and lumpy at first, then it will smooth out into a glossy, dark, silky mixture. This takes about 5-7 minutes. Don’t walk away. Don’t check your phone. Just keep stirring. You’re looking for a uniform, smooth consistency with no streaks of white from the condensed milk.
- Remove from heat and add candy canes. Once the mixture is completely smooth and glossy, take it off the heat. Stir in the crushed candy canes (reserving those 2 tablespoons for the top). Stir just until they’re evenly distributed—about 15 seconds of stirring. The candy canes will start to melt slightly into the warm fudge, which is exactly what you want.
- Pour into the prepared pan. Scrape every last bit of fudge into your parchment-lined pan. Use your spatula to spread it into an even layer. It will be thick and slightly sticky, so take your time. Get it as flat and even as you can.
- Sprinkle the reserved candy canes on top. Immediately sprinkle those reserved 2 tablespoons of crushed candy canes over the top. Gently press them into the surface with your fingers or the back of a spoon so they stick.
- Chill until firm. Place the pan in the refrigerator for at least 2 hours, or until the fudge is completely firm to the touch. I usually leave it for 3 hours to be safe. If you’re in a hurry, you can pop it in the freezer for about 45 minutes, but keep an eye on it—you don’t want it to get rock hard.
- Lift and cut. Once the fudge is firm, use the parchment handles to lift the entire block out of the pan. Place it on a cutting board. Use a sharp knife to cut it into squares. I usually go for 1-inch squares, which gives you about 64 pieces from one batch. For cleaner cuts, wipe your knife with a damp paper towel between cuts.
That’s it. Nine steps, most of which are just waiting. The fudge will be creamy, rich, and studded with little bursts of peppermint in every bite. The texture is exactly what you want from a good fudge—dense but not heavy, smooth but with that satisfying crunch from the candy cane pieces.
Cooking Tips & Techniques
I’ve made this Easy 3-Ingredient Peppermint Bark Fudge enough times to have learned a few things the hard way. Here are my best tips to make sure your first batch (and every batch after) turns out perfectly.
- Low and slow is the rule. I cannot stress this enough. Chocolate burns easily, and sweetened condensed milk scorches just as fast. Keep your heat on low and stir constantly. The first time I made this, I got impatient and turned the heat up to medium. The chocolate seized up into a grainy, oily mess. I had to start over. Learn from my mistake.
- Use a heavy-bottomed saucepan. Thin pans create hot spots that can burn your chocolate even on low heat. A heavy-bottomed pan distributes the heat more evenly and gives you more control. If you only have a thin pan, consider using a double boiler instead.
- Don’t over-crush the candy canes. You want a mix of textures. Some fine powder that melts into the fudge and gives it that peppermint flavor throughout, plus some small chunks that provide a satisfying crunch. If you crush them too fine, you lose that texture contrast.
- Let the fudge set completely before cutting. I know it’s tempting to cut into it after an hour, but it won’t be fully set. The fudge needs that full 2-3 hours in the fridge to firm up properly. Cutting too early gives you messy, ragged edges and fudge that sticks to your knife.
- Store in the refrigerator. This fudge stays best in the fridge. It will keep for up to two weeks in an airtight container. Let it sit at room temperature for about 10 minutes before serving for the best texture—it softens just slightly and becomes incredibly creamy.
- Double the recipe for gift-giving. This recipe doubles beautifully. Use a 9×13 pan and increase the chilling time to about 3-4 hours. I make a double batch every year for holiday gifts, and it’s always a hit.
Variations & Adaptations
One of the best things about this fudge is how easy it is to adapt. Here are some variations I’ve tried and loved.
- Dark Chocolate Peppermint Fudge: Swap the semi-sweet chips for dark chocolate chips (60-70% cacao). The bitterness of the dark chocolate balances the sweetness of the condensed milk beautifully, and the peppermint flavor really pops against the darker chocolate. This is my personal favorite version.
- White Chocolate Peppermint Fudge: Use white chocolate chips instead of semi-sweet. The result is sweeter and has a creamier, almost vanilla-like flavor. It looks gorgeous too—pure white fudge studded with red and white candy cane pieces. This version is always the first to disappear at parties.
- Mint Chocolate Chip Fudge: Skip the candy canes and stir in 1/2 cup of mini chocolate chips along with 1 teaspoon of peppermint extract. The mini chips stay intact and give you that classic mint chocolate chip ice cream vibe in fudge form. My kids go crazy for this version.
- Vegan Version: Use dairy-free chocolate chips and a can of coconut sweetened condensed milk (yes, it exists—look for it in the baking aisle or health food section). The texture is slightly different—a bit softer—but it’s still delicious and completely plant-based.
- Add a Chocolate Drizzle: After the fudge has set, melt 1/4 cup of additional chocolate chips with 1 teaspoon of coconut oil and drizzle it over the top. Let it set for another 15 minutes before cutting. It adds a beautiful finishing touch that makes the fudge look professionally made.
I’ve tried all of these variations at one point or another, and they each have their own charm. The dark chocolate version is what I make for myself when I want something a little more sophisticated. The white chocolate version is what I make for holiday parties where I know there will be kids. And the mint chocolate chip version? That’s what I make when I want to pretend it’s summer in the middle of December.
Serving & Storage Suggestions
This fudge is incredibly versatile when it comes to serving and storing. Here’s everything you need to know.
Serving: Serve the fudge chilled or at room temperature. I prefer letting it sit out for about 10 minutes after taking it out of the fridge—it softens just enough to become incredibly creamy without losing its structure. Arrange the squares on a festive platter or in a decorative tin. For holiday parties, I like to stack them in a small pyramid on a cake stand. It looks impressive with almost no effort.
Pairing Suggestions: This fudge pairs beautifully with a hot cup of coffee, a mug of hot cocoa, or a glass of cold milk. For an adult twist, serve it alongside a warm mug of pumpkin chai latte—the spicy notes of the chai complement the cool peppermint perfectly. I also love serving it as part of a holiday dessert board alongside a harvest charcuterie board for a stunning presentation.
Storage: Store the fudge in an airtight container in the refrigerator for up to 2 weeks. Layer the pieces between sheets of parchment paper to prevent them from sticking together. I use a glass Pyrex container with a tight-fitting lid, and it works perfectly.
Freezing: This fudge freezes beautifully. Place the cut pieces in a single layer on a baking sheet and freeze for 1 hour. Then transfer them to a freezer-safe bag or container. They’ll keep for up to 3 months. Thaw in the refrigerator overnight before serving. I always keep a stash in my freezer for unexpected guests or last-minute holiday cravings.
Flavor Development: Here’s something interesting—the flavor actually improves after a day or two in the fridge. The peppermint mellows out and melds with the chocolate, creating a more balanced, harmonious taste. So if you can resist eating it all on day one, you’ll be rewarded with even better fudge on day two.
Nutritional Information & Benefits
Let’s be real—this is a treat, not a health food. But here’s what you should know about what’s in it.
Estimated Nutritional Values (per 1-inch square, based on 64 pieces):
- Calories: 85
- Total Fat: 4g
- Saturated Fat: 2.5g
- Carbohydrates: 12g
- Sugar: 10g
- Protein: 1g
- Sodium: 15mg
Key Ingredient Benefits: Dark chocolate (if you use semi-sweet or dark chips) contains antioxidants called flavonoids, which have been linked to heart health benefits. Sweetened condensed milk provides calcium and protein, though it’s also high in sugar. Peppermint has been used for centuries to aid digestion—so technically, eating this fudge after a big meal is practically medicinal. (I’m only half joking.)
Dietary Considerations: This recipe is naturally gluten-free, nut-free, and egg-free. It does contain dairy from both the chocolate chips and the sweetened condensed milk. For a dairy-free version, use the vegan substitutions mentioned in the variations section. If you’re watching your sugar intake, this is definitely an occasional treat rather than an everyday snack.
Allergen Note: Always check your chocolate chip labels for potential cross-contamination if you’re serving someone with severe allergies. Some brands process chocolate on shared equipment with nuts or soy.
Conclusion
This Easy 3-Ingredient Peppermint Bark Fudge has become a non-negotiable part of my holiday season. It’s the recipe I turn to when I need something that looks impressive but doesn’t require hours in the kitchen. It’s the recipe I make when I want to give a homemade gift without spending a whole day baking. And honestly? It’s the recipe I make when I just want to eat something delicious and not have to think too hard about it.
The beauty of this fudge is that it’s forgiving. It doesn’t care if you’re a seasoned baker or someone who rarely steps foot in the kitchen. It works either way. The first time I made it, I was skeptical. Three ingredients? No fancy techniques? It felt too simple to be good. But then I tasted it, and I understood. Sometimes the simplest things are the ones that surprise you the most.
I’d love to hear how this fudge turns out for you. Did you try any of the variations? Did you add your own twist? Drop a comment below and let me know. And if you’re looking for another no-fuss holiday treat, you might enjoy this easy no-bake chocolate peanut butter protein balls recipe for a slightly healthier option. Happy holidays, and happy fudge-making!
Frequently Asked Questions
Can I use milk chocolate instead of semi-sweet?
Absolutely. Milk chocolate will give you a sweeter, creamier fudge. Just keep in mind that the final result will be significantly sweeter since the sweetened condensed milk is already quite sugary. If you have a serious sweet tooth, go for it. I personally prefer semi-sweet for balance.
Why did my fudge turn out grainy?
Grainy fudge usually means the chocolate got too hot or seized. This happens when you cook it over high heat or if even a tiny drop of water gets into the mixture. Make sure your saucepan is completely dry before you start, and keep the heat on low. Stir constantly. If it does seize, unfortunately there’s no fixing it—you’ll need to start over.
Can I use peppermint extract instead of candy canes?
You can, but the texture and appearance will be different. Use 1 teaspoon of peppermint extract added when you remove the mixture from heat. You’ll lose the crunchy bits of candy cane, so consider adding some crushed candy canes on top for visual appeal. The flavor will still be there, but the fudge won’t have that signature peppermint bark look.
How do I get clean, neat cuts?
Use a sharp knife and wipe it clean between each cut. Run the knife under hot water, dry it off, then make your cut. The heat helps the knife glide through the fudge without dragging or sticking. For the cleanest edges, chill the fudge for the full 3 hours before cutting.
Can I make this fudge in the microwave?
Yes, you can. Combine the chocolate chips and sweetened condensed milk in a microwave-safe bowl. Microwave in 30-second intervals, stirring thoroughly between each interval, until the chocolate is completely melted and the mixture is smooth. This usually takes about 2-3 minutes total. Be careful not to overheat it. Then proceed with the recipe as written.
Pin This Recipe!
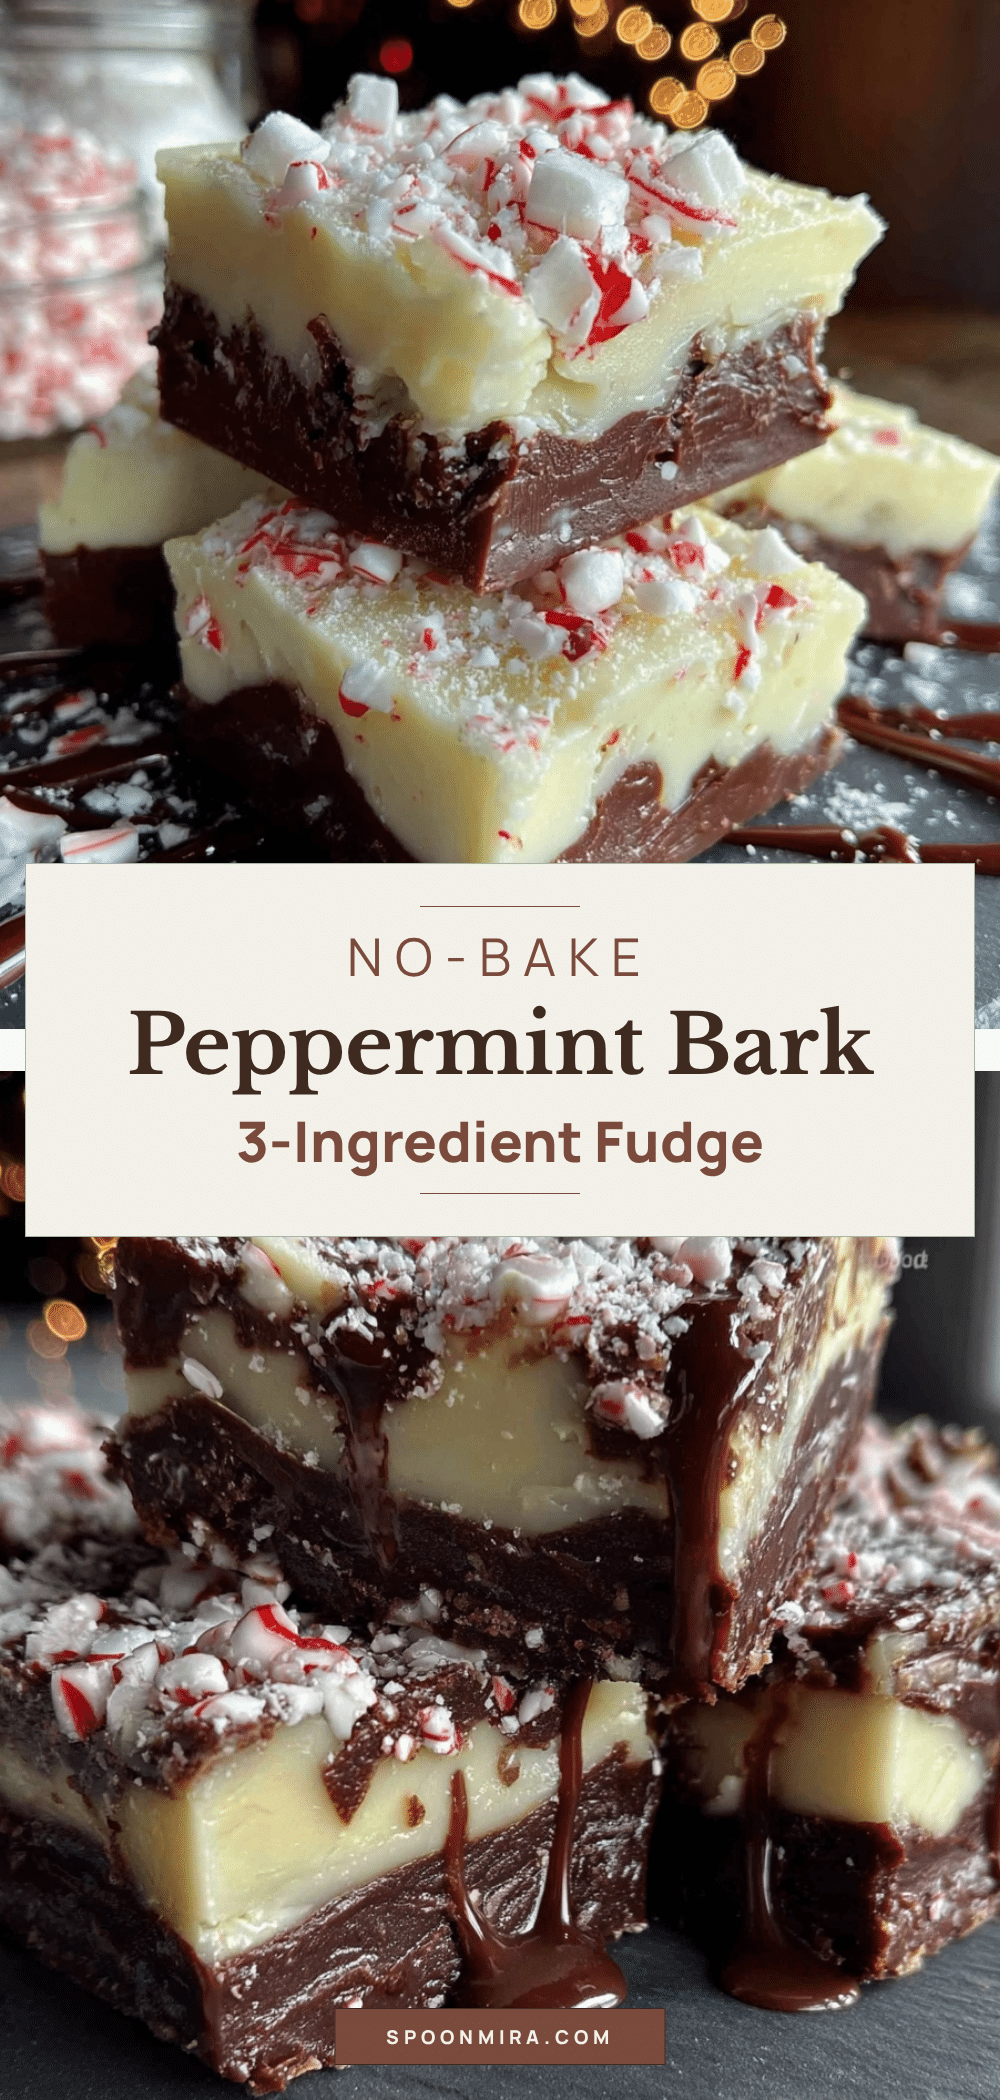
Easy 3-Ingredient Peppermint Bark Fudge

This Easy 3-Ingredient Peppermint Bark Fudge is a creamy, rich holiday treat made with chocolate chips, sweetened condensed milk, and crushed candy canes. Ready in under 30 minutes, it’s perfect for gift-giving and holiday parties.
- Prep Time: 10 minutes
- Cook Time: 7 minutes
- Total Time: 2 hours 17 minutes (including chilling)
- Yield: 64 servings 1x
- Category: Dessert
- Cuisine: American
Ingredients
- 2 cups (12 oz) semi-sweet chocolate chips
- 1 can (14 oz) sweetened condensed milk
- 1 cup crushed candy canes (about 8–10 regular-sized candy canes)
Instructions
- Prep your pan. Line an 8×8-inch baking pan with parchment paper, leaving about 2 inches of overhang on two opposite sides. Lightly spray with non-stick cooking spray if desired.
- Crush your candy canes. Place unwrapped candy canes in a sturdy Ziploc bag and crush with a rolling pin or heavy pan until you have a mix of fine powder and small chunks (about pea-sized). Set aside 2 tablespoons for the top.
- Combine the chocolate and condensed milk. Pour chocolate chips and entire can of sweetened condensed milk into a medium saucepan over low heat.
- Stir constantly with a rubber spatula until the mixture is smooth and glossy, about 5-7 minutes. Do not walk away.
- Remove from heat and stir in the crushed candy canes (reserving 2 tablespoons). Stir just until evenly distributed, about 15 seconds.
- Pour into the prepared pan and spread into an even layer with the spatula.
- Sprinkle the reserved 2 tablespoons of crushed candy canes on top and gently press them into the surface.
- Chill in the refrigerator for at least 2 hours (or 3 hours to be safe) until firm. For a quicker set, freeze for about 45 minutes.
- Once firm, use the parchment handles to lift the fudge out of the pan. Place on a cutting board and cut into 1-inch squares (about 64 pieces) with a sharp knife. Wipe the knife clean between cuts for neat edges.
Notes
Use low heat to prevent chocolate from seizing. For clean cuts, run the knife under hot water and wipe dry between cuts. The fudge flavor improves after a day or two in the fridge. Store in an airtight container in the refrigerator for up to 2 weeks, or freeze for up to 3 months.
Nutrition
- Serving Size: 1 piece (1-inch squa
- Calories: 85
- Sugar: 10
- Sodium: 15
- Fat: 4
- Saturated Fat: 2.5
- Carbohydrates: 12
- Protein: 1
Keywords: peppermint bark fudge, 3-ingredient fudge, holiday fudge, easy fudge recipe, no-bake fudge, gluten-free fudge, peppermint fudge, Christmas fudge


