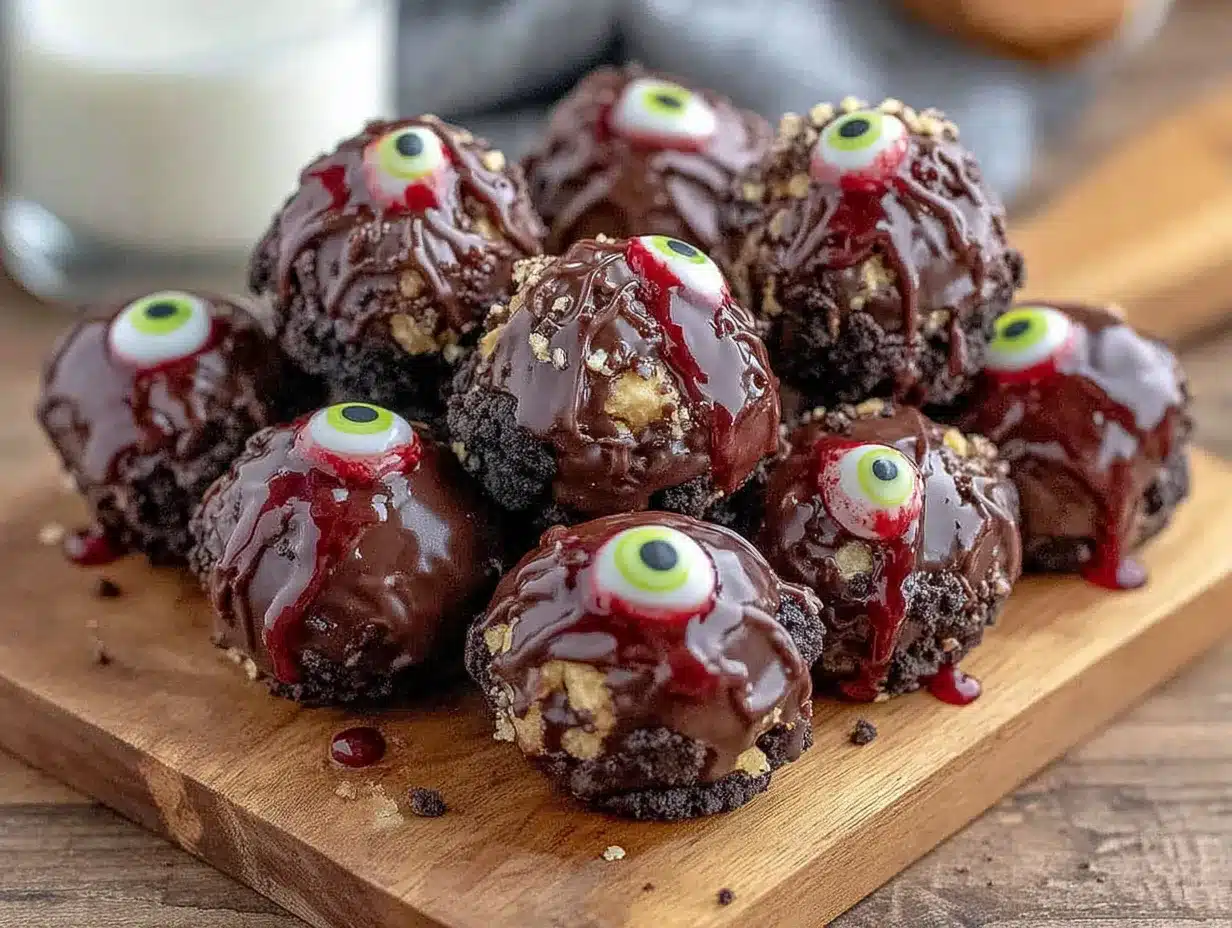
The glossy, unblinking stare of a single eyeball looking up at you from a dessert plate—that’s the whole point. I made these Easy No-Bake Monster Eyeball Cake Pops for a Halloween party last year, and honestly, everything else about the recipe is just a delivery system for that moment of ridiculous, gleeful horror. The smooth, slightly tacky surface of the white candy coating, the way the light catches the blue iris, the tiny red vein you paint on as an afterthought—it’s the kind of detail that makes kids shriek and adults laugh out loud.
I wasn’t even planning to make them. I had a box of leftover cake mix from my daughter’s birthday, a bag of melting wafers that had been sitting in the pantry since Easter, and a sudden, desperate need to contribute something to the neighborhood potluck that wasn’t another bag of chips. I remember standing in my kitchen, staring at the ingredients, and thinking, “What’s the most unsettling thing I can make with this?” The answer was obvious. They were ugly. They were weird. They were absolutely perfect.
And here’s the thing—they were the first thing to disappear. Not the pumpkin bars, not the caramel popcorn. These little creepy cake pops. People couldn’t stop talking about them. They’re not just a Halloween treat; they’re a conversation starter. They’re the kind of thing you make when you want to be the hero of the party without spending hours in the kitchen. They’re easy, they’re no-bake, and they’re genuinely fun to make. So if you’re looking for a dessert that delivers on both flavor and freak factor, you’ve found it.
Why You’ll Love This Recipe
Let me be honest with you—I’ve made a lot of Halloween desserts over the years, and most of them are more trouble than they’re worth. These Easy No-Bake Monster Eyeball Cake Pops are the exception. They’re the recipe I come back to year after year because they just work. Here’s why you’ll love them too:
- No-Bake & Foolproof: No oven required. No worrying about cake layers sinking or cookies burning. If you can melt chocolate and roll a ball, you can make these.
- Simple Ingredients: You probably have most of these in your pantry right now. Cake mix, frosting, candy melts—that’s it. No fancy grocery store runs.
- Perfect for Halloween Parties: These are the star of any spooky spread. They’re portable, they’re individually portioned, and they look incredible on a dessert table.
- Crowd-Pleaser: Kids love the gross-out factor. Adults love the nostalgia. Everyone loves the taste. It’s a win-win-win.
- Unbelievably Easy: Seriously. From start to finish, you’re looking at about an hour of active time. The hardest part is waiting for the chocolate to set.
What makes these different from every other cake pop recipe? The trick is in the texture. I use a specific ratio of cake to frosting that gives you a dense, fudge-like interior that holds its shape perfectly. No crumbling, no cracking, no falling off the stick. It’s the kind of recipe that makes you look like a pro even if you’ve never made a cake pop in your life.
And honestly? There’s something deeply satisfying about biting into something that looks like a monster eyeball. It’s the kind of treat that makes you close your eyes after the first bite—partly because it’s delicious, and partly because you don’t want to see what you’re eating. Trust me, that’s the whole fun of it.
What Ingredients You Will Need
This recipe uses simple, everyday ingredients to create something that looks anything but ordinary. The magic is in how you combine them, not in what you buy. Here’s everything you’ll need:
For the Cake Pops Base
- 1 box (15.25 oz) vanilla cake mix (or your favorite flavor—I prefer white or yellow cake for the neutral base)
- Ingredients called for on the cake mix box (typically eggs, oil, and water)
- 1/2 cup (120g) cream cheese frosting (store-bought is fine; I like the canned stuff for convenience)
For the Coating & Decoration
- 12 oz (340g) white candy melts or white chocolate melting wafers (I recommend Ghirardelli or Wilton for the smoothest melt)
- 1/2 cup (90g) blue candy melts (for the iris—you can also use green or brown for variety)
- 1 tablespoon (15ml) coconut oil or shortening (for thinning the chocolate; this is optional but helps get that perfect dip)
- Black gel food coloring (for the pupils—the gel kind is essential, liquid will seize the chocolate)
- Red gel food coloring (for the bloodshot veins—optional but highly recommended)
- White candy pearls or small white sprinkles (for the highlight on the eyeball—this is what makes them look alive)
For Assembly
- 24 lollipop sticks (6-inch size works best)
- 1 block of styrofoam or a cake pop stand (for drying—this is non-negotiable, trust me)
Pro tip: If you can’t find blue candy melts, you can use white melts and color them with oil-based food coloring. Just don’t use regular liquid food coloring—it will turn your chocolate into a grainy, unusable mess. I learned that one the hard way.
Equipment Needed
You don’t need a professional bakery setup for these Easy No-Bake Monster Eyeball Cake Pops. Here’s what you’ll actually use:
- 9×13 inch baking pan (for baking the cake—any size works, really)
- Large mixing bowl (for crumbling and mixing the cake with frosting)
- Electric hand mixer or stand mixer (for making the cake batter; you can do it by hand, but the mixer is easier)
- Small cookie scoop or tablespoon (for portioning the cake balls evenly—I use a #40 scoop)
- Baking sheet lined with parchment paper (for freezing the cake balls)
- Microwave-safe bowls (for melting the candy—glass or ceramic works best)
- Small piping bags or zip-top bags (for the blue and black chocolate details)
- Toothpicks (for painting on the veins—I prefer this over a brush for the fine lines)
- Styrofoam block (for drying the dipped cake pops—a cardboard box with holes works in a pinch)
If you don’t have lollipop sticks, you can make these as cake balls instead. Just skip the sticks and place them on a parchment-lined tray. They’re slightly less dramatic but just as delicious.
Preparation Method
Okay, let’s get into the actual process. I’ve broken this down step by step so you can follow along without any confusion. Take your time—this is supposed to be fun, not stressful.
Step 1: Bake the Cake
Preheat your oven to 350°F (175°C). Prepare the cake mix according to the package directions—usually that means combining the mix with eggs, oil, and water. Pour the batter into a greased 9×13 inch pan and bake for 25-30 minutes, or until a toothpick inserted in the center comes out clean. Let the cake cool completely. This is important—if the cake is even slightly warm, the frosting will melt and you’ll end up with a sticky, unworkable mess. I usually bake mine the night before and let it cool overnight.
Step 2: Crumble and Combine
Once the cake is completely cool, crumble it into a large mixing bowl. You want fine, even crumbs—no large chunks. I use my hands for this, but you can also use a fork or a pastry cutter. Add the 1/2 cup of cream cheese frosting and mix it in with your hands or a spatula. The mixture should hold together when you squeeze it, like damp sand. If it’s too dry, add a tablespoon more frosting. If it’s too wet, add a little more cake crumb.
Step 3: Form the Balls
Scoop out about 1.5 tablespoons of the cake mixture and roll it into a smooth ball. Place each ball on a parchment-lined baking sheet. You should get about 24 balls. Once they’re all rolled, pop the tray in the freezer for 15-20 minutes. This firms them up so they don’t fall apart when you dip them. Don’t skip this step—I promise it makes all the difference.
Step 4: Melt the White Coating
While the cake balls are chilling, melt the white candy melts. Place them in a microwave-safe bowl and heat in 30-second intervals, stirring after each, until completely smooth. Add 1 tablespoon of coconut oil or shortening if the mixture is too thick—you want it thin enough to dip easily but not so thin that it runs off the ball. Let it cool for a few minutes before dipping.
Step 5: Dip and Stick
Remove the cake balls from the freezer. Dip the tip of a lollipop stick into the melted white chocolate, then insert it about halfway into a cake ball. This acts like glue and keeps the pop from sliding off. Dip the entire cake ball into the melted white chocolate, covering it completely. Gently tap the stick on the edge of the bowl to let excess chocolate drip off. Insert the stick into your styrofoam block and let it set for about 10 minutes.
Step 6: Create the Eyeballs
While the white coating is still slightly tacky (or after it’s fully set—either works), it’s time to decorate. Melt the blue candy melts in a separate bowl. Transfer to a small piping bag or zip-top bag and snip off a tiny corner. Pipe a small circle in the center of each cake pop—this is the iris. Let it set for 5 minutes.
Using the black gel food coloring and a toothpick, dot a small pupil in the center of each blue iris. Then, take a white candy pearl or small white sprinkle and place it just off-center on the blue iris. This highlight is what makes the eyeball look glossy and alive—don’t skip it.
Step 7: Add the Veins (Optional but Awesome)
For the bloodshot effect, dip a clean toothpick into the red gel food coloring and drag thin, jagged lines from the edge of the white coating toward the iris. Don’t overthink this—real blood vessels are messy and random. A few uneven lines look way better than perfect ones.
Step 8: Let Them Set Completely
Allow the cake pops to set fully in the styrofoam block for at least 30 minutes. If you’re in a hurry, you can pop them in the fridge for 15 minutes. Just be careful—condensation can make the coating sticky.
Cooking Tips & Techniques
I’ve made these Easy No-Bake Monster Eyeball Cake Pops about a dozen times now, and I’ve picked up a few tricks along the way. Here’s what I wish someone had told me before my first attempt:
- Don’t overmix the cake and frosting. You want the mixture to hold together, but if you work it too much, it gets greasy and heavy. Stop as soon as it comes together.
- Use a cookie scoop for even sizing. Uneven cake balls mean uneven drying times and a lopsided final look. A #40 scoop gives you perfectly uniform balls every time.
- Let the chocolate cool before dipping. If the melted candy is too hot, it will melt the cake ball and you’ll end up with a soupy mess. Let it cool until it’s warm to the touch but not hot.
- Work in small batches. Only take 4-5 cake balls out of the freezer at a time. If they warm up too much, they’ll fall apart when you dip them. Keep the rest chilled until you’re ready.
- Tap, tap, tap. After dipping, tap the stick gently on the edge of the bowl to remove excess chocolate. This prevents drips and gives you a smooth, even coating.
- Fix cracks immediately. If you see a crack forming in the coating, dip your finger in a little melted chocolate and smooth it over before it sets. Cracks are the enemy of a good eyeball.
I once tried to rush the cooling process and ended up with cake pops that looked more like sad, lumpy snowmen than monster eyeballs. It was a disaster. Now I’m religious about the freezing step, and I never skip the cooling period between dips. Patience is the secret ingredient here.
Variations & Adaptations
One of the best things about this recipe is how easy it is to customize. Here are a few variations I’ve tried and loved:
- Chocolate Monster Eyeballs: Swap the white candy melts for dark or milk chocolate. Use green or yellow candy melts for the iris. The dark chocolate version tastes like a truffle—it’s dangerously good.
- Gluten-Free Version: Use a gluten-free cake mix and gluten-free frosting. The process is exactly the same. I’ve tested this with King Arthur’s gluten-free yellow cake mix, and it works perfectly.
- Vegan Monster Eyeballs: Use a vegan cake mix, vegan frosting, and vegan candy melts. Coconut oil works great for thinning the chocolate. Just double-check that your candy melts are dairy-free—some brands use milk powder.
- Zombie Eyeballs: Add a few drops of green food coloring to the white coating for a sickly, undead look. Use red candy melts for the iris and skip the highlight for a more matte, lifeless finish.
- Mini Eyeball Pops: Use a melon baller to make tiny cake balls and use short 4-inch sticks. These are perfect for kids’ parties or as cupcake toppers.
I once made a batch using red velvet cake mix and cream cheese frosting, and the dark red interior peeking through the white coating looked disturbingly realistic. My husband refused to eat them. I considered that a win.
Serving & Storage Suggestions
These Easy No-Bake Monster Eyeball Cake Pops are best served at room temperature, straight off the stick. The coating should be firm and snappy, and the interior should be soft and fudgy. Arrange them on a platter with the sticks pointing up, like a creepy bouquet. For extra drama, place them in a bowl of dry ice for a foggy, haunted effect—just make sure the dry ice doesn’t touch the chocolate directly.
They pair perfectly with a batch of creamy loaded buffalo chicken dip for a savory-sweet Halloween spread. Or serve them alongside crispy bacon-wrapped jalapeño poppers for the ultimate party platter.
For storage, place the cake pops in an airtight container in the refrigerator for up to 5 days. Layer them between sheets of parchment paper so they don’t stick together. To freeze, wrap each pop individually in plastic wrap, then place in a freezer-safe bag for up to 3 months. Thaw in the refrigerator overnight before serving.
One thing to note: the flavors actually get better after a day or two. The cake softens and absorbs the frosting, and the coating sets into a perfect shell. So don’t be afraid to make these a day ahead—they’ll taste even better.
Nutritional Information & Benefits
Let’s be real—these are a treat, not a health food. But here’s the estimated nutritional breakdown per cake pop (based on 24 servings):
- Calories: 185
- Fat: 8g
- Carbohydrates: 27g
- Protein: 2g
- Sugar: 18g
That said, there are a few small benefits worth noting. The cream cheese frosting adds a little calcium and protein. The cake provides quick energy for a sugar-fueled Halloween night. And honestly? Sometimes the mental health benefit of making something ridiculous and fun is worth more than any nutritional value. I firmly believe that joy is a nutrient—and these cake pops deliver it in spades.
If you’re looking for a lighter option, you can use a sugar-free cake mix and reduced-fat frosting. The texture will be slightly different, but the flavor is still great.
Conclusion
These Easy No-Bake Monster Eyeball Cake Pops are the kind of recipe that makes you the legend of the Halloween party. They’re fun to make, easy to customize, and absolutely delicious. Whether you’re hosting a spooky gathering, bringing a dish to a potluck, or just looking for a way to make your kids laugh, these creepy little eyeballs deliver every single time.
I’d love to see how yours turn out. Tag me in your photos, leave a comment below, or share your own variations. Did you make them with zombie eyes? Chocolate version? Something completely unhinged? Tell me about it. I read every comment, and honestly, your ideas often inspire my next batch.
So go ahead—get your hands dirty, make a mess, and enjoy every single bite. Halloween only comes once a year, and you deserve to have a little fun with it.
Frequently Asked Questions
Can I use homemade cake instead of boxed mix?
Absolutely! Any vanilla or yellow cake recipe will work. Just make sure it’s completely cool before you crumble it. Homemade cake tends to be a little denser, so you might need slightly less frosting to get the right consistency.
Why did my cake pops fall off the stick?
This usually happens when the cake balls are too warm or the chocolate is too thick. Make sure your cake balls are thoroughly chilled before dipping, and thin your chocolate with a little coconut oil if needed. Also, don’t skip the “glue” step—dipping the stick in chocolate before inserting it makes a huge difference.
Can I make these ahead of time?
Yes! These are perfect for make-ahead prep. You can bake the cake and form the balls up to 2 days in advance. Store them in the refrigerator until you’re ready to dip. Once decorated, they’ll keep for up to 5 days in the fridge or 3 months in the freezer.
How do I get the chocolate coating perfectly smooth?
The secret is temperature and thinning. Make sure your chocolate isn’t too thick—add a little coconut oil until it’s the consistency of heavy cream. Also, tap the stick firmly on the edge of the bowl after dipping to shake off excess. If you see any bumps, smooth them with your finger before the chocolate sets.
Can I use food coloring instead of candy melts for the iris?
You can, but it’s trickier. If you use liquid food coloring, it will seize the white chocolate and you’ll end up with a grainy mess. Use oil-based food coloring or gel food coloring mixed with a tiny bit of coconut oil to thin it out. Honestly, the candy melts are easier and give a better result.
For more Halloween dessert inspiration, check out these easy no-bake pumpkin cheesecake bars or these perfect pumpkin cream cheese muffins. They’re both perfect for your fall baking lineup!
Pin This Recipe!
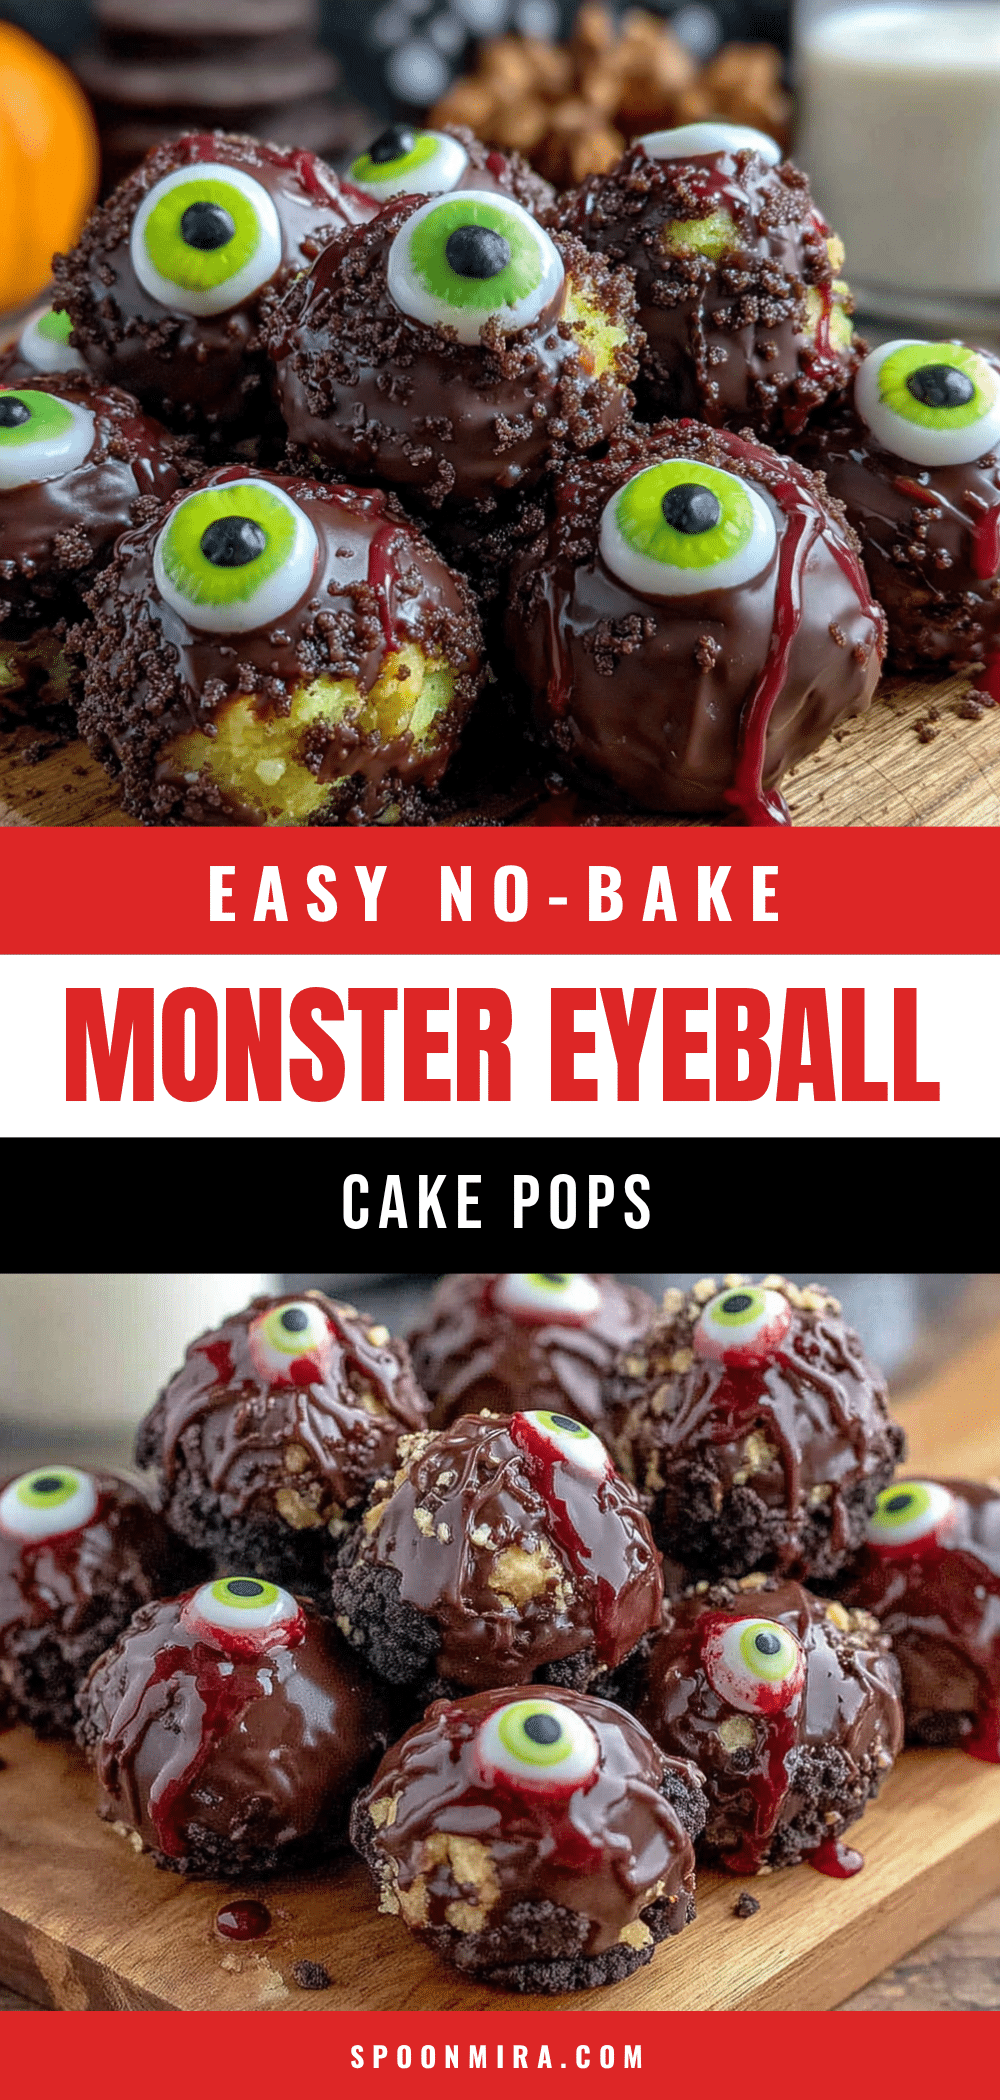
Easy No-Bake Monster Eyeball Cake Pops: Perfect Halloween Treats
These Easy No-Bake Monster Eyeball Cake Pops are the perfect Halloween treat—fun to make, easy to customize, and absolutely delicious. They’re a conversation starter and the star of any spooky spread.
- Prep Time: 15 minutes
- Cook Time: 30 minutes
- Total Time: 45 minutes
- Yield: 24 servings 1x
- Category: Dessert
- Cuisine: American
Ingredients
- 1 box (15.25 oz) vanilla cake mix
- Ingredients called for on the cake mix box (typically eggs, oil, and water)
- 1/2 cup (120g) cream cheese frosting
- 12 oz (340g) white candy melts or white chocolate melting wafers
- 1/2 cup (90g) blue candy melts
- 1 tablespoon (15ml) coconut oil or shortening
- Black gel food coloring
- Red gel food coloring
- White candy pearls or small white sprinkles
- 24 lollipop sticks
- 1 block of styrofoam or a cake pop stand
Instructions
- Preheat your oven to 350°F (175°C). Prepare the cake mix according to the package directions—usually that means combining the mix with eggs, oil, and water. Pour the batter into a greased 9×13 inch pan and bake for 25-30 minutes, or until a toothpick inserted in the center comes out clean. Let the cake cool completely.
- Once the cake is completely cool, crumble it into a large mixing bowl. You want fine, even crumbs—no large chunks. Add the 1/2 cup of cream cheese frosting and mix it in with your hands or a spatula. The mixture should hold together when you squeeze it, like damp sand. If it’s too dry, add a tablespoon more frosting. If it’s too wet, add a little more cake crumb.
- Scoop out about 1.5 tablespoons of the cake mixture and roll it into a smooth ball. Place each ball on a parchment-lined baking sheet. You should get about 24 balls. Once they’re all rolled, pop the tray in the freezer for 15-20 minutes.
- While the cake balls are chilling, melt the white candy melts. Place them in a microwave-safe bowl and heat in 30-second intervals, stirring after each, until completely smooth. Add 1 tablespoon of coconut oil or shortening if the mixture is too thick. Let it cool for a few minutes before dipping.
- Remove the cake balls from the freezer. Dip the tip of a lollipop stick into the melted white chocolate, then insert it about halfway into a cake ball. Dip the entire cake ball into the melted white chocolate, covering it completely. Gently tap the stick on the edge of the bowl to let excess chocolate drip off. Insert the stick into your styrofoam block and let it set for about 10 minutes.
- While the white coating is still slightly tacky (or after it’s fully set—either works), it’s time to decorate. Melt the blue candy melts in a separate bowl. Transfer to a small piping bag or zip-top bag and snip off a tiny corner. Pipe a small circle in the center of each cake pop—this is the iris. Let it set for 5 minutes.
- Using the black gel food coloring and a toothpick, dot a small pupil in the center of each blue iris. Then, take a white candy pearl or small white sprinkle and place it just off-center on the blue iris.
- For the bloodshot effect, dip a clean toothpick into the red gel food coloring and drag thin, jagged lines from the edge of the white coating toward the iris.
- Allow the cake pops to set fully in the styrofoam block for at least 30 minutes. If you’re in a hurry, you can pop them in the fridge for 15 minutes.
Notes
Don’t overmix the cake and frosting. Use a cookie scoop for even sizing. Let the chocolate cool before dipping. Work in small batches. Tap the stick gently after dipping to remove excess chocolate. Fix cracks immediately.
Nutrition
- Serving Size: 1 cake pop
- Calories: 185
- Sugar: 18
- Sodium: 150
- Fat: 8
- Saturated Fat: 4
- Carbohydrates: 27
- Protein: 2
Keywords: Halloween, cake pops, no-bake, monster eyeball, easy, party treat


