I have a confession to make. For years, I genuinely believed I was bad at making chocolate chip cookies. Not just “eh, they’re okay” bad — I mean the kind of bad where you take a tray of sad, flat discs out of the oven and wonder where you went wrong. I’d follow recipes to the letter, chill the dough for hours (sometimes overnight, because that’s what all the experts said to do), and still end up with cookies that spread into one giant, greasy blob. It was frustrating enough that I almost gave up on homemade cookies entirely.
Then one Tuesday night — a random, nothing-special Tuesday — I had a desperate craving for a warm cookie. Not a whole batch. Not a project. Just one perfect, soft, chewy cookie. I didn’t have time to chill dough. I didn’t have the patience for a long recipe. So I threw together a tiny batch of ingredients, skipped the chilling step entirely, and popped them in the oven more out of stubborn hope than confidence. What came out of that oven changed everything for me. They were exactly what I’d been chasing: golden edges, soft centers, melty chocolate in every bite. No spreading. No flat discs. Just pure, simple cookie perfection.
That night taught me something important. Sometimes the rules we think are essential — like chilling cookie dough — aren’t actually necessary for every recipe. Sometimes you can have your cookie and eat it warm, right now, without waiting. These perfect small-batch chocolate chip cookies (no chilling) are proof that you don’t need complicated techniques or hours of patience to get bakery-quality results. You just need the right proportions and a little trust in the process. And honestly? I think that’s a pretty beautiful thing.
Why You’ll Love This Recipe
Let me tell you why this recipe has become my absolute go-to, and why I think it’ll become yours too. I’ve tested this batch more times than I care to admit — probably a dozen iterations over the course of a few months, tweaking ratios, trying different butter temperatures, and testing various flour types. What I landed on is the sweet spot between convenience and quality.
- No Chilling Required: This is the big one. You go from craving to cookie in under 20 minutes. No waiting. No planning ahead. Just mix, scoop, bake, and eat.
- Perfectly Portioned: This recipe makes exactly 6 cookies. Not 24, not 36 — just enough for a small household or a midnight craving without leftovers tempting you for days.
- Simple Pantry Ingredients: You probably have everything you need right now. Butter, sugar, flour, an egg, chocolate chips. Nothing fancy, nothing hard to find.
- Consistent Results Every Time: I’ve made these in my regular oven, a toaster oven, and even a friend’s ancient apartment oven. They turn out perfectly every single time — golden edges, soft centers, no spreading.
- That Texture You’re Looking For: You know that perfect cookie texture? Slightly crispy on the outside, soft and chewy on the inside, with pockets of melted chocolate? That’s exactly what this recipe delivers.
What makes these cookies different from every other chocolate chip cookie recipe out there is the ratio. I spent a lot of time figuring out why small batches behave differently than full-sized batches. The key is the balance of butter to flour and the way the sugar dissolves without a long rest. This isn’t just a scaled-down version of a bigger recipe — it’s a recipe designed specifically for small batches, and that makes all the difference.
These cookies are the kind that make you close your eyes after the first bite. They’re comfort food at its simplest and best — no fuss, no waiting, just pure cookie joy. Perfect for those evenings when you need something warm and sweet but don’t want to commit to a full baking project.
What Ingredients You Will Need
This recipe uses simple, everyday ingredients to create something truly special. Each one plays a specific role in getting that perfect texture and flavor. Here’s what you’ll need and why each ingredient matters.
- Unsalted Butter, melted (4 tablespoons / 57g): Melted butter is the secret to these cookies. Unlike softened butter that requires creaming, melted butter gives you that chewy texture without any extra effort. I use unsalted so I can control the salt level. If you only have salted butter, just reduce the added salt by a pinch.
- Granulated Sugar (3 tablespoons / 38g): This adds sweetness and helps create those slightly crispy edges. The granulated sugar also contributes to spreading — but in this small batch, it spreads just the right amount.
- Light Brown Sugar, packed (3 tablespoons / 43g): Brown sugar is where the magic happens. It adds moisture, depth of flavor, and that soft, chewy center we all love. The molasses in brown sugar keeps the cookies tender. I prefer light brown sugar, but dark brown works too if you want a more intense flavor.
- Large Egg Yolk (1 yolk): Just the yolk, not the whole egg. This is a game-changer. Using only the yolk gives you richness and tenderness without the extra moisture that would make the cookies spread too much. Save the egg white for an omelet or scramble the next morning.
- Vanilla Extract (½ teaspoon): Pure vanilla extract adds warmth and rounds out all the flavors. I recommend using real vanilla extract, not imitation — it makes a noticeable difference in a small batch where every ingredient counts.
- All-Purpose Flour (½ cup + 1 tablespoon / 75g): Standard all-purpose flour works perfectly here. I’ve tested this with bread flour too, and it gives slightly chewier cookies. But AP flour is what most people have on hand, and it delivers excellent results. Spoon and level your flour — don’t scoop directly from the bag or you’ll end up with too much.
- Baking Soda (¼ teaspoon): This is our leavening agent. It helps the cookies rise and spread just enough. Make sure your baking soda is fresh — if it’s been sitting in your cabinet for over a year, it might not work as well.
- Salt (¼ teaspoon): Salt is crucial in cookies. It balances the sweetness and enhances the chocolate flavor. I use fine sea salt for the dough and sometimes sprinkle a little flaky salt on top before baking.
- Semi-Sweet Chocolate Chips (⅓ cup / 60g): Semi-sweet is my go-to because it’s not too sweet and not too bitter. You can use dark chocolate, milk chocolate, or even chopped chocolate bars. I personally love using a mix of chips and chopped chocolate for varied pockets of chocolate throughout the cookie.
Ingredient Tips: For the best results, make sure your butter is fully melted but not hot. Let it cool for a minute or two after melting. Your egg yolk should be at room temperature — just let it sit on the counter for 10 minutes before you start. And please, use good quality chocolate chips. I prefer Ghirardelli or Guittard for their meltability and flavor. Trust me, cheap chocolate chips don’t melt the same way and can leave you with waxy pockets instead of gooey chocolate.
Equipment Needed
You don’t need a fancy kitchen to make these cookies. Here’s what you’ll need:
- Mixing Bowls: One medium bowl for the wet ingredients and one small bowl for the dry ingredients. Any bowl works — I use a simple ceramic mixing bowl.
- Whisk: For combining the wet ingredients. A fork works in a pinch, but a whisk makes it easier to get everything smooth.
- Rubber Spatula or Wooden Spoon: For folding in the flour and chocolate chips. A spatula is gentler and helps avoid overmixing.
- Measuring Cups and Spoons: Accurate measurements matter in baking. Use proper measuring cups for dry ingredients and liquid measuring cups for wet ingredients.
- Kitchen Scale (optional but recommended): Weighing your ingredients is more accurate than measuring by volume. If you bake often, a small kitchen scale is worth the investment.
- Baking Sheet: A small baking sheet works perfectly. I use a quarter sheet pan for these small batches.
- Parchment Paper or Silicone Baking Mat: This prevents sticking and helps with even browning. Parchment paper is cheap and disposable; silicone mats are reusable and eco-friendly.
- Cookie Scoop or Tablespoon: For portioning the dough evenly. A #40 cookie scoop (about 1.5 tablespoons) is perfect for these cookies.
- Cooling Rack: For cooling the cookies after baking. If you don’t have one, you can let them cool on the baking sheet for a few extra minutes.
Budget-Friendly Tip: You don’t need to buy expensive equipment. A regular spoon and your hands work fine for mixing. I’ve made these cookies with nothing but a fork, a bowl, and a baking sheet, and they turned out just as good.
Preparation Method
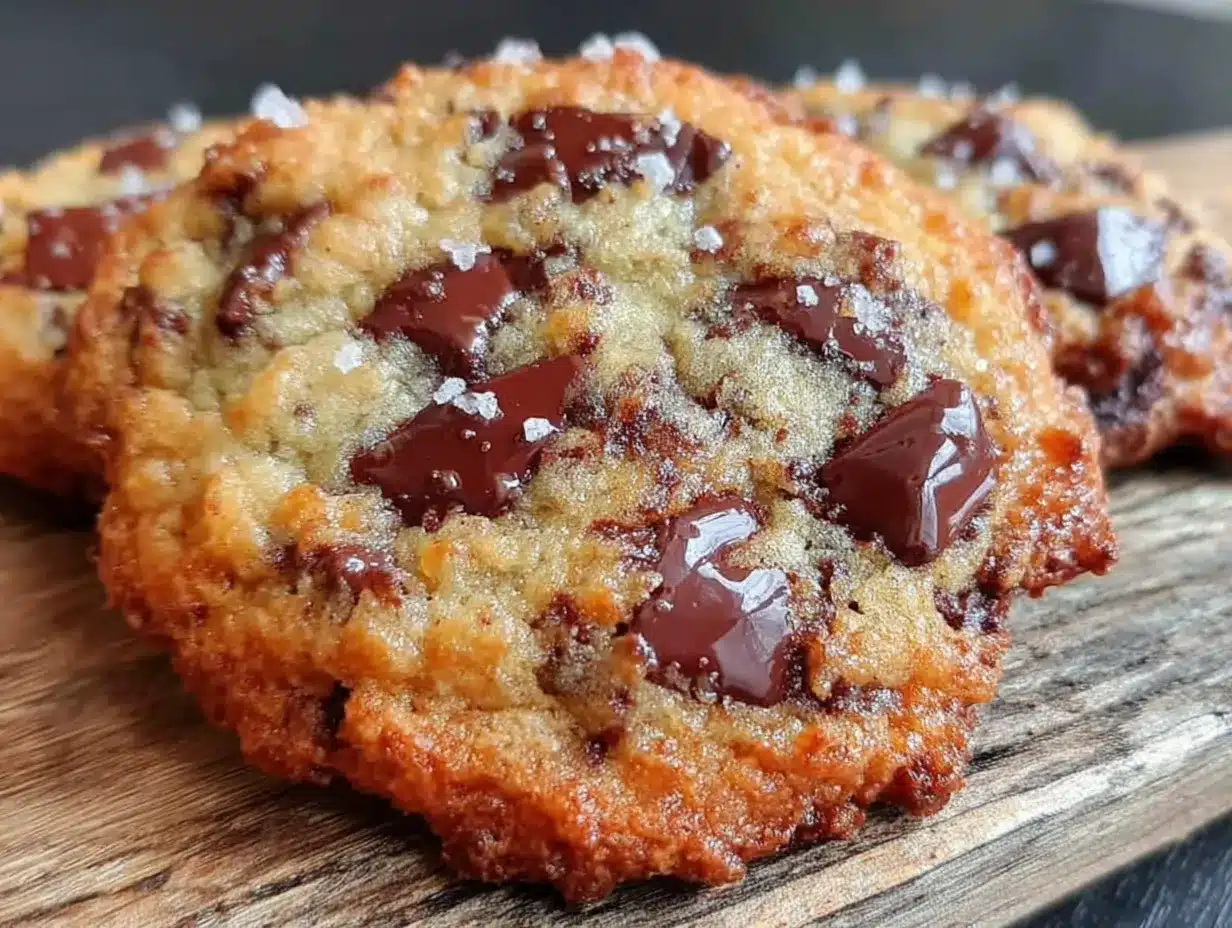
Let’s get baking! This entire process takes about 15 minutes from start to finish — and that includes baking time. Here’s how to make perfect small-batch chocolate chip cookies with no chilling required.
- Preheat your oven to 350°F (175°C). Line a small baking sheet with parchment paper or a silicone mat. Preheating is important — if your oven isn’t hot enough, the cookies will spread too much before they set.
- Melt the butter. Place 4 tablespoons of unsalted butter in a microwave-safe bowl and heat in 15-second intervals until fully melted. Alternatively, melt it in a small saucepan over low heat. Let it cool for about a minute — you want it warm, not hot. If it’s too hot, it can cook the egg yolk.
- Combine the sugars and butter. In a medium mixing bowl, whisk together the melted butter, 3 tablespoons granulated sugar, and 3 tablespoons packed light brown sugar. Whisk until the mixture is smooth and well combined — about 30 seconds. It should look like a thick, glossy paste.
- Add the egg yolk and vanilla. Drop in the egg yolk and ½ teaspoon vanilla extract. Whisk vigorously until the mixture becomes lighter in color and slightly thickened — about 1 minute. This step is important because it incorporates air into the dough, which helps with texture. The mixture should look like a thick caramel sauce.
- Combine the dry ingredients. In a separate small bowl, whisk together ½ cup plus 1 tablespoon all-purpose flour, ¼ teaspoon baking soda, and ¼ teaspoon salt. Make sure the baking soda is evenly distributed — nobody wants a pocket of baking soda in their cookie.
- Add the dry ingredients to the wet mixture. Pour the flour mixture into the butter-sugar mixture. Use a rubber spatula or wooden spoon to fold everything together gently. Mix just until you no longer see streaks of flour — about 15 to 20 strokes. Overmixing at this stage will develop gluten and make your cookies tough.
- Fold in the chocolate chips. Add ⅓ cup semi-sweet chocolate chips to the dough. Fold them in gently with your spatula until they’re evenly distributed. The dough will be thick and slightly sticky — that’s exactly what you want.
- Portion the dough. Using a cookie scoop or a tablespoon, scoop out 6 equal portions of dough — about 1.5 tablespoons each. Place them on the prepared baking sheet, spacing them about 2 inches apart. You don’t need to roll them into perfect balls; slightly craggy edges give the cookies a more rustic, homemade look.
- Bake for 9 to 11 minutes. Place the baking sheet in the preheated oven and bake for 9 to 11 minutes. At 9 minutes, the cookies will be very soft and puffy — perfect for gooey centers. At 11 minutes, they’ll be slightly firmer with more golden edges. I personally prefer 10 minutes for that ideal balance. The cookies will look slightly underbaked in the center when you take them out — that’s okay. They continue to bake on the hot sheet as they cool.
- Cool on the baking sheet for 5 minutes. Let the cookies rest on the baking sheet for 5 minutes. This allows them to set up without becoming too firm. After 5 minutes, transfer them to a cooling rack. Or, you know, eat one warm right off the sheet — I won’t tell anyone.
Sensory Cues: During baking, you’ll notice the cookies puff up slightly, then settle and develop golden-brown edges. The kitchen will smell like vanilla and butter — that’s how you know they’re almost done. The centers should look slightly soft and pale while the edges are set and golden. If the entire cookie is golden brown, they’re overbaked.
Pro Tip: If you want those picture-perfect round cookies, here’s a trick: right when they come out of the oven, place a round cookie cutter or a glass slightly larger than the cookies over each one and gently swirl it in a circular motion. This nudges the edges into a perfect circle. I don’t always bother with this, but it’s a nice touch if you’re serving them to guests.
Cooking Tips & Techniques
After making these cookies more times than I can count, I’ve picked up a few tricks that make a real difference. Here are my best tips for getting perfect results every time.
Don’t overmix the dough. This is probably the most common mistake I see. Once you add the flour, mix just until it disappears. Overmixing develops gluten, which makes cookies tough and cakey instead of tender and chewy. You want to see the flour disappear, then stop. It’s okay if the dough looks a little rough — that’s actually a good sign.
Use room temperature egg yolk. I learned this the hard way after a few batches where the cold yolk seized up the melted butter and created a greasy dough. Let your egg yolk sit at room temperature for about 10 minutes before you start. If you forgot to take it out, place the yolk in a small bowl and set that bowl in warm water for a couple of minutes.
Measure flour correctly. This is a big one. If you scoop your measuring cup directly into the flour bag, you can end up with 20% more flour than the recipe calls for. Instead, use a spoon to fluff the flour, then spoon it into your measuring cup and level it off with a knife. Even better — use a kitchen scale. 75 grams of flour is the sweet spot for this recipe.
Watch the bake time carefully. Ovens vary wildly. My oven runs a little hot, so I check my cookies at 8 minutes. Your oven might need the full 11 minutes. The key is to look for golden edges and slightly puffy, pale centers. If the centers are fully set and golden, they’ve been in too long. Remember: cookies continue to bake on the hot sheet after you pull them out.
Let them cool properly. I know it’s tempting to grab a cookie right away — and honestly, sometimes I do. But if you want the best texture, let them cool on the baking sheet for at least 5 minutes. This allows the structure to set so they hold together without falling apart. The first time I made these, I tried to move one immediately and it basically crumbled in my hands. Patience pays off here.
One more thing — if your cookies spread too much, it’s usually because the butter was too warm or you used too much sugar. If they’re too thick and puffy, you might have added too much flour. Baking is science, but it’s forgiving science. Even imperfect cookies are still delicious.
Variations & Adaptations
One of the best things about this recipe is how easily you can adapt it to your preferences. Here are some variations I’ve tried and loved.
- Double Chocolate Chip: Replace 1 tablespoon of the all-purpose flour with 1 tablespoon of unsweetened cocoa powder. Use white chocolate chips or dark chocolate chips for a delicious twist. The cookies come out rich and fudgy — perfect for serious chocolate lovers.
- Gluten-Free Option: Substitute the all-purpose flour with a good quality 1-to-1 gluten-free baking flour blend. I’ve tested this with Bob’s Red Mill 1-to-1 Baking Flour and it works beautifully. Add an extra tablespoon of the gluten-free flour to account for the difference in absorption. The texture is slightly more delicate, but still delicious.
- Nutty Chocolate Chip: Add 2 tablespoons of toasted chopped walnuts or pecans along with the chocolate chips. Toast the nuts in a dry pan for 2 to 3 minutes before adding them — it brings out their flavor and adds a wonderful crunch. I love this version for fall baking.
- Sea Salt Finish: Sprinkle a tiny pinch of flaky sea salt on top of each cookie right before baking. The salt enhances the chocolate flavor and balances the sweetness. This is my favorite way to make these cookies feel a little more special without any extra effort.
- Vegan Adaptation: Use vegan butter (I like Miyoko’s) and replace the egg yolk with 1 tablespoon of aquafaba (the liquid from a can of chickpeas) mixed with 1 teaspoon of cornstarch. The texture won’t be exactly the same — slightly less chewy — but they’re still really good. I tested this for a friend with egg allergies and was pleasantly surprised.
Personal Favorite: My go-to variation is the sea salt finish with dark chocolate chips. There’s something about that salty-sweet combination that just hits different. I also love adding a handful of these small batch pumpkin snickerdoodle cookies to my baking rotation when I want something seasonal with that same quick-and-easy approach.
Serving & Storage Suggestions
These cookies are best enjoyed warm, fresh from the oven. But let’s be real — you might not eat all six at once. Here’s how to serve and store them properly.
Serving Temperature: Warm cookies are unbeatable. If you’re serving them to guests, try to time the baking so they come out about 10 minutes before you’re ready to serve. The residual heat keeps them soft and the chocolate melty. For an extra treat, serve them with a glass of cold milk or a scoop of vanilla ice cream.
Presentation Ideas: Arrange the cookies on a small plate or wooden board. A light dusting of powdered sugar or a drizzle of melted chocolate makes them look bakery-worthy. For a cozy dessert spread, pair them with a warm mug of coffee or hot chocolate.
Complementary Dishes: These cookies go beautifully with a bowl of cozy fall harvest chicken and wild rice soup for a comforting meal-dessert combo. They’re also fantastic alongside a scoop of grilled peach and bourbon caramel sundae for a full dessert experience.
Storage Instructions: Store leftover cookies in an airtight container at room temperature for up to 3 days. Place a slice of bread in the container — it absorbs excess moisture and keeps the cookies soft. Replace the bread slice every day if you’re storing them longer.
Freezing Instructions: You can freeze the baked cookies for up to 3 months. Wrap each cookie individually in plastic wrap, then place them in a freezer bag. To thaw, let them sit at room temperature for about 30 minutes. For that fresh-from-the-oven experience, pop a frozen cookie in the microwave for 10 to 15 seconds.
Reheating Tips: The best way to reheat a cookie is in the microwave for 8 to 10 seconds. This softens the center and melts the chocolate without making the cookie tough. You can also reheat them in a 300°F oven for 3 to 4 minutes if you’re reheating multiple cookies at once.
Flavor Development: Here’s something interesting — these cookies actually taste even better the next day. The flavors meld together overnight, and the texture becomes even more chewy. If you can resist eating them all on day one, you’re in for a treat on day two.
Nutritional Information & Benefits
Let’s talk numbers. Keep in mind that these values are estimates and will vary based on the specific brands and ingredients you use.
| Nutrient | Per Cookie (1 of 6) |
|---|---|
| Calories | 185 |
| Total Fat | 10g |
| Saturated Fat | 6g |
| Cholesterol | 35mg |
| Sodium | 135mg |
| Total Carbohydrates | 23g |
| Dietary Fiber | 1g |
| Sugars | 14g |
| Protein | 3g |
Health Benefits: While these are definitely a treat, there are a few bright spots. Dark chocolate (if you use it) contains antioxidants called flavonoids that support heart health. The butter provides vitamin A, and the egg yolk is a good source of choline, which is important for brain health. Plus, the small batch size helps with portion control — it’s easier to enjoy just a couple cookies when there aren’t two dozen staring at you.
Dietary Considerations: This recipe contains gluten, dairy, and eggs. For a gluten-free version, see the variations section above. For a dairy-free version, use vegan butter. For an egg-free version, substitute the egg yolk with a flax egg (1 tablespoon ground flaxseed mixed with 2.5 tablespoons water, let sit for 5 minutes). The texture will be slightly different, but still delicious.
My Personal Take: I believe in balance. These cookies are a treat, not a health food, and that’s okay. Life is too short to skip dessert. The beauty of a small batch is that you can satisfy your craving without having a mountain of cookies tempting you for days. Enjoy them mindfully, savor every bite, and don’t feel guilty about it.
Conclusion
These perfect small-batch chocolate chip cookies (no chilling) have become my go-to for a reason. They’re quick, they’re reliable, and they deliver that nostalgic, homemade cookie experience without any of the fuss. No chilling, no waiting, no complicated techniques — just warm, chewy, chocolatey cookies in under 20 minutes.
I love that this recipe meets you where you are. Maybe you’re craving a late-night treat. Maybe you need a quick dessert for unexpected guests. Maybe you just want to teach your kid how to bake something simple and satisfying. Whatever the reason, these cookies are here for you. They’ve been there for me on countless Tuesday nights and lazy Sunday afternoons, and they never disappoint.
I’d love to hear how yours turn out! Did you add any fun mix-ins? Did you try the sea salt version? Drop a comment below and let me know — your feedback helps other readers too. And if you’re looking for another quick dessert that delivers big flavor with minimal effort, you should definitely try my easy one bowl pumpkin chocolate chip bread — it follows the same no-fuss philosophy.
Happy baking, friend. Go make some cookies — you deserve them.
Frequently Asked Questions
Can I double this recipe?
Absolutely! Simply double all the ingredients. The baking time might increase by a minute or two if you’re baking a full sheet of cookies. Just keep an eye on them and look for those golden edges.
Why did my cookies spread too much?
This usually happens when the butter is too warm or the dough wasn’t mixed properly. Make sure your melted butter has cooled slightly before adding the egg yolk. Also, check that you measured your flour correctly — too little flour can cause excess spreading.
Can I use whole wheat flour instead of all-purpose?
You can, but the texture will be denser and less tender. If you want to try it, use ⅓ cup plus 2 tablespoons of whole wheat flour instead of the all-purpose flour. The cookies will have a nuttier flavor and a heartier texture.
How do I make these cookies softer or crispier?
For softer cookies, bake for 9 minutes and let them cool on the sheet for the full 5 minutes. For crispier cookies, bake for 11 minutes and transfer them to a cooling rack immediately after baking. You can also press the cookies down slightly before baking for a thinner, crispier result.
Can I make the dough ahead of time?
Yes! While this recipe is designed for no chilling, you can absolutely make the dough and refrigerate it for up to 48 hours. Just scoop the dough into balls, place them on a plate, cover with plastic wrap, and refrigerate. Bake directly from the fridge — add 1 to 2 minutes to the baking time.
Pin This Recipe!
Perfect Small-Batch Chocolate Chip Cookies (No Chilling)

These perfect small-batch chocolate chip cookies require no chilling and deliver warm, chewy, chocolatey cookies in under 20 minutes. Made with simple pantry ingredients, this recipe yields exactly 6 cookies with golden edges, soft centers, and melty chocolate in every bite.
- Prep Time: 10 minutes
- Cook Time: 10 minutes
- Total Time: 20 minutes
- Yield: 6 cookies 1x
- Category: Dessert
- Cuisine: American
Ingredients
- 4 tablespoons (57g) unsalted butter, melted
- 3 tablespoons (38g) granulated sugar
- 3 tablespoons (43g) light brown sugar, packed
- 1 large egg yolk
- ½ teaspoon vanilla extract
- ½ cup + 1 tablespoon (75g) all-purpose flour
- ¼ teaspoon baking soda
- ¼ teaspoon salt
- ⅓ cup (60g) semi-sweet chocolate chips
Instructions
- Preheat your oven to 350°F (175°C). Line a small baking sheet with parchment paper or a silicone mat.
- Melt the butter in a microwave-safe bowl in 15-second intervals or in a small saucepan over low heat. Let it cool for about a minute.
- In a medium mixing bowl, whisk together the melted butter, granulated sugar, and packed light brown sugar until smooth and well combined (about 30 seconds).
- Add the egg yolk and vanilla extract. Whisk vigorously until the mixture becomes lighter in color and slightly thickened (about 1 minute).
- In a separate small bowl, whisk together the all-purpose flour, baking soda, and salt.
- Pour the flour mixture into the butter-sugar mixture. Fold gently with a rubber spatula or wooden spoon just until no streaks of flour remain (about 15 to 20 strokes).
- Fold in the chocolate chips until evenly distributed.
- Using a cookie scoop or tablespoon, portion the dough into 6 equal portions (about 1.5 tablespoons each). Place them on the prepared baking sheet, spacing about 2 inches apart.
- Bake for 9 to 11 minutes. The cookies should have golden edges and slightly soft, pale centers.
- Cool on the baking sheet for 5 minutes, then transfer to a cooling rack. Enjoy warm.
Notes
For best results, use room temperature egg yolk. Measure flour correctly by spooning and leveling. Don’t overmix the dough. Watch the bake time carefully; cookies continue to bake on the hot sheet after removal. For picture-perfect round cookies, gently swirl a round cookie cutter or glass over each cookie right out of the oven. Store leftovers in an airtight container at room temperature for up to 3 days; place a slice of bread in the container to keep them soft. Freeze baked cookies for up to 3 months.
Nutrition
- Serving Size: 1 cookie
- Calories: 185
- Sugar: 14
- Sodium: 135
- Fat: 10
- Saturated Fat: 6
- Carbohydrates: 23
- Fiber: 1
- Protein: 3
Keywords: small batch chocolate chip cookies, no chill cookies, easy chocolate chip cookies, 6 cookies, quick cookies, chewy chocolate chip cookies


